Using grid list boxes
Grid list box holds a scrollable list of objects arranged in a grid. As you insert the objects in a grid list box, they are placed either in the first row or column. When the objects reach the set width or height of the grid list box, the objects are placed in the next row or column.
When there are more items than fit in a gird list box they become visible as you scroll the grid list box. For example, if you set the height of grid list box layout to 10 and set Layout Direction property to Down, adding three radius 5 spheres adds the second sphere below the first one, but since the third one does not fit into the same column, it is added to the next row and users can access it by scrolling the grid list box.
Users select objects in a grid list box by clicking or tapping the object.
Note that list box items are not children of a list box, even though in Kanzi Studio it seems so when you add items to a list box. Because list box items are not children of a list box, you cannot refer to these items from outside of a list box using paths or aliases. If you need to refer from a list box item to an object outside of a list box, use bindings and aliases. See Using grid list boxes.
Creating a grid list box
To create a grid list box:
- In the Project right-click the scene where you want to create a grid list box and select Create > Grid List Box.
- Add several objects to the grid list box.
For example, in the Project right-click the grid list box and select Create > Box.
As you add objects, Kanzi Studio positions them from the top-left towards the bottom-left corner of the grid list box.
Setting the scrolling direction for grid list boxes
You can set the grid list box so that users can scroll it in either horizontal or vertical direction.
To set the scrolling direction for a grid list box:
- Create a grid list box and add objects to it.
For example, add nine Sphere objects.
- In the Properties set the Layout Direction property to either one of the following values:
- Right to set the scrolling to vertical direction.
With this setting, when adding new objects to the grid list box, each new object is added to the right of the previous object. - Down to set the scrolling to horizontal direction.
With this setting, when adding new objects to the grid list box, each new object is added below the previous object.
Showing a grid list box as a 2D object
To show a grid list box as a 2D object:
- Create a grid list box and add objects to it. See Creating a grid list box.
-
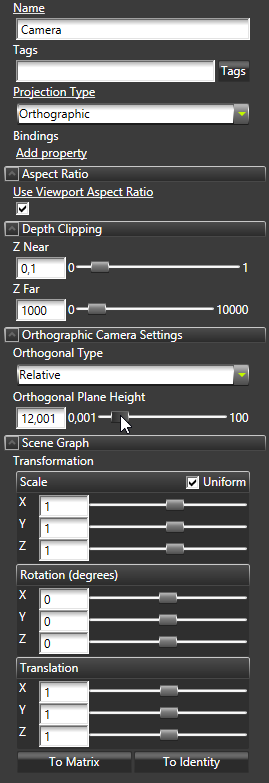
In the Project select the camera you use to view the list box and in the Properties set properties:
- Projection Type to Orthographic
- Transformation property attributes:
- All Scale attributes to 1
- All Rotation attributes to 0
- All Translation attributes to 1
- Adjust the Orthogonal Plane Height property to set the distance between the list box and the camera.
Binding to properties outside of a list box
Use an alias to bind a list box item property to a property of an object outside of the list box.
For example, if you have a Grid List Box or a Trajectory List Box with a Text Block item and want to set the Text property value of the Text Block to a value of an Empty Node property that is not in the list box:
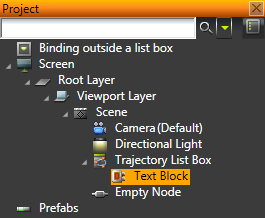
- Create an alias for the Empty Node. See Using aliases.
- In the Text Block create a binding to the Empty Node using the alias you created in the previous step. See Reference for bindings expressions.
For example, use a binding expression {#Empty Node/TextBlock.Text}.
The Text property in the Text Block gets the value of the Text property in the Empty Node.
See also
Using trajectory list boxes
Using grid layers
Using grid layouts
Open topic with navigation