Rendering
The most important items in rendering are the render passes. Use render passes to define the rendering of nodes in your application. For example, in a render pass you define which Camera that render pass uses for rendering, what nodes it renders, and settings for the color and depth buffer use. See Render passes.
Kanzi contains filters and object sources you can use to select and refine the collection of nodes you send to a render pass for rendering. Doing so you can precisely define the order of how Kanzi renders the content of the Scene or Viewport 2D node. See Filters and Using object sources.
Render passes
In Kanzi Studio each Scene node has the Render Pass property that determines which render pass Kanzi uses for rendering the scene. When you create a Kanzi Studio project, the Scene node in the project uses the DefaultRenderPass to render its content.
You can define how you want Kanzi to render the nodes in your project by creating render passes, setting the hierarchy and order of the render passes, and specifying the object source in each render pass using filters. See Using object sources.
Create a nested hierarchy of render passes with as many levels as you want, and set the Render Pass property of a Scene node to a Group Render Pass at the top-most level in your render pass tree. Kanzi Studio executes the render passes in the Library > Rendering > Render Passes from top to bottom. Each render pass applies its settings, renders its children, and undoes its settings.
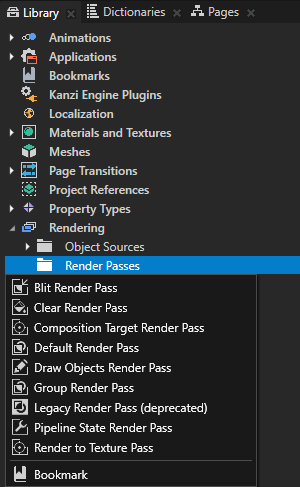
These render passes are available in Kanzi Studio:
- Group Render Pass allows you to group render passes so that you can refer to a single group render pass in your Scene or Viewport 2D.
You do not need a Group Render Pass if your topmost render pass can have all your other render passes as its children.
- Clear Render Pass clears some or all of the buffers of the current render context.
You can set the values to which Kanzi clears color, depth and stencil buffer.
- Pipeline State Render Pass allows you to set depth, scissor and stencil testing, transparency, and culling.
Kanzi uses the properties set in a Pipeline State Render Pass to render its child render passes, not its sibling render passes.
If you do not set a property in a Pipeline State Render Pass, Kanzi uses the value for the property set in the nearest parent Pipeline State Render Pass. If there is no parent render pass, Kanzi uses the default value.
- Draw Objects Render Pass renders one object source using the camera from the scene. See Using object sources.
Set all rendering parameters for a Draw Objects Render Pass in its parent Pipeline State Render Pass.
- Blit Render Pass blits one or more render passes or textures on the screen using a specific material. See Rendering multiple render passes or textures and Post-processing in multiple render passes.
The area Kanzi uses to render the texture(s) is the same as the current render context area.
- Composition Target Render Pass renders itself to a composition target.
You can set the composition target manually. If you do not set the composition target, Kanzi creates one automatically.
A Blit Render Pass can use the composition target a Composition Target Render Pass renders itself to.
- Default Render Pass creates the render passes and filters you need to first render opaque nodes, and then transparent nodes.
Use the Default Render Pass as a starting point for your render pass tree. See Using the Default Render Pass.
- Render to Texture Pass creates the render passes and texture you need to render to a texture. See Rendering to texture.
To create a render pass, in the Library > Rendering press Alt and right-click Render Passes and select the render pass you want to create.
See also
Rendering best practices
Using Kanzi Studio render pass templates
Rendering multiple render passes or textures
Post-processing in multiple render passes
Using the stencil buffer to mask areas
Using object sources
Filters

Open topic with navigation