The starting point of this tutorial is the Indicator.kzprojKanzi Studio project file stored in the <KanziWorkspace>/Tutorials/Indicator/Assets directory.
The <KanziWorkspace>/Tutorials/Indicator/Completed directory contains the completed project of this tutorial.
Create the turn indicator
In this section you create the turn indicator. After opening the starting point project you first create a custom property type you use to control the turn indicators, then you create and use a state manager which you use to control the indicators.
To create the turn indicator:
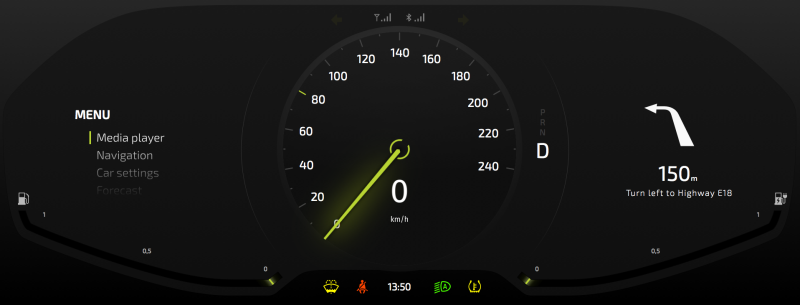
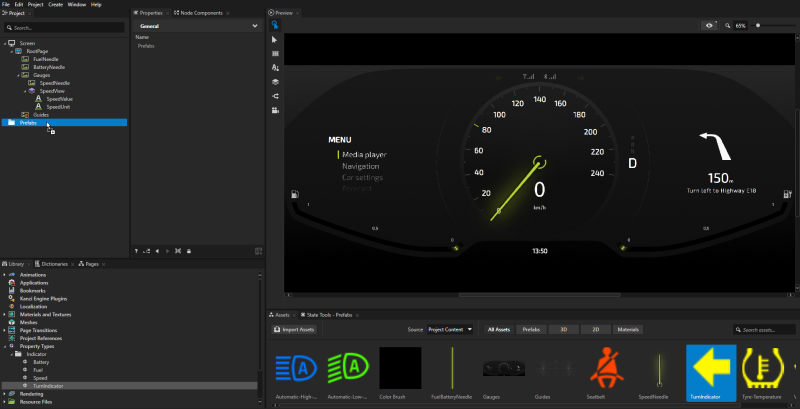
In Kanzi Studio open the project stored in <KanziWorkspace>/Tutorials/Indicator/Assets. The project contains the working speed, fuel, and battery gauge needles. To learn how to control the position of gauge needles, see Tutorial: Create gauges.
TIP
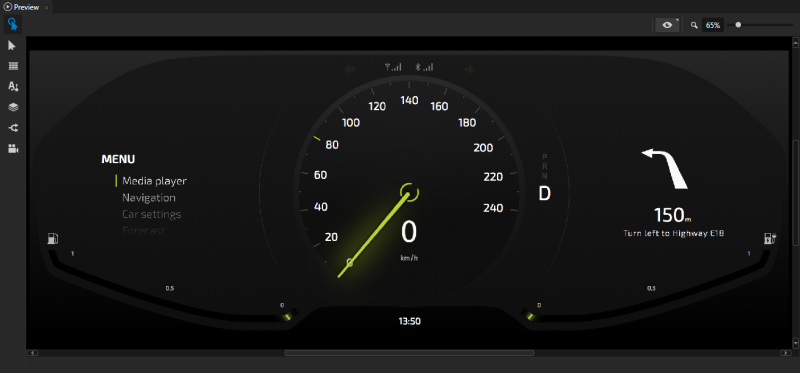
If you cannot see all three gauges in the Preview, you can adjust the Preview zoom level in the upper right corner of the Preview.
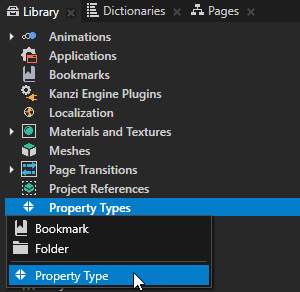
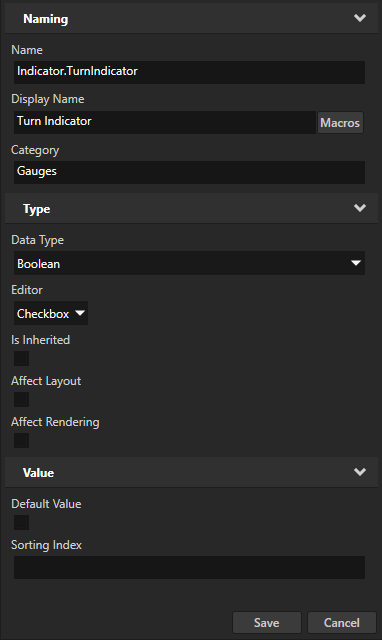
In the Librarypress Alt and right-clickProperty Types and select Property Type. The Property Type Editor opens.
In the Property Type Editor set:
Name to Indicator.TurnIndicator
Display Name to Turn Indicator
Category to Gauges
Data Type to Boolean
Click Save to create a property type with the properties you defined. You use this custom property type to control when the turn indicator is switched on and when off.
From the Assets at the bottom of the Kanzi Studio, drag the TurnIndicator image and drop it on the Project > Prefabs. When you drop an asset or a node to Project > PrefabsKanzi Studio creates a prefab from that item. Use prefabs (prefabricated templates) to structure your application and to create consistent interfaces. Prefabs allow you to create the building blocks of your application and make the application easier to maintain. Create a prefab for every item in your application that appears more than once, when you want to logically separate a part of your application, or add content to the scene graph when your application is already running. See Using prefabs.
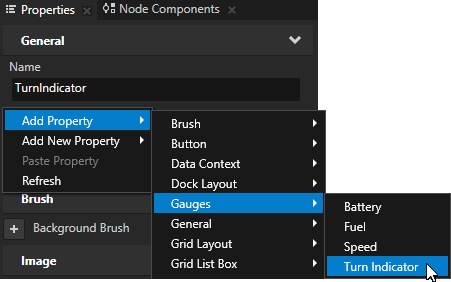
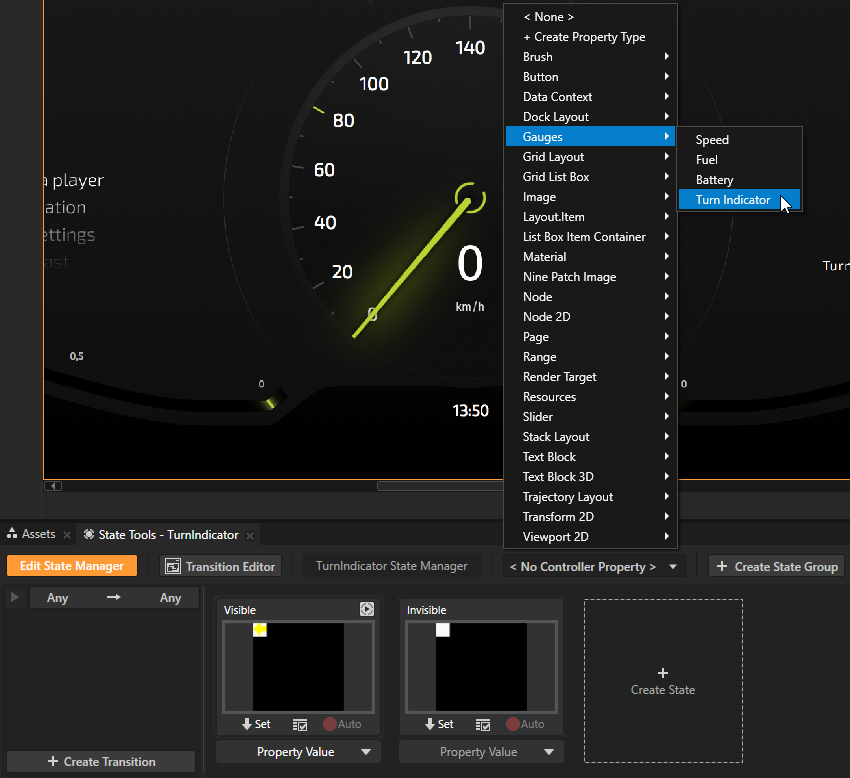
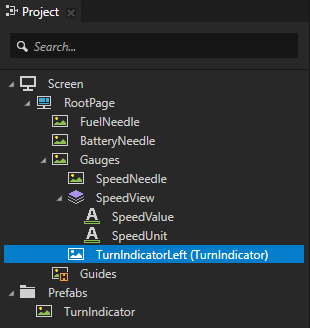
In the Project > Prefabs select the TurnIndicator prefab, right-click in the Properties, and select Add Property > Gauges > Turn Indicator. You add this custom property type to the prefab so that you can control the visibility of the turn indicators with that property in each turn indicator.
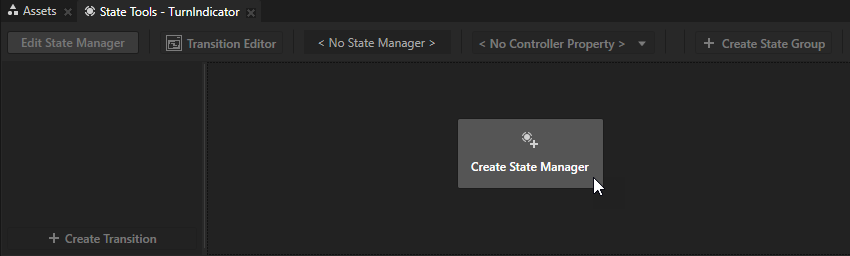
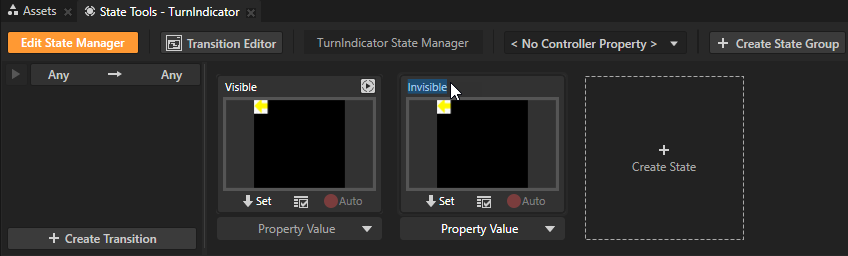
In the Project > Prefabs select the TurnIndicator prefab, and in the State Tools click Create State Manager. You can find the State Tools window below the Preview window. Kanzi Studio creates a new state manager and assigns it to the TurnIndicator node.
In the State Tools click Create State twice to create two states, double-click the name of each state, and rename the states. For example, name one state Visible and the other Invisible. The Visible state defines the state of your application when the turn indicator is visible, the Invisible state when the turn indicator is not visible.
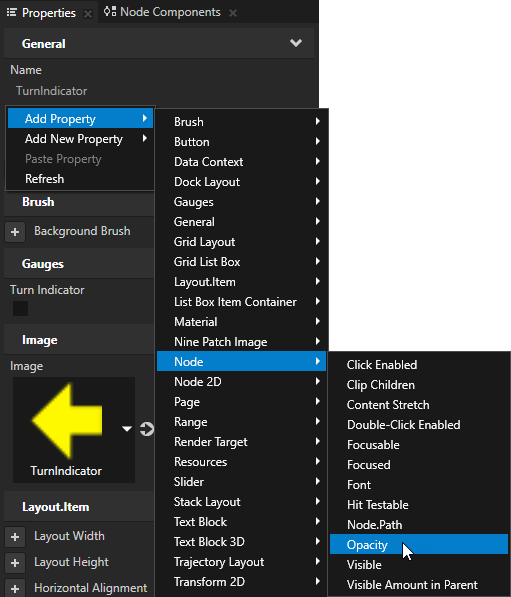
In the Project > Prefabs select the TurnIndicator prefab, right-click in the Properties, and select Add Property > Node > Opacity. With the Opacity property you can control how translucent is a node. You add this property so that you can face the appearance of the indicator.
In the State Tools click in the Visible state to save the current value of the Opacity property to that state. The default value of the Opacity property is 1, which makes a node visible, so save that value to the Visible state.
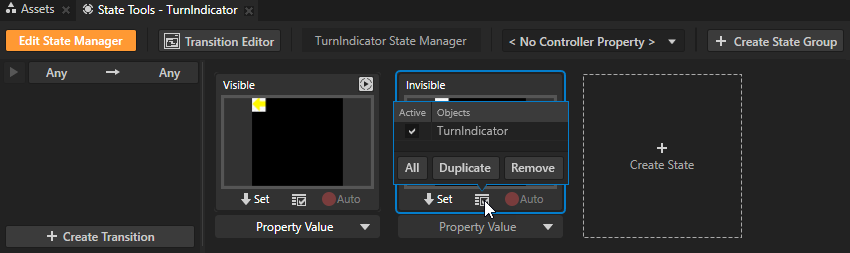
In the Properties set the Opacity property to 0, and in the State Tools click in the Invisible state to save the current value of the Opacity property to that state.
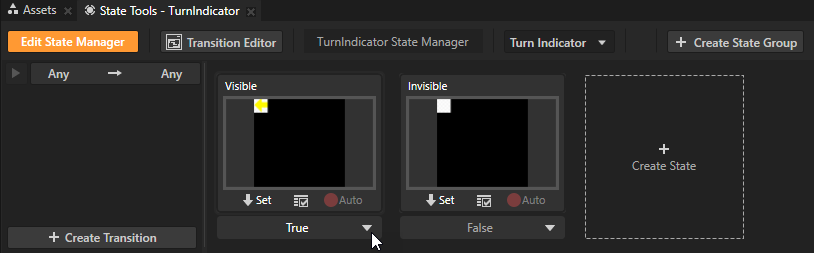
In the State Tools click <No Controller Property> and select Gauges > Turn Indicator. In a state manager the value of the property you select as the Controller Property defines the conditions when each state in a state group is active.
In the State Tools set the value of the controller property for each state. For the Visible state set the value to True, and for the Invisible state leave the value set to False.
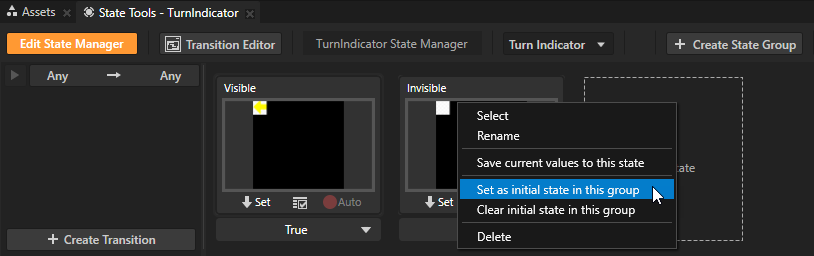
In the State Tools right-click the Invisible state and select Set as initial state in this group. The initial state is the state that Kanzi uses when the application is first started. Because you want to keep the turn indicator off until the user switches it on, you use the Invisible state as the initial state.
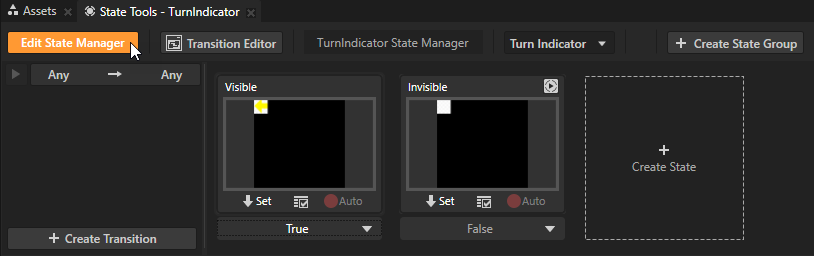
In the State Tools click Edit State Manager to deactivate the State Tools.
Add the turn indicator to the cluster
In this section you add the TurnIndicator prefab to the cluster to create the left and right turn indicators. Because the state manager logic for both left and right turn indicators is the same, you use the same state manager, but still control each turn indicator separately.
To add the turn indicator to the cluster:
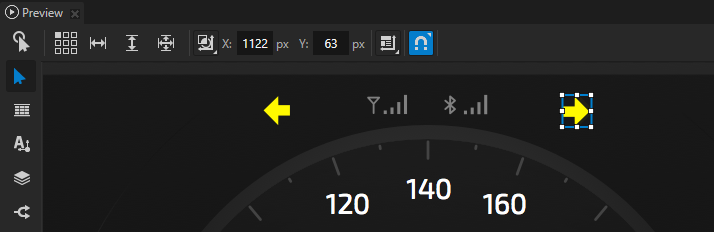
In the Project > Prefabs drag the TurnIndicator prefab to the Gauges node, select the TurnIndicator node, press the F2 key, and name the node TurnIndicatorLeft.
In the Project select the TurnIndicatorLeft node, in the Properties click next to the Turn Indicator property to add that property, and enable the Turn Indicator property. When you enable the property you make the TurnIndicatorLeft node visible so that you can place it in the Preview.
In the Preview select the Node tool and click to disable snapping to nodes and guides. When you disable snapping, you can use the Node tool to move a node in the Preview so that it does not snap to nodes or guides.
In the Preview click and select Render Transformation for the target transformation, and use the Node tool to place the TurnIndicatorLeft node on the left side of the icons in the top row of the cluster. Position the TurnIndicatorLeft node so that it covers the off indicator for the TurnIndicatorLeft.
TIP
Hold down the Shift key when you drag a node with the Node tool to move the node in a true horizontal or vertical line.
You can apply transformations in these ways:
Layout transformation transforms the item before it applies the layout pass.
Render transformation transforms the item after it applies the layout pass, but before it renders the item.
Always use the Render Transformation, unless you know that you have to recalculate the layout.
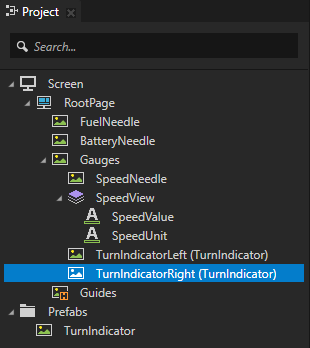
In the Project right-click the TurnIndicatorLeft node, select Duplicate, press the F2 key, and name the node TurnIndicatorRight.
In the Preview use the Node tool to place the TurnIndicatorRight node on the right side of the icons in the top row of the cluster, and to rotate it 180 degrees so that it points to the right.
TIP
When you use the Node tool, move the mouse pointer over the center of the node handles to resize the node , and to the outer side of the handles to rotate the node . When rotating hold down the Shift key to rotate a node in 45 degree increments.
When you select in the Project either the TurnIndicatorLeft or the TurnIndicatorRight node you can control the visibility of the indicators by enabling and disabling the Turn Indicator property in the Properties.
What's next?
In this tutorial you learned how to create an indicator and control it with a property using the Kanzi state manager. In the Assets of the project you worked on in this tutorial you can find the images for the light, seat belt, tire temperature, and windscreen liquid indicators. You can use the approach you learned in this tutorial to add these indicators below the speed gauge to the left and right of the clock.
You can also:
Learn how to control the position of gauge needles with custom properties included in the starting point project of this tutorial. See Tutorial: Create gauges.

 in the Visible state to save the current value of the Opacity property to that state.
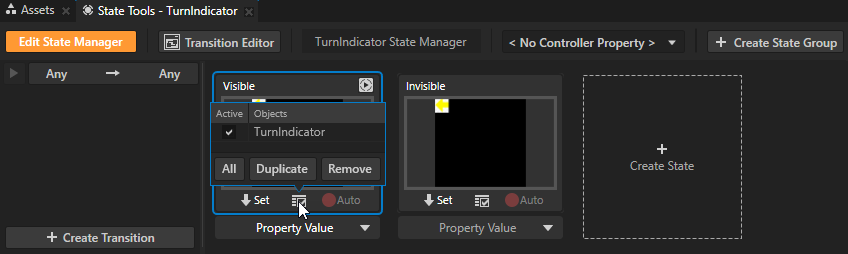
 next to the
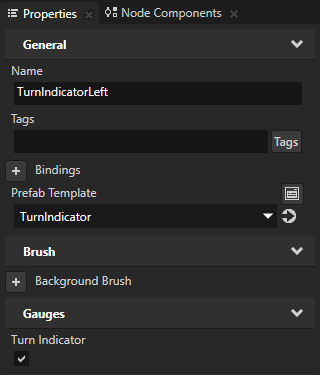
 to disable snapping to nodes and guides.
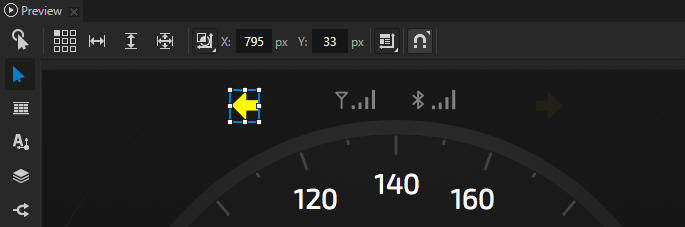
 to place the
  , and to the outer side of the handles to rotate the node
  . When rotating hold down the