The starting point of this tutorial is the Slider.kzprojKanzi Studio project file stored in the <KanziWorkspace>/Tutorials/Slider/Assets directory.
The <KanziWorkspace>/Tutorials/Slider/Completed directory contains the completed project of this tutorial.
Create the slider structure
In this section you create the structure for the slider.
To create the slider structure:
In Kanzi Studio open the project stored in the <KanziWorkspace>/Tutorials/Slider/Assets directory.
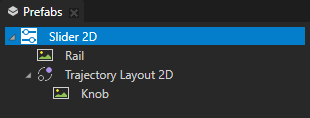
In the Prefabs create a Slider 2D prefab and inside it create:
A node that visually represents the rail along which the slider knob moves. You can use an Image node or several Image nodes inside a layout. For example, create an Image node and name it Rail.
A Trajectory Layout 2D node that acts as the rail along which you want to move the slider knob.
Inside the Trajectory Layout 2D create a node that you want to use as the visual representation of the slider knob. For example, create an Image node and name it Knob.
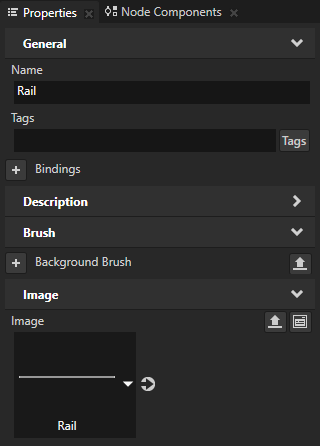
In the Prefabs select the Rail node and in the Properties set the Image property to the Rail image.
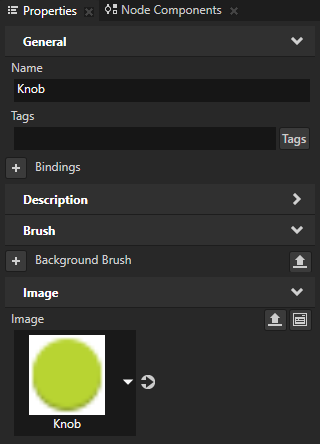
In the Prefabs select the Knob node and in the Properties set the Image property to the Knob image.
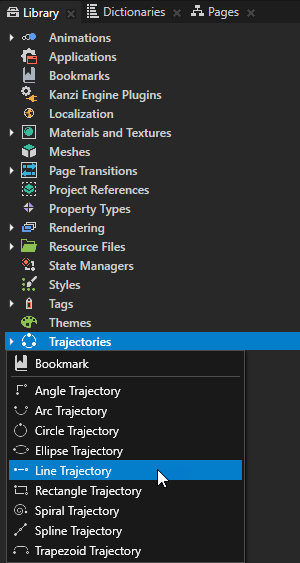
Create a line trajectory that acts as the rail along which the knob of the slider moves:
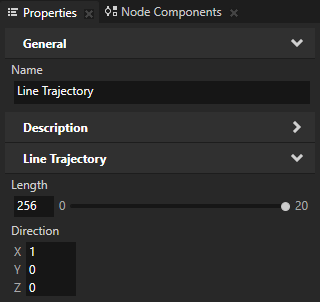
In the Librarypress Alt and right-clickTrajectories and select the Line Trajectory.
In the Properties set:
Length to 256. Set the Length property to the same length as is the length in pixels of the visual representation of the rail.
DirectionX property field to 1, all other property fields to 0. This way you set the trajectory of the slider on the x axis so that the slider knob moves horizontally on the rail.
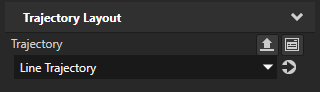
In the Prefabs select the Trajectory Layout 2D and in the Properties set the Trajectory property to the Line Trajectory you created in the previous step.
Create an alias that Kanzi uses to tell the slider which trajectory to use as the rail of the slider:
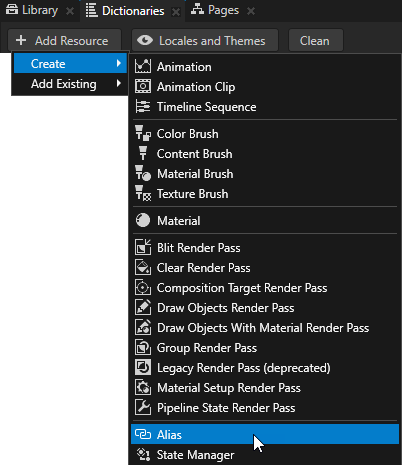
In the Prefabs select the Slider 2D prefab, in the Dictionaries window click + Add Resource, and select Create > Alias.
Name the alias $layout and set it to point to the Trajectory Layout 2D node in the Slider 2D prefab. Kanzi uses this alias to tell the slider along which trajectory to move the slider knob.
Set the slider size and make the knob move along the trajectory
In this section you set the layout sizes of the slider and the visual representation of the slider rail to meet the size of the visual representation and the trajectory along which the knob on the slider moves.
To set the slider sizes and make the knob move along the trajectory:
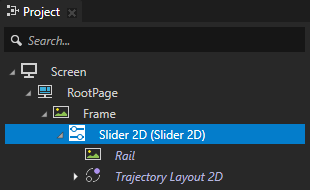
From the Prefabs drag the Slider 2D to the Project and drop it on the Frame node to instantiate the prefab.
In the Preview click to enter the Analyze mode, right-click , deselect 3D Grid, and select:
Debug objects This way you see the shape of the Trajectory Layout 2D node.
Borders of 2D nodes This way you see the size of different elements in your slider.
In the Project select the instantiated Slider 2D prefab, in the Preview select the Node tool and click the center square to align the Slider 2D prefab instance to the center of the Frame node.
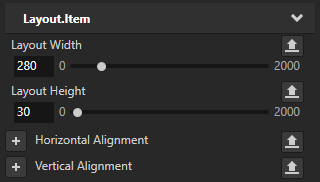
In the Prefabs select the Slider 2D prefab, and in the Properties add and set:
Layout Width to 280
Layout Height to 30
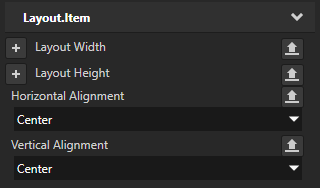
In the Prefabs select the Rail node, and in the Properties add and set:
Horizontal Alignment to Center
Vertical Alignment to Center
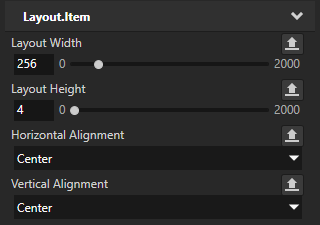
In the Prefabs select the Trajectory Layout 2D node, and in the Properties add and set:
Layout Width to 256
Layout Height to 4
Horizontal Alignment to Center
Vertical Alignment to Center
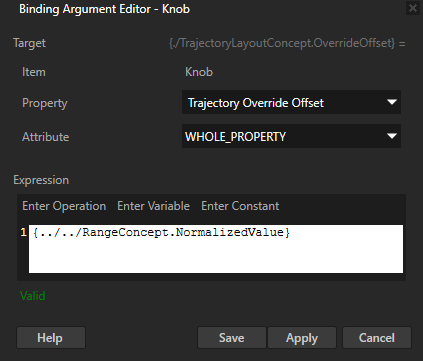
In the Prefabs select the Knob node, in the Properties add the Bindings property, and in the Binding Argument Editor set:
Property to Trajectory Override Offset
Expression to
{../../RangeConcept.NormalizedValue}
Click Save.
In the Preview click to exit the Analyze mode, click to enter the Interact mode, and click and drag the slider knob along the rail.
What's next?
In this tutorial you learned how to create a slider. Now you can:
Learn how to create a button that changes its appearance based on user actions. See Tutorial: Creating a button.


 to enter the
  , deselect
 and click the center square
  to align the
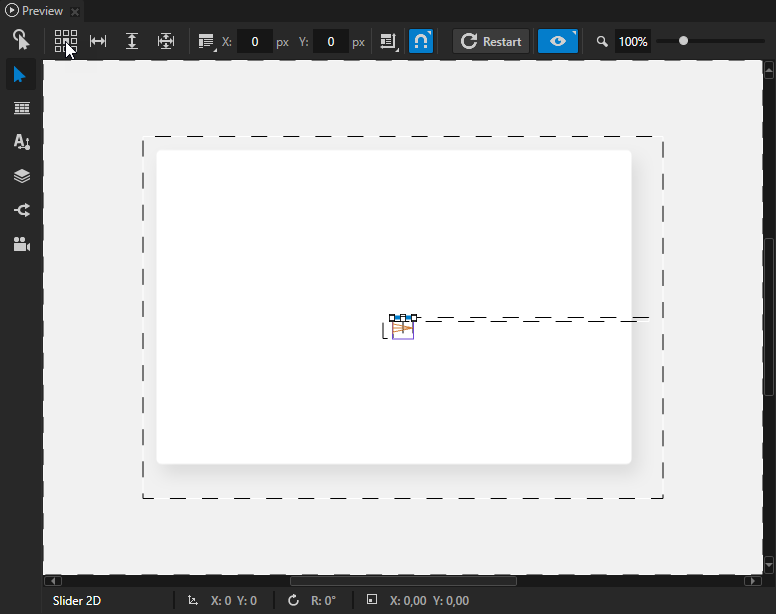

 to enter the