Use the Trajectory List Box 3D node to create scrollable lists of items arranged along a trajectory.
Kanzi Studio comes with several types of trajectories you can use. When you need a different type of trajectory, you can create a spline trajectory in a third-party tool and import it to your Kanzi Studio project. See Trajectories.
The items in a Trajectory List Box 3D node appear in the order you add them to the Trajectory List Box 3D node. To select an item in a Trajectory List Box 3D node click or tap the item.
The size of the trajectory defines the interactive area for click and drag gestures. If the trajectory is too small, users will not be able to select the items in the Trajectory List Box 3D node. To avoid this, make sure the trajectory is large enough. See Trajectories.
NOTE
Items in all list box nodes (Grid List Box nodes and Trajectory List Box 3D node) are not its child nodes, even though in Kanzi Studio it seems so when you add items to a list box. Because list box items are not child nodes of a list box, you cannot refer to these items from outside of a list box using paths or aliases. If you need to refer from a list box item to an object outside of a list box, use bindings and aliases. See Binding to properties outside of a Trajectory List Box 3D node and Navigating to Page nodes from a Trajectory List Box 3D node.
Nest Trajectory List Box 3D nodes to create a Trajectory List Box 3D within a Trajectory List Box 3D, each of which you can scroll independently. See Nesting Trajectory List Box 3D nodes.
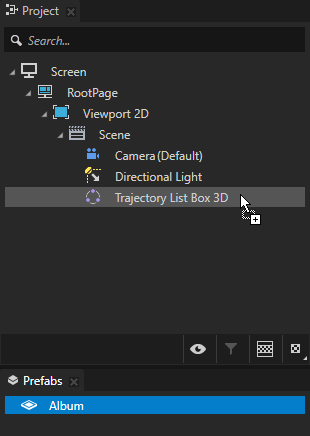
In the Projectpress Alt and right-click the node where you want to create a Trajectory List Box 3D node and select Trajectory List Box 3D. Note that you can create the Trajectory List Box 3D node only inside 3D nodes.
TIP
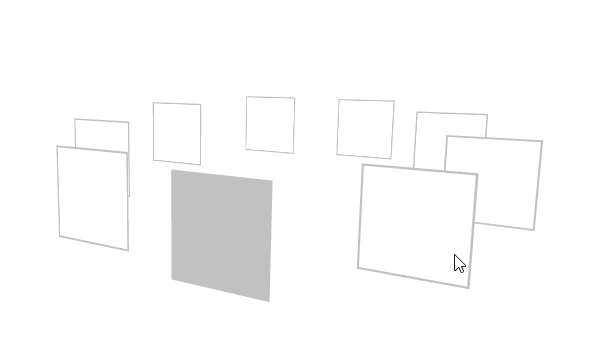
To see the trajectory, in the Preview click to enter the Analyze mode, right-click , and select Debug objects.
In the Project add items to the Trajectory List Box 3D node. Use a data source to add items to a List Box node. See Using a data source. For example, to create an album list, add several nodes which represent the albums in the list. See Using the List Box Item Container prefabs. As you add items, the Trajectory List Box 3D node arranges them along the trajectory used by the Trajectory List Box 3D node. To browse the items in a Trajectory List Box 3D node, in the Preview click and drag the items in the Trajectory List Box 3D node.
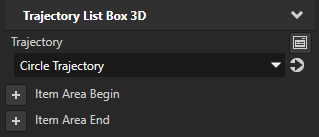
(Optional)Kanzi Studio creates and uses a circle trajectory by default. You can use an angle, arc, circle, ellipse, line, rectangle, spiral, spline, or a trapezoid trajectory. See Trajectories.
Fine tuning the mechanics of a Trajectory List Box 3D node
You can fine tune the mechanics of a list box. You can set the list box to:
Bring the selected item to the center of the list box. To set the list box to bring the item to the center of the list box object when a user clicks or taps the item, set the Selection Behavior property to Bring Center. Use the Cursor Offset property to set the direction in which selection moves the items in the list box. Use the Cursor Offset property to set the direction in which selection moves the items in the list box.
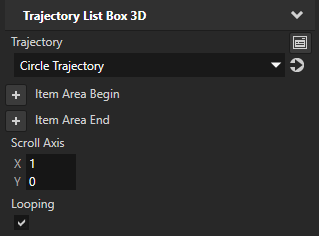
Show items from the beginning after reaching the last item. To start showing the items in a Trajectory List Box 3D from the beginning after reaching the last item, enable the Looping property.
Use either x or y axis for scrolling the items in the list box. To set the scrolling axis, add and set the Scroll Axis property. For example, to set the list box so that users scroll along the y axis to browse the list box items, set the Scroll Axis property values X to 0 and Y to 1.
Change the appearance of the items based on their location on the trajectory. To set how the items look at different points on the trajectory, use the Item Area Begin and Item Area End properties. You use the Item Area Begin and Item Area End properties to set the value of the Visible Amount In Parent property, which sets shaders to change the appearance of an item based on the location of that object in the list box. For example, if you use the Visible Amount In Parent property to gradually change the visibility of an item, set the Item Area Begin property to a larger value and the Item Area End property to a smaller value. This way you limit the area where that item is visible.
Nesting Trajectory List Box 3D nodes
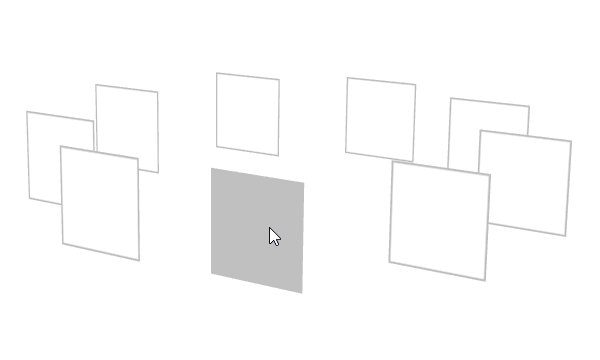
You can nest Trajectory List Box 3D nodes to create a Trajectory List Box 3D node within a Trajectory List Box 3D node, each of which you can scroll independently. For example, you can create a Trajectory List Box 3D which you use to scroll on a circle trajectory Trajectory Layout 3D nodes which contain sets of albums.
In a Trajectory List Box 3D node use the Scroll Axis property to set the axis on which users can scroll.
Select the Trajectory List Box 3D node that you created in the previous step and in the Properties set the Scroll Axis property to the axis on which you want that node to scroll. For example, to set the Trajectory List Box 3D node to scroll on the x axis, set the X property field of the Scroll Axis property to 1.
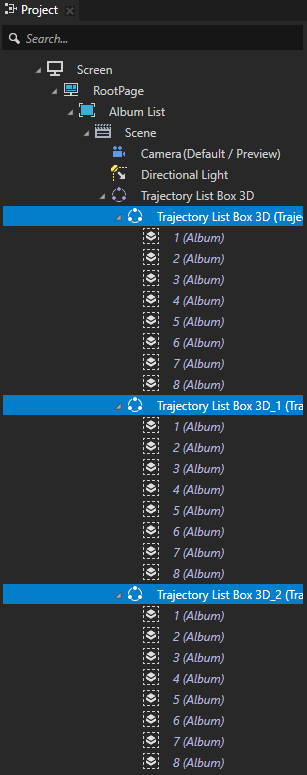
Create the Trajectory List Box 3D node you want to nest in the Trajectory List Box 3D node that you created in the previous step. For example, if you want to create several nested Trajectory List Box 3D nodes of albums, in the Prefabs create a Trajectory List Box 3D node, use the default circle trajectory, and set the Scroll Axis property X property field to 1 to set that node to scroll on the x axis.
In the Project add items to the Trajectory List Box 3D node. For example, from the Prefabs drag several Trajectory List Box 3D prefabs which represent the album lists, and in each nested Trajectory List Box 3D node add items which represent the albums in each list. You can add items to a Trajectory List Box 3D using a data source. See Using a data source.
Binding to properties outside of a Trajectory List Box 3D node
Use an alias when you want to bind a property of a list box item to a property of a node outside of the list box.
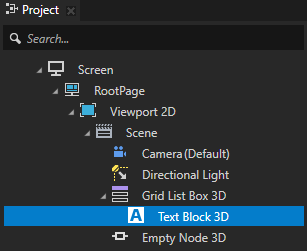
For example, if you have a Grid List Box 3D or a Trajectory List Box 3D node with a Text Block 3D node item and want to set the Text property value of the Text Block 3D node to a value of an Empty Node 3D node property that is not in the list box:
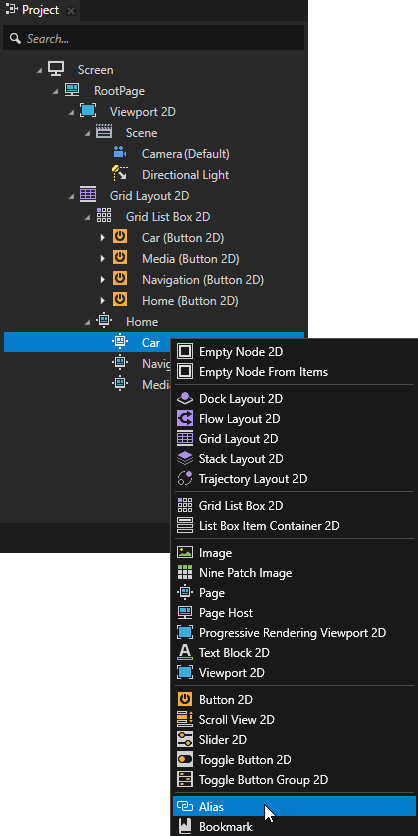
In the Projectpress Alt and right-click the nodes that contain the property to which you want to bind and select Alias. See Using aliases. For example, create an alias for the Empty Node 3D node.
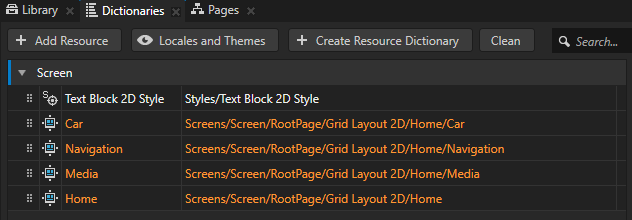
In the Dictionaries make sure that the aliases you created are in the resource dictionary that the list box node can access. For example, place all aliases to the resource dictionary of the Screen node, or create a resource dictionary in the list box node and place the aliases to that resource dictionary. See Using resource dictionaries.
Create the binding:
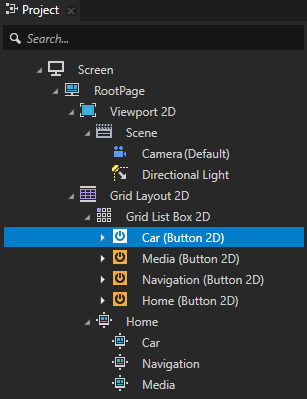
In the Project select the node inside the list box node from which you want to bind to a node outside of the list box node.
In the Properties add the Bindings property and create the binding using the alias to bind to the property in a node outside of the list box node. For example, in the Text Block 3D node create a binding to the Empty Node 3D node using the alias you created in the first step. See Bindings expressions reference. For example, use this binding expression:
{#Empty Node 3D/TextBlockConcept.Text}
The Text property in the Text Block 3D node gets the value of the Text property from the Empty Node 3D node.
Click Save.
Navigating to Page nodes from a Trajectory List Box 3D node
Use an alias when you want to navigate to a Page node from a node that is inside a list box node. For example, if you use a Grid List Box or a Trajectory List Box 3D node to create an address book and want to show the content of an address book entry in a Page node.
To navigate to Page nodes from a list box node:
In the Projectpress Alt and right-click each Page node to which you want to navigate to and select Alias. Kanzi Studio creates an alias that points to the node from which you created it, and places the alias to the nearest resource dictionary.
In the Dictionaries make sure that the aliases you created are in the resource dictionary that the list box node can access. For example, place all aliases to the resource dictionary of the Screen node, or create a resource dictionary in the list box node and place the aliases to that resource dictionary. See Using resource dictionaries.
Add and set the Navigate to Page action:
In the Project in the list box node select the node that contains the trigger you want to use to navigate to one of the Page nodes for which you created the alias in the first step.
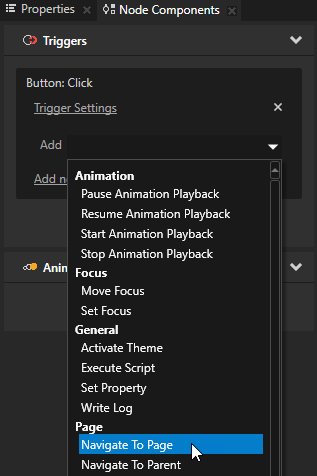
In the Node Components > Triggers section in the trigger you want to use to navigate to the Page node add the Navigate to Page action.
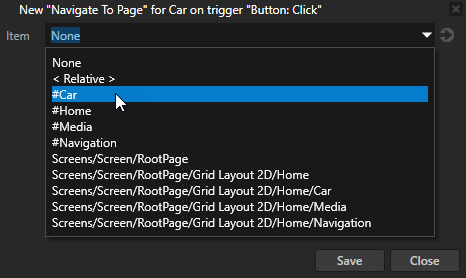
In the Navigate to Page settings window set the Item property to the alias of the Page node to which you want to navigate and click Save. All aliases start with a # sign.
In the Preview when you click the node that contains the Navigate to Page action, you activate the Page node selected in the action.
Reacting when the user interacts with a Trajectory List Box 3D node
Use the List Box triggers to react when the user interacts with a Trajectory List Box 3D node. For example, you can set the appearance of a Trajectory List Box 3D when the user scrolls that list box.
You can use these List Box triggers with a Trajectory List Box 3D node:
List Box: Item Selected trigger is set off when the user selects an item in a list box.
List Box: Item Hidden trigger is set off when an item in a list box node is unloaded from the working memory.
List Box: Item Visible trigger is set off when an item in a list box is created and loaded to the working memory.
List Box: Scroll Started trigger is set off when the scrolling of a list box starts.
List Box: Scrolled trigger is set off whenever a list box node scrolls.
List Box: Scroll Finished trigger is set off when the scrolling of a list box ends.
List Box: Target Changed trigger is set off when the user finishes scrolling a Trajectory List Box 3D by releasing the pointer.
To use the List Box triggers with a Trajectory List Box 3D node:
Define the behavior that you want to set with the List Box triggers. For example, create a state manager where you define the states which set the appearance of the Trajectory List Box 3D node when the List Box: Scroll Started and List Box: Scroll Finished triggers are set off. See Creating a state manager.
Add and configure a List Box trigger:
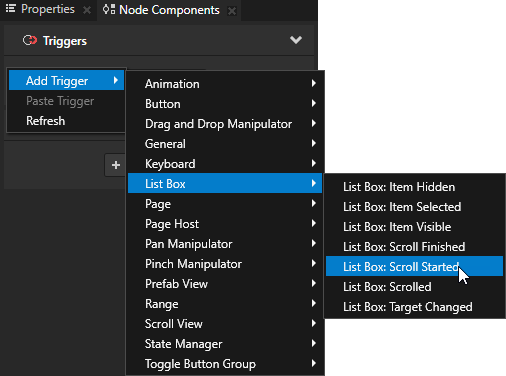
In the Project select the List Box node to which you want to add the trigger, and in the Node Components > Triggers section add one of the List Box triggers. For example, in the Project select the Trajectory List Box 3D node that you created in the beginning of this procedure and in the Node Components add the List Box: Scroll Started trigger.
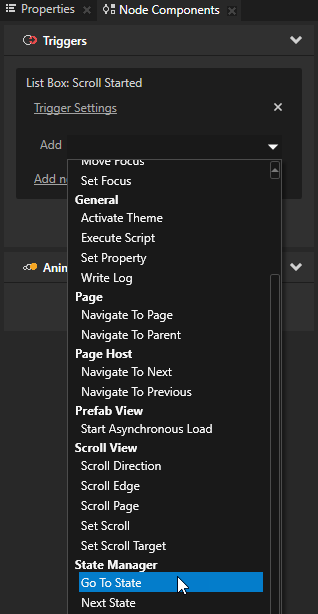
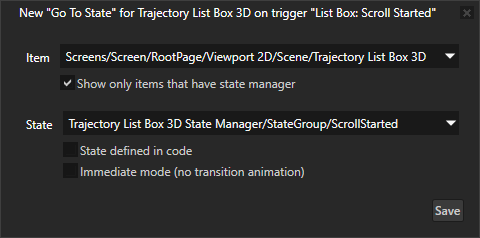
In the trigger you created in the previous step, in the Add dropdown menu select an action and configure it. For example, select the Go to State action, and in the action settings set:
Item to the Trajectory List Box 3D node that you created in the beginning of this procedure
State to the state which sets the appearance of the Trajectory List Box 3D node when the List Box: Scroll Started trigger is set off
Repeat the previous step to add and configure more List Box triggers. For example, add the List Box: Scroll Finished trigger. In the Go to State action of the trigger set State to the state which sets the appearance of the node when that trigger is set off.
In the Preview when you scroll the Trajectory List Box 3D node you created, the triggers you added are set off.
Trajectory list box example
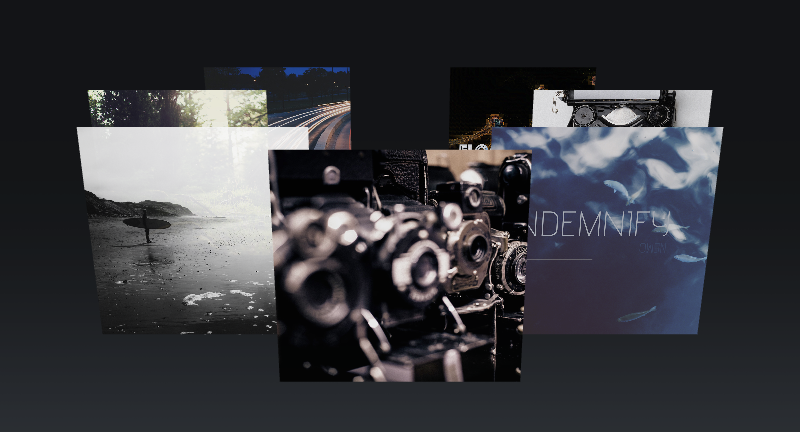
This example shows the use of the Trajectory List Box 3D node to create an interactive scrollable list of items. The example implements a simple gallery of photos with a selection effect using an animation.
The Trajectory List Box 3D node, its Circle Trajectory, content shown in the Trajectory List Box 3D, and animation that highlights the centered photo are created in Kanzi Studio. The point of time at which a highlight-animation is launched is defined based on the scroll speed and focused item data available from the user input events that the trajectory list box component produces.
The Trajectory List Box 3D node in the example uses these features:
Scroll Axis. The scroll axis for the trajectory is set to the x axis. The trajectory defines the scroll path.
Looping. You can clamp the items in the Trajectory List Box 3D node to the defined trajectory start and end or to transition between the start and end positions, as in this example, with the Looping property.
Trajectory. To use a trajectory for the Trajectory List Box 3D, you need to create it in the Library > Trajectories. You can create circle and line trajectories in Kanzi Studio. To use a spline trajectory, create a spline in a third-party tool, import it, and add the spline as a Spline Trajectory. See Using circle trajectories, Using line trajectories, and Using spline trajectories. You can customize the trajectory by adding and setting trajectory properties such as Item Area Begin, Item Area End, Cursor Offset, and Override Distance.
Selection and target behavior. Selection and target events are handled separately. The target changed message is generated at the moment the user releases the pointer. It contains the information on the item that is brought to the center with the current trajectory movement. The selection message is generated when a user selects an item by clicking or tapping it. You can select the Bring Center selection behavior in Kanzi Studio. You can define more actions for the target and selection events for any member of the Trajectory List Box 3D, or even the trajectory list box component itself, by setting invoked actions for List Box: Target Changed or List Box: Item Selected triggers.
You can find the example in the <KanziWorkspace>/Examples/Trajectory_list_box directory.
Using the Trajectory List Box 3D node in the API
To create a Trajectory List Box 3D:
// Create a Trajectory List Box 3D named MyListBox.
TrajectoryListBox3DSharedPtr trajectoryListBox = TrajectoryListBox3D::create(domain, "MyListBox");
To set the trajectory you want the list box to use:
// Create a circle trajectory named Circle with radius of 4 device independent units.
TrajectorySharedPtr trajectory = Trajectory::createCircle(Vector3(), Vector3::up(), 0.0f, 4.0f, domain, "Circle");

// Set the list box to use the trajectory.
trajectoryListBox->setTrajectory(trajectory);
// Increase the layout size to cover the whole trajectory.
trajectoryListBox->setWidth(10.0f);
trajectoryListBox->setDepth(10.0f);
trajectoryListBox->setHeight(3.0f);
To add items to the list box:
// Create cube meshes and add them as items of the trajectory list box.
// Items on the trajectory appear in the order you add them to the list.
Model3DSharedPtr item1 = Model3D::createCube(domain, "item1", 1.0f, ThemeRed);
Model3DSharedPtr item2 = Model3D::createCube(domain, "item2", 1.0f, ThemeGreen);
Model3DSharedPtr item3 = Model3D::createCube(domain, "item3", 1.0f, ThemeBlue);
Model3DSharedPtr item4 = Model3D::createCube(domain, "item4", 1.0f, ThemeOrange);
Model3DSharedPtr item5 = Model3D::createCube(domain, "item5", 1.0f, ThemeYellow);
trajectoryListBox->addItem(item1);
trajectoryListBox->addItem(item2);
trajectoryListBox->addItem(item3);
trajectoryListBox->addItem(item4);
trajectoryListBox->addItem(item5);
To make the list box loop:
// Make the list box looping. All items fit to the trajectory so they are positioned evenly.
trajectoryListBox->setLooping(true);
To set selection behavior:
// Make clicking items bring them to the center of the trajectory.
trajectoryListBox->setSelectionBehavior(ListBoxConcept::SelectionBehaviorBringToCenter);
// Change the position where the clicked items are brought to be one quarter from the beginning of the trajectory.
trajectoryListBox->setCursorOffset(0.25f);

 to enter the Analyze mode, right-click
  , and select Debug objects.