Multimodal example
This example shows how you can extend the Kanzi Connect Server by bringing external functionality using remote services.
This example consists of these separate applications:
The VoiceInput application records voice commands from the user and dispatches them to a Kanzi Connect Server.
The VoiceControlledIVI application listens to these commands and acts accordingly.
You can find this example in the <KanziConnectInstallation>/SDK/examples/Multimodal directory.
Requirements
Run the VoiceInput application on an Android terminal with an internet connection.
To get the best possible speech recognition results, set the language of the device running the VoiceInput application to English.
Main features
Extend the Kanzi Connect Server with a remote service that runs on an Android device and uses Google cloud services for speech recognition.
Control the remote device with speech commands. You can switch between tabs with these voice commands:
“Contacts” to switch to the Contacts page
“Music” to switch to the Music page
“Speech” to switch to the Speech page
“My car” to switch to the My Car page.
Project architecture
This graph shows the architecture of this example:
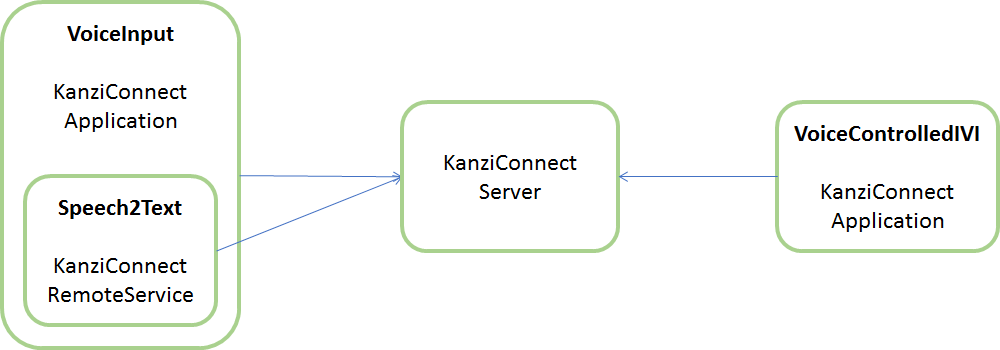
The VoiceInput application controls the text recognition and also embeds a remote service that performs the actual speech recognition using the relevant Android service (android.speech.SpeechRecognizer).
The VoiceControlledIVI application is a slave that reacts to commands received from the Speech2Text Service.
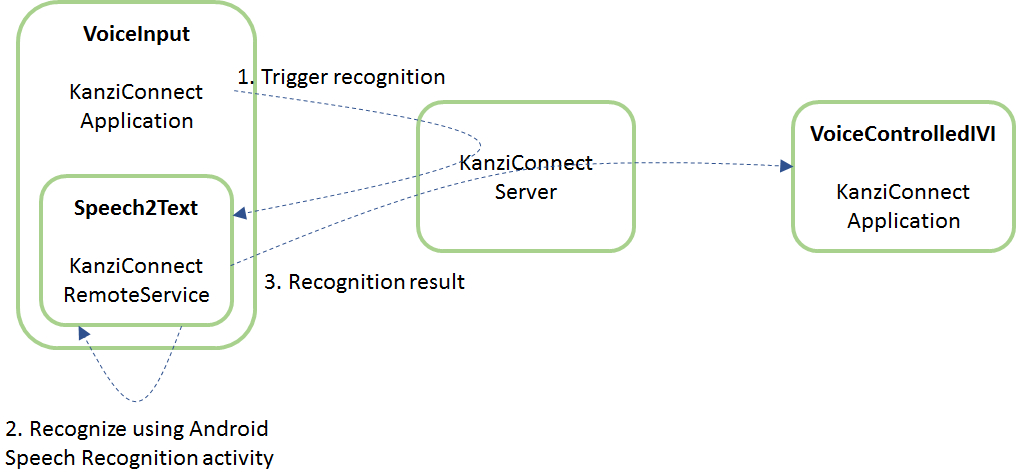
The user triggers the voice recognition by pressing the microphone button on the mobile terminal screen. The following communication sequence occurs:
Kanzi Connect application sends a recognition start message through Kanzi Connect Server to the Speech2Text Service.
The Speech2Text Service instructs the Android service to start speech recognition.
Once the speech recognition completes, the Speech2Text Service reports the results to the VoiceControlledIVI application.
Source code
VoiceControlledIVI is a basic Kanzi Connect application.
VoiceInput consists of:
Basic Kanzi Connect application that provides the user interface.
Embedded speech2text remote service that is implemented in Java and uses the Kanzi Connect Android bindings. This example also shows how to run Kanzi Connect remote service in the same application main loop where the standard Android application runs.
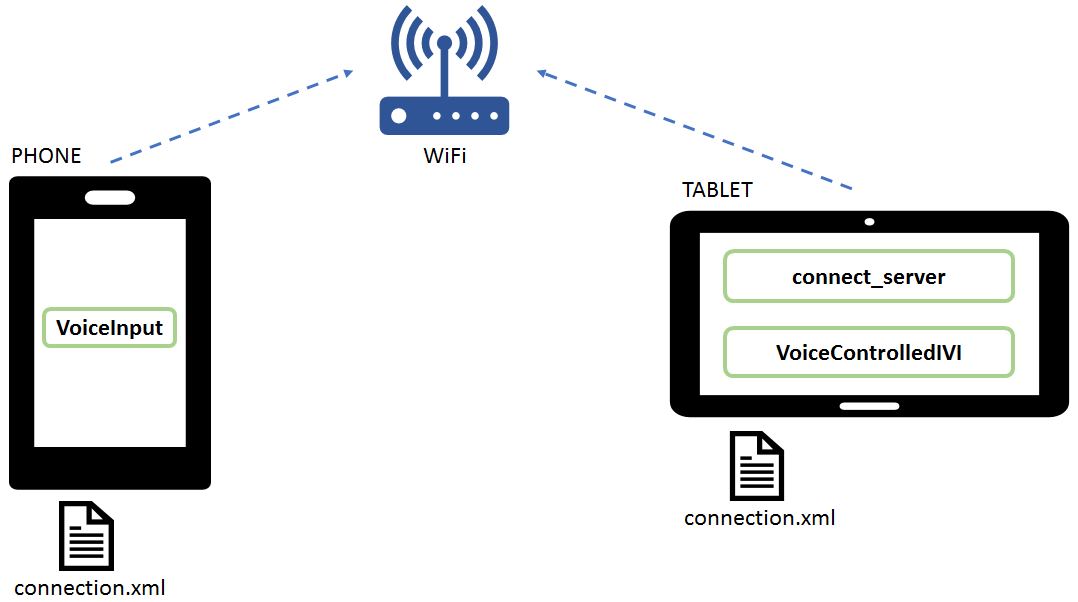
Example setup
This image shows an example voice control setup that uses these Android devices:
VoiceInput is installed to an Android phone. To make sure that the Google speech recognition recognizes the English words used in the example, use an Android phone with English language.
VoiceControlledIVI and Kanzi Connect Server are installed to an Android tablet.
Both Android devices are connected to same Wi-Fi base station, which enables them to communicate.
To learn how to configure Kanzi Connect Server for Android see Running a preconfigured Kanzi Connect Server on Android.
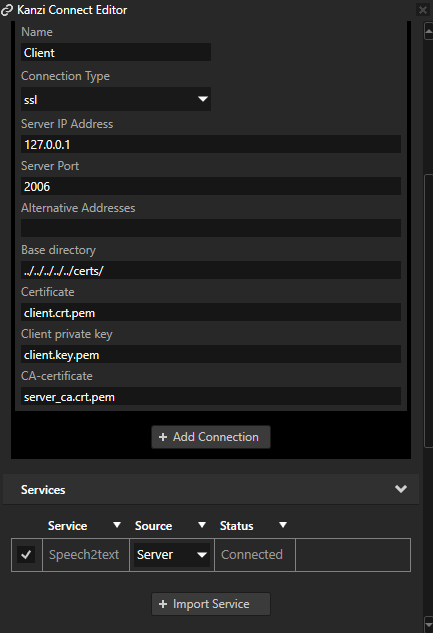
To configure the connection parameters for the Kanzi Connect Server, do this on both Android devices:
In Windows Explorer go to the Android device internal storage.
In the root of the internal storage create a directory named Connect.
Copy the
SDK/examples/<name>/Application/bin/connection.xmlfile to the Connect directory you created in the previous step.In a text editor open the
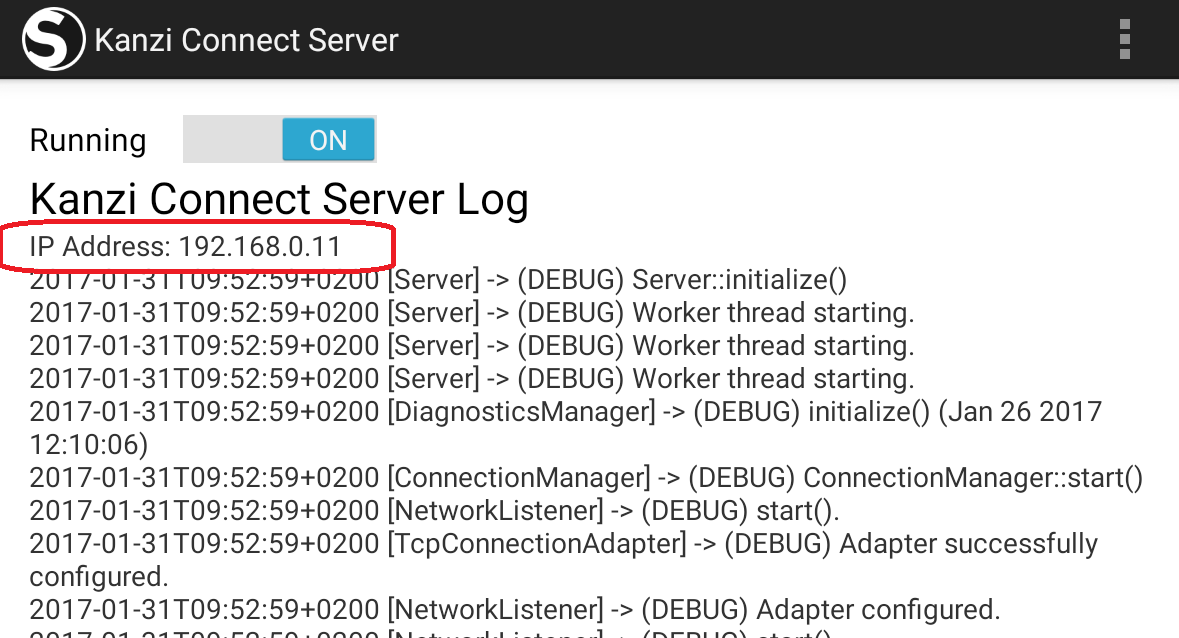
Internal Storage/Connect/connection.xmlfile and change the server IP address to match the IP address of the device which runs the server.
In the connection.xml file of the tablet set the address to 127.0.0.1:
<address>127.0.0.1</address>
In the connection.xml file of the phone set the address to the IP address of the tablet. You can check the IP address from the text output of the Kanzi Connect Server when you run it on Android. Here the IP address is 192.168.0.11:
Using voice control
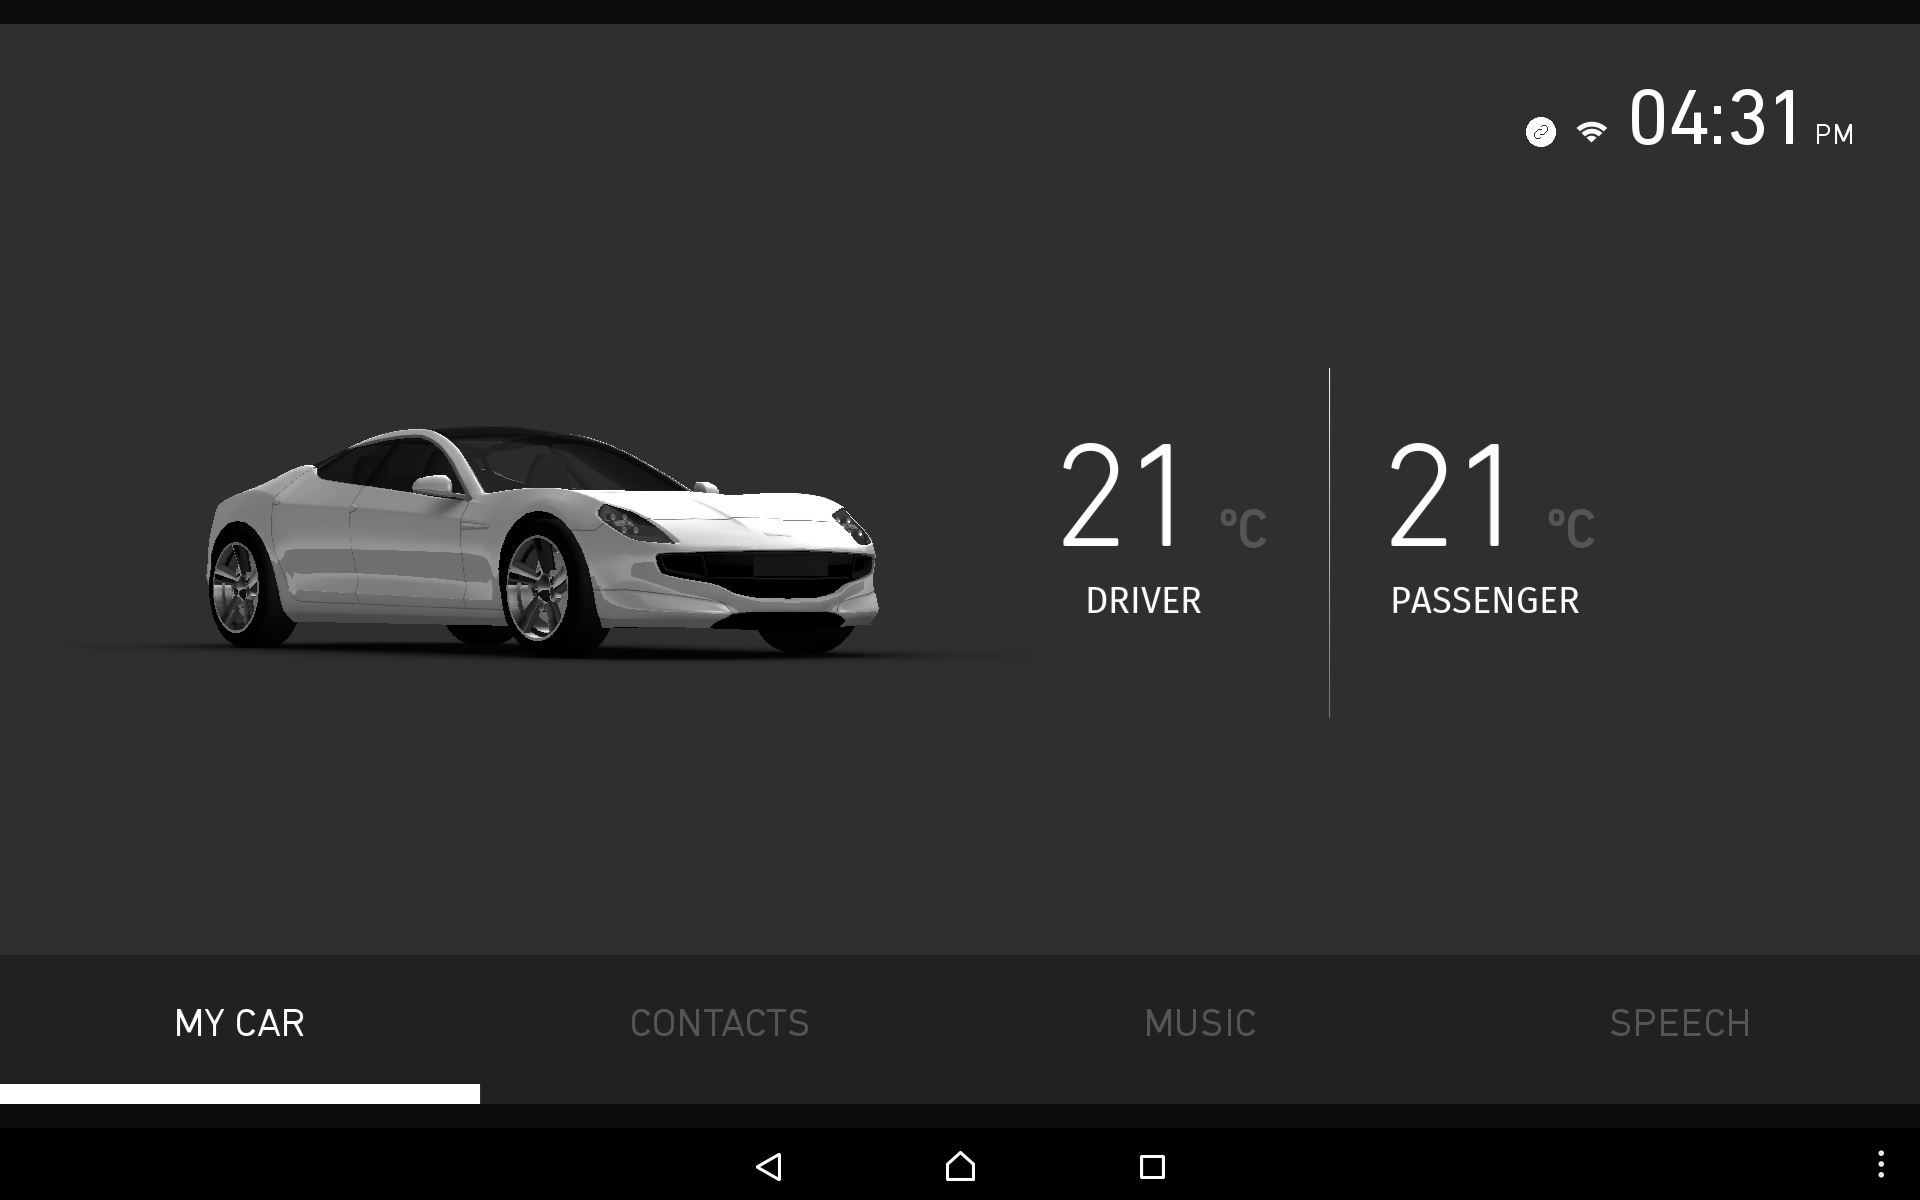
Once you set up the voice control, in the VoiceInput application tap the microphone icon. The voice recognition starts after you hear a ‘beep’ sound.

When the application recognizes a command, the VoiceControlledIVI application reacts to your speech commands. For example, when you say “contacts”, the UI switches to the CONTACTS tab.
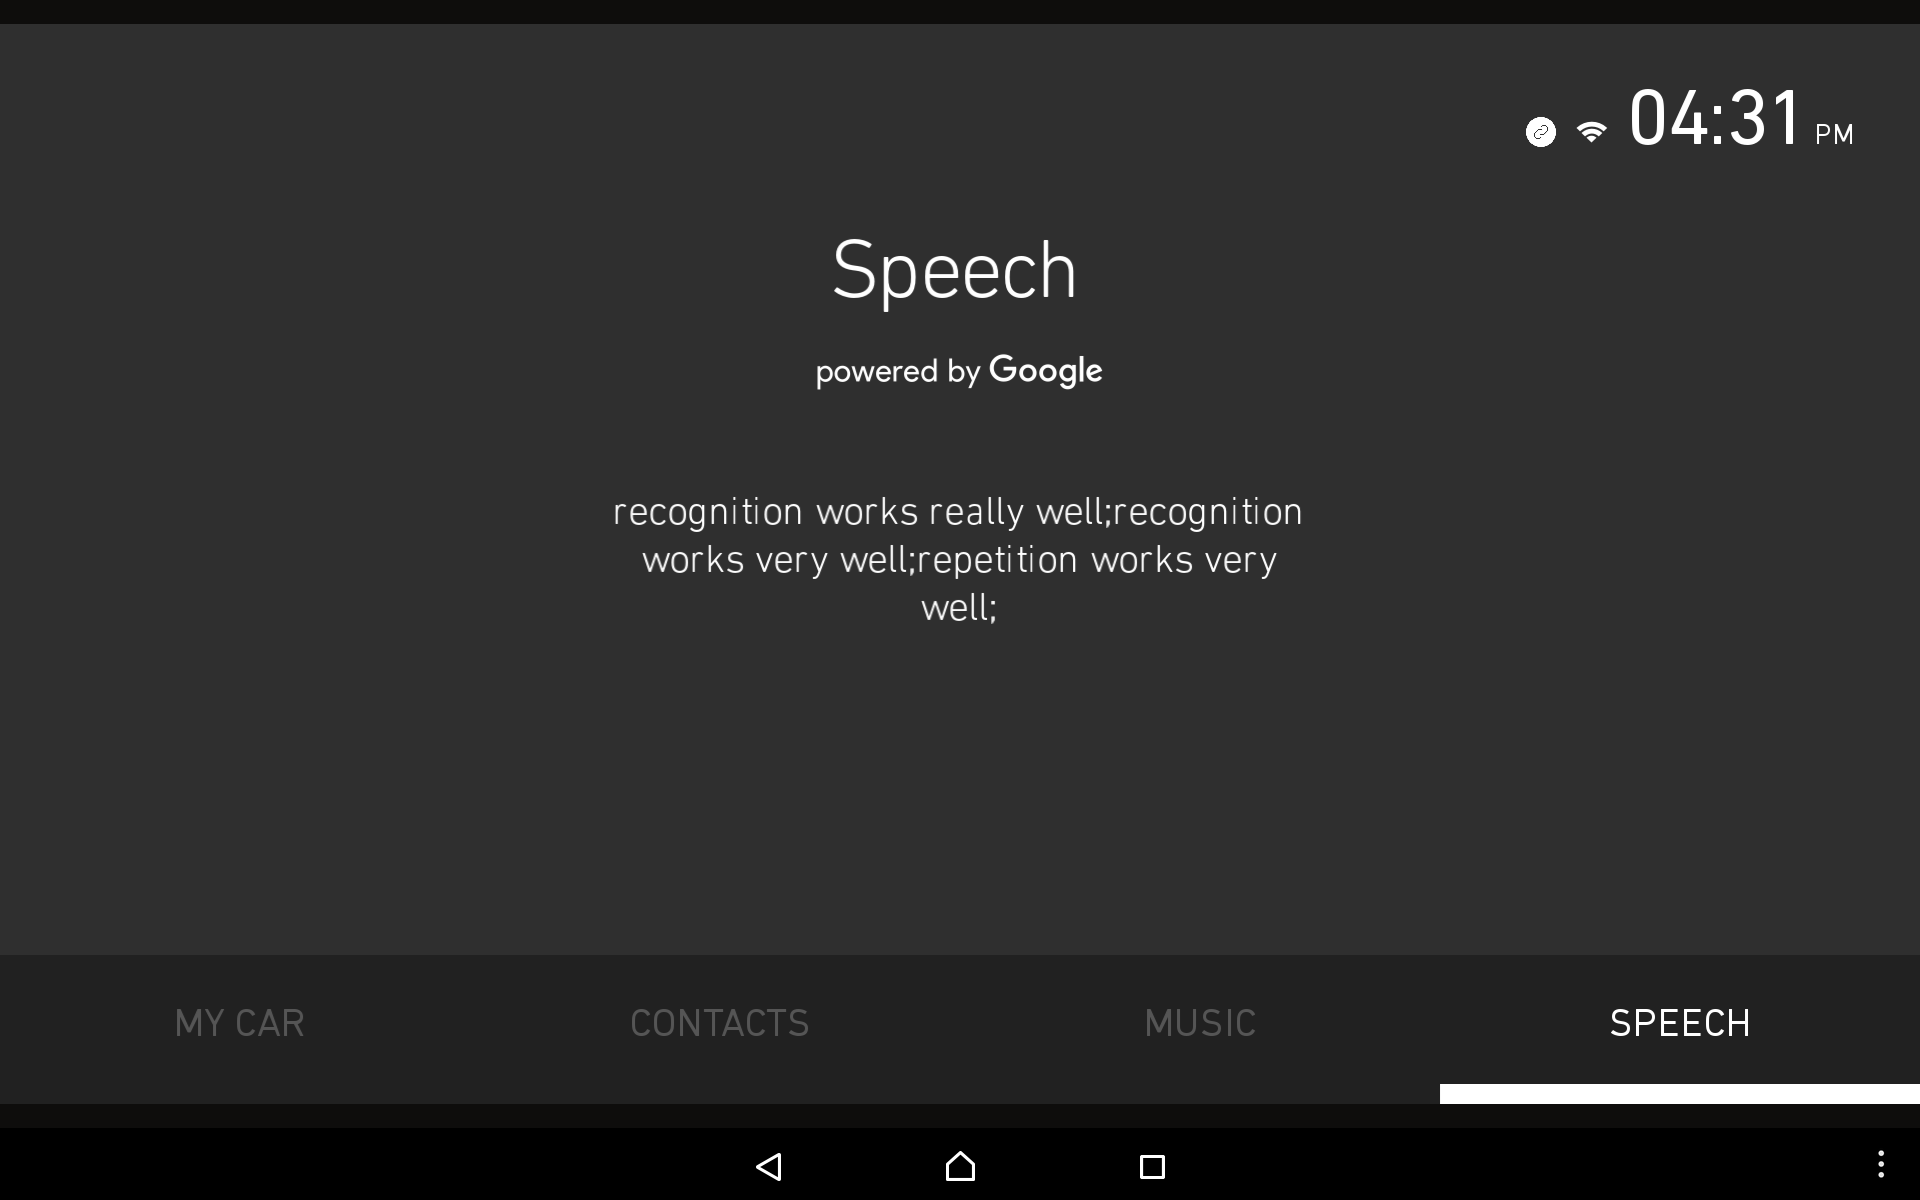
When the speech tab is active the raw data returned by the Google speech recognition service is printed to the screen. It usually provides multiple suggestions.
VoiceControlledIVI data bindings
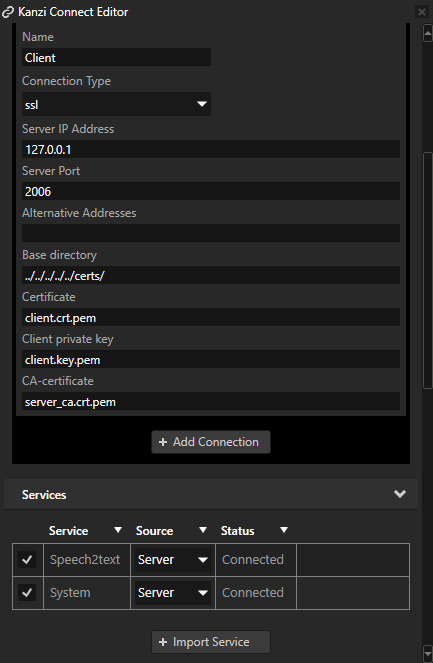
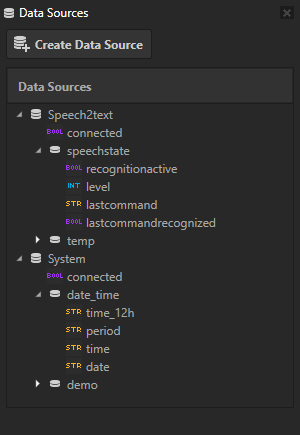
The data sources in this project are imported from Kanzi Connect. The Data Sources window lists all the data sources in the project:
Speech2text provides information about the last spoken command
System provides information, such as date and time
Here is an overview of the data bindings in the VoiceControlledIVI project:
Connection state has its data binding in the RootPage > Time > Connected node. It uses the System data source.
[ConnectedState] = {DataContext.connected}
Date and time (date_time.time_12h) has its data binding in the RootPage > Time > Time node. It uses the System data source.
[TimeText] = {DataContext.date_time.time_12h}
Last command uses the Speech2text data source which is set in the RootPage > Speech node. All its child nodes inherit the data context from this node. The data binding is in the RootPage > Speech > Content > SpeechToText:
[Text] = {DataContext.speechstate.lastcommand}
VoiceInput
Voice input uses only the Speech2text data source which is provided by the server running on Android.

Data binding
Here is an overview of the data bindings in the VoiceInput project:
“Connection State” has its data binding in the RootPage > Mic > NoConnection node which sets the visibility of the “No connection” text according to state of the server connection:
[Connection] = {DataContext.connected}The RootPage > Mic > MicBtn button node activates the microphone. It has a binding for the control property recognitionactive which tells whether voice recognition is active or not:
[recognitionactive] = {DataContext.speechstate.recognitionactive}The latest voice command has its data binding in the RootPage > Mic > SpeechIndicator:
[LastCommandRecognized] = {DataContext.speechstate.lastcommandrecognized}This controls the SpeechIndicator State Manager.
The RootPage > Mic > SpeechIndicator > Speech node shows the text command:
[Text] = {DataContext.speechstate.lastcommand}
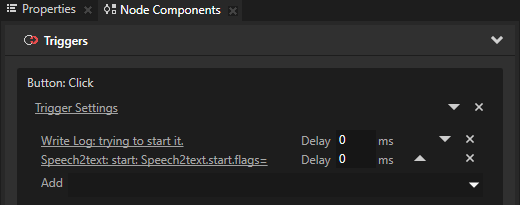
Events
The RootPage > Mic > MicBtn node has a Button: Click trigger with a Speech2text:start action. When the user clicks the MicBtn button Speech2text action starts.