Using Kanzi Stereoscopy
To stereoscopically render 3D content in your Kanzi application:
Set up your Kanzi Studio project and import Kanzi Stereoscopy. See Setting up your Kanzi Studio project.
Create and set up the render passes to stereoscopically render 3D content. You can create the stereoscopic effect:
Using composition materials. See Rendering 3D content stereoscopically with a composition material.
Using side-by-side rendering. See Rendering 3D content stereoscopically side-by-side.
Setting up your Kanzi Studio project
To set up your Kanzi Studio project for Kanzi Stereoscopy:
Make sure that the settings in your Kanzi Studio project match the solution configuration that you use in Visual Studio to build your application and plugin projects.
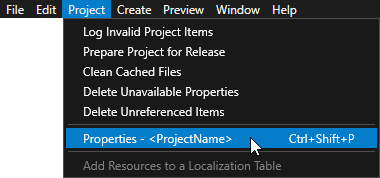
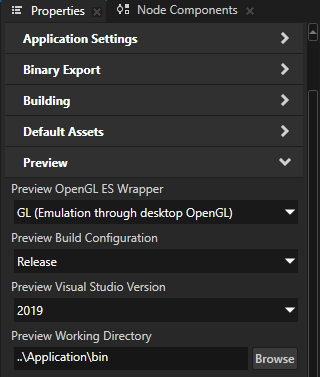
For example, if you use the Release solution configuration in Visual Studio 2019, in your Kanzi Studio project in the Project > Properties set:
Preview OpenGL ES Wrapper to GL (Emulation through desktop OpenGL)
Preview Build Configuration to Release
Preview Visual Studio Version to 2019
Preview Working Directory to ..\Application\bin
With these settings you set the Kanzi Studio Preview to work with Kanzi Stereoscopy.
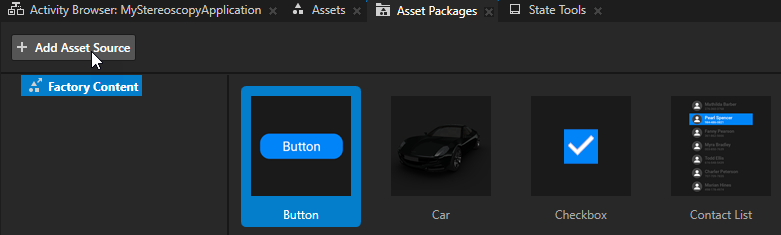
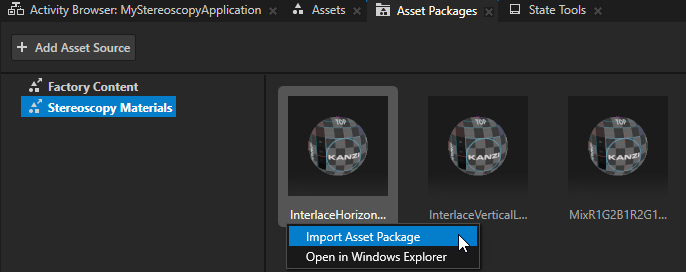
In the Asset Packages click + Add Asset Source and in the directory where you extracted the Kanzi Stereoscopy package select the
assets/Stereoscopy Materialsfolder.After you add the asset source, you see in the Asset Packages window the materials included in the Stereoscopy Materials asset package.
When you add an asset source to Kanzi Studio, you make that asset source available to all your Kanzi Studio projects.
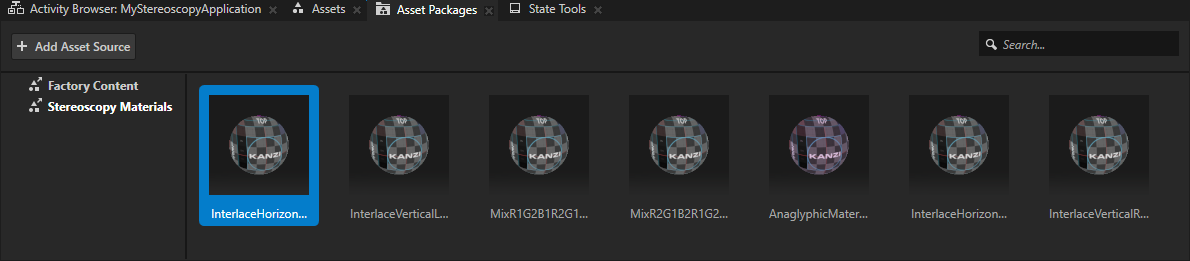
The Stereoscopy Materials asset package provides these materials to compose stereoscopic content in your Kanzi application for different stereoscopic devices:
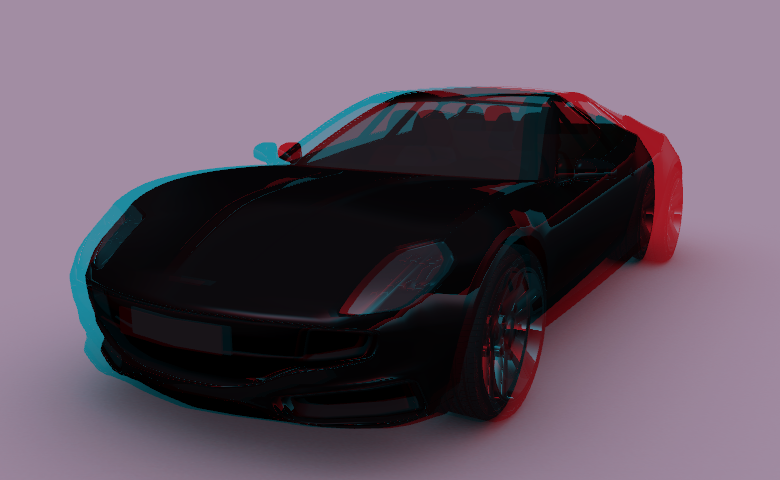
Use the AnaglyphicMaterial material to show content from the position of each eye using anaglyphic coloring, usually red and cyan.
Kanzi Stereoscopy renders the content for each eye to a separate framebuffer, then composites to the screen using the StereoBlitAnaglyphic material type.
You achieve the 3D effect by using a regular display and anaglyphic color filter glasses. If the display enhances colors, the stereoscopic effect decreases.
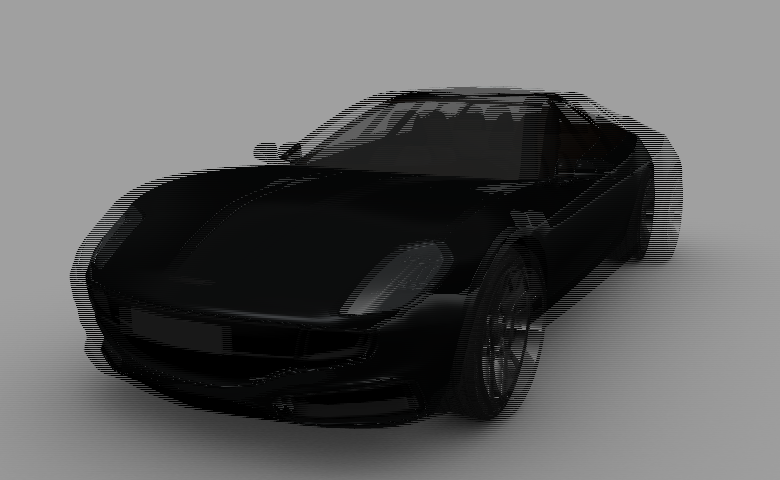
Use the InterlaceHorizontalLeftFirstMaterial and InterlaceHorizontalRightFirstMaterial materials for displays that show content from the position of each eye using alternating horizontal lines.
Kanzi Stereoscopy renders the content for each eye to a separate framebuffer, then composites to the screen using the StereoBlitInterlace material type.
You achieve the 3D effect by using either:
Polarizing display and polarizing glasses
Autostereoscopic display that supports horizontal interlacing mode
Use the InterlaceVerticalLeftFirstMaterial and InterlaceVerticalRightFirstMaterial materials for displays that show content from the position of each eye using alternating vertical lines.
Kanzi Stereoscopy renders the content for each eye to a separate framebuffer, then composites to the screen using the StereoBlitInterlace material type.
You achieve the 3D effect by using either:
Polarizing display and polarizing glasses
Autostereoscopic display that supports vertical interlacing mode

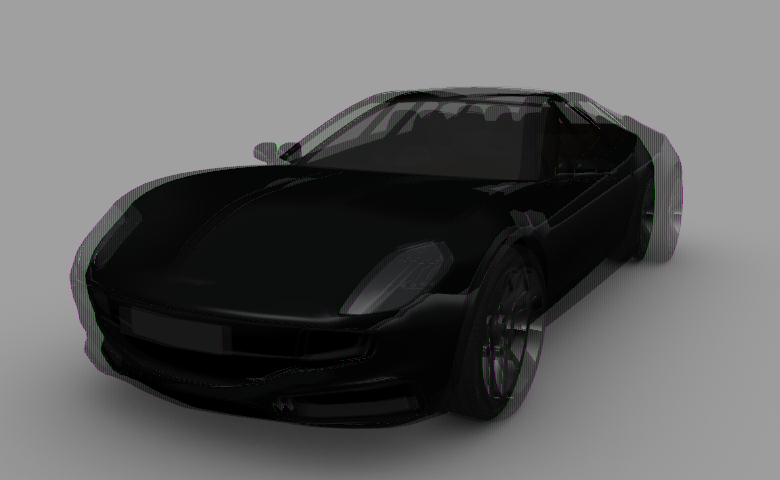
Use the MixR1G2B1R2G1B2Material and MixR2G1B2R1G2B1Material materials for displays that show content from the position of each eye using spatial alternation of two sets of narrow band-pass color filters:
MixR1G2B1R2G1B2Material to produce a result where for two horizontally adjacent pixels:
First pixel: the left eye sees the red and blue components of the left-eye view and the right eye sees the green component of the right-eye view.
Second pixel: the left eye sees the green component of the left-eye view and the right eye sees the red and blue components of the right-eye view.
MixR2G1B2R1G2B1Material to produce a result where for two horizontally adjacent pixels:
First pixel: the left eye sees the green component of the left-eye view and the right eye sees the red and blue components of the right-eye view.
Second pixel: the left eye sees the red and blue components of the left-eye view and the right eye sees the green component of the right-eye view.
Kanzi Stereoscopy renders the content for each eye to a separate framebuffer, then composites to the screen using the StereoMixHorizontal material type.
You achieve the 3D effect by using 3D glasses with filters and a display that supports spatially alternating two sets of narrow band-pass color filters.
To import to your Kanzi Studio project the material for the type of stereoscopy that you want to use, either:
From the Asset Packages drag the material to the Library > Materials and Textures > Materials.
In the Asset Packages right-click the material and select Import Asset Package.
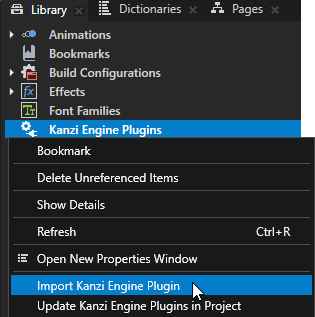
In the Library right-click Kanzi Engine Plugins and select Import Kanzi Engine Plugin.
In the Kanzi Stereoscopy package go to the
libdirectory, select the plugin DLL in the directory of the configuration that you selected in the first step, and click Open.For example, select
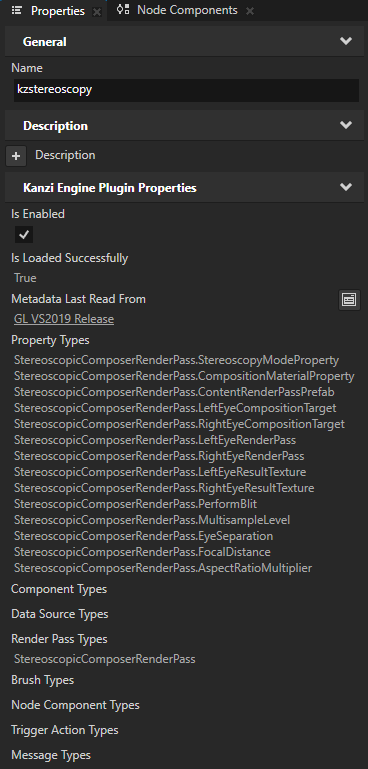
win64/GL_vs2019_Release/kzstereoscopy.dll.Kanzi Studio imports Kanzi Stereoscopy to your Kanzi Studio project. Kanzi Stereoscopy provides the Stereoscopic Composer Render Pass which renders content stereoscopically using the materials that you imported in step 2. You can now set up the content in your project to use Kanzi Stereoscopy to render the content. See Rendering 3D content stereoscopically with a composition material.
Rendering 3D content stereoscopically with a composition material
To render 3D content stereoscopically with a composition material:
In Kanzi Studio set up your project for Kanzi Stereoscopy. See Setting up your Kanzi Studio project.
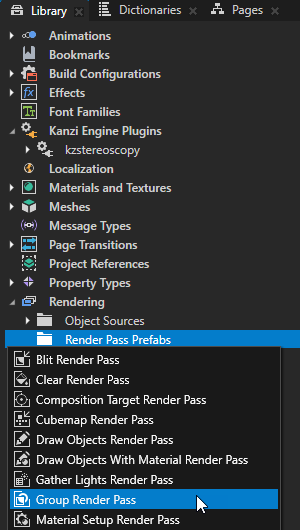
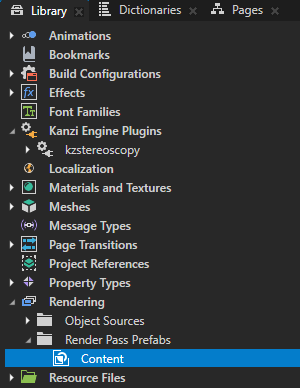
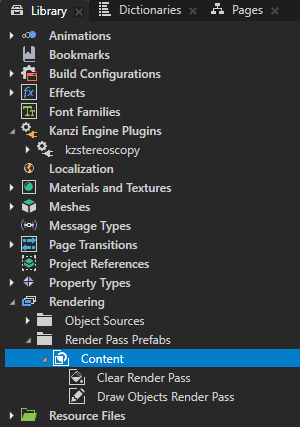
In the Library press Alt and right-click Rendering, select Group Render Pass, and name it Content.
You use this Group Render Pass render pass prefab to collect the render passes that you use to render the content for each eye.
In the Content render pass prefab create:
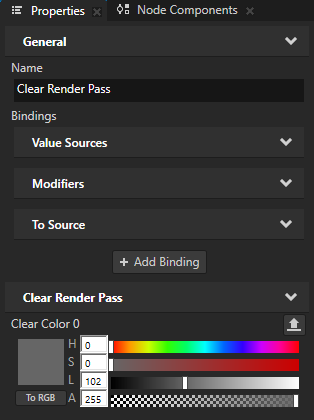
Clear Render Pass and set the Clear Color 0 property to the color with which you want to clear the render targets at the start of each frame.
When you use a composition material to render content, Kanzi Stereoscopy renders to a framebuffer object. You use this Clear Render Pass to remove the data from the previous frame before drawing a new frame.
Draw Objects Render Pass
You use this render pass to draw the content for each eye.
In the Library > Rendering > Render Pass Prefabs create a render pass prefab where you place a Stereoscopic Composer Render Pass that you use to apply stereoscopic rendering to 3D content.
For example:
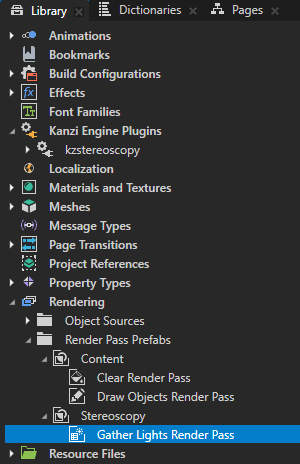
Create a Group Render Pass render pass prefab and name it Stereoscopy.

In the Stereoscopy render pass prefab create a Gather Lights Render Pass.
You use this render pass to collect the Light nodes that you use to light the 3D content to which you want to apply stereoscopic rendering.
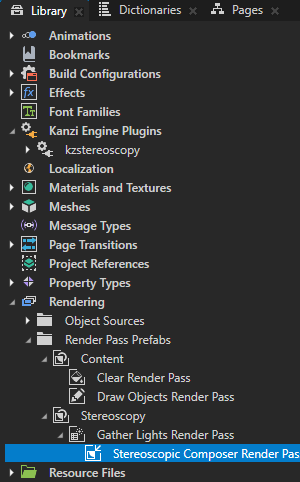
In the Gather Lights Render Pass create a Stereoscopic Composer Render Pass.
You use this render pass to apply stereoscopic rendering to the 3D content that you draw using the Content render pass prefab.
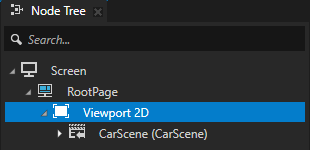
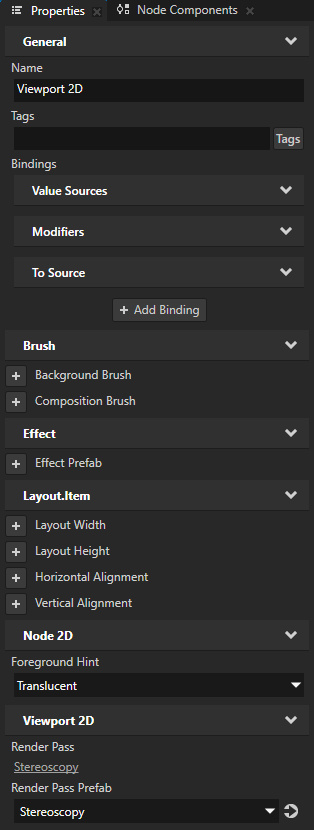
In the Node Tree select the Viewport 2D node whose content you want to render with Kanzi Stereoscopy and in the Properties set the Render Pass Prefab property to the Stereoscopy render pass prefab.
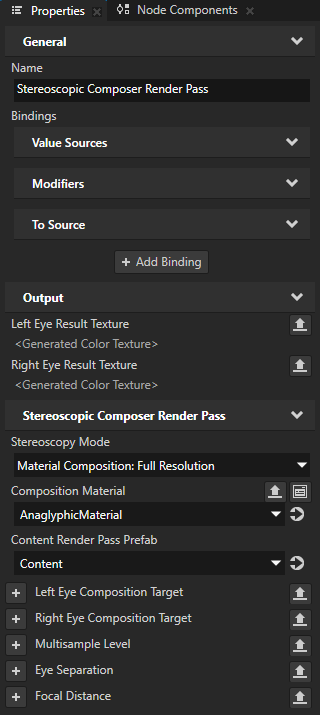
In the Library > Rendering > Render Pass Prefabs select the Stereoscopic Composer Render Pass and in the Properties add and set:
Stereoscopy Mode to Material Composition: Interlace Half-Height, Material Composition: Interlace Half-Width, or Material Composition: Full Resolution
Material Composition: Interlace Half-Height mode renders left and right eye images in half resolution in vertical direction. During rendering it adjusts the projection so that, counting from the bottom:
In the left eye half-height image the n-th row of pixels contains (2*n)th row of pixels of full-resolution left eye image
In the right eye half-height image the n-th row of pixels contains (2*n + 1)th row of pixels of full-resolution right eye image
Material Composition: Interlace Half-Width mode renders left and right eye images in half resolution in horizontal direction. During rendering it adjusts projection so that, counting from the left side:
In the left eye half-width image the n-th column of pixels contains (2*n)th column of pixels of full-resolution left eye image
In the right eye half-width image the n-th column of pixels contains (2*n + 1)th column of pixels of full-resolution right eye image
The limitations of the Material Composition: Interlace Half-Height and Material Composition: Interlace Half-Width modes are:
Mipmap filtering creates a blurry visual result.
Non-fullscreen Viewport nodes create a result where the stereoscopic effect is either incorrect or lost. Use these modes only with full-screen Viewport nodes.
Composition Material to one of the materials provided by the Stereoscopy Materials asset package.
For example, set it to AnaglyphicMaterial.
Content Render Pass Prefab to the render pass prefab that you use to render the content of your scene.
For example, set it to the Content render pass prefab.
(Optional) Multisample Level to the number of anti-aliasing samples that you want to use. See Applying anti-aliasing.
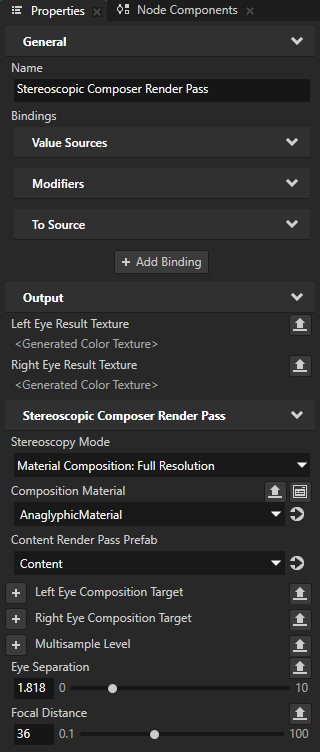
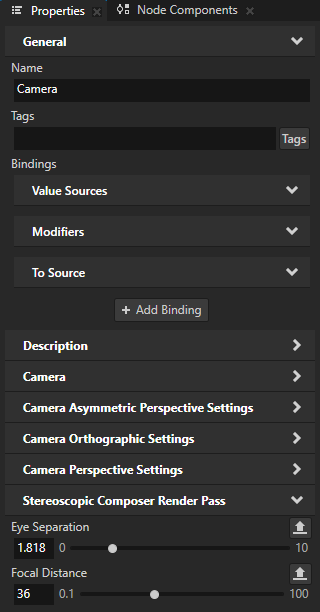
In the Stereoscopic Composer Render Pass render pass or in the Camera node that you use to show the content that you render stereoscopically, set:
Eye Separation to set the space between the positions of eyes in the Camera node space coordinates.
The eye position is the offset from the Camera node along the x axis in the Camera space. One Eye Separation property unit equals one Kanzi unit.
Focal Distance to set the distance from the Camera node in the Camera node space coordinates, at which the projections of a 3D point converge into the same 2D position on the screen.
The 3D points at this distance from the Camera node are seen as being on the normal image plane, without stereo separation. One Focal Distance property unit equals one Kanzi unit.
The values that you set in the Camera node override the values that you set in the Stereoscopic Composer Render Pass render pass.
To find the correct eye separation and focal distance values for stereoscopic content in your Kanzi application, see Best practices.
Rendering 3D content stereoscopically side-by-side
To render 3D content stereoscopically side-by-side:
In Kanzi Studio set up your project for Kanzi Stereoscopy. See Setting up your Kanzi Studio project.
In the Library press Alt and right-click Rendering, select Group Render Pass, and name it Content.
You use this Group Render Pass render pass prefab to collect the render passes that you use to render the content for each eye.
In the Content render pass prefab create:
Clear Render Pass and set the Clear Color 0 property to the color with which you want to clear the render targets at the start of each frame.
When you use a composition material to render content, Kanzi Stereoscopy renders to a framebuffer object. You use this Clear Render Pass to remove the data from the previous frame before drawing a new frame.
Draw Objects Render Pass
You use this render pass to draw the content for each eye.
In the Library > Rendering > Render Pass Prefabs create a render pass prefab where you place a Stereoscopic Composer Render Pass that you use to apply stereoscopic rendering to 3D content.
For example:
Create a Group Render Pass render pass prefab and name it Stereoscopy.
In the Stereoscopy render pass prefab create a Gather Lights Render Pass.
You use this render pass to collect the Light nodes that you use to light the 3D content to which you want to apply stereoscopic rendering.
In the Gather Lights Render Pass create a Stereoscopic Composer Render Pass.
You use this render pass to apply stereoscopic rendering to the 3D content that you draw using the Content render pass prefab.
In the Node Tree select the Viewport 2D node whose content you want to render with Kanzi Stereoscopy and in the Properties set the Render Pass Prefab property to the Stereoscopy render pass prefab.
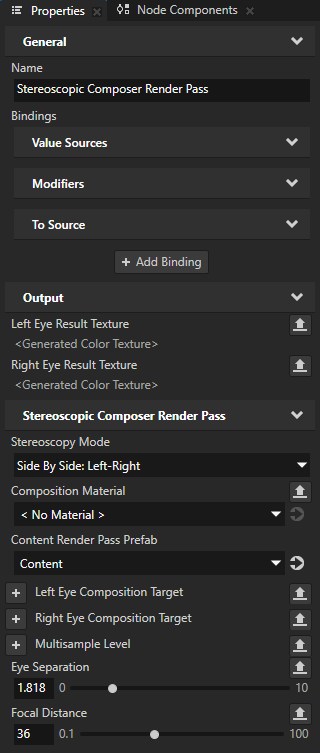
In the Library > Rendering > Render Pass Prefabs select the Stereoscopic Composer Render Pass and in the Properties add and set:
Stereoscopy Mode to Side By Side: Left-Right, Side By Side: Right-Left, Side By Side: Top-Bottom (Left on top), or Side By Side: Top-Bottom (Right on top)
Composition Material to < No Material >
Content Render Pass Prefab to the render pass prefab that you use to render the content of your scene.
For example, set it to the Content render pass prefab.

In the Stereoscopic Composer Render Pass render pass or in the Camera node that you use to show the content that you render stereoscopically, set:
Eye Separation to set the space between the positions of eyes in the Camera node space coordinates.
The eye position is the offset from the Camera node along the x axis in the Camera space. One Eye Separation property unit equals one Kanzi unit.
Focal Distance to set the distance from the Camera node in the Camera node space coordinates, at which the projections of a 3D point converge into the same 2D position on the screen.
The 3D points at this distance from the Camera node are seen as being on the normal image plane, without stereo separation. One Focal Distance property unit equals one Kanzi unit.
The values that you set in the Camera node override the values that you set in the Stereoscopic Composer Render Pass render pass.
To find the correct eye separation and focal distance values for stereoscopic content in your Kanzi application, see Best practices.
See also
Customizing stereoscopic rendering