To add C++ code to your application you need to create a Kanzi Studio project with C++ application and add the C++ code to your application in Visual Studio. See Using C++ code.
Using a JavaScript script
In this example you create a project and write a JavaScript script to toggle the visibility of a node.
To use a JavaScript script:
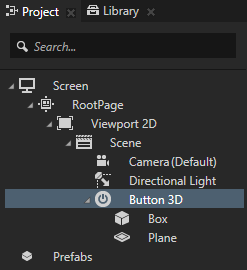
In the Project create a Button 3D node and add to it a Box node and a Plane node. You use a trigger in the Button 3D node to trigger a JavaScript script which toggles the visibility of the Plane node. Box node is the visual shape of the button.
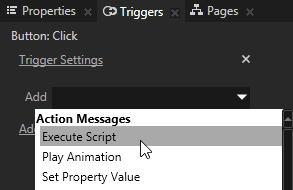
In the Project select the Button 3D node, in the Triggers in the Button: Click click the Add drop-down menu, and select Execute Script action.
In the Execute Script window select <Add new script...> and in the Script Editor write the script that toggles the visibility of the Plane node:
// Get the Plane node.
var plane = node.lookupNode('./Plane');
// If the Visible property of the Plane node is set to true, set it to false,
// and the other way around.
plane.Visible = !plane.Visible;
In the Script Editor click Save and in the Execute Script window click Save. Click the Box node to toggle the visibility of the Plane.
In this example you create a project and use the Kanzi Engine API C++ code to toggle the visibility of a node.
To create Kanzi applications that use C++ code you need to:
Create a Kanzi Studio project with C++ application
Have Visual Studio 2010 Service Pack 1 installed
To use C++ code:
In Kanzi StudioQuick Start window click New Project...:
Choose the name and location for your project. For example, name your project Hello world.
In Project Type select Kanzi Studio project with C++ application.
Kanzi creates a Kanzi Studio project in <KanziWorkspace>/Projects/<ProjectName>/Tool_project directory and the structure for the Visual Studio solution for your project in <KanziWorkspace>/Projects/<ProjectName>/Application:
bin directory contains the binaries and configuration files of your project.
configs directory contains the configuration files for different platforms. By default Kanzi creates configuration files for several different platforms. The recommended platform for developing Kanzi applications is Microsoft Visual Studio 2010. See Deploying Kanzi applications.
src contains the source code for your project.
In the Project create a Button 3D node and add to it a Box node and a Plane node. You use a trigger in the Button 3D node to trigger a JavaScript script which toggles the visibility of the Plane node. Box node is the visual shape of the button.
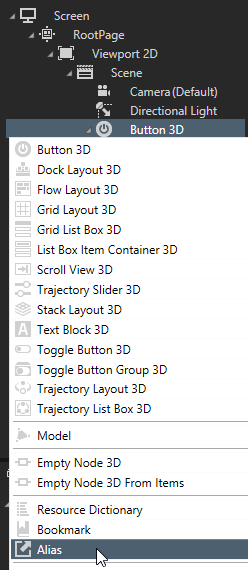
In the Projectpress Alt and right-click the Button 3D node and select Alias. Kanzi Studio creates and alias named Button 3D and adds it to the resource dictionary of the Screen node. Use an Alias to get consistent access to a Kanzi node. You can use aliases to access nodes both in Kanzi Studio and using the Kanzi Engine API or scripting. Because while creating your application in Kanzi Studio you move nodes in the scene graph of your project, the easiest way to keep track of them is to use aliases. You can retrieve the alias target nodes with the API or scripting using the name of the alias, regardless of the node location in the project.
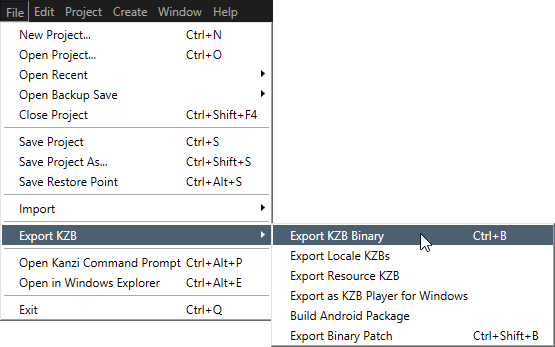
In Kanzi Studio select File > Export KZB > Export KZB Binary. Kanzi Studio creates the .kzb binary and configuration files from your Kanzi Studio project. Kanzi Studio stores the exported files in <KanziWorkspace>/Projects/<ProjectName>/Application/bin or the location you specify in the Binary Export Directory property in Project > Properties. The .kzb binary file contains all nodes and resources from your Kanzi Studio project, except the resources you mark in a localization table as locale packs. When you run your Kanzi application from Visual Studio, your Visual Studio solution reads these files to create your Kanzi application.
In Visual Studio open the Visual Studio solution for your application located in <ProjectName>/Application/configs/platforms/win32. For example, if you named your Kanzi Studio project Hello world, the Visual Studio solution is called Hello_world.sln.
Open the hello_world.cpp file and set the BasicPlayerApplication class to use ExampleApplication, instead of Application. ExampleApplication simplifies application development by handling the registration of the required modules.
class BasicPlayerApplication : public ExampleApplication
In the onProjectLoaded() function get the Button 3D node you created in the Kanzi Studio project and add the clicked message handler to the Button 3D node. When you place a function inside the onProjectLoaded()Kanzi calls the function after it loads your application.
virtual void onProjectLoaded() KZ_OVERRIDE
{
	// Get the Button 3D node using the alias you created in Kanzi Studio.
	// To access the nodes in the .kzb file you first have to get the Screen node
	// and then use either aliases or relative paths to get each node.
	Button3DSharedPtr button = getScreen()->lookupNode<Button3D>("#Button 3D");

	// Add the clicked message handler to the Button 3D node.
	// You implement the message in the next step.
	button->addMessageHandler(Button3D::ClickedMessage,
		std::bind(&BasicPlayerApplication::onButtonClicked, this, std::placeholders::_1));
}
After the onProjectLoaded() function implement the event handler for the Button 3D click message. When you click the Button 3D node, the event handler gets the Plane node and toggles its visibility.
void onButtonClicked(Button3D::ClickedMessageArguments& arguments)
{
	// Get the Plane node in the Button 3D node.
	Node3DSharedPtr plane = arguments.getSource()->lookupNode<Node3D>("Plane");

	// If the Visible property of the Plane node is set to true, set it to false,
	// and the other way around.
	bool isVisible = plane->isVisible();
	plane->setVisible(!isVisible);
}
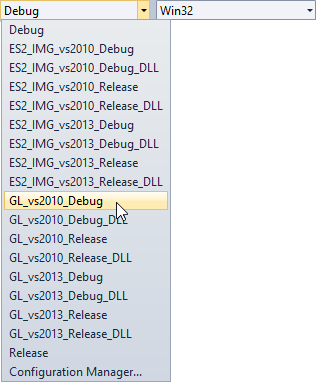
In Visual Studio select one of the solution configurations for your version of Visual Studio and run your application. For example, if you are still developing your application, select the GL_vs2010_Debug configuration. If you want to create a production version of your Kanzi application, select one of the available release configurations. Click the Box node to toggle the visibility of the Plane.