Setting up environment for Kanzi AppView
Before you can use Kanzi AppView in your Kanzi application, you must set up:
The Kanzi Studio project that defines the application where you want to use Android applications. See Setting up your Kanzi Studio project.
The Android configuration of your Kanzi application. See Setting up your Android project.
The backend in your Android project. See Setting up the default backend in your Android project.
The device where you want to use Kanzi AppView. See Setting up your device for the default backend.
Setting up your Kanzi Studio project
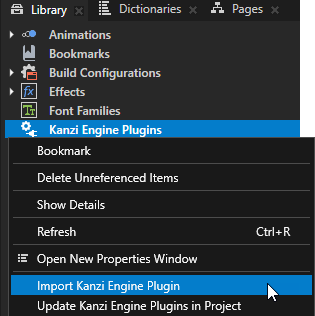
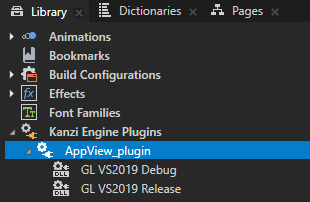
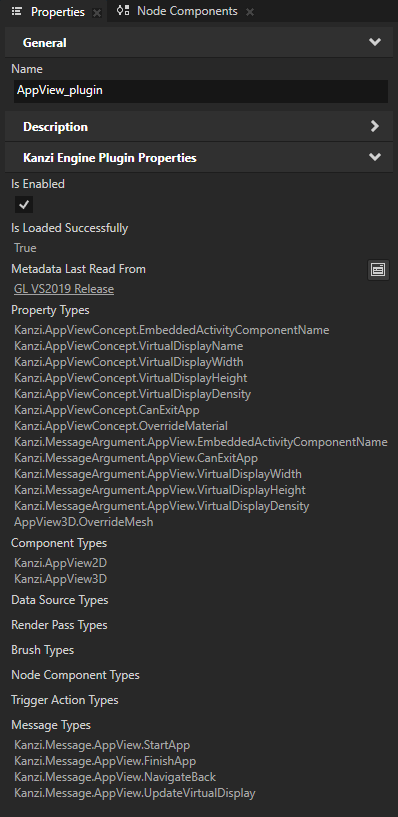
To set up your Kanzi Studio project, open the project in Kanzi Studio, in the Library, right-click Kanzi Engine Plugins, select Import Kanzi Engine plugins, and import the Kanzi Engine plugins from the package:
lib/Win64/GL_vs2019_Debug_DLL/AppView_plugin.dlllib/Win64/GL_vs2019_Release_DLL/AppView_plugin.dll


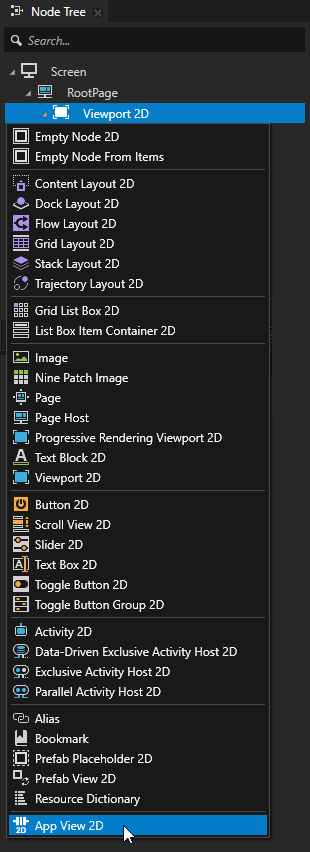
In the Node Tree, you can now create App View 2D and App View 3D nodes.

Setting up your Android project
To set up your Android project:
In Android Studio, open your Kanzi project.
In the
Application/configs/platforms/android_gradle/app/build.gradle, add Kanzi AppView as dependency:import com.rightware.gradle.KanziHelpers
dependencies {
    // ...

    // The default relative path for building is the 'Engine/plugins/appview/lib/android' directory.
    def aarDir = new File(projectDir, "../../../../../../../lib/android")
    if (!aarDir.exists()) {
        // Build in Kanzi Studio or moved location.
        aarDir = new File(
           KanziHelpers.getKanziHome(project),
           '/Engine/plugins/appview/lib/android')
    }

    debugImplementation files("${aarDir}/AppViewPlugin-debug.aar")
    releaseImplementation files("${aarDir}/AppViewPlugin-release.aar")
    profilingImplementation files("${aarDir}/AppViewPlugin-profiling.aar")

}
Add the native libraries to
Application/CMakeLists.txt:Find the location of the Kanzi AppView plugin:
set(PLUGIN_COMMON_SETUP cmake/common-setup.cmake)
if(EXISTS ${PROJECT_SOURCE_DIR}/../../../${PLUGIN_COMMON_SETUP})
    # Building manually with gradlew or Android Studio
    set(PLUGIN_ROOT ${PROJECT_SOURCE_DIR}/../../..)
elseif(EXISTS $ENV{KANZI_HOME}/Engine/plugins/appview/${PLUGIN_COMMON_SETUP})
    # Maybe building in Kanzi Studio
    set(PLUGIN_ROOT $ENV{KANZI_HOME}/Engine/plugins/appview)
endif()
if(NOT DEFINED PLUGIN_ROOT)
    message(FATAL_ERROR "Cannot find AppView_plugin's root directory. Please install the plugin under '<WORKSPACE>/Engine/plugins'.")
endif()
include(${PLUGIN_ROOT}/${PLUGIN_COMMON_SETUP})
Include the Kanzi AppView plugin in the build:
include(${PLUGIN_ROOT}/cmake/appview-config.cmake)
Link the Kanzi AppView plugin with the application. Add
KanziPlugin::AppView_plugintotarget_link_libraries. Instead ofMyApp, use the executable name defined in theadd_executableCMake command.target_link_libraries(MyApp Kanzi::kzui Kanzi::kzcoreui Kanzi::kzjava Kanzi::kzinterop KanziPlugin::AppView_plugin)
Setting up the default backend in your Android project
To set up the default backend in your Android project:
In the
Application/configs/platforms/android_gradle/app/build.gradleof your Kanzi project, add the default backend as dependency:dependencies { // ... debugImplementation files("${aarDir}/AppViewBackend-debug.aar") profilingImplementation files("${aarDir}/AppViewBackend-release.aar") releaseImplementation files("${aarDir}/AppViewBackend-release.aar") }
You can implement your own backend, either as a library or implement the required classes in your application.
In the
AndroidManifest.xml, add the shared system IDandroid:sharedUserId="android.uid.system".<manifest xmlns:android="http://schemas.android.com/apk/res/android" android:sharedUserId="android.uid.system">
Optionally, you can grant the application the required permissions on the platform configuration level. See https://source.android.com/docs/core/permissions/perms-allowlist.
This way you get required permissions to inject input events and start Android applications in a virtual display.
Add the platform signature:
Copy the public Android debug keystore from
examples/Launcher/Application/configs/platforms/android_gradle/platform.keystoreto your application keystore
Application/configs/platforms/android_gradle/platform.keystoreYou can use this keystore with AOSP emulators and AOSP GSI builds. For development boards and production, use your own keystore.
In
app/build.gradle, sign the application with the key:signingConfigs { platform { storeFile new File(rootDir, "platform.keystore") storePassword "android" keyAlias "platform" keyPassword "android" } } // ... buildTypes { release { minifyEnabled false proguardFiles getDefaultProguardFile('proguard-android.txt'), 'proguard-rules.pro' externalNativeBuild { cmake { arguments "-DCMAKE_BUILD_TYPE=Release" } } } debug { packagingOptions { doNotStrip "**/*.so" } } release.signingConfig signingConfigs.platform debug.signingConfig signingConfigs.platform profiling.signingConfig signingConfigs.platform }
Setting up your device for the default backend
To use Kanzi AppView with the default backend, you need a device or an emulator for which you can sign applications with the system key.
To set up your device for the default backend, you can either:
Use an AOSP emulator image from Android Studio that does not have Google API. Emulator images that have in the Target column Google Play use Google API.
For example, use the UpsideDownCake, 34, x86_64, Android 14.0 (AOSP Tablet) emulator image.
To learn how to create an Android virtual device, see https://developer.android.com/studio/run/managing-avds.
Use your own device and sign the application with the platform key.