Tutorial: Create a Kanzi Connect application
In this tutorial you learn how to create a simple Kanzi Connect application that connects to a Kanzi Connect Server and shows data from the Cluster and Content services.
Assets for the tutorial
The <KanziConnectInstallation>/SDK/tutorials/Connect_application/Completed directory contains the completed tutorial.
Create a Kanzi Studio project and configure the data sources
In this section you create a Kanzi Studio project using the Kanzi Connect project template.
To create a Kanzi Studio project and configure the data sources:
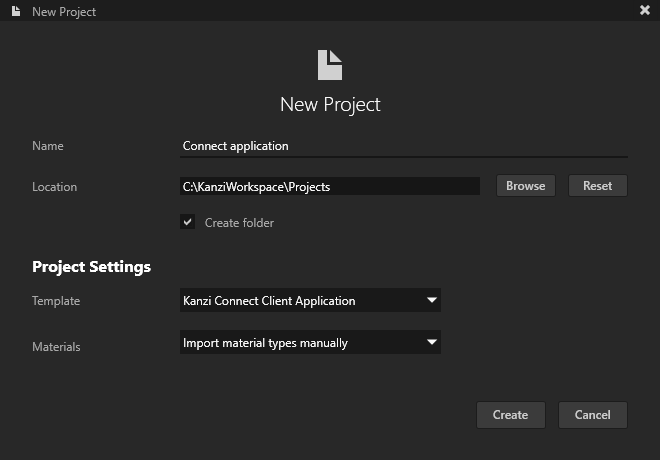
In Kanzi Studio in the New Project window set:
Name to the name you want to use for your project.
Location to the directory where you want to create your project.
Template to Kanzi Connect Client Application
The Kanzi Connect Client Application template includes:
Kanzi Studio project template for Kanzi Connect applications
The source code for creating Kanzi Connect applications
connect_services Kanzi Engine plugin which defines the Kanzi Connect data source and provides access to Kanzi Connect reference services that provide data you can use to demonstrate your application
Click Create to create the project.
In the Kanzi Studio main menu select Kanzi Connect > Start Kanzi Connect Server.
Kanzi Studio starts the Kanzi Connect Server that is installed on your computer.

In the Kanzi Studio main menu select Kanzi Connect > Open Kanzi Connect Editor.
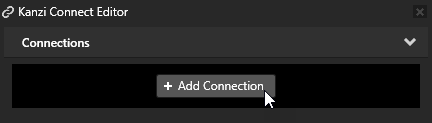
Use the Kanzi Connect Editor to create and manage connections to Kanzi Connect servers and services.

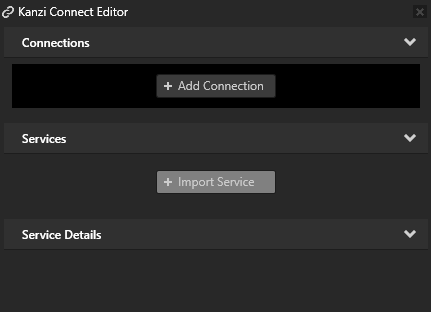
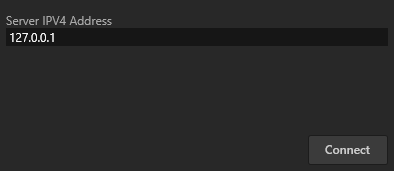
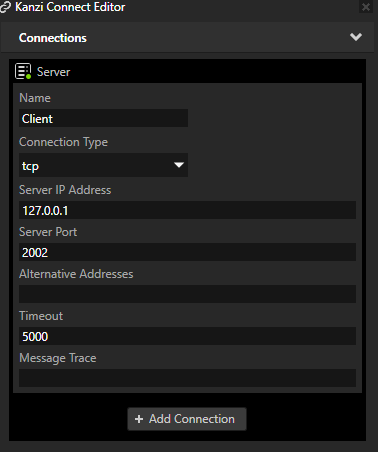
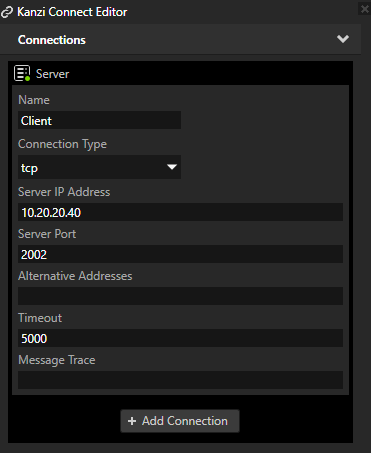
In the Kanzi Connect Editor click + Add Connection and in the Select Connect Server window click Connect.
That way you create a connection to a Kanzi Connect Server. You can see the connection in the Kanzi Connect Editor.
The Server IPV4 Address property sets the IP address of the Kanzi Connect Server that the Kanzi Studio Preview uses to connect to the server and look for Kanzi Connect services available on that server.
Here you use the default Kanzi Connect Server running on the local host at the IP address 127.0.0.1.
The Server IP Address property sets the address of the Kanzi Connect Server that the client application uses during runtime.
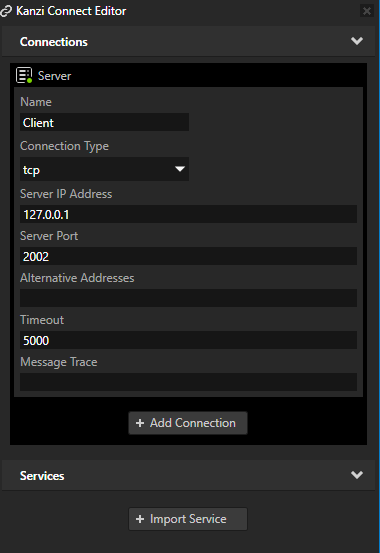
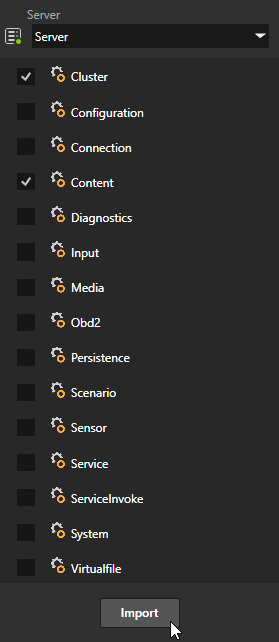
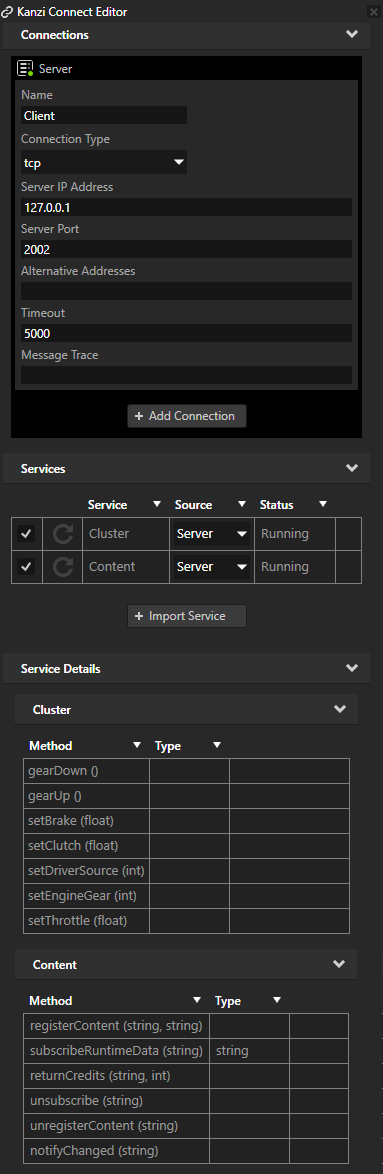
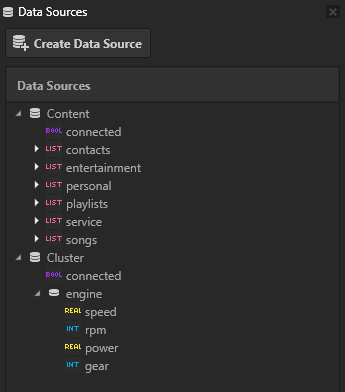
In the Kanzi Connect Editor click + Import Service, in the Import Connect Services window select the Content and Cluster services, and click Import.
This way you import from the selected Kanzi Connect Server the Cluster and Content services and the data sources that those services provide.
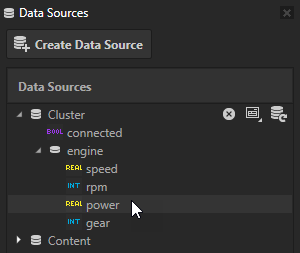
The Data Sources window shows the data that is available through the Cluster and Content data sources.
To view the Data Sources window, in the Kanzi Studio main menu select Window > Data Sources.
Use data from a Kanzi Connect data source
In this section you learn how to use in your application data from a Kanzi Connect data source.
To use data from a Kanzi Connect data source:
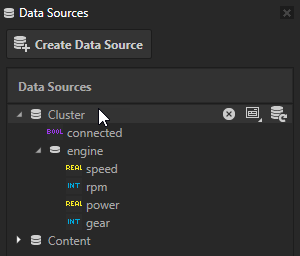
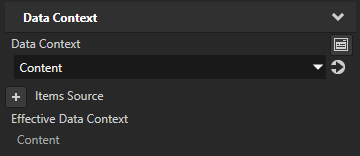
From the Data Sources window drag the Cluster data source to the RootPage node in the Node Tree.
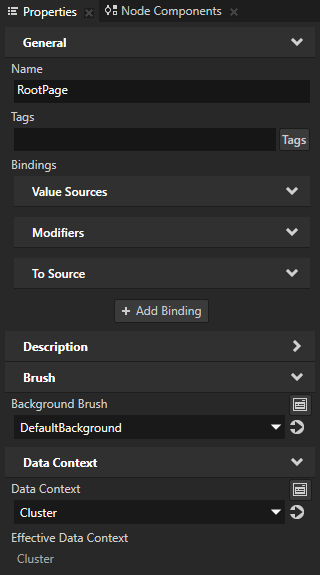
This way you set the Data Context property of the RootPage node to the Cluster data source. By setting the Data Context property you tell your application from which data source it receives data. Now all the data in the Cluster data source is visible to the RootPage node and all its child nodes.
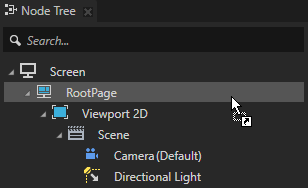
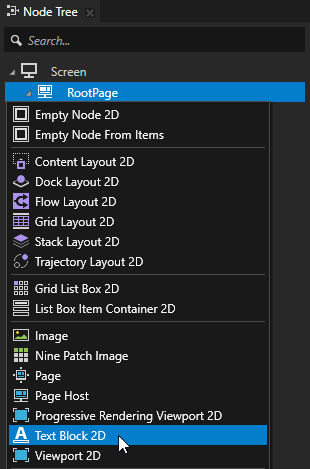
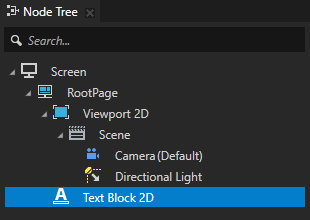
In the Node Tree press Alt and right-click the RootPage node and select Text Block 2D.
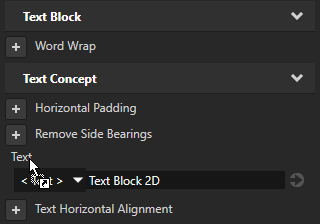
In the Node Tree select the Text Block 2D node, from the Data Sources window drag the Cluster > engine > power data object to the Properties, and drop it on the Text property.
Kanzi creates in the Text Block 2D node a binding that binds the value of the Text property to the Cluster > engine > power data object.
In the Preview you see the value of the power data object that the application gets from the Cluster data source.

Use list data from a Kanzi Connect data source
In this section you learn how to use in your application list data from a Kanzi Connect data source.
To use list data from a Kanzi Connect data source:
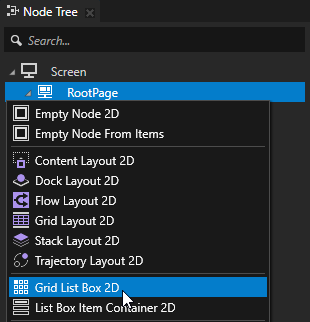
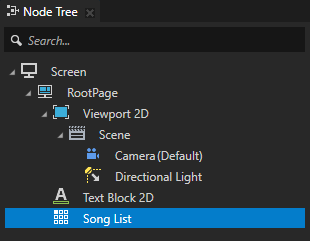
In the Node Tree press Alt and right-click the RootPage node, select Grid List Box 2D and name it Song List.
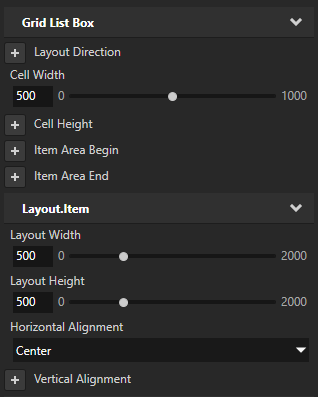
In the Node Tree select the Song List node and in the Properties add and set:
Cell Width to 500
Layout Width to 500
Layout Height to 500
Horizontal Alignment to Center
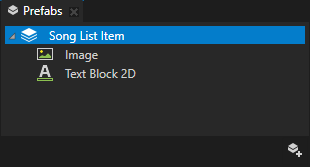
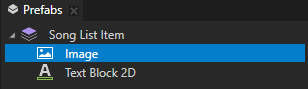
In the Prefabs click
 , select Stack Layout 2D, name it Song List Item, and inside it create:
Image node, and in the Properties set Layout Width to 100.
Text Block 2D node
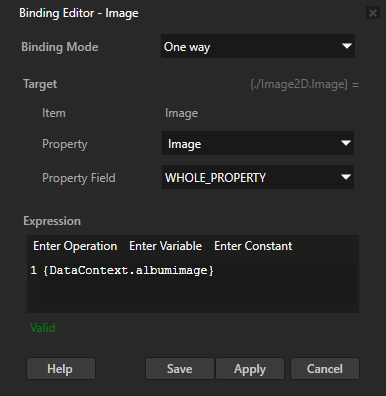
In the Prefabs select the Image node, in the Properties click + Add Binding, and in the Binding Editor set:
Property to Image
Expression to
Acquire({DataContext.albumimage})
Tip
To create a binding to a data object, from the Data Sources window drag the data object to the Expression text box. For example, from the Data Sources window drag the Content > songs > item > albumimage to the Expression text box.
Click Save.
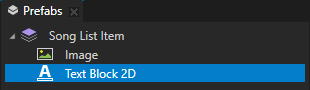
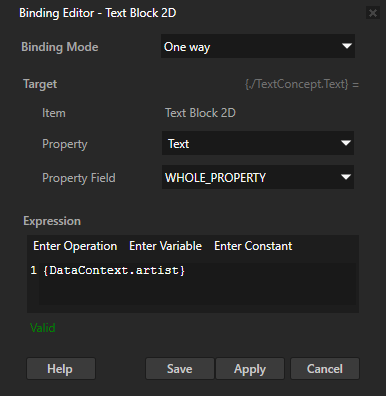
In the Prefabs select the Text Block 2D node, in the Properties click + Add Binding, and in the Binding Editor set:
Property to Text
Expression to
{DataContext.artist}
Click Save.
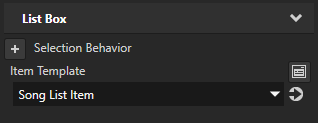
In the Node Tree select the Song List node and in the Properties add and set:
Data Context to Content This way you set the Song List node to receive data from the Content data source.
Item Template to Song List Item This way you set the Song List node to use the Song List Item prefab template to show the data from the list data objects in the Content data source.
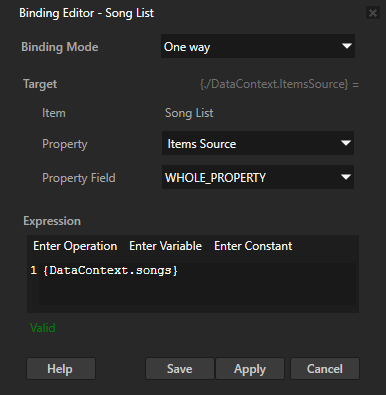
Click + Add Binding, and in the Binding Editor set:
Property to Items Source
Expression to
{DataContext.songs}
Click Save.
Kanzi creates a binding that binds the value of the Items Source property to the songs data object from the Content data source.
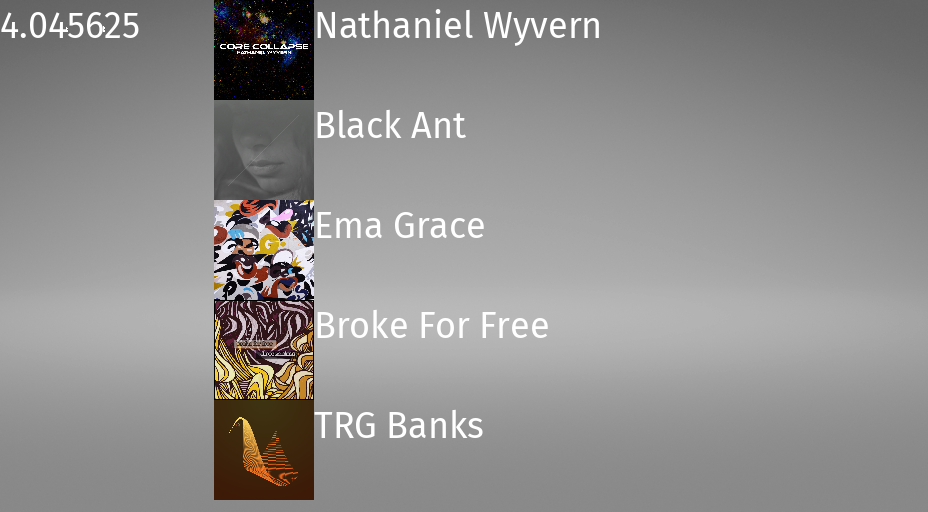
In the Preview you see the list of album images and artist names that the application gets from the Content data source.
Run the application on an Android device
Kanzi Connect applications use the connection.xml configuration file to set connection parameters, which you can find in the Application/bin directory. For example, in the connection.xml you can set the IP address and port of the device on which you are running Kanzi Connect Server to which you want your Kanzi Connect application to connect.
In this section you use the Kanzi Connect tools in Kanzi Studio to modify the connection.xml file to set up your application to connect to a Kanzi Connect Server which is running on a different device.
To run the application on an Android device:
In Kanzi Studio in the Kanzi Connect Editor window set:
Server IP Address to the IP address of the computer where you started the Kanzi Connect Server
Server Port to the port of the computer where you started the Kanzi Connect Server
The Server IP Address and Server Port properties set the address and port of the Kanzi Connect Server that the client application uses during runtime.
Connect your Android device to your computer and set the connection type to Transfer Files.
This way you can access the device file system with Windows Explorer.
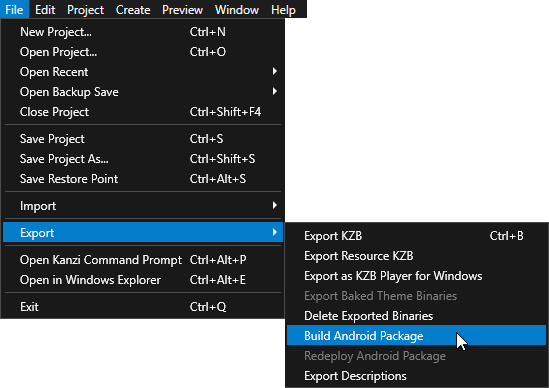
In Kanzi Studio main menu select File > Export > Build Android Package.
Kanzi Studio creates an Android package from your Kanzi Studio project, deploys, and runs it on your Android device.
When the application starts, it connects to the Kanzi Connect Server that runs on the IP address and port you set in the Kanzi Connect window in Kanzi Studio.
What’s next?
In this tutorial you learned how to create a Kanzi Connect application, run it on an Android device so that it connects to a Kanzi Connect Server running on another computer. Now you can learn how to create your own Kanzi Connect service. See Tutorial: Create a custom Kanzi Connect service.
See also
To learn more about the Kanzi Connect Server, see Using the Kanzi Connect Server.
To learn more about the Kanzi Connect services, see Kanzi Connect services.
To learn more about deploying Kanzi Connect applications, see Deploying Kanzi Connect applications to embedded devices.