Setting up your Kanzi Studio project
Before you can use a Physical Camera, you must set up your Kanzi Studio project.
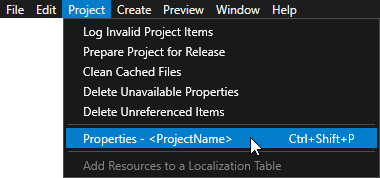
To set up your Kanzi Studio project:
Make sure that the settings in your Kanzi Studio project match the solution configuration that you use in Visual Studio to build your application and plugin projects.
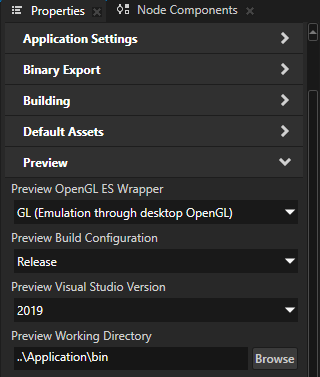
For example, if you use the Release solution configuration in Visual Studio 2019, in your Kanzi Studio project in the Project > Properties set:
Preview OpenGL ES Wrapper to GL (Emulation through desktop OpenGL)
Preview Build Configuration to Release
Preview Visual Studio Version to 2019
Preview Working Directory to ..\Application\bin
With these settings you set the Kanzi Studio Preview to work with Physical Camera Plugin.
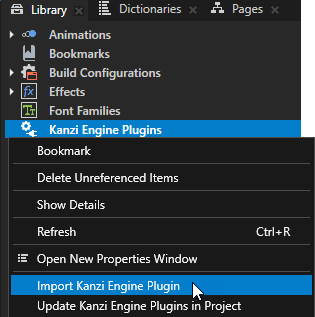
In the Library, right-click Kanzi Engine Plugins and select Import Kanzi Engine Plugin.
In the Physical Camera Plugin package
libdirectory, select the plugin DLL in the directory of the configuration that you selected in the first step, and click Open.For example, select
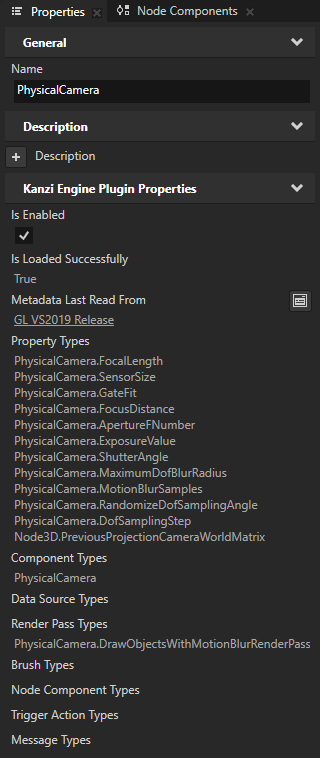
win64/GL_vs2019_Release/PhysicalCamera.dll.Kanzi Studio imports Physical Camera Plugin to your Kanzi Studio project. Physical Camera Plugin provides the Physical Camera node and its property types.
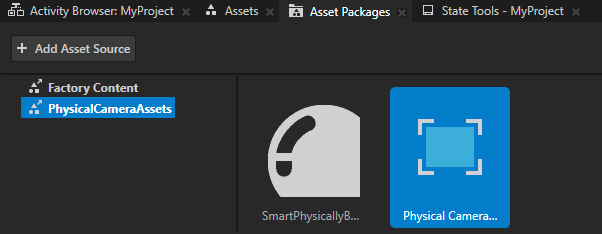
In the Asset Packages, click + Add Asset Source and in the directory where you extracted the Physical Camera Plugin package select the
PhysicalCameraAssetsdirectory.When you add an asset source to Kanzi Studio, you make that asset source available and can import it to all your Kanzi Studio projects.
The PhysicalCameraAssets asset package contains:
A render pass prefab that enables physical camera effects
A prefab that is set up to use these render pass prefab
A smart physically-based example material that contains support for velocity buffer
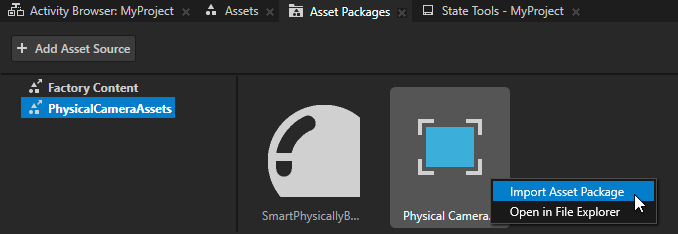
In the Asset Packages, right-click the Physical Camera Effects and select Import Asset Package.
Kanzi Studio imports to:
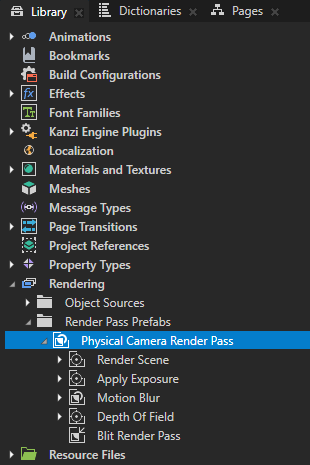
Library the render pass prefab that enables the functionality of a Physical Camera
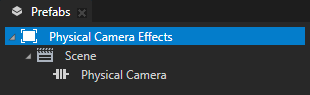
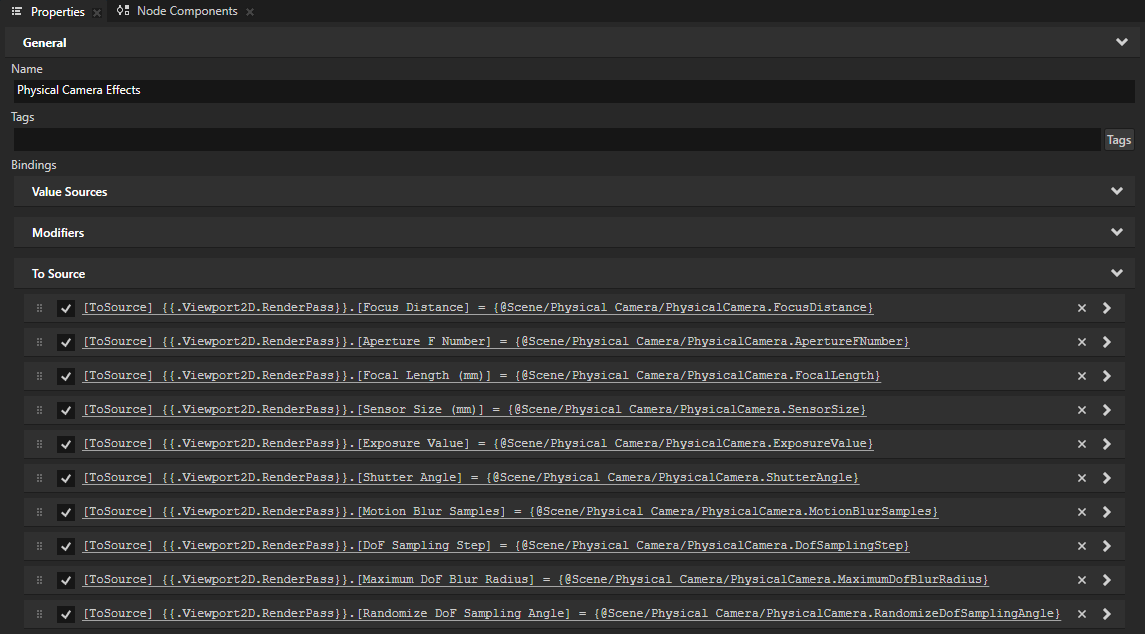
Prefabs a Viewport 2D node that contains a Physical Camera and binds the properties of the camera to the render pass prefab that enables the functionality of the camera
Adding Physical Camera Plugin to your Kanzi application
To run your Kanzi application with Physical Camera Plugin on a target device, add Physical Camera Plugin as a dependency to the CMake configuration of your application. In the <ProjectName>/Application/CMakeLists.txt of your application, add:
# Locate PhysicalCamera plugin
set(PLUGIN_COMMON_SETUP cmake/common-setup.cmake)
if(DEFINED KANZI_ROOT AND EXISTS ${KANZI_ROOT}/Engine/plugins/physical-camera/${PLUGIN_COMMON_SETUP})
   # Use KANZI_ROOT discovered by findKanzi()
   set(PLUGIN_ROOT ${KANZI_ROOT}/Engine/plugins/physical-camera)
elseif(EXISTS $ENV{KANZI_HOME}/Engine/plugins/physical-camera/${PLUGIN_COMMON_SETUP})
   # Fallback to KANZI_HOME environment variable
   set(PLUGIN_ROOT $ENV{KANZI_HOME}/Engine/plugins/physical-camera)
endif()
if(NOT DEFINED PLUGIN_ROOT)
   message(FATAL_ERROR "Cannot find PhysicalCamera plugin's root directory. Please install the plugin under '<WORKSPACE>/Engine/plugins'.")
endif()

include(${PLUGIN_ROOT}/${PLUGIN_COMMON_SETUP})
include(${PLUGIN_ROOT}/cmake/physical-camera-config.cmake)
Then add the plugin to the target_link_libraries:
target_link_libraries(PhysicalCameraExample Kanzi::kzui Kanzi::kzcoreui KanziPlugin::PhysicalCamera)
To start using Physical Camera, see Using a physical camera.