Customizing the Stereoscopy plugin rendering
You can customize the Stereoscopy composition to get the rendering result you need:
Rendering to a Render Target Texture
Stereoscopic Composer Render Pass renders to framebuffer object targets that are automatically created and available only to that render pass. When you render to a Render Target Texture you can control the lifetime and properties of the texture, such as size. For example, you can set the size of the render targets to do supersampling or subsampling, allow multiple composers to use the same render target, or create your own composition or additional visualization for each eye.
To render to a Render Target Texture:
Take the Stereoscopy plugin into use in your Kanzi Studio project. See Using the Stereoscopy plugin.
Create a Render Target Texture:
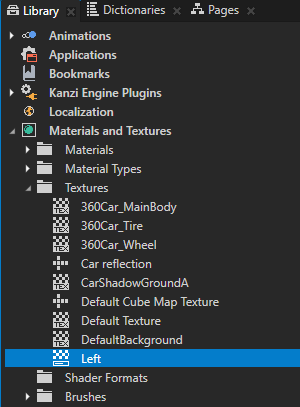
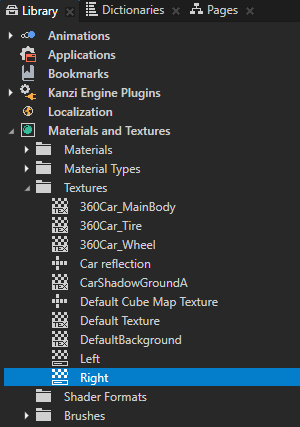
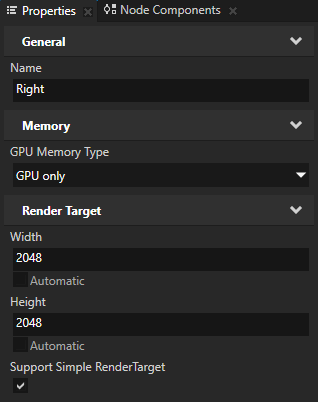
In the Library press Alt and right-click Materials and Textures, select Render Target Texture, and name it Left.
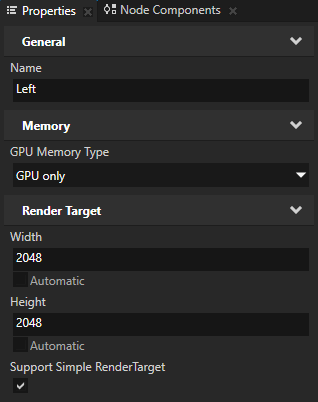
In the Properties set:
Support Simple RenderTarget to enabled
Width and Height to the size you want to use for the texture
Other texture properties that you want to apply to the texture
Repeat the previous step, but name the Render Target Texture Right.
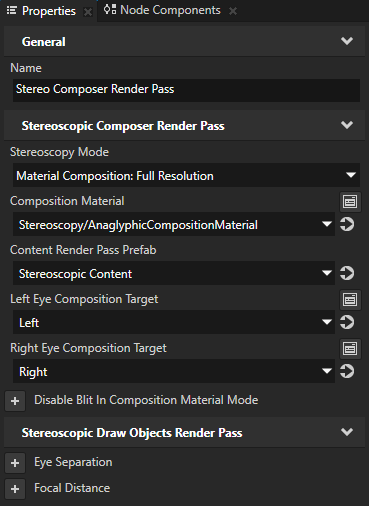
In the Library > Rendering select the Stereoscopic Composer Render Pass that you use to stereoscopically render the content in your project and in the Properties add and set:
Left Eye Composition Target to the Left Render Target Texture
Right Eye Composition Target to the Right Render Target Texture
Stereoscopy Mode to Material Composition: Full Resolution
(Optional) Disable Blit in Composition Material Mode to enabled
Enable this property when using one of the material composition stereoscopy modes and when you want to draw the result of the Stereoscopic Composer Render Pass using another render pass and do not want the Stereoscopic Composer Render Pass to draw the composed result.
Inverting interlacing
When the display of your device uses interlacing to achieve a 3D effect, the Stereoscopic Composer Render Pass composes the content for the position of each eye using alternating horizontal or vertical lines. If the depth of the content appears inverted, to correctly render the content, invert the interlacing in the material you use in the Stereoscopic Composer Render Pass.
To invert interlacing:
Take the Stereoscopy plugin into use in your Kanzi Studio project. See Using the Stereoscopy plugin.
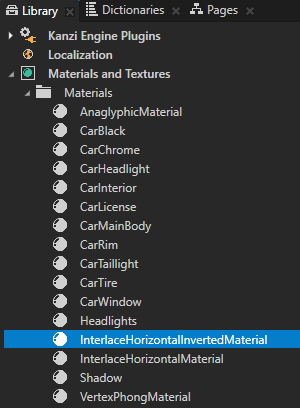
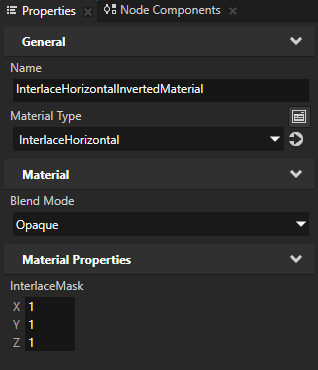
In the Library > Materials and Textures > Materials select the material for which you want to invert interlacing, duplicate the material by pressing Ctrl D, press F2, and rename the material.
For example, duplicate the InterlaceHorizontalCompositionMaterial material and rename it to InterlaceHorizontalInvertedCompositionMaterial.
In the Properties set the InterlaceMask property field values so that they represent the correct interlacing values for your device.
For example, to invert the InterlaceHorizontalCompositionMaterial that comes with the Stereoscopy plugin, in the Properties set the property fields for the InterlaceMask property:
X to 1
Y to 1
Z to 1
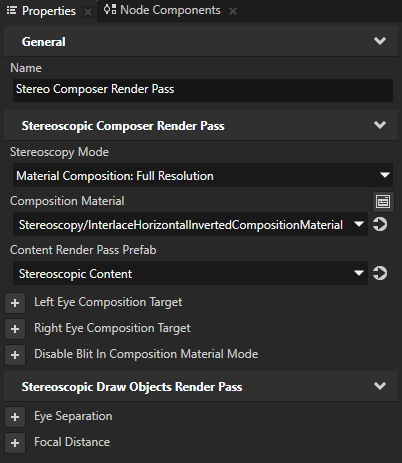
In the Library > Rendering select the Stereoscopic Composer Render Pass that you use to stereoscopically render the content in your project and in the Properties set the Composition Material property to the material for which you inverted interlacing in step 1.
For example. set the Composition Material property to InterlaceHorizontalInvertedCompositionMaterial.
Using more than one Camera node
You can combine the views of multiple Camera nodes in one Scene node to render a single stereoscopic image. For example, you can use one static Camera node for the foreground objects and another Camera node that moves and shows a model of a car.
To use more than one Camera node:
Take the Stereoscopy plugin into use in your Kanzi Studio project. See Using the Stereoscopy plugin.
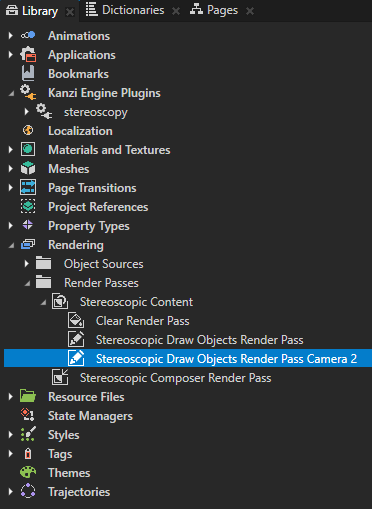
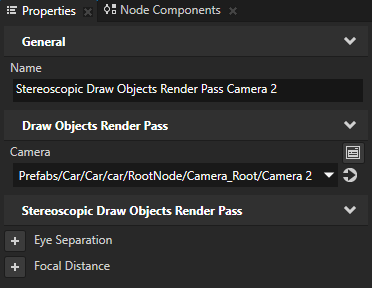
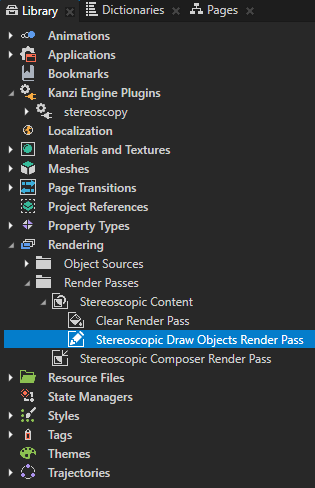
In the Library > Rendering in the Group Render Pass which you use to render the content for each eye, select the Stereoscopic Draw Objects Render Pass, in the Properties add the Camera property, and set it to the first Camera node you use to render the Scene.
For example, in the Library > Rendering > Render Pass Prefabs > Stereoscopic Content select the Stereoscopic Draw Objects Render Pass and set the Camera property.
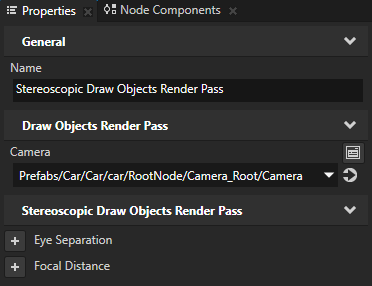
In the Library > Rendering select the Stereoscopic Draw Objects Render Pass you modified in the previous step, duplicate the render pass by pressing Ctrl D, and in the Properties set:
Name to the name you want to use for this render pass
For example, set it to Stereoscopic Draw Objects Render Pass Camera 2.
Camera to the second Camera node in the Scene you want to use