Using Android bindings
Here you can find out how to generate Android bindings using Android Studio. For creating Android bindings, Kanzi Connect is tested to work with Android Studio version 4.2.2 on Windows.
To learn how to set up the Android build environment, in the Kanzi framework documentation see Working with > Android > Requirements.
Creating an Android application that uses Kanzi Connect bindings
To create an Android application that uses Kanzi Connect bindings:
In Android Studio, create an Android Studio project where you want to use the Kanzi Connect bindings.
For example, select File > New > New Project. In the New Project window, select a project template and set:
Name to ConnectTestApplication
Company domain to yourcompany.com
Language to Java
If you use different application name and company domain, you must make changes in the code used later in this topic.

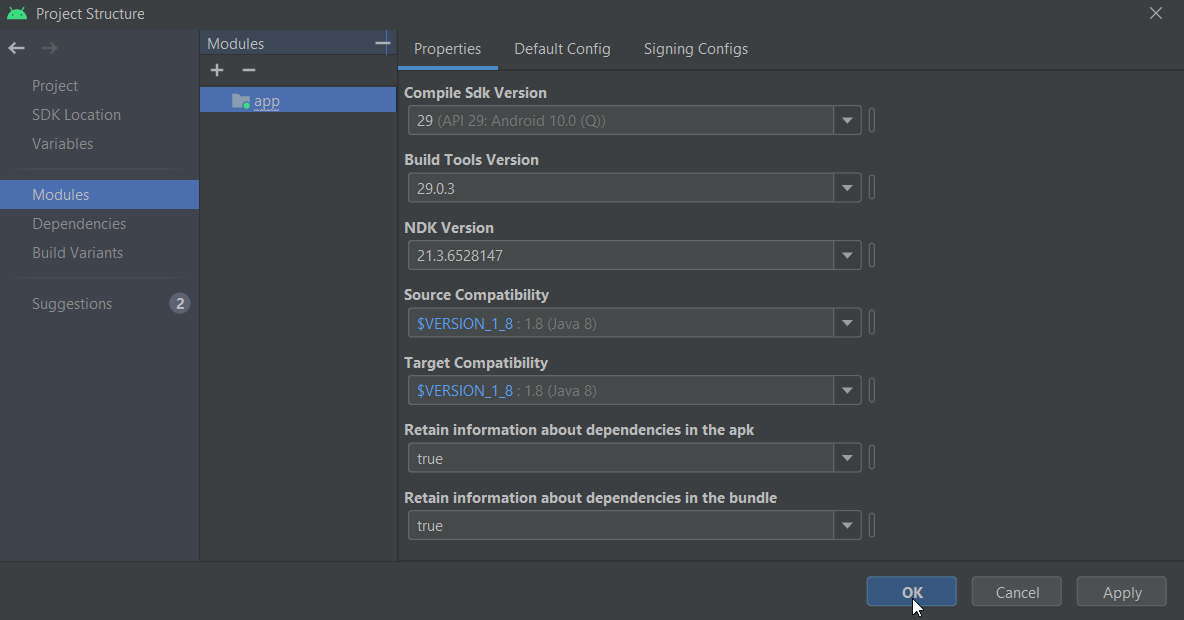
Select File > Project Structure, select Modules > app and in the Properties tab set the properties.
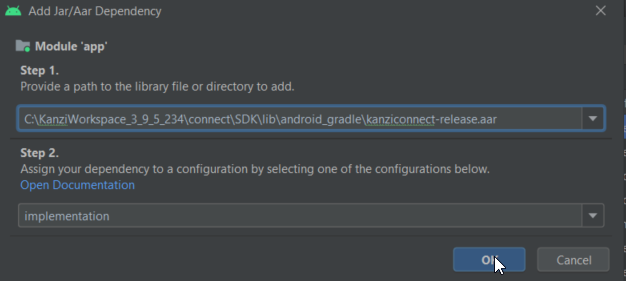
In the Project Structure window, select app Dependencies, under Declared Dependencies click +, select JAR/AAR Dependency, and select the modules that you want to add as dependencies.
For example, select the
kanziconnect-release.aar.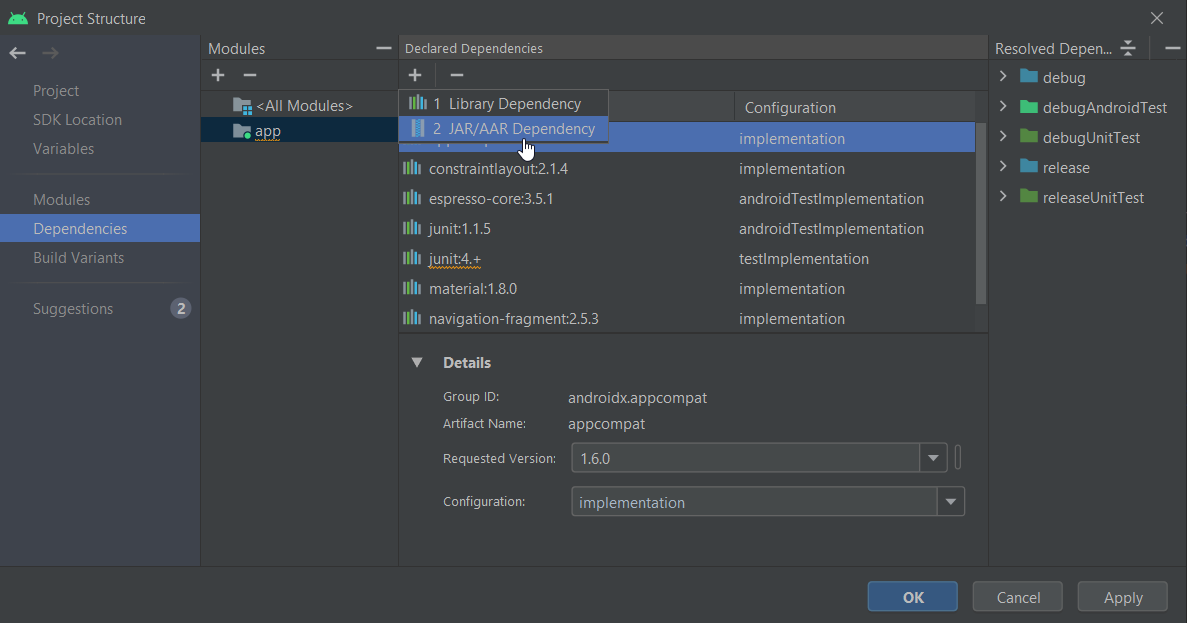
(Optional) This step is required if you want to use the generated
<ServiceName>RuntimeDataListener.javaclass in your project.To enable the data bindings set, in Android Studio open the
build.gradle(:app)file and addbuildFeatures.dataBinding = true
If you do not enable the data bindings, the project compiles successfully, but cannot run on a target device.
To connect to a Kanzi Connect Server, you need protobuf library that is located in
<KanziConnectInstallation>/ext/platforms/android_gradle/lib.Edit
build.gradle(:app)to get the protobuf library and pack into the apkapply plugin: 'com.android.application' //begin kanziconnect if (!System.env.KANZI_CONNECT_SDK) { throw new FileNotFoundException('Missing environment variable: KANZI_CONNECT_SDK') } def connectSdkDir = System.getenv('KANZI_CONNECT_SDK') def thirdPartyLibDir = new File(connectSdkDir, "/ext/platforms/android_gradle/lib") //end kanziconnect android { compileSdkVersion 29 buildToolsVersion "29.0.3" // begin kannziconnect buildFeatures.dataBinding = true // end kanziconnect defaultConfig { applicationId "com.rightware.connecttestapplication" minSdkVersion 28 targetSdkVersion 29 versionCode 1 versionName "1.0" testInstrumentationRunner "androidx.test.runner.AndroidJUnitRunner" //begin kanziconnect sourceSets { main { jniLibs.srcDirs = [thirdPartyLibDir] } } //end kanziconnect } buildTypes { release { minifyEnabled false proguardFiles getDefaultProguardFile('proguard-android-optimize.txt'), 'proguard-rules.pro' } } compileOptions { sourceCompatibility JavaVersion.VERSION_1_8 targetCompatibility JavaVersion.VERSION_1_8 } dependenciesInfo { includeInApk true includeInBundle true } ndkVersion '21.3.6528147' // begin kanziconnect packagingOptions { pickFirsts += ["**/libprotobuf.so"] } //end kanziconnect }Now you can import the Kanzi Connect classes to your application with a regular Java import statement.
import com.rightware.connect.*;
When you create an Android application in which you want to use Kanzi Connect bindings you can integrate Kanzi Connect API to Android Activity. See Integrating Kanzi Connect API to Android Activity.
Integrating Kanzi Connect API to Android Activity
To integrate Kanzi Connect, use the KanziConnectContext class included in the AAR package.
To integrate Kanzi Connect API to Android Activity:
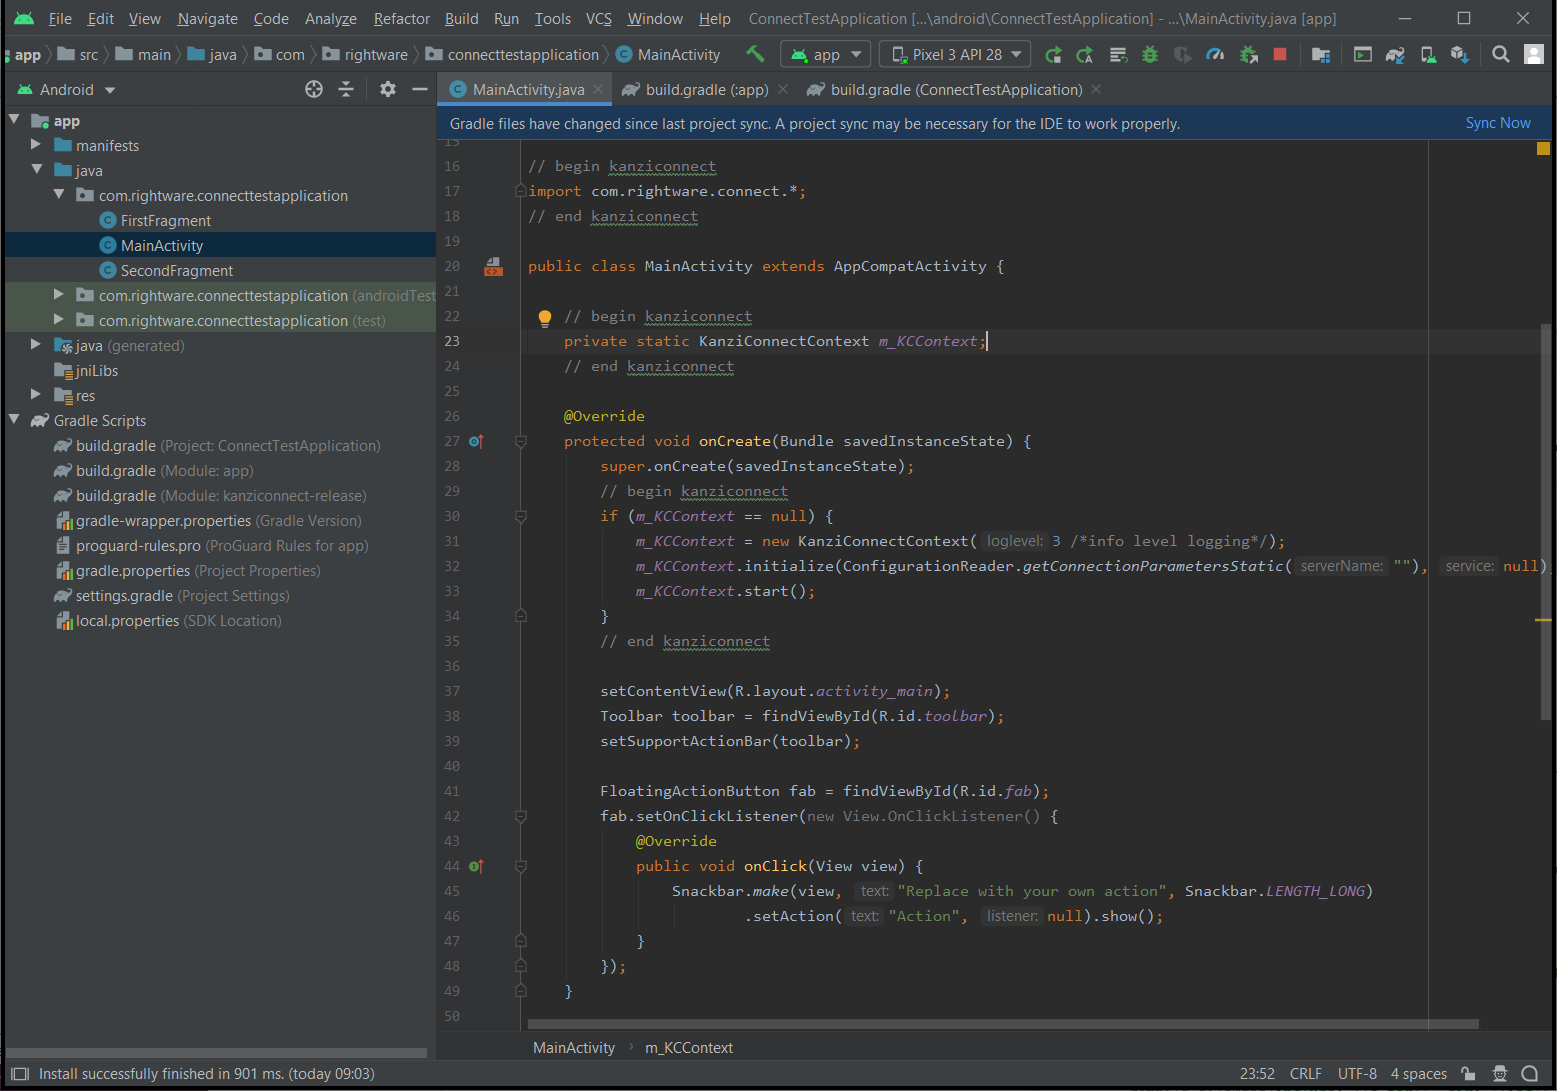
Add the Kanzi Connect code to relevant locations in your code of the main activity of your application
// begin kanziconnect
import com.rightware.connect.*;
// end kanziconnect

public class MainActivity extends AppCompatActivity {
    // begin kanziconnect
    private static KanziConnectContext m_KCContext;
    // end kanziconnect
    private AppBarConfiguration appBarConfiguration;
    private ActivityMainBinding binding;

    @Override
    protected void onCreate(Bundle savedInstanceState) {
        super.onCreate(savedInstanceState);

        // begin kanziconnect
        if (m_KCContext == null) {
            m_KCContext = new KanziConnectContext(3 /*info level logging*/);
            m_KCContext.initialize(ConfigurationReader.getConnectionParametersStatic(""), null);
            m_KCContext.start();
        }
        // end kanziconnect
        binding = ActivityMainBinding.inflate(getLayoutInflater());
        setContentView(binding.getRoot());
        setSupportActionBar(binding.toolbar);

        NavController navController = Navigation.findNavController(this, R.id.nav_host_fragment_content_main);
        appBarConfiguration = new AppBarConfiguration.Builder(navController.getGraph()).build();
        NavigationUI.setupActionBarWithNavController(this, navController, appBarConfiguration);

        binding.fab.setOnClickListener(new View.OnClickListener() {
            @Override
            public void onClick(View view) {
                Snackbar.make(view, "Replace with your own action", Snackbar.LENGTH_LONG)
                        .setAction("Action", null).show();
            }
        });
    }
In Android Studio select Build > Rebuild Project and run your application.
When you start your application, it connects to the Kanzi Connect server located at localhost.
Kanzi Connect AAR supports native libraries for armeabi-v7a, arm64-v8a, x86, and x86_64. You can run the application on these targets or in the emulator.
Generating Android bindings for a service
Create Java bindings for a service using the generate_java_bindings.py script. The script takes these arguments:
The service interface to process
The output directory where to store the generated Java files
For example, to generate on Windows the Java bindings for the speech2text service and store them to the c:/temp/speech2text/, use
<KanziConnectInstallation>\SDK\interfaces>py -3 generate_java_bindings.py definitions\speech2text_interface.xml c:\temp\speech2text\
This command creates these Java files for each service interface:
File name |
Description |
|---|---|
|
This class implements the service functionality and integrates it towards generic android Java bindings. Do not manually edit this file. |
|
You can use this stub file as a basis for service implementation. It contains empty functions for all the service methods and extends the |
|
This is a client-side interface for the mentioned service. It has a method for each method defined in service description and defines a callback interface to receive events. |
|
Creates a listener for the service runtime data. Changes for each value within the runtime data can be observed independently. |