Renderer nodes
Renderers are nodes that take map data as input, filter that data, and visualize the resulting geometry so that it follows the current map location and scale defined by the Map View node. See Using the Map View node.
These Renderer nodes are available in Kanzi Maps:
Area Renderer
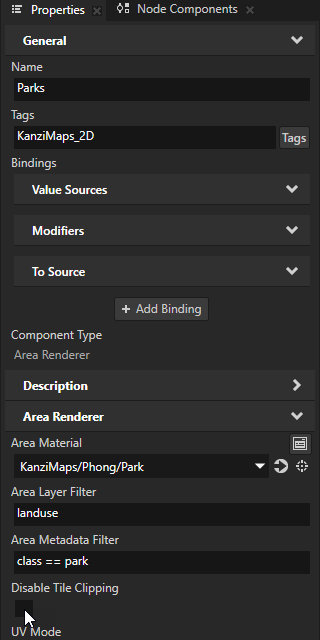
Use the Area Renderer node to render 2D map areas, such as land and water, and 3D surfaces, such as road lanes. The Area Renderer renders filled 2D and 3D polygons, 2D triangle lists, and 3D strips.
Coordinate Renderer
Use the Coordinate Renderer node to place a child node on a map at given coordinates. For example, you can render a navigation marker.
Debug Tile Renderer
Use the Debug Tile Renderer node for debugging. Debug Tile Renderer visualizes the boundaries of map tiles by rendering the tiles in a checkerboard pattern.
Prefab Feature Renderer
Use the Prefab Feature Renderer node to instantiate a prefab in place of all instances of a specific map feature, such as place of interest or street label.
Prefab Object Renderer
Use the Prefab Object Renderer node to instantiate a prefab on a map at given coordinates. For example, you can render a navigation marker, or visualize route waypoints or geocoding results.
Prefab Tile Renderer
Use the Prefab Tile Renderer node to render raster tiles. For example, you can render 2D satellite imagery.
Route Renderer
Use the Route Renderer node to render routes for navigation.
Stroke Extrusion Renderer
Use the Stroke Extrusion Renderer node to render strokes with 3D extrusion.
Stroke Mesh Renderer
Use the Stroke Mesh Renderer node to render multiple copies of a mesh along a 2D or 3D line string. For example, you can render 3D elements along roads.
Stroke Renderer
Use the Stroke Renderer node to render roads, rivers, and borders. The Stroke Renderer renders stroked 2D and 3D line string geometry and stroked 2D polygons.
Structure Renderer
Use the Structure Renderer node to render structures, such as 3D buildings and landmarks. The Structure Renderer renders extruded 2D polygons and 3D meshes.
Terrain 3D Renderer
Use the Terrain 3D Renderer node to render a 3D terrain as a mesh. Kanzi Maps creates the mesh using a height map that you provide from a map layer.
Tip
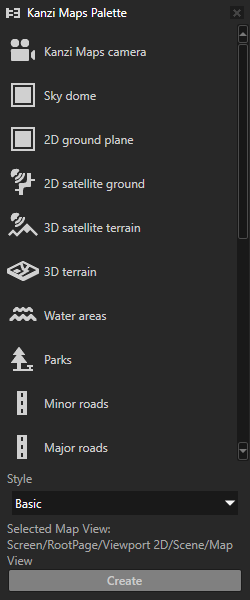
You can use the Palette to create and configure Renderer nodes that render typical map features. See Using the Palette.
Filtering map content
Most renderers that operate on map tile data support filtering map content. For example, you can filter content by:
The name of the layer from which Kanzi Maps gets the map features. See Supported backends.
Metadata filter that selects a subset of map features from a layer.
You can use the Renderer Editor to set layer and metadata filters. See Using the Renderer Editor.
Metadata filters
A metadata filter consists of a tree of rules. When the entire metadata filter expression matches a map feature, the Renderer node renders that feature. Kanzi Maps evaluates a metadata filter expression by considering all rules in that expression, starting from the outermost rule.
These tables list the operations that you can use in a metadata filter.
Logical operations
This table lists the logical operations that you can use in a metadata filter.
all match |
|
All rules within this operation match. Can have as its child any rule, except an arithmetic operation. |
at least one matches |
|
At least one rule within this operation matches. Can have any rule as its child. |
Set rules
This table lists the set rules that you can use in a metadata filter.
is one of |
|
Metadata value associated with the metadata key is one of the values listed as children. |
is none of |
|
Metadata value associated with the metadata key is none of the values listed as children. |
Comparison rules
This table lists the comparison rules that you can use in a metadata filter.
A comparison rule cannot have child rules.
is |
|
The value associated with the metadata key is the same as right-hand-side value. |
is not |
|
The value associated with the metadata key is different from the right-hand-side value. |
is greater than |
|
The value associated with the metadata key is greater than the right-hand-side value. |
is greater or equal to |
|
The value associated with the metadata key is greater than or equal to the right-hand-side value. |
is less than |
|
The value associated with the metadata key is less than the right-hand-side value. |
is less or equal to |
|
The value associated with the metadata key is less than or equal to the right-hand-side value. |
Arithmetic operations
This table lists the arithmetic operations that you can use in a metadata filter.
An arithmetic operation cannot have child rules.
% |
|
Calculates the modulo that is the remainder when one number is divided by another. |
Controlling the visibility of content based on zoom level
To avoid visual clutter in your map, you can show content only at a specific range of zoom levels. Use the Minimum Zoom Level and Maximum Zoom Level properties to set the range of zoom levels at which a tile-based Renderer renders its content.
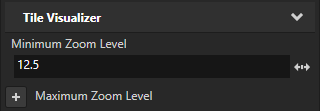
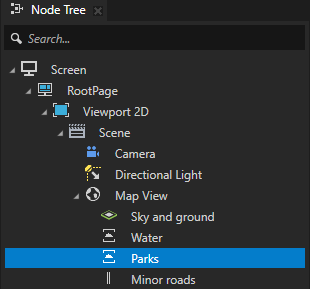
For example, in the Node Tree, select a Renderer node. In the Properties, add and set the Minimum Zoom Level property to 12.5.
This way, you hide the content rendered by the Renderer when in the Map View node the value of the Zoom Level property is less than 12.5.
Cross-fading map content
It is common for some map content to appear and other content to disappear when you adjust the zoom level of a map. See Controlling the visibility of content based on zoom level.
You can create smooth transitions by setting Renderer nodes to cross-fade their content.
To cross-fade map content:
In the Node Tree, select the Renderer node whose content you want to cross-fade.
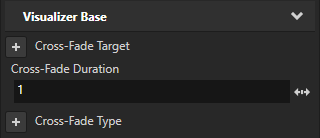
In the Properties, add and set:
(Optional) Cross-Fade Target to the property to which you want to apply a transition.
Use a float property whose value is in the range from 0 to 1, where 0 is invisible and 1 is fully invisible. The default target is the Blend Intensity property.
Cross-Fade Duration to the time in seconds that you want the transition to last.
(Optional) Cross-Fade Type to Normal to make the content fade in and out simultaneously.
The default transition type Disjoint first fades in the content that appears, then fades out the content that disappears.
In the Properties, set the Disable Tile Clipping property to disabled.
This enables the Renderer node to clip the geometry to the boundaries of map tiles. This way, you get rid of the visible artifacts caused by overlapping content at the tile boundaries.
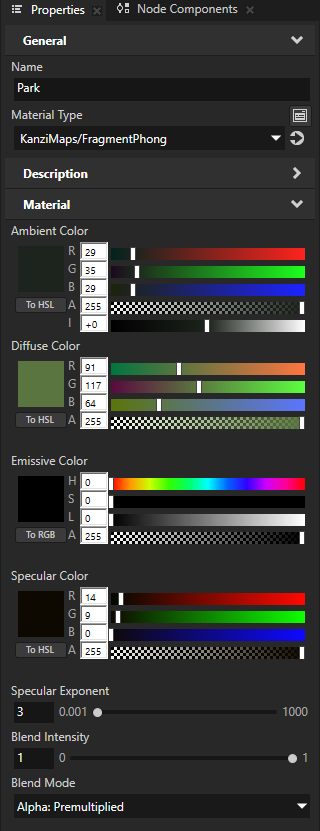
In the Library > Materials and Textures > Materials, select the material used by the Renderer node. In the Properties, set the Blend Mode property to Alpha: Premultiplied.
This way, you enable the Renderer node to use color blending instead of fading the content to and from black.
See also
Using the Coordinate Renderer node
Using the Debug Tile Renderer node
Using the Prefab Feature Renderer node
Using the Prefab Object Renderer node
Using the Prefab Tile Renderer node
Using the Stroke Extrusion Renderer node
Using the Stroke Mesh Renderer node
Using the Stroke Renderer node
Using the Structure Renderer node