Getting started with Kanzi Particles
This guide walks through setting up Kanzi Particles in Kanzi Studio, from an empty project to a working emitter with custom emission logic, a collider, event generation, and a subemitter.
Each section builds on the previous one. If you already have a project and just want to add custom shader logic, skip to Writing custom compute materials.
Tip
Fastest path to particles on screen. If you just need a standard shape emitter (box, sphere, disc, torus, or point), drop the matching prefab into your ParticleSystem and tune the published properties on the prefab root. No manual material import, no property-type imports, no GLSL. See Starting with templates.
Continue with this page when you want to build an emitter from the materials by hand — useful for learning how the pieces fit together, or for cases the prefabs don’t cover (custom emission shape, non-standard material slots).
Note
Kanzi Particles and its underlying Kanzi branch are under active development. You can encounter transient compiler errors, UI glitches, or workflow rough edges. These are known and being fixed before release. The Known issue callouts in this document flag the bigger ones.
Smoke test: your first emitter
Create a new Kanzi Studio project
Launch Kanzi Studio.
In the Quick Start window, click New.
Choose the Kanzi Studio project template. (The Application template generates a C++ scaffold; you do not need that for this walkthrough.)
In the right-hand panel:
Project Name:
FirstSparks(or whatever you like).Location: the default
C:\KanziWorkspace\Projectsis fine.Create folder: leave checked.
Materials: choose Add materials later. The particle rendering materials used in this tutorial come from the asset package, so there is no need to generate any defaults.
Click Create.

Set the target graphics API
By default new projects target OpenGL ES 3.0, which does not support compute shaders. Kanzi Particles runs all of its emission, simulation, and collision on the GPU via compute, so you need OpenGL ES 3.1 or higher.
From the main menu, select Project → Properties.
In the Properties panel, scroll to the Profile group and set Target Graphics API to OpenGL ES 3.1 (or higher).
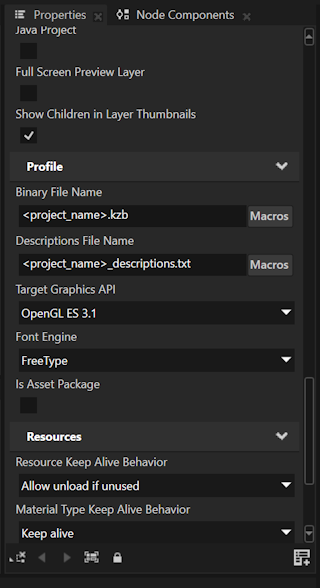
If you skip this step, the plugin loads, but any emitter, affector, or collider that references a compute material fails to run.
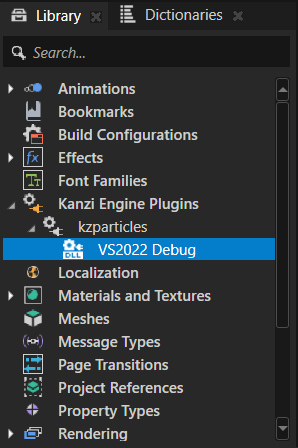
Add the Kanzi Particles DLL
In Kanzi Studio, open the Library panel.
Locate the Kanzi Engine Plugins category.
Right-click Kanzi Engine Plugins and select the option to add a plugin.
Browse to
kzparticles.dll. This is typically at<KanziWorkspace>/Engine/plugins/plugins-particles-2/lib/<platform>/kzparticles.dllafter building the plugin.
Once added, the plugin appears in the Library under Kanzi Engine Plugins → kzparticles → your chosen build configuration (for example, VS2022 Debug).
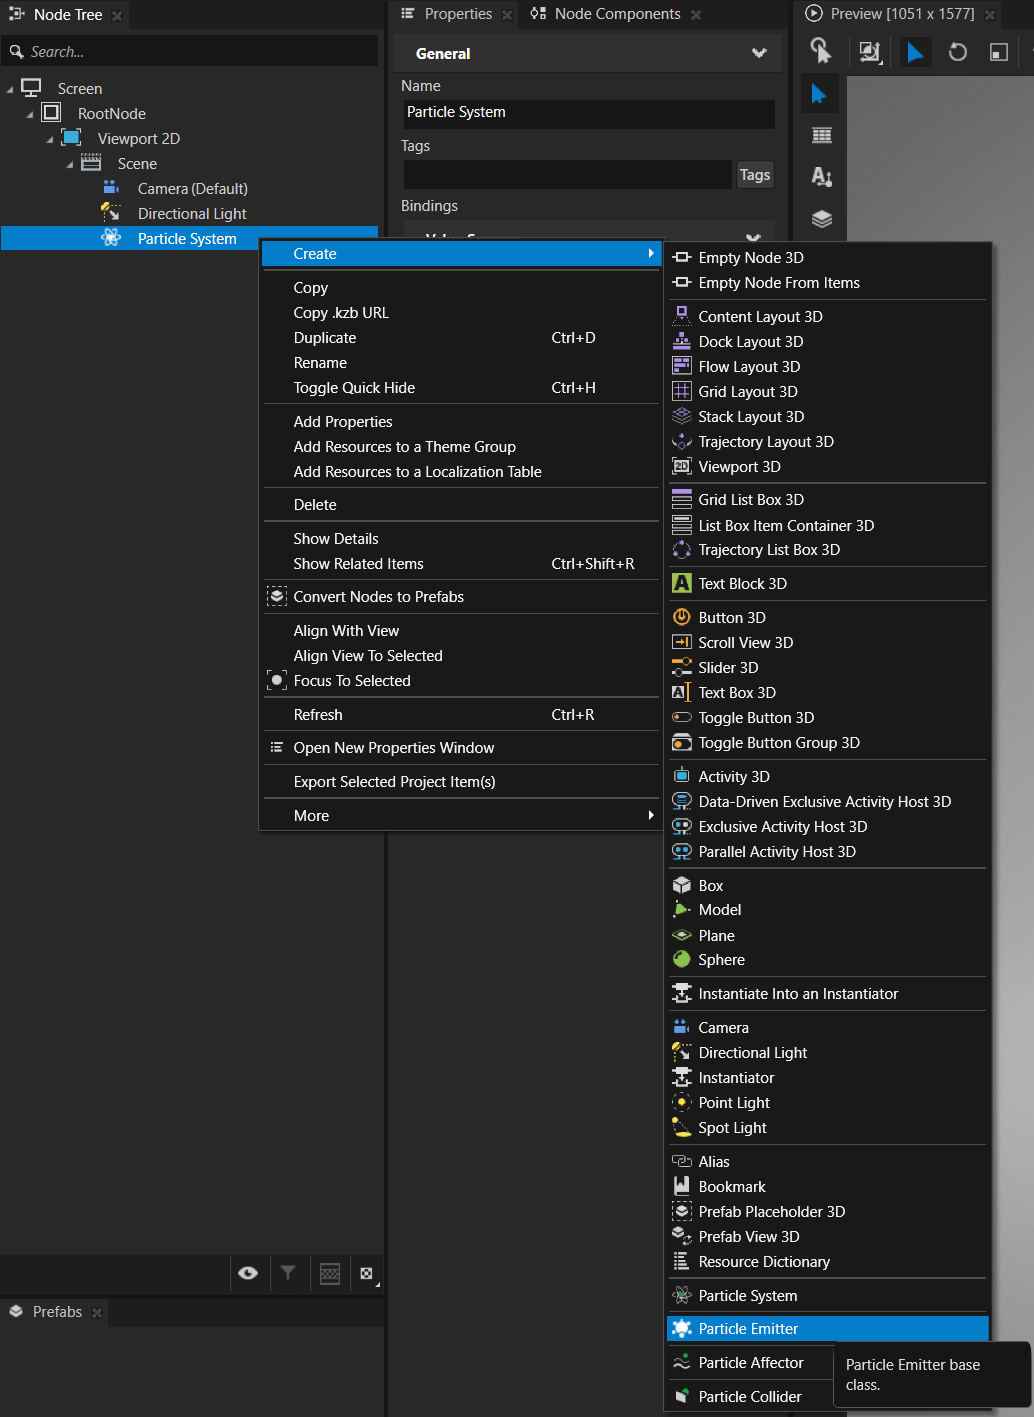
After the plugin loads, four new node types become available when you right-click a node in the Node Tree and select Create:
Particle System: root node for a single system of particles; contains emitters, affectors, and colliders.
Particle Emitter: emits particles according to material shaders.
Particle Affector: applies forces to particles.
Particle Collider: bounces particles off surfaces.
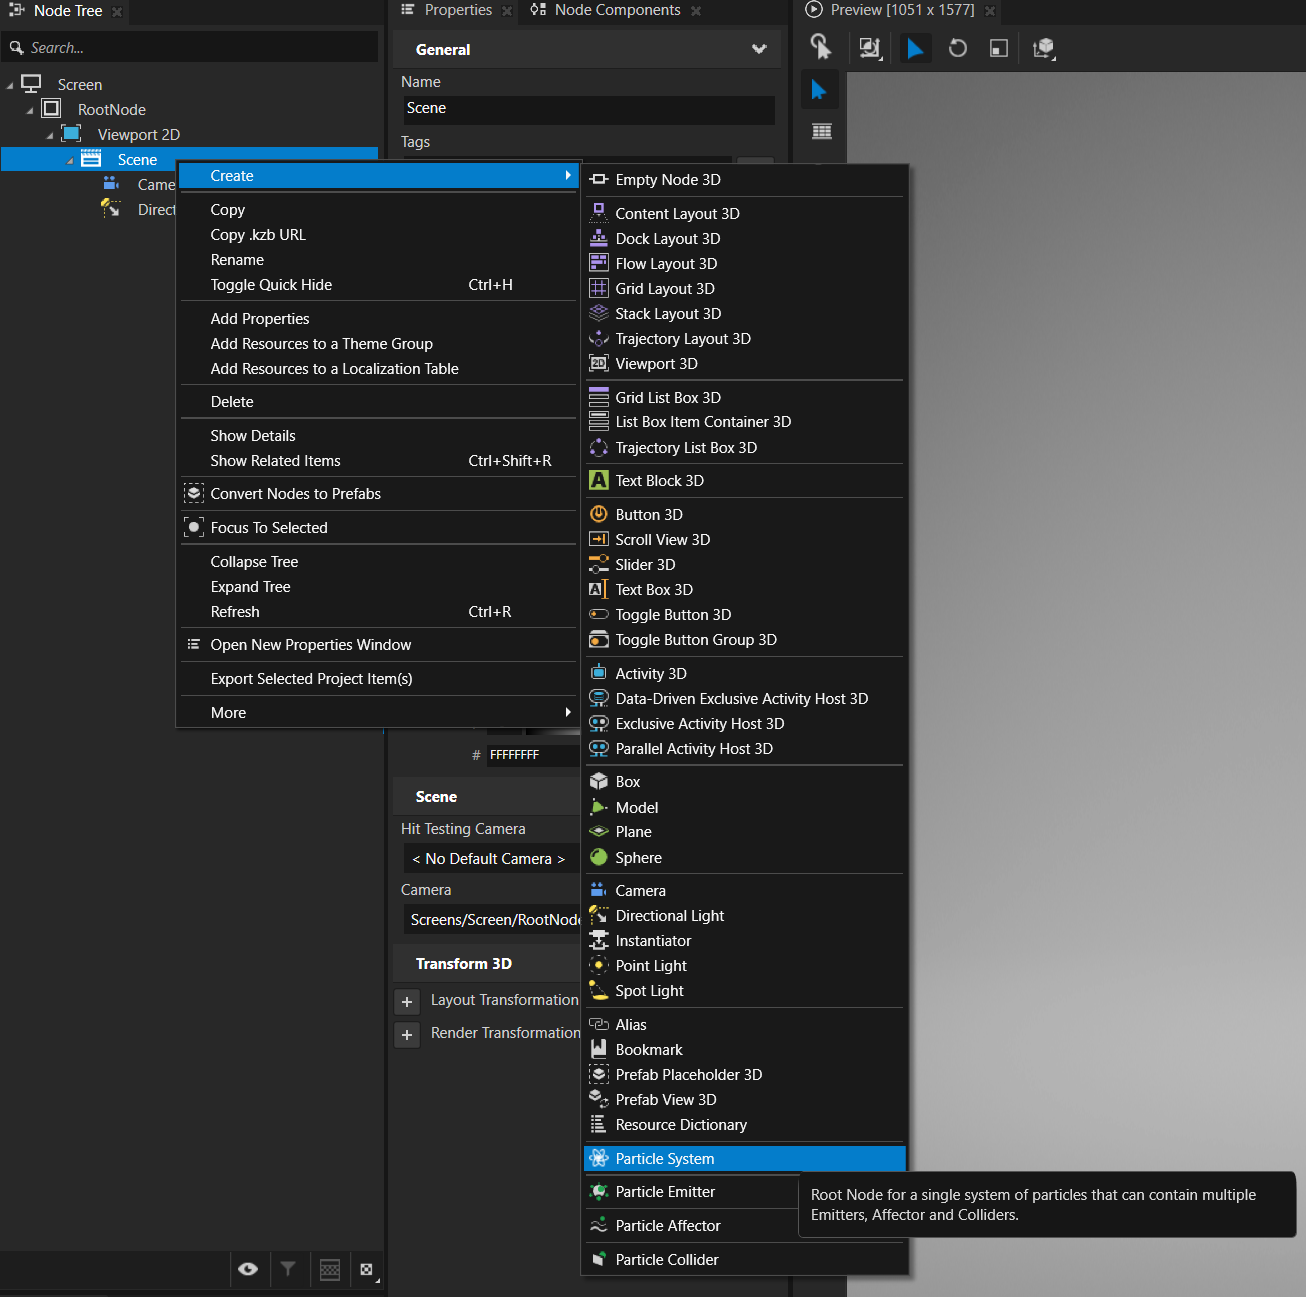
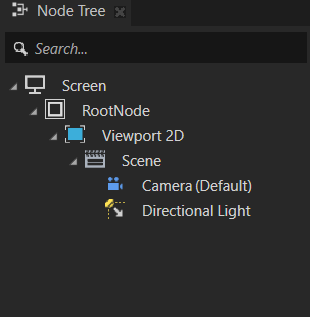
Add a Particle System and Emitter
In the Node Tree, right-click the Scene node and select Create → Particle System. Kanzi Studio prompts for a name: enter
ParticleSystemand confirm.Right-click the new ParticleSystem node and select Create → Particle Emitter. Name it
ParticleEmitterand confirm.
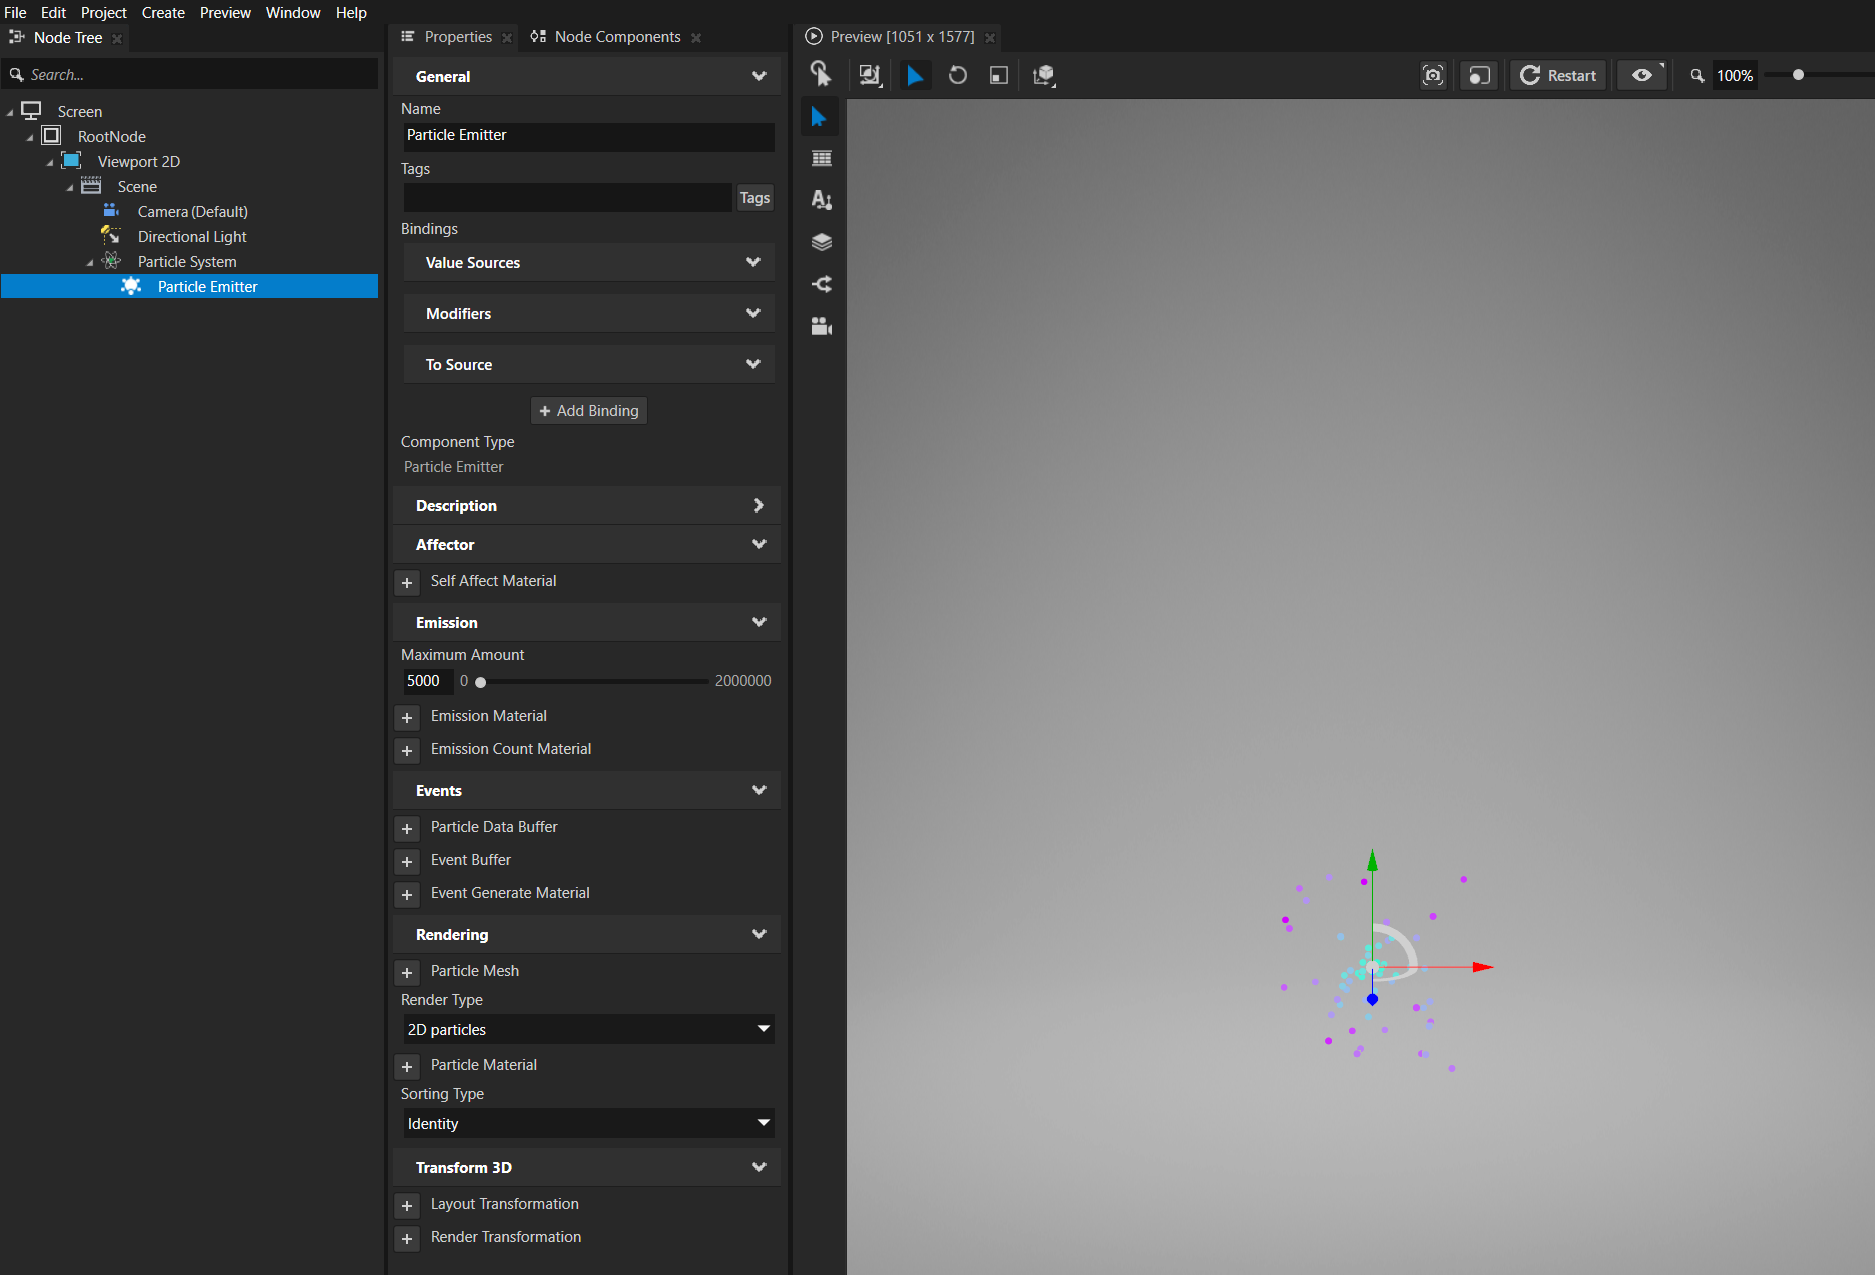
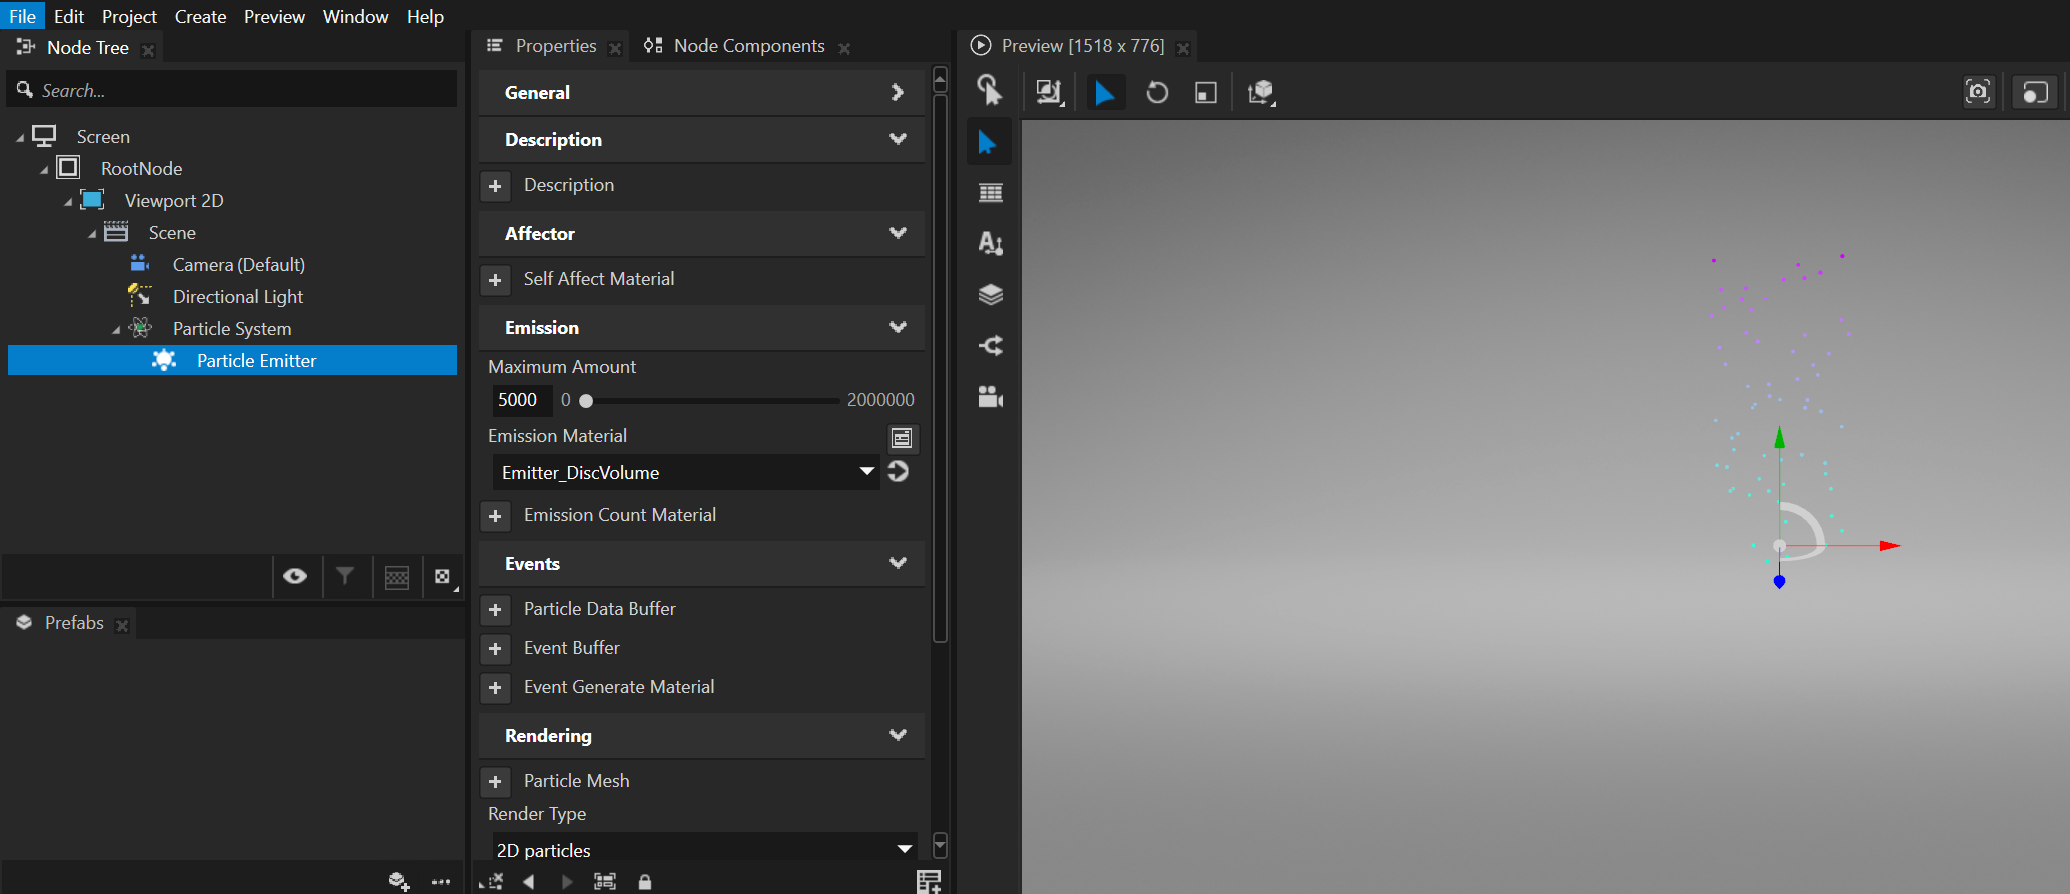
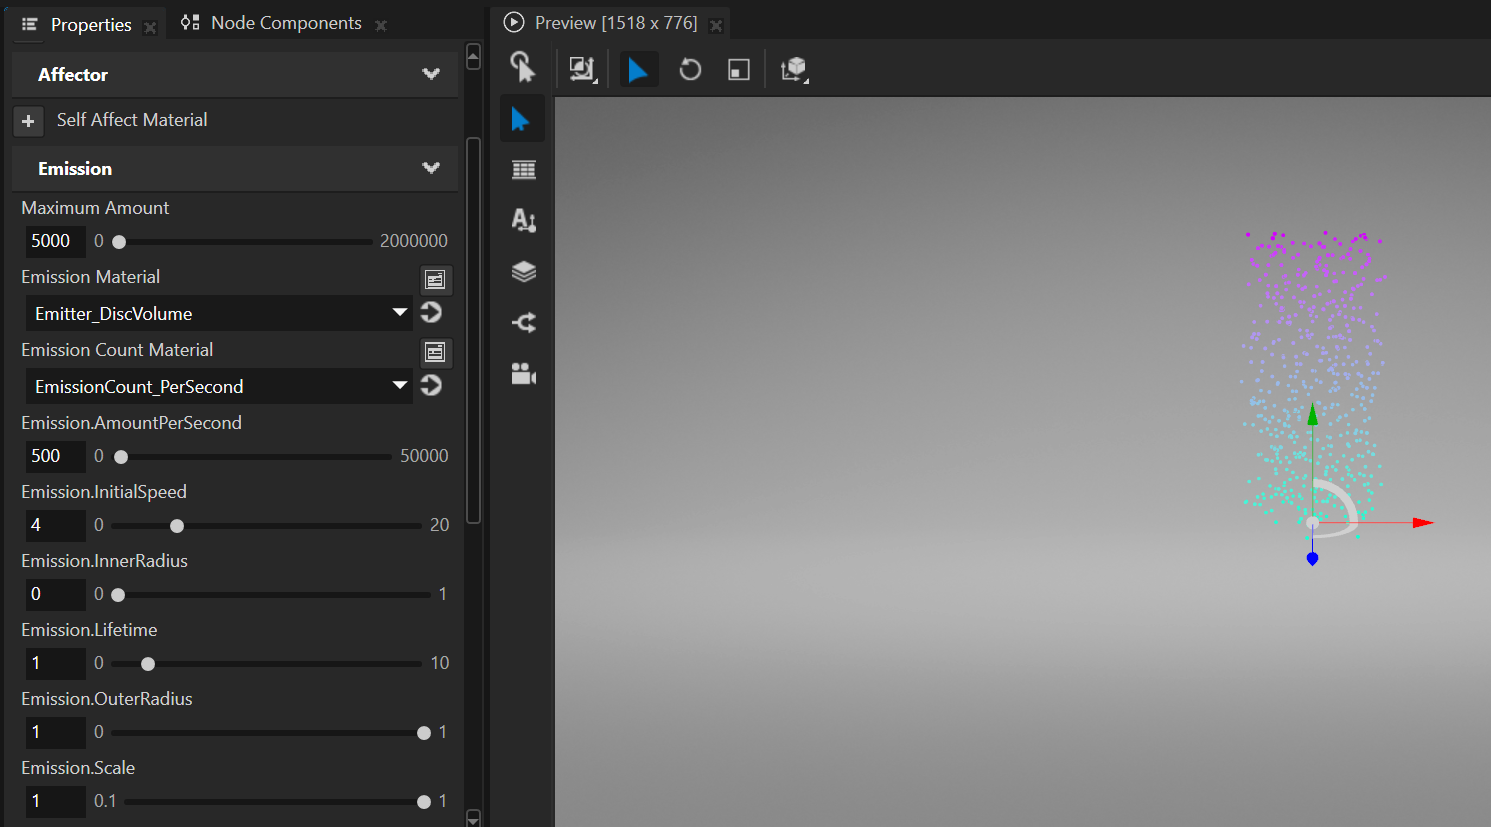
In the Preview pane, you should already see a small cluster of coloured particles emitting from the centre of the scene. The emitter ships with sensible defaults for all of its materials so there is something on screen right away.
With the ParticleEmitter selected, the Properties panel shows the material slots grouped by pipeline stage:
Affector → Self Affect Material: applies forces local to this emitter.
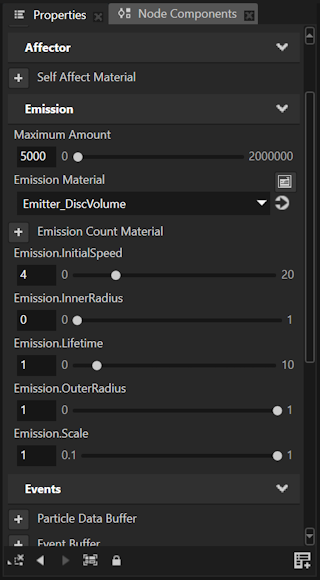
Emission → Maximum Amount, Emission Material, Emission Count Material: how many particles, how they are initialised.
Events → Event Generate Material: conditions under which a particle generates an event (death, hit, and so on).
Rendering → Particle Material, Particle Mesh, Sorting Type: how particles are drawn.
You will replace the default materials with asset-package materials in the next section, and with your own custom shaders via Writing custom compute materials.
Adding the asset package
Building materials and shaders by hand for every project is tedious. The ParticlesAssetPackage ships with ready-made emitter shapes, affectors, colliders, emission counts, event generators, and rendering materials that you can drop into any project.
Add the asset package as a source
Asset package sources are configured globally in Kanzi Studio, not per-project. If you have added ParticlesAssetPackage in a previous session, it is already in the list and you can skip this step.
Note
If the asset package was added previously but the contents look stale (for example, materials you expect to see are missing), the source may be cached. Try clicking refresh on the asset source, or remove and re-add the source to pull the current contents.
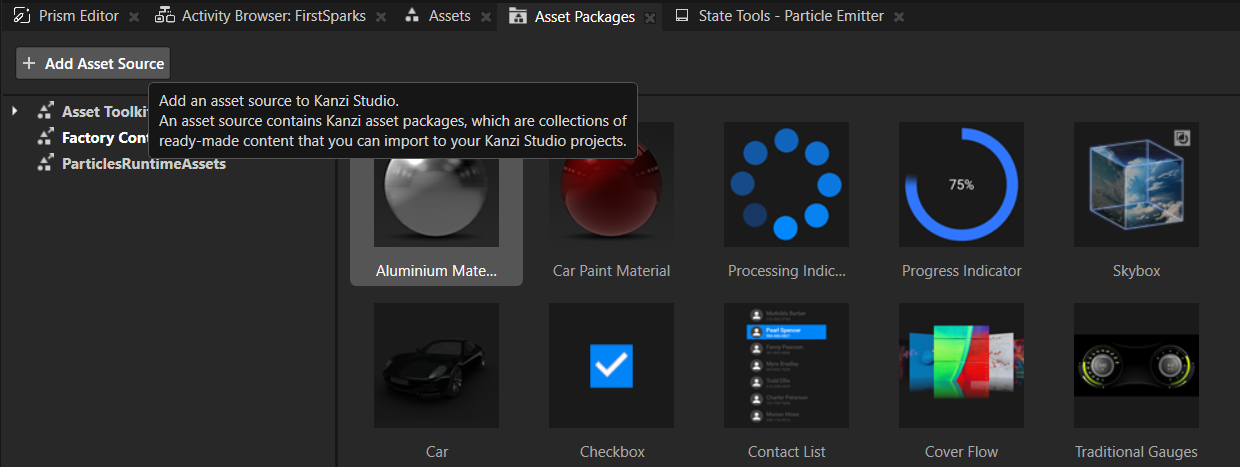
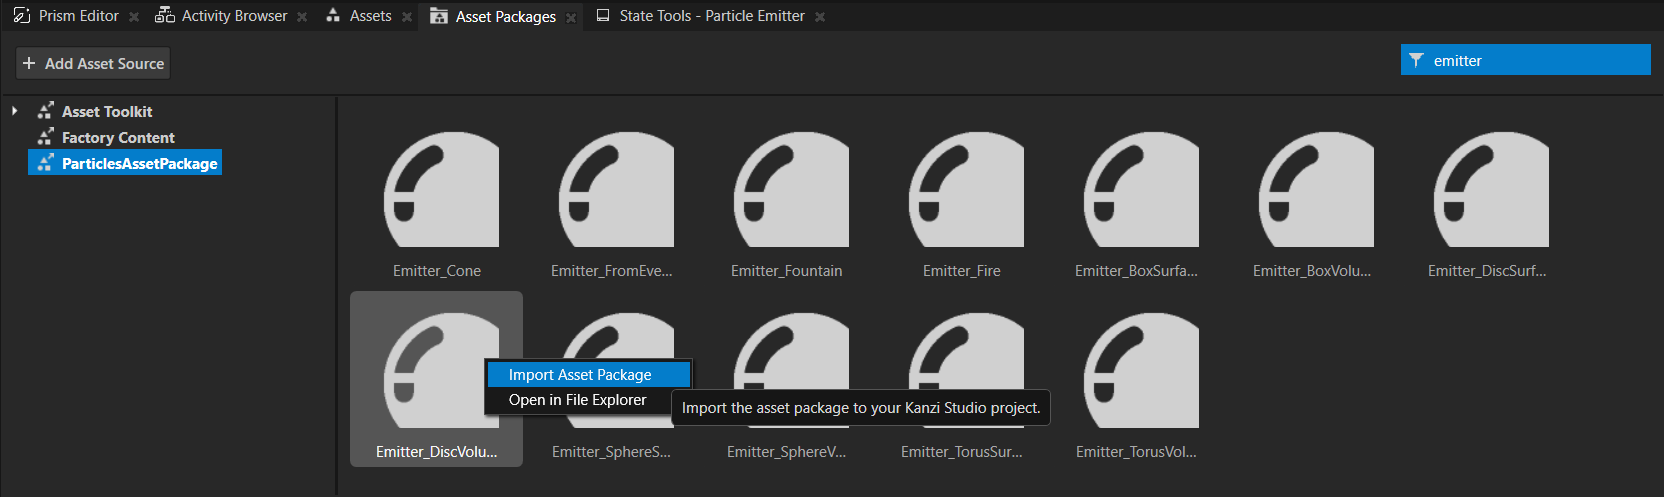
Open the Asset Packages tab.
Click the + Add Asset Source button at the top of the panel.
In the Select Asset Source folder picker, navigate to
<plugins-particles-2>/assets/ParticlesAssetPackage/and click Select Folder.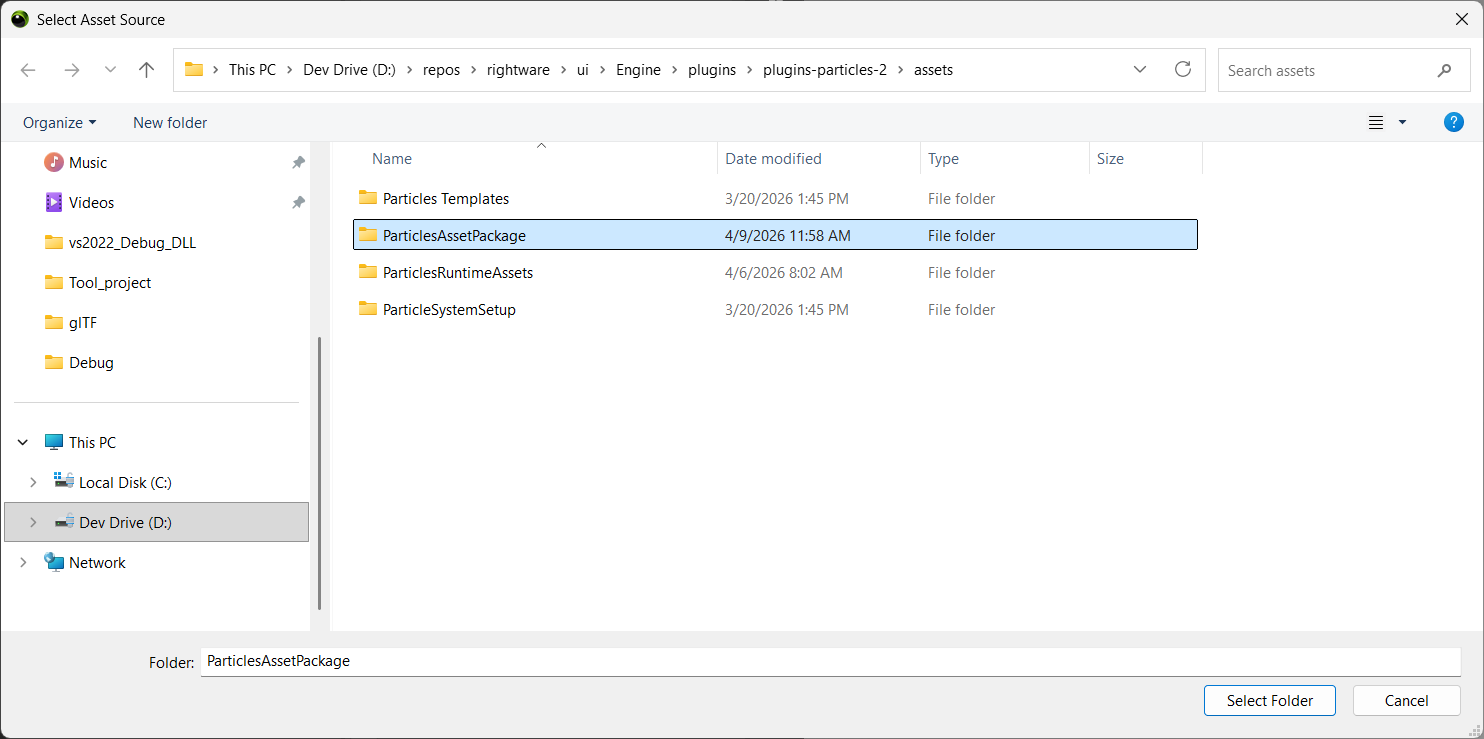
The left-hand list of sources now shows a ParticlesAssetPackage entry alongside any pre-installed sources (for example, Asset Toolkit, Factory Content, ParticlesRuntimeAssets). Selecting it shows the available materials, material types, property types, and prefabs as thumbnails.
Import an emitter material
In Asset Packages, select ParticlesAssetPackage from the list of sources on the left. The main area shows all exported assets as a flat thumbnail grid. Use the search box at the top to narrow down the list.
Find the Emitter_DiscVolume thumbnail, right-click it, and select Import Asset Package.
Note
Known issue. Importing an asset package may not preserve the folder structure of GLSL #include dependencies. If you see errors like #include - Could not process include directive for header name: Particles/emitter.glsl, the imported shader is missing its include files. Workaround: copy the Shaders/Particles/ folder from ParticlesAssetPackage into your project’s Shaders/ directory manually so relative include paths resolve.
After the manual copy, your project’s Resource Files tree should look like this:
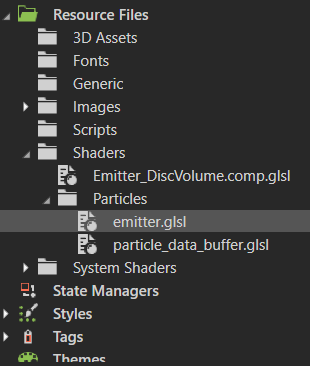
The material, its material type, and all its required property types are copied into your project. You can find them under Materials, Material Types, and Property Types in the library.
Assign the material to the emitter node
Select the Particle Emitter in the node tree.
In the Properties panel, under the Emission group, locate the Emission Material property.
Click the property value and select the Emitter_DiscVolume material you just imported.
Add emission property types to the node
The emission shader exposes several uniforms (radius, lifetime, initial speed, and so on). To control them in Kanzi Studio you must add the matching property types to the emitter node.
Select the Particle Emitter.
In Properties, click + Add Property.
In the Add Properties dialog, select the All tab and type
emissionin the search box. The available properties list narrows to the Emission category.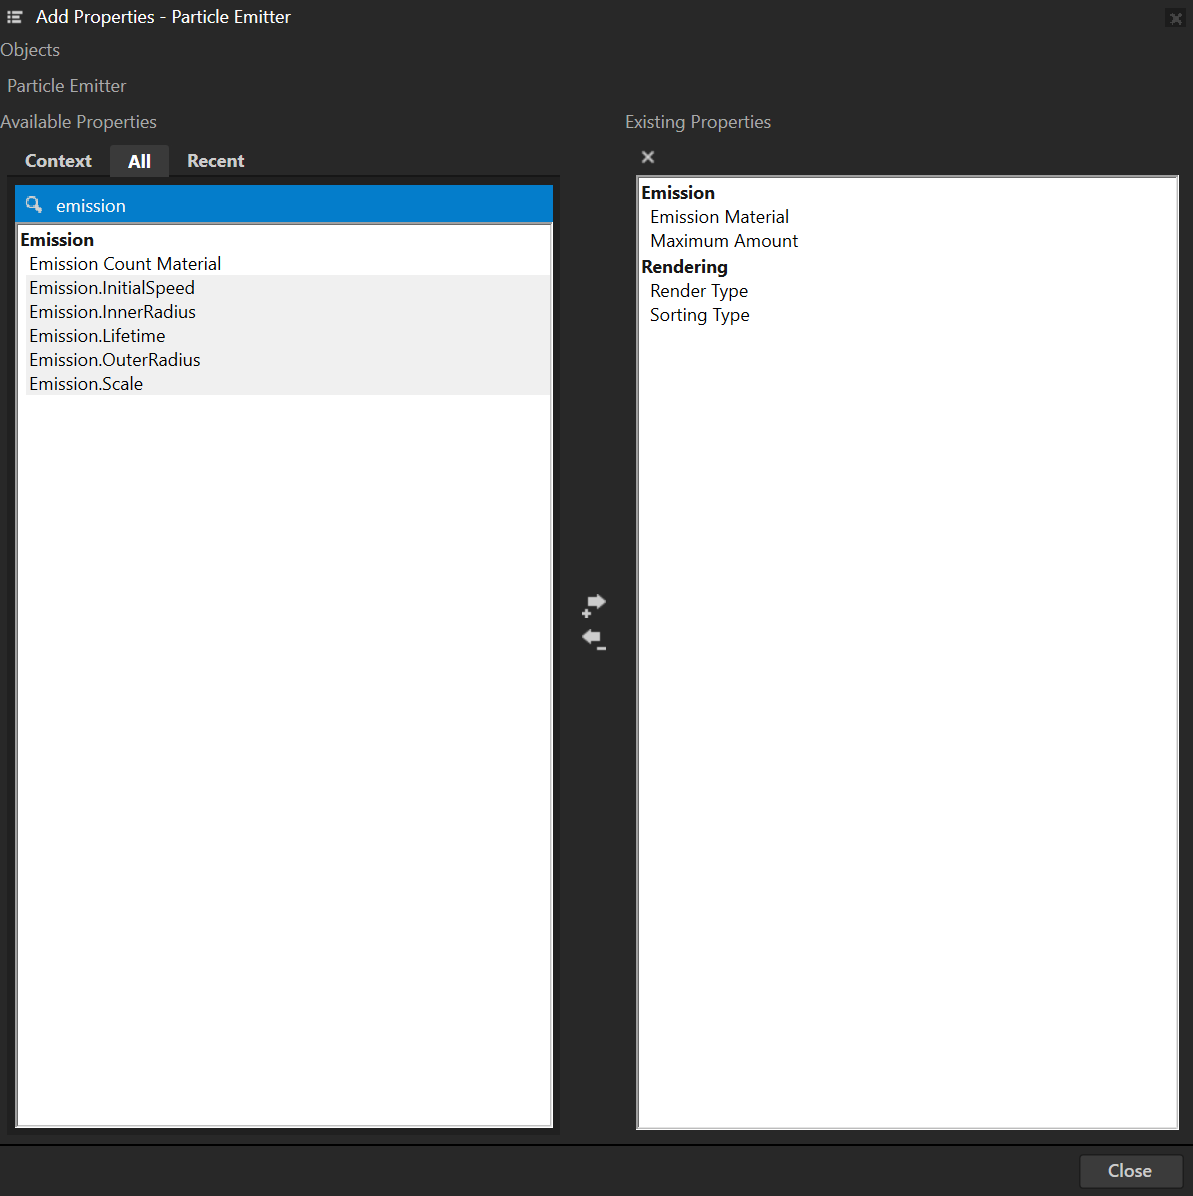
Add the following properties:
Emission.OuterRadiusEmission.InnerRadiusEmission.LifetimeEmission.InitialSpeedEmission.Scale
The asset-package defaults (OuterRadius=1, Lifetime=1, InitialSpeed=4, Scale=1) give you visible particles out of the box. Sliders appear in the Emission group of the Properties panel for each one.
Import and assign an emission count material
By default an emitter uses a built-in emission count material that emits 100 particles per second. To control the rate yourself, replace it with one from the asset package.
In Asset Packages → ParticlesAssetPackage, type
countin the search box. Select EmissionCount_PerSecond and import it (right-click → Import Asset Package).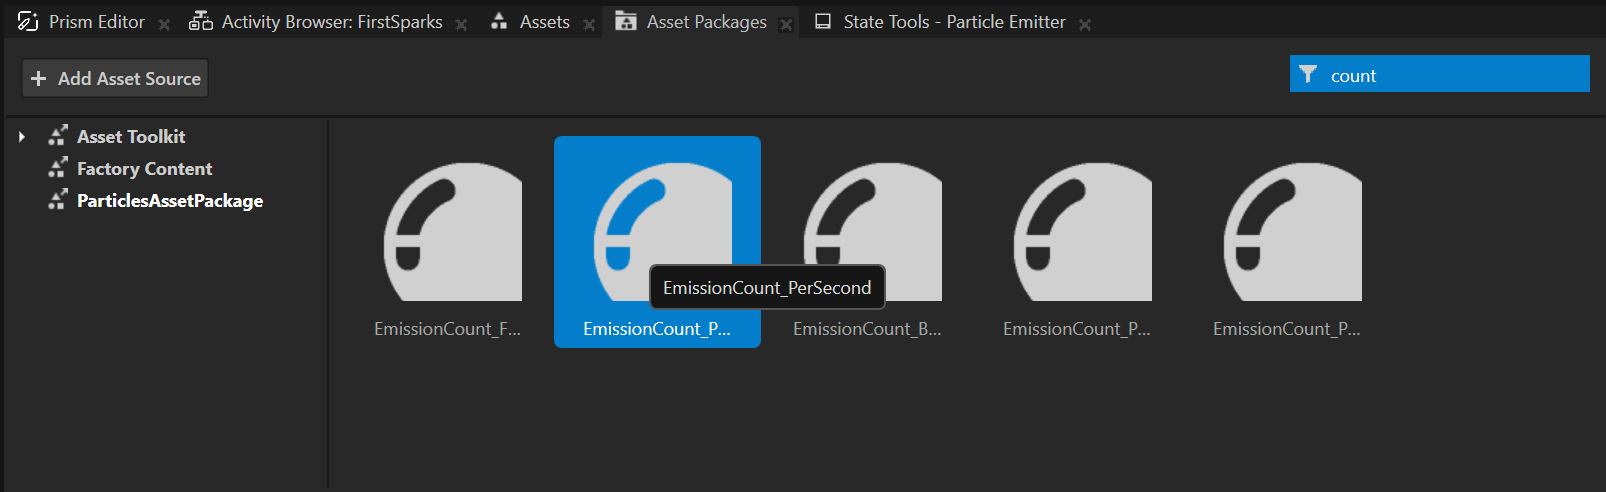
Select the Particle Emitter.
In the Emission group of the Properties panel, set Emission Count Material to EmissionCount_PerSecond.
Add the
Emission.AmountPerSecondproperty to the emitter node and set it to the rate you want (for example, 500 particles/sec).
Tip
Maximum Amount caps live particles. The emitter’s Maximum Amount property (default 5000) is the hard upper limit on how many particles can be alive at once. If AmountPerSecond × Lifetime exceeds Maximum Amount, emission stalls once the cap is reached and particles visibly pop in as older ones die. For smooth emission, keep Maximum Amount ≥ AmountPerSecond × Lifetime. You can also create a binding that computes this automatically: set Maximum Amount to {./Emission.AmountPerSecond} * {./Emission.Lifetime}. See Sizing MaximumAmount.
Writing your own compute materials
The asset package covers common cases, but custom behaviour requires writing your own compute shader for the relevant slot (emission, emission count, affector, collider, event generator).
For the authoring workflow (GLSL include structure, declaring uniforms and wiring them up to asset-package property types, and hooking a custom material into an existing node slot) see Writing custom compute materials.
Writing a collider
A collider tests each particle for penetration into a surface and reports a hit point, normal, and parametric hit time. The collider template handles the physical response (reflect velocity, apply bounce/friction, advance remaining sub-step time): your shader only answers the geometric question.
Collider shader template
#version 450 core
#include "Particles/collider.glsl"

// Uniforms here.

HitInfo Collide(vec3 position, vec3 prevPosition)
{
    HitInfo info;
    info.hit  = false;
    info.tHit = 0.0;

    // The collider node's world transform is available via getColliderTransform().

    // If this particle has penetrated your surface, fill in:
    //   info.hit      = true
    //   info.position = contact point on the surface
    //   info.normal   = outward surface normal (unit length)
    //   info.tHit     = [0..1] parametric hit time along prevPosition → position

    return info;
}
Hook it up
Right-click Particle System → Create → Particle Collider.
In the Library → Material Types, duplicate an existing collider material type (for example, Collider_Sphere) and rename the copy. Replace its Compute Shader with your collider shader.
Create a material instance and assign it to the collider node’s Collider Material property.
The collider node has built-in Bounce (default
0.5) and Friction (default0.1) properties: no need to add them manually. The collider template feeds these into the response calculation automatically.
Reference colliders in the asset package: Collider_Plane, Collider_Sphere, Collider_Box, Collider_Cylinder, Collider_Capsule, Collider_Cone.
Other emission count options
Earlier you imported EmissionCount_PerSecond to control the emission rate. The asset package provides several other emission count materials for different patterns:
EmissionCount_Burst: emit a fixed count once.
EmissionCount_Periodic: emit a burst on a repeating schedule.
EmissionCount_FromEvents: emit N particles per event received from another emitter (used by subemitters; set Emission.ParticlesPerEvent to
N).
Import and assign any of these the same way as EmissionCount_PerSecond. See Emission for the full catalog.
Generating events
An emitter can generate events for notable moments in a particle’s life: death, collision, or custom conditions. These events drive subemitters.
On-death events
In Asset Packages → ParticlesAssetPackage, search for
lifetimeand import Event_Lifetime.Select the emitter node.
Set its Event Generate Material property to Event_Lifetime. Its defaults (Events.LifetimeMin = Events.LifetimeMax =
1) fire an event on death.
Each frame, every particle that died this frame writes an event into the emitter’s event buffer. On its own this does nothing visible: events only take effect when another emitter consumes them.
Probabilistic events
Add the Events.Probability property to Event_Lifetime to fire for only a fraction of dying particles (0.0 = never, 1.0 = every particle). The roll is population-level (per-particle deterministic), so a steady fraction fires rather than flickering frame to frame. Useful when you do not want a 1:1 ratio between parent and sub-emitted particles.
See Events and subemitters for the full generator catalog.
Subemitters
A subemitter is a second Particle Emitter that reads events from a source emitter and spawns one or more particles per event. Canonical use case: smoke puffs spawning where fire particles die. Full recipe is in Events and subemitters; a short walkthrough follows.
Add a second emitter node
Right-click Particle System → Create → Particle Emitter. Name it
SubEmitterto distinguish it from the first one.Assign it a Particle Material for rendering (for example, a smoke material from the asset package).
Import event-driven emission materials
From the asset package (search for event), import:
EmissionCount_FromEvents (set Emission.ParticlesPerEvent to
Nfor N particles per event; defaults to 1).Emitter_FromEvents (a simple emission material that spawns each particle at the hit/death position of the source particle).
Wire up the subemitter
Select the SubEmitter node.
Set Emission Count Material to EmissionCount_FromEvents.
Set Emission Material to Emitter_FromEvents.
Add the Emission.SourceEventBuffer property to the subemitter.
Click the property value. A picker appears: select the Event Buffer property of the source emitter (the first one, with Event_Lifetime).
This binding tells the subemitter to read events from the source emitter’s event buffer. Each frame, the subemitter spawns one particle per event: at the position of the source particle that generated the event.
For the exact binding shape (target expression, Push Target, and required consumer properties) see Events and subemitters.
Play and tune
Press Play. You should see the original emitter plus a stream of subparticles appearing wherever a source particle dies. Adjust:
Events.Probability on the source: fewer events, fewer sub-particles.
Subemitter lifetime, scale, and rendering material: to make the secondary particles look distinct.
What’s next?
Browse the demo scene in the asset package (
ParticlesAssetPackage.kzproj). It contains working examples of every emitter, affector, and collider.Read Particle system anatomy for the node and material-slot model.
Check
Shaders/Particles/particle_data_buffer.glslfor the complete list of per-particle accessors (getPosition,getVelocity,getNormalizedLifetime, and so on).