Creating Bloom Effect with Prism Graphs
These steps guide you through creating a Prism graph with Bloom and tonemap post-processing effects. Learn how to set up a scene with a 3D model, configure lighting for HDR rendering, and build a complete render graph with bloom effects.
Import and Set Up the Car Model
Ensure you are working with Linear color flow. Find this setting in Project > Properties and Binary Export settings > Color Workflow and set it to Linear >
Import your car model into the project:
In the Asset Packages window, right-click Asset Toolkit > Car and select Import Asset Package.
The Car will appear in your Prefabs window when the import completes.

Add the car model to your Scene:
Drag the imported model from the Prefabs into your Scene hierarchy.
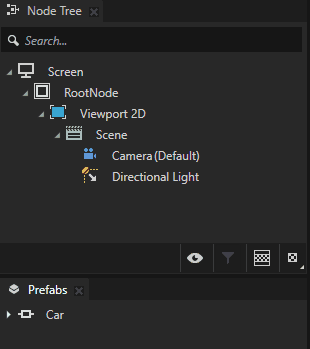
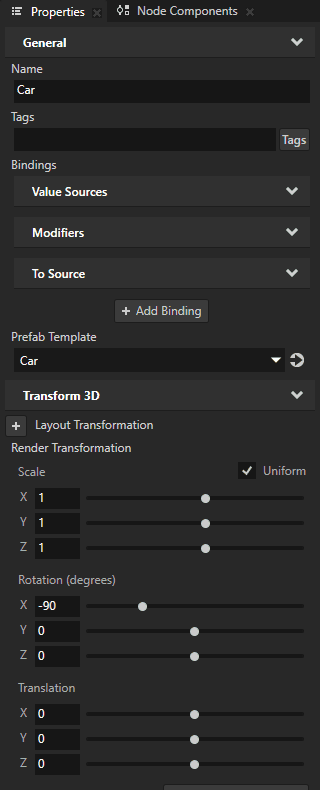
Position the camera node or modify the Car model scaling and position in the Preview window.
Configure Lighting for HDR
For bloom effects to work properly, your materials should support the Emissive Factor property, which allows producing colors in the HDR range. The Asset Toolkit Car model supports this by default
Select the light materials in your Scene. In the Library, expand the Material Types and navigate to PhysicallyBased > PBR BrakeLight for example
Select the PBR BrakeLight material and in the Properties panel, adjust the Emissive Factor property.

Tip
Emissive Factor Intensity values greater than 0.0 produce HDR colors that will enhance the bloom effect. The higher the value, the stronger the bloom effect.
Set the Emissive Factor Intensity to a grater value (for example, 7.0 ) to create bright areas that will bloom.
Apply a high Emissive Factor property value to all of the materials where you want to enhance the bloom effects (for example, the headlights, brake lights and turn signals). In the Car model from the Asset Toolkit, the PhysicallyBased materials PBR BrakeLight, PBR HeadLight and PBR TurnLight are used.
Create a Prism Graph with Bloom
Create an Empty Graph
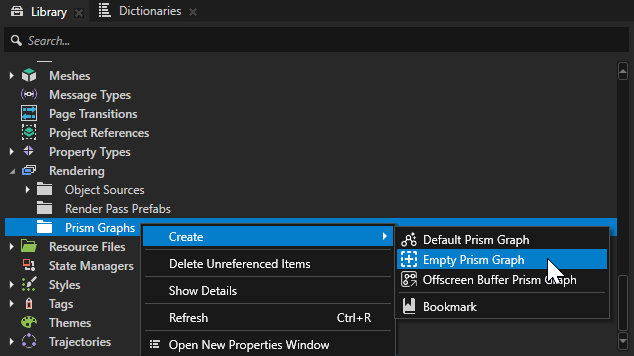
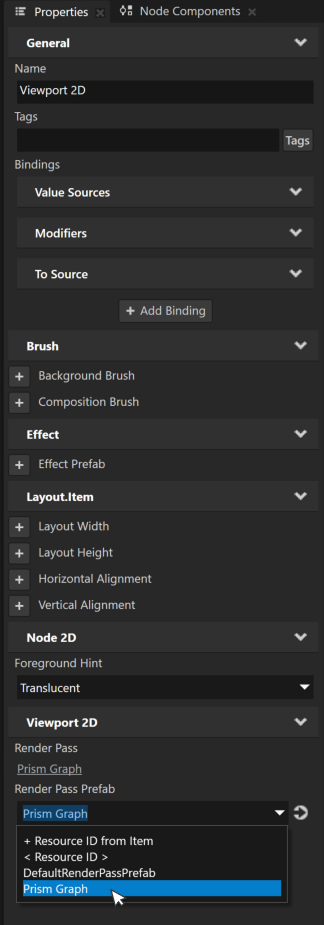
In the Library, find Rendering, right-click on Prism Graphs, and select Create > Empty Prism Graph and name it Prism Graph for example.
A new graph is created. The graph is not used for rendering yet. To use it, it must have nodes, and must be set as the Render Pass Prefab of the Viewport 2D.
Select the viewport you want to render with the graph. In the Properties panel, go to Render Pass Prefab and select your graph from the dropdown list.
Your viewport will stop rendering, because the render graph is still empty. Rendering will be enabled in the next steps.

Add Rendering Nodes
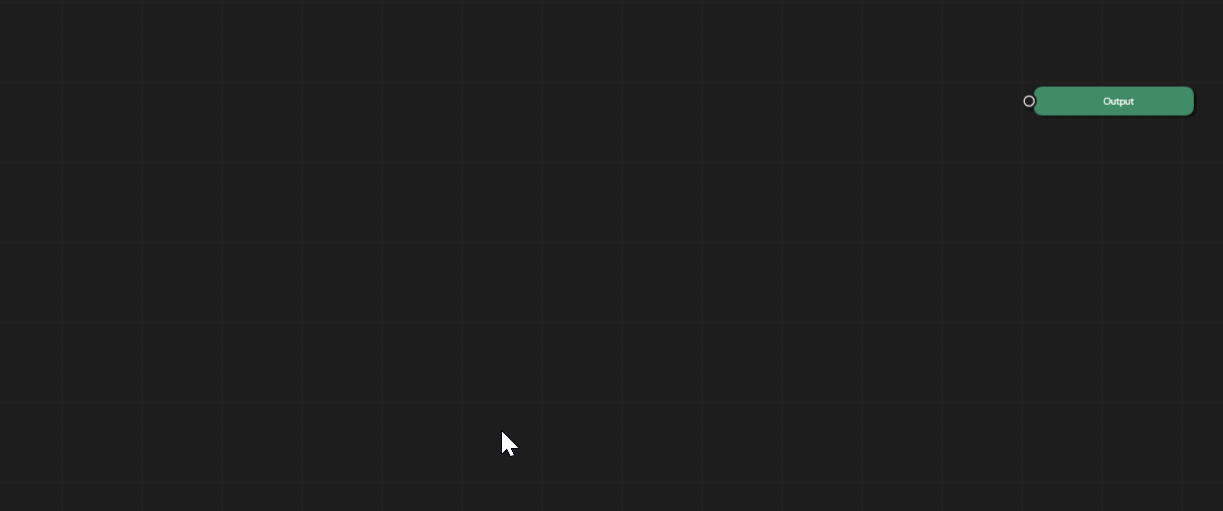
To open your graph, double-click it in the Library folder.
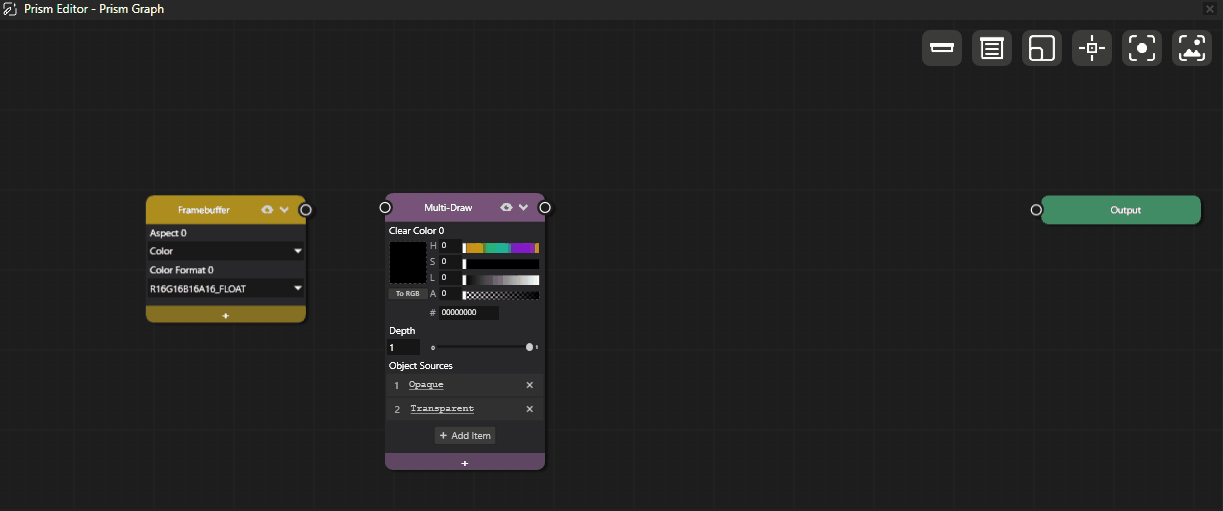
The initial graph is empty and only contains an output node.
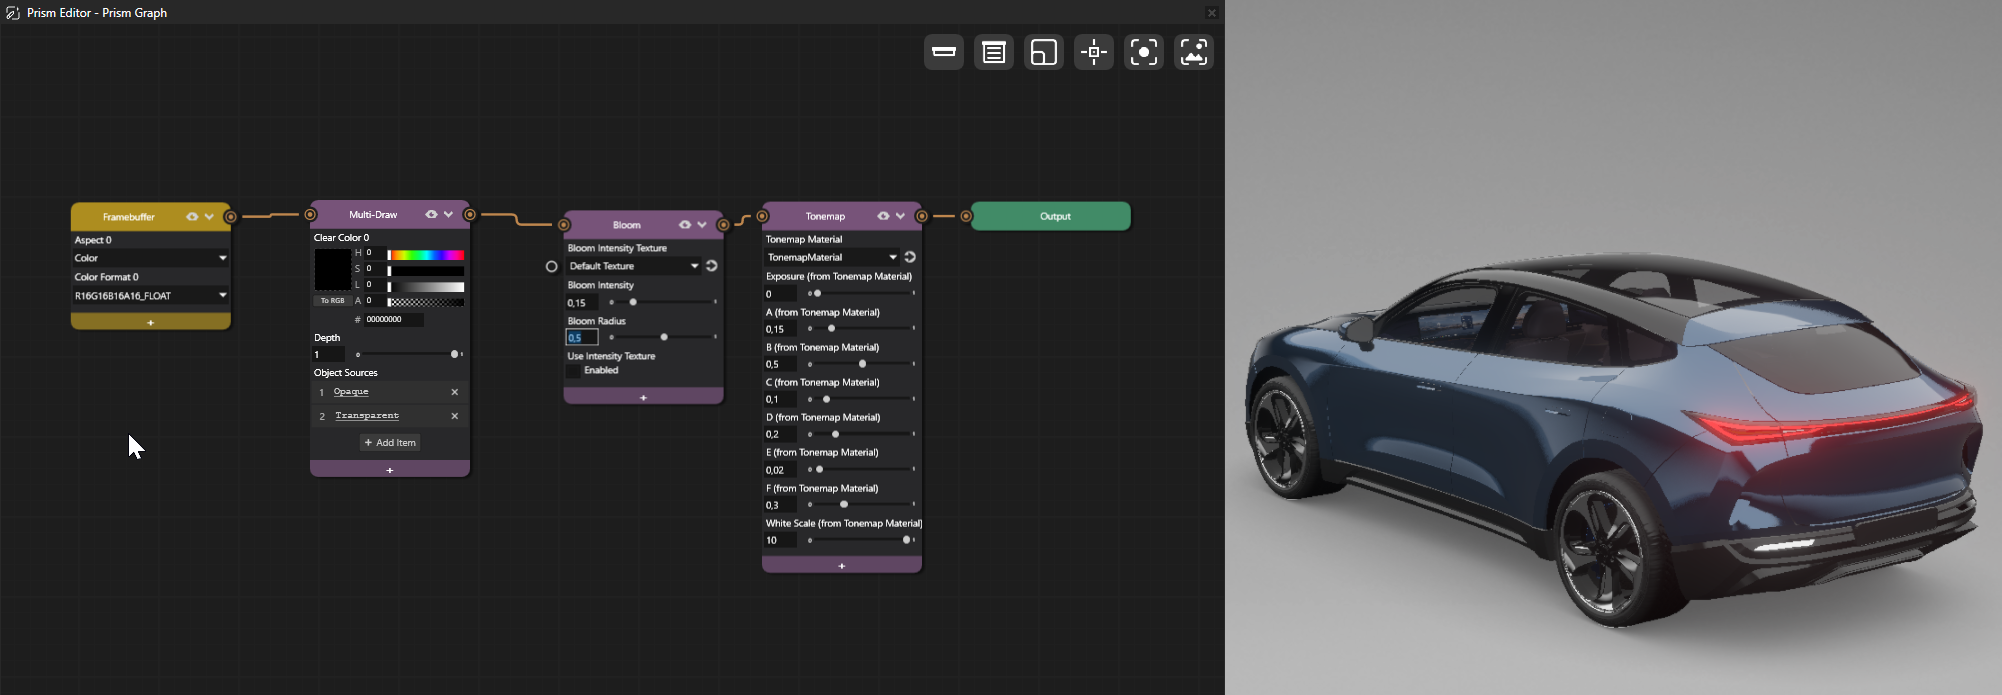
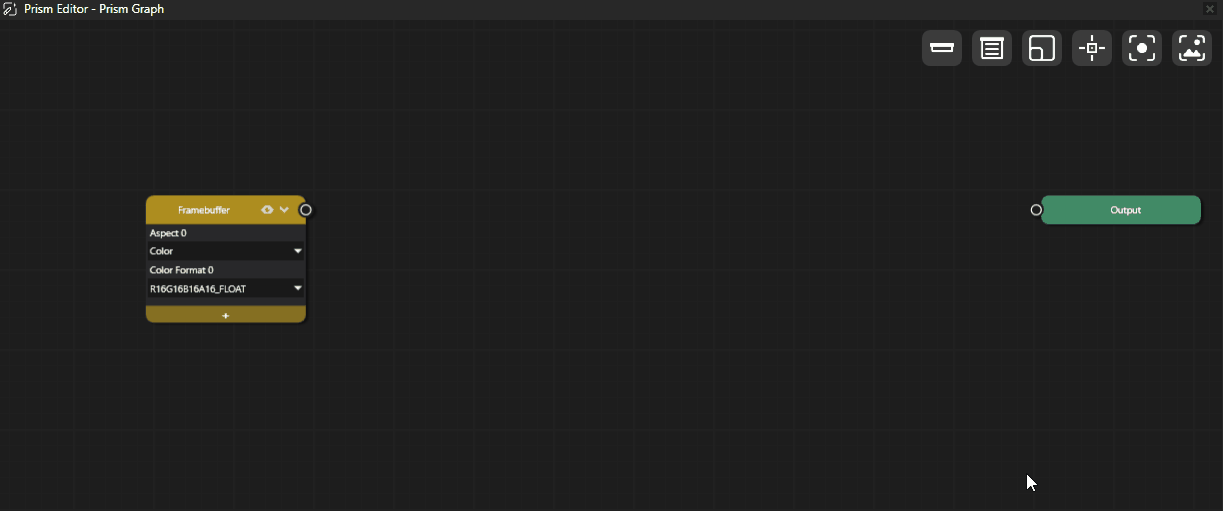
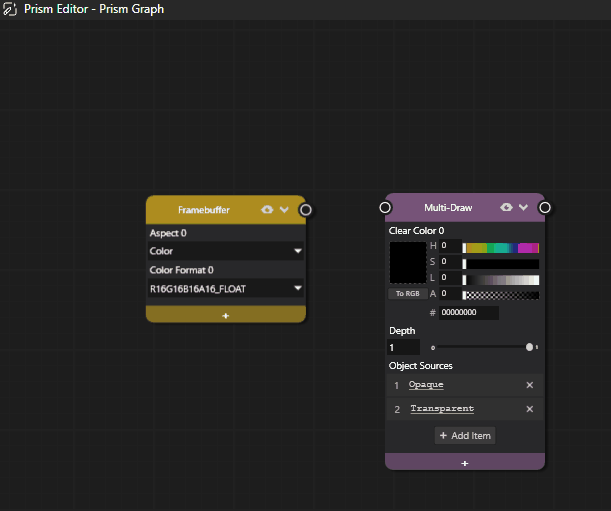
To add an Offscreen Framebuffer Node, right-click on the graph and select Add Node > Offscreen > Framebuffer.
To add Color Format 0 property to the Offscreen Framebuffer Node, click the + button and select Aspect > Color Format 0. This property must be set to R16G16B16A16_Float to support HDR rendering.
To add a Multi-Draw node, by select Add Node > Advanced > Multi-Draw.
Set the Clear Color 0 property to your desired background color.
Tip
Use the Object Sources property to define which object sources to draw, and organize them in the order you want it to be done.
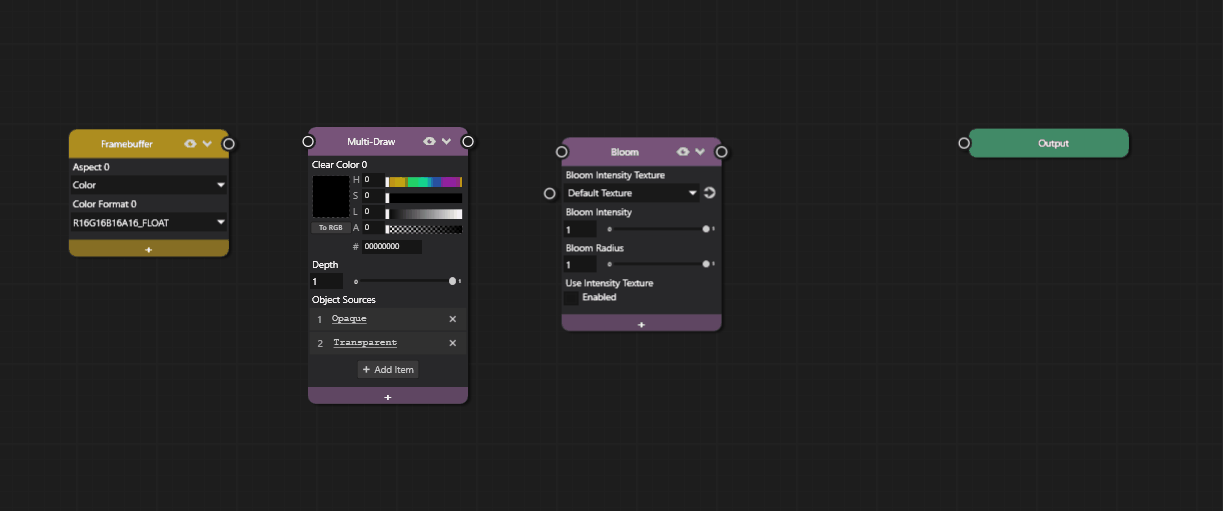
To add a Bloom node, right-click on the graph and select Add Node > Advanced > Bloom.
The Bloom node creates a glow effect around bright areas of your scene, particularly useful for HDR lighting. Adjust the properties to control the intensity and spread of the bloom effect.
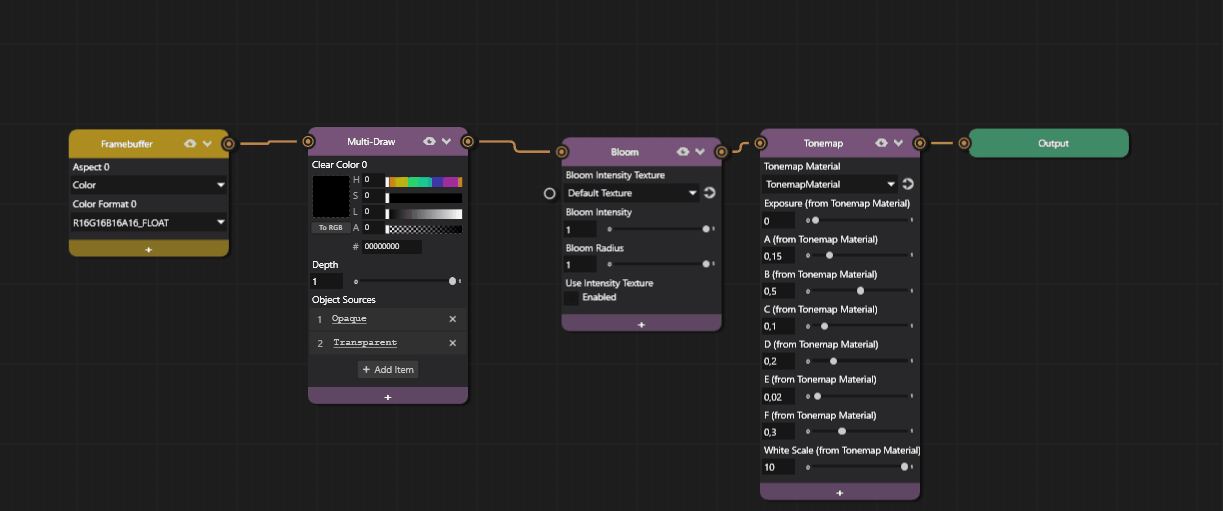
To add a Tonemap node, right-click on the graph and select Add Node > Advanced > Tonemap.
The Tonemap node converts HDR color values to LDR (Low Dynamic Range) for display, preserving detail in both bright and dark areas.
Connect the Nodes
Connect the nodes in the following order:
Connect the Offscreen Framebuffer node output to the Multi-Draw node input.
Connect the Multi-Draw node output to the Bloom node input.
Connect the Bloom node output to the Tonemap node input.
Connect the Tonemap node output to the Output node input.

Once the connections are complete, your graph is now valid and you should see your car model rendered with bloom and tonemap effects applied. Use the next steps to adjust the bloom and tonemap settings to achieve your desired visual effect.
Adjust Bloom and Tonemap Settings
Select the Bloom node in the graph.
In the Properties panel, adjust the bloom settings:
Bloom Intensity controls the strength of the bloom effect. Set this value to around 0.15 to start with.
Bloom Radius controls the spread of the bloom glow. Set this value to around 0.5 to start with.
Tip
The Bloom Intensity Texture property can be used to define which areas of the scene will bloom based on brightness levels. Use a grayscale texture where white areas bloom the most.
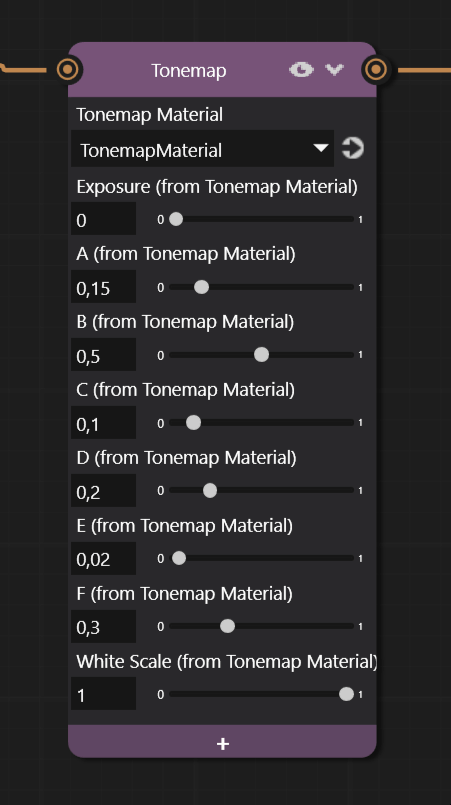
Select the Tonemap node in the graph.
In the Properties panel, adjust the tonemap settings. The White Scale for example controls the overall brightness of the tonemapped image. Adjusted this to 10.0 to start with.
Adjust the Emissive Factor values on your materials to control which areas bloom, and in which color.
Modify the Clear Color 0 property on the Multi-Draw node if you want to change the background color.
Preview the results in real-time as you adjust the properties.