Creating Prism graphs
This tutorial guides you through building a basic render graph. You’ll learn how to create render graphs, add nodes, and connect nodes together to create a complete render graph.
Creating an empty graph
Start by creating a new Prism graph:
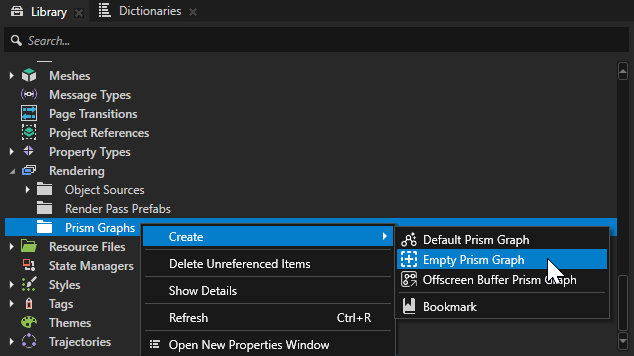
In the Library, find Rendering, right-click on Prism Graphs, and select Create > Empty Prism Graph.
A new graph is created. The graph is not used for rendering yet. It has to be connected to a viewport.
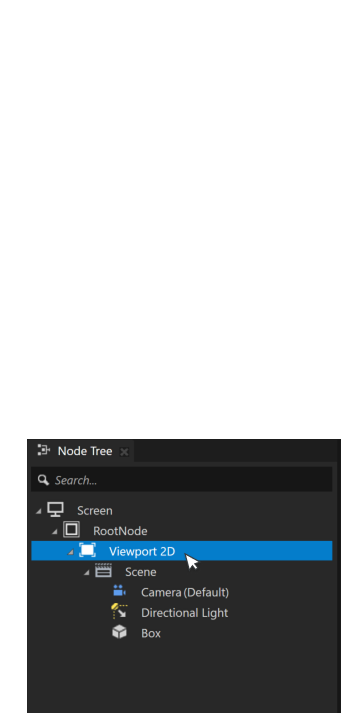
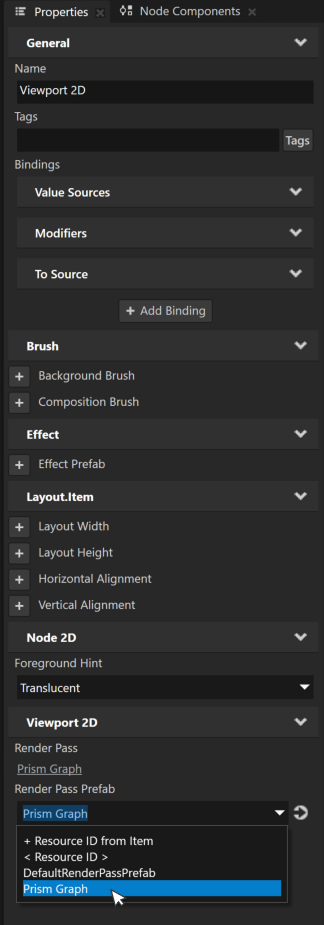
Select the viewport you want to render with the graph. In the Properties panel, go to Render Pass Prefab and select your graph from the dropdown list.
Your viewport will now stop rendering. This is normal because the render graph is currently empty. Rendering will be enabled in the following steps.
Add and connect nodes
Open your graph by double-clicking it in the Library folder.
The initial graph is empty and only contains an output node.
Render graph is where you define how Kanzi renders each frame. The graph consists of nodes and connections between them. Nodes can be basic nodes, offscreen nodes, or smart nodes.
Basic nodes are primitive rendering operations: Draw, Clear, and Blit.
Offscreen nodes are render targets where drawing results are stored and used.
Smart nodes are quick shortcuts to common rendering operations, such as adding shadows or rendering post-processing effects.
In this tutorial, we’ll cover the basic nodes to learn the fundamentals first.
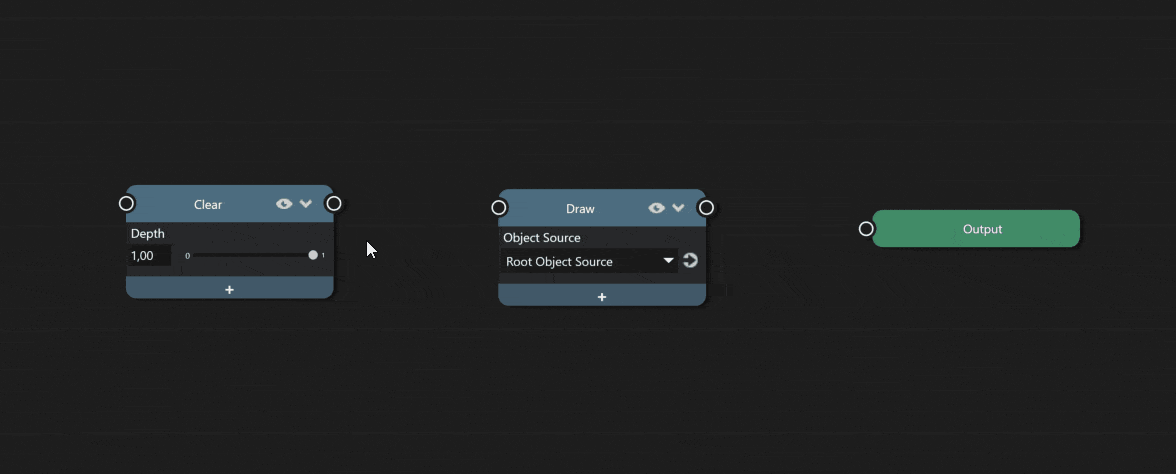
To add a clear node, right-click anywhere on the graph and select Add Node > Basic Node > Clear.
Similarly, add a draw node by selecting Add Node > Basic Node > Draw.

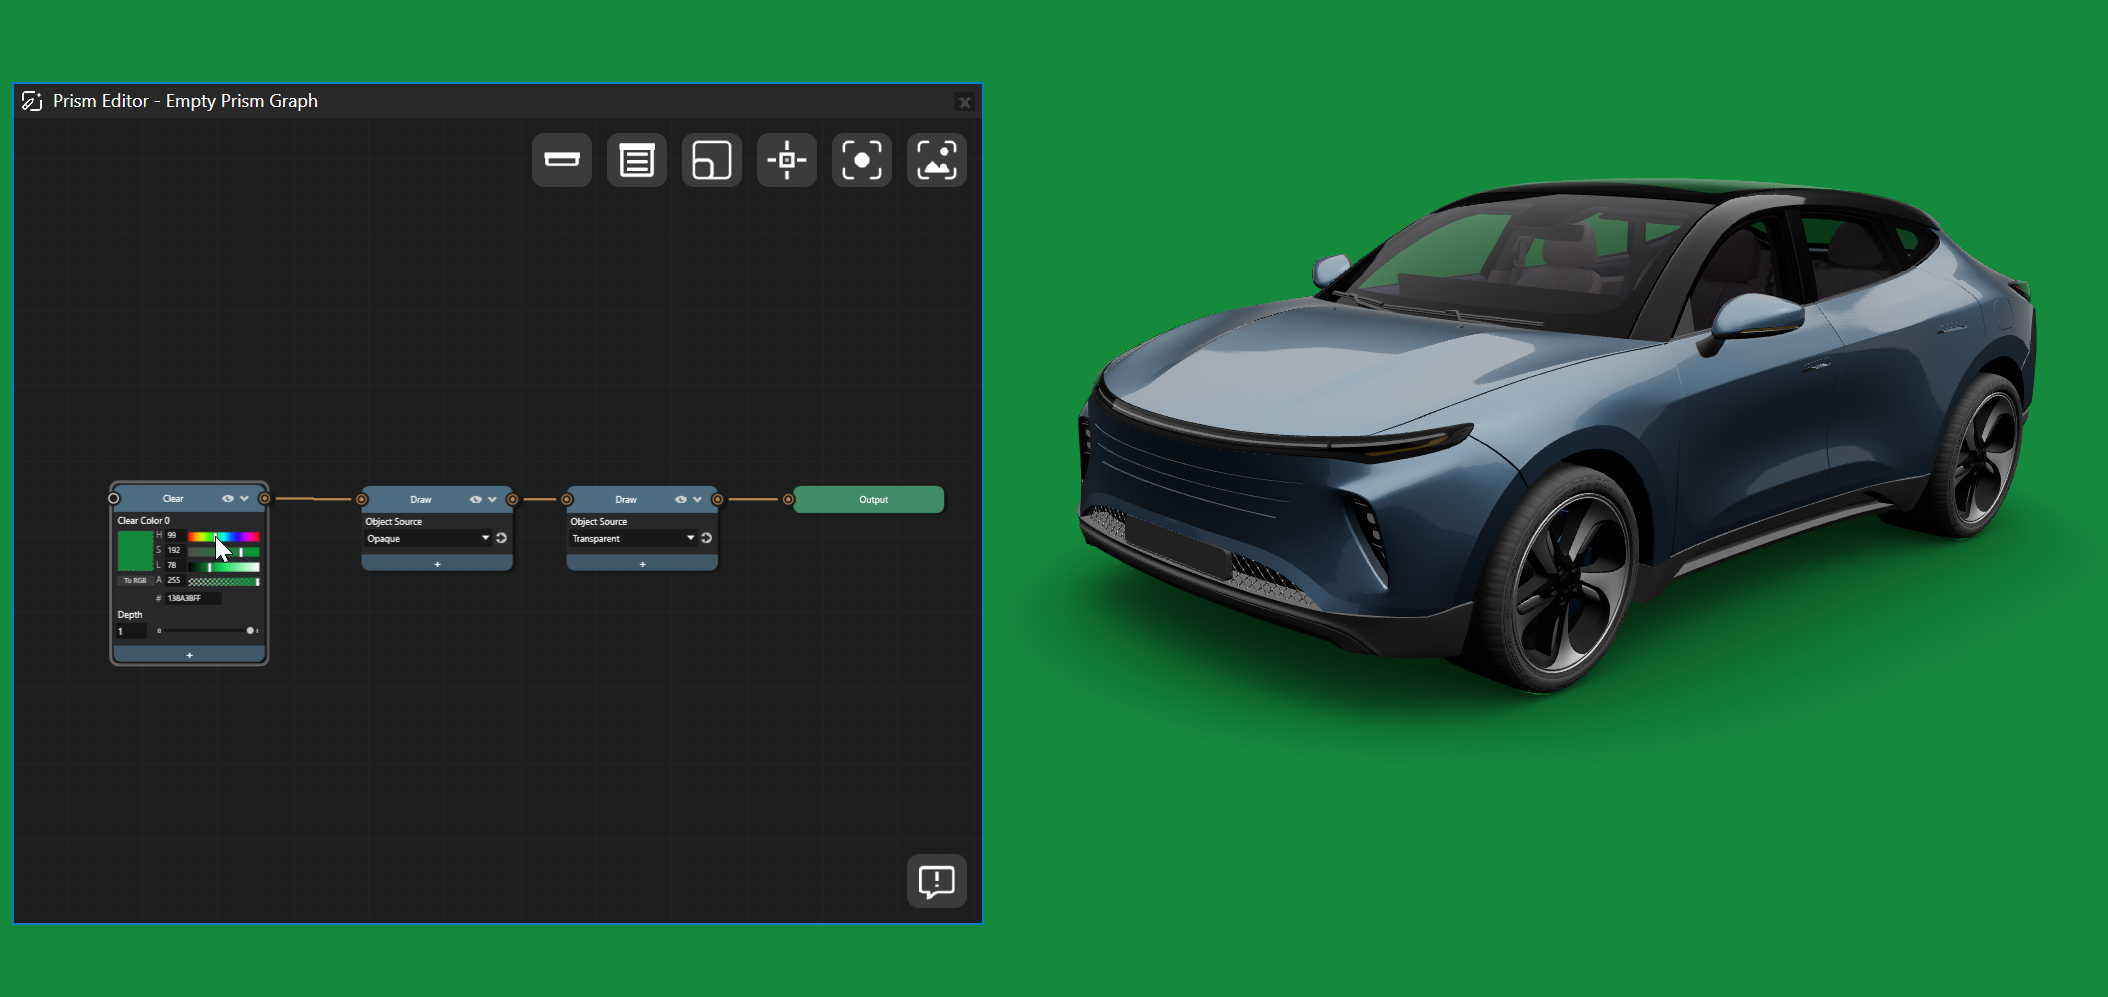
Clear node clears the target it is connected to. Often this is a draw node, where the first operation is to clear the previously rendered frame color or depth information.
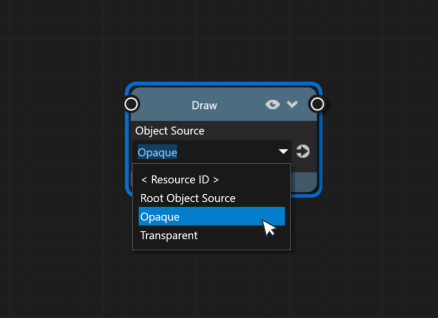
Draw node renders objects to screen or into a render target.
All the required nodes are now there with no errors, but they are not rendering anything on the screen yet. The next step is to make connections to complete the graph.
Tip
Use the Object Source property to define which objects to draw.
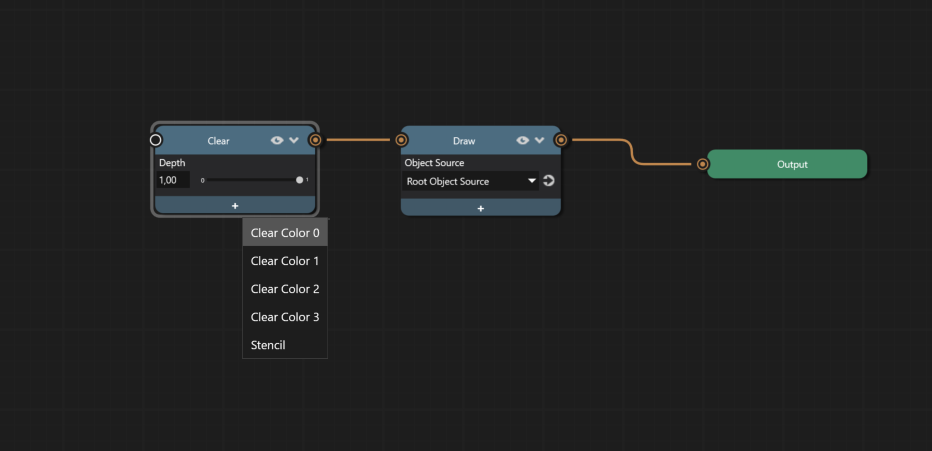
Connect the clear node to the draw node, and the draw node to the output node by dragging connections from the node output socket.
Once the connections are done, your graph is now valid and complete. You should now see 3D objects being rendered in your preview window.
Modify node properties
You can modify each node by adding new properties to it. Next, add a color property to the clear node to change rendering background color.
Click the + icon below the clear node and add the Clear Color 0 property to it.
Adjust the background color by adjusting the color property.