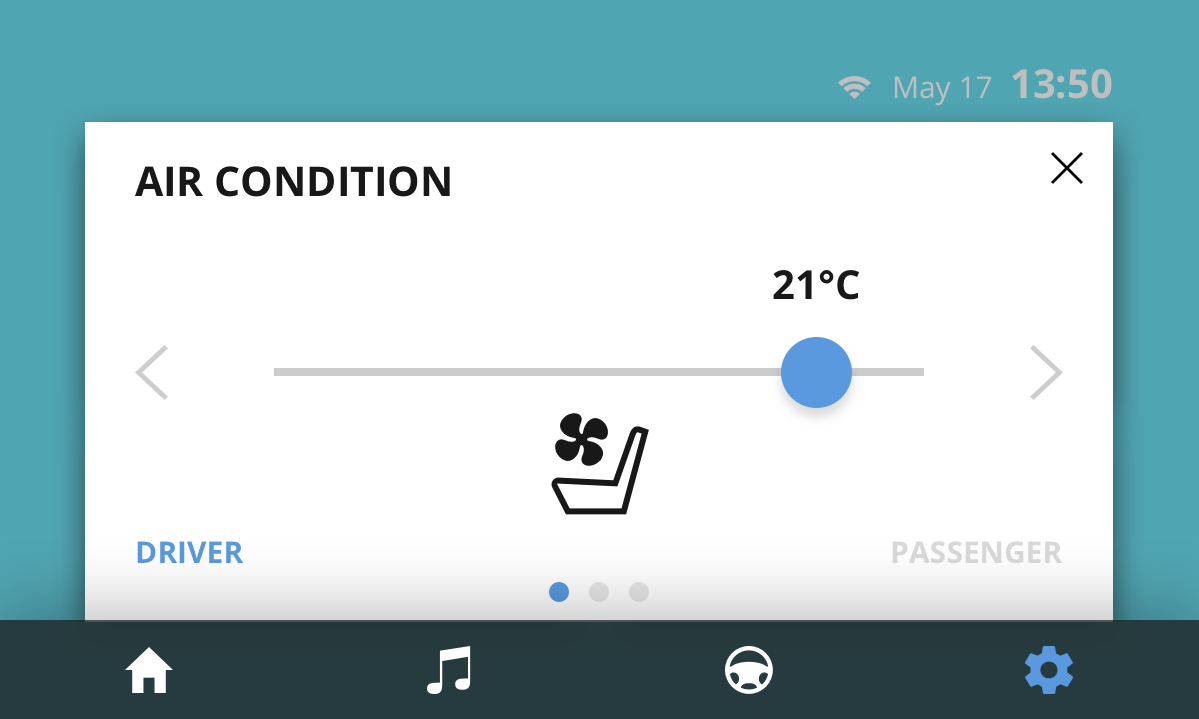
Step 4 - Create a popup window
In this step of the tutorial you use the Kanzi Engine API to show the content of a Page or Page Host node as a popup window.
Create the structure for the Settings popup window
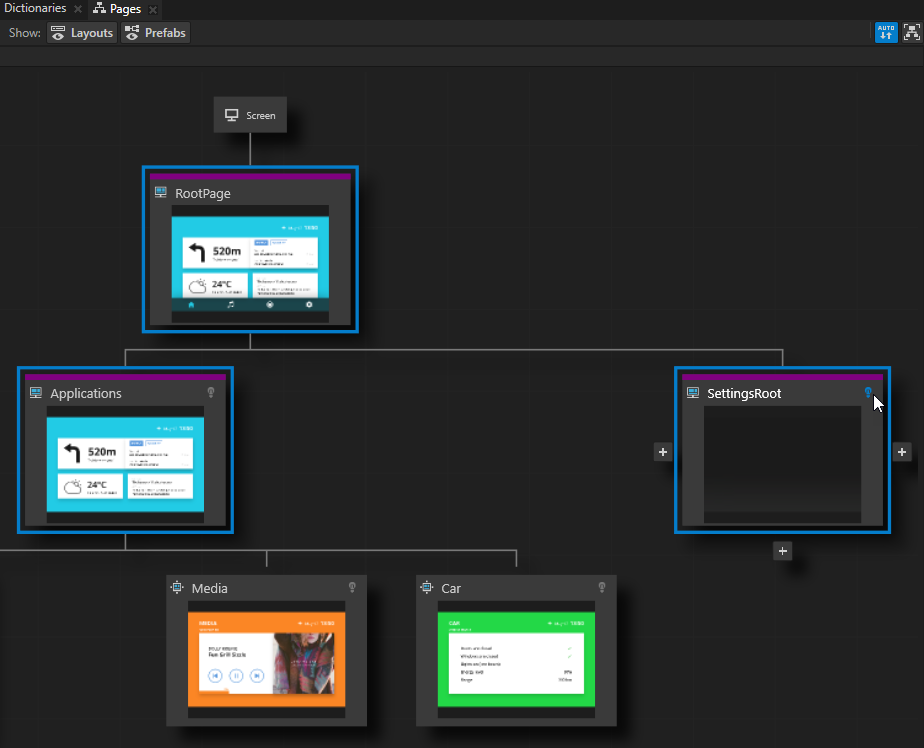
In this section you add structure to the SettingsRoot node and set it up so that it is shown on top of the Home, Media, and Car applications.
If you always want to show the content of a Page or a Page Host node as a popup window on top of all the other content in your application, you have to place that Page or Page Host node as the last node in the node tree so that Kanzi always renders it on top of everything.
To create the structure for the Settings popup window:
In the Pages in the top-right corner of the Page Host node SettingsRoot click
 to enable the Keep Active property.
When you enable the Keep Active property Kanzi activates that Page or Page Host node whenever its parent Page or Page Host node is active. When a Page or a Page Host node is active its content is shown and you can interact with it. Because you use the SettingsRoot node to hold content that is shown in the application user interface as a popup window on top of all the other application content, the SettingsRoot node itself is empty and shows content from its child Page nodes.
In the Pages at the bottom of the Page Host node SettingsRoot click
 to create a child Page node under that node, and name it Settings.
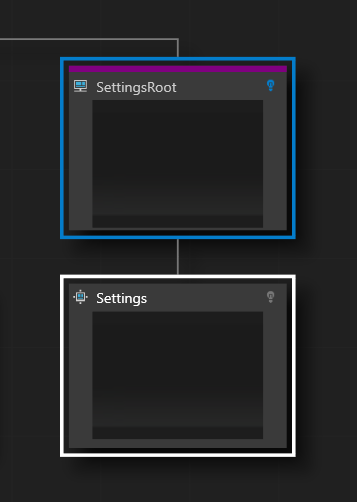
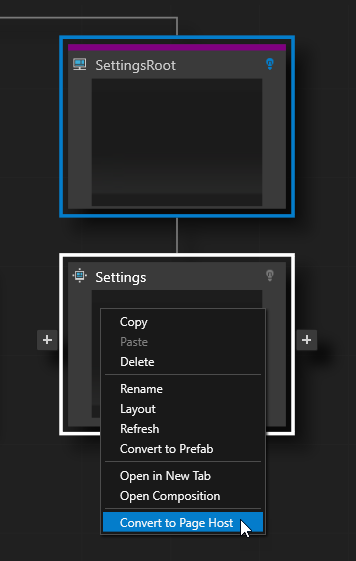
Right-click the Settings node you created in the previous step and select Convert to Page Host.
You convert the Page node Settings to a Page Host node so that you can close the Settings popup window by navigating to its parent node.
In the Pages at the bottom of the Settings node click
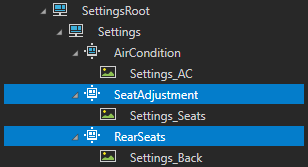
three times to create three child Page nodes under the Settings node, and name them AirCondition, SeatAdjustment, and RearSeats.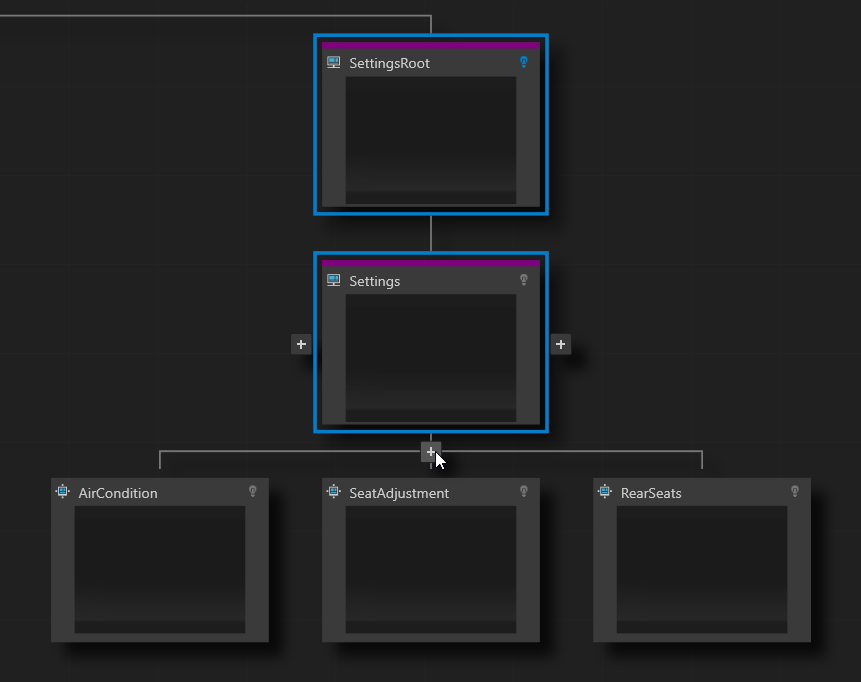
From the Assets drag to the Pages window:
Settings_AC texture to the AirCondition node
Settings_Seats texture to the SeatAdjustment node
Settings_Back texture to the RearSeats node
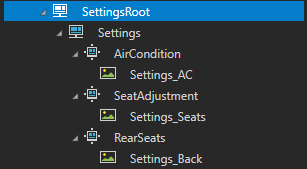
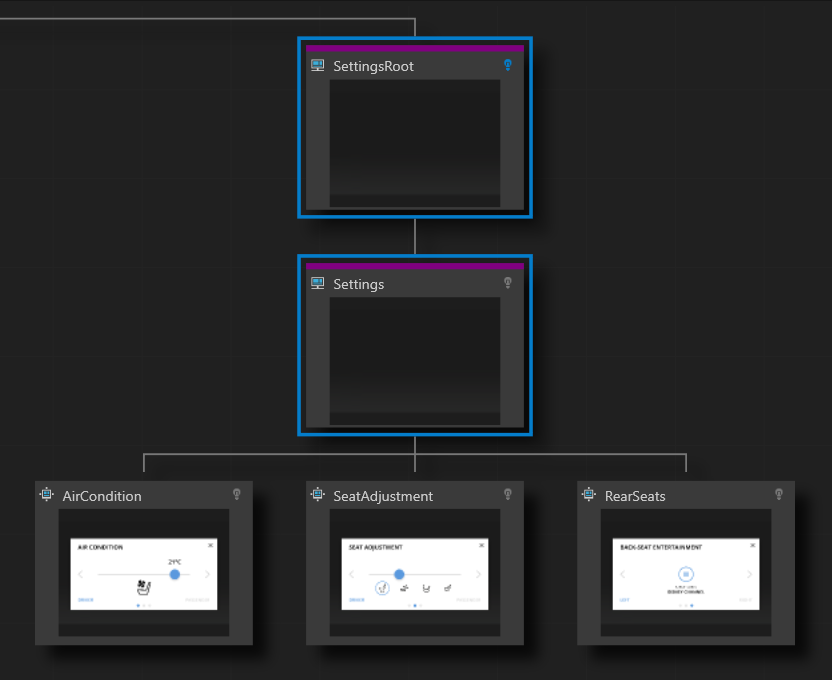
In the Node Tree select the Settings Page Host node and in the Properties set the Default Subpage property to the AirCondition node.

Dim the selected Page node when the Settings popup window is open:
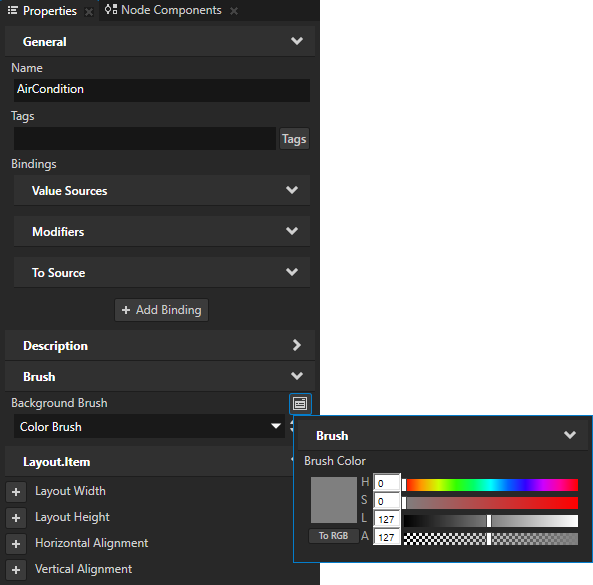
In the Node Tree select the AirCondition node, in the Properties add the Background Brush property, select + Color Brush, click
 next to the property name, and set the Alpha (A) to 127 to make the Color Brush transparent gray.
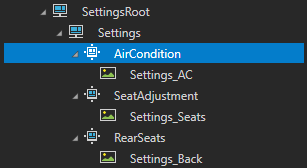
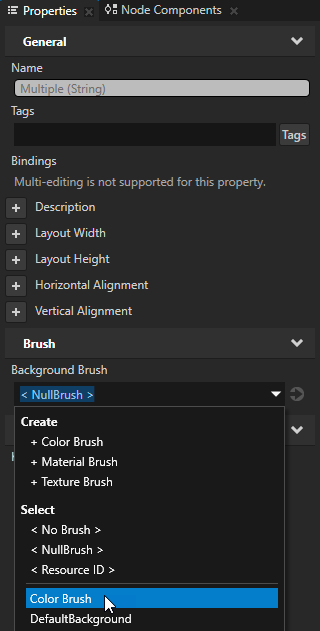
In the Node Tree select the SeatAdjustment and RearSeats nodes, in the Properties add the Background Brush property, and set it to the Color Brush you created in the previous step.
Create the navigation for the Settings popup window
In this section you create the navigation for the Page nodes AirCondition, SeatAdjustment, and RearSeats in the Settings popup window. With the navigation you enable the users to navigate between Page nodes in the Page Host node Settings, and close the popup window.
To create the navigation for the Settings popup window:
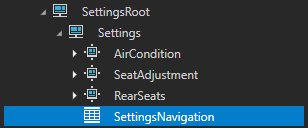
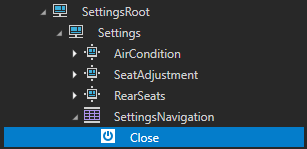
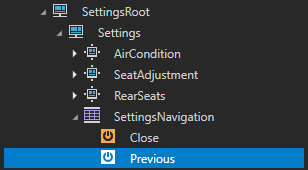
In the Node Tree press Alt and right-click the Settings node, select Grid Layout 2D, and name it SettingsNavigation.
In the Preview use the Node tool
 to position and resize the SettingsNavigation node so that it covers the close, previous, and next buttons in the Image node Settings_AC.
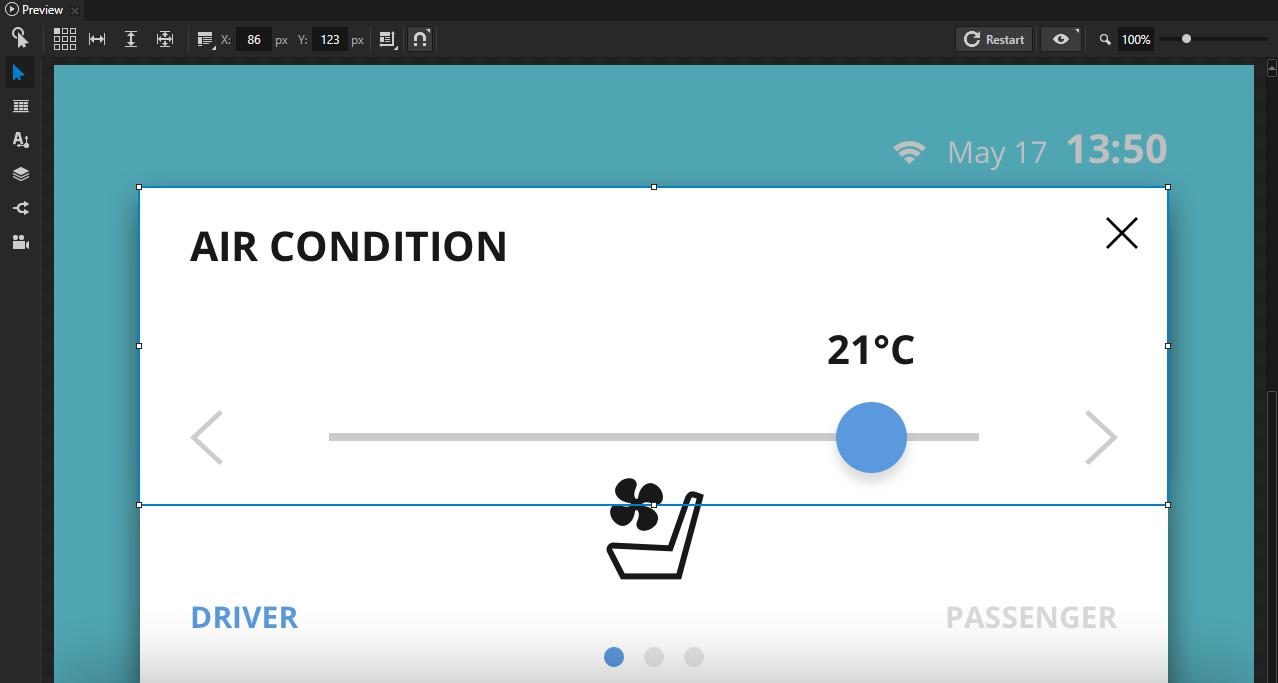
In the Node Tree select the SettingsNavigation node and in the Properties:
In the Columns and Rows click
 to remove one column and one row.
You need only two columns and two rows in the Grid Layout 2D node. You use the first row and second column for the close button, and both columns in the second row for the previous and next buttons.
Set all columns and rows to Proportional.
This way each column and row takes an equal amount of space in the Grid Layout 2D node.

Create the navigation buttons:
In the Node Tree in the SettingsNavigation node create a Button 2D node and name it Close.
In the Node Tree select the Close node and in the bottom-right corner of the Properties click
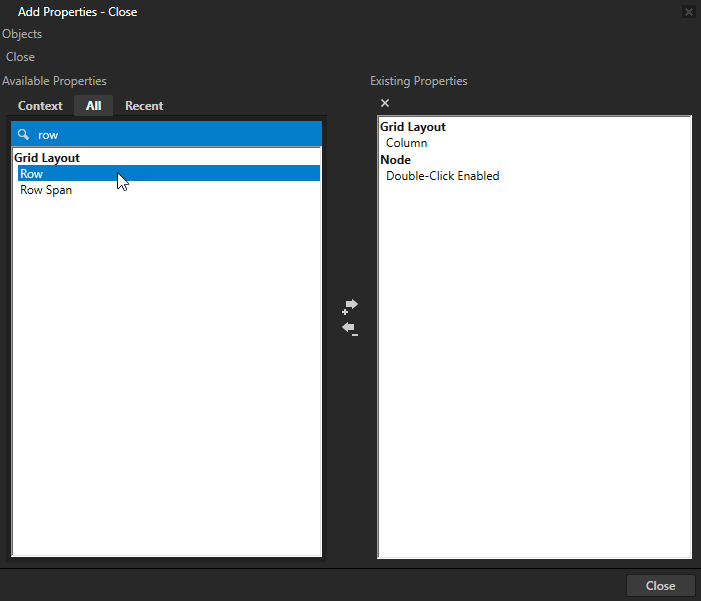
 to open the Add Properties window. In the left column of the Add Properties window double-click the Column and Row properties to add them to the node you selected.
In the left column of the Add Properties window that opens you can see which properties you can add to the node you selected in the Node Tree window.
Tip
To quickly find a property, type a few letters of the property name in the search box of the Add Properties window.
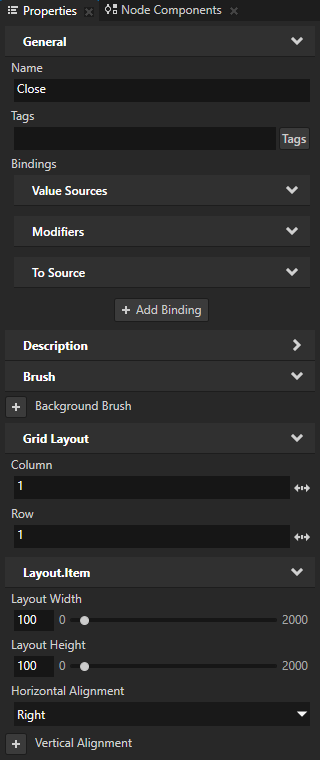
In the Node Tree select the Close node and in the Properties add and set:
Column to 1
Row to 0
Layout Width to 100
Layout Height to 100
Horizontal Alignment to Right
This way you place the Close node in the second column of the first row, set its size, and align it to the right side.
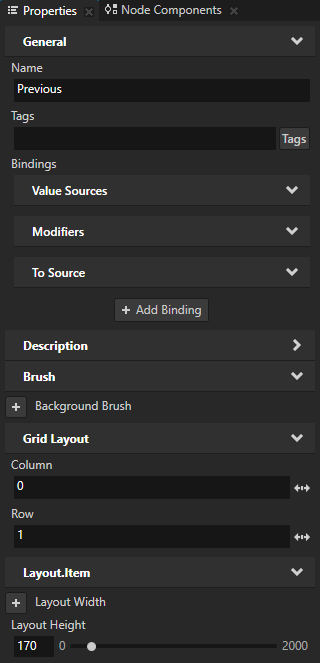
In the Node Tree in the SettingsNavigation node create a Button 2D node, name it Previous, and in the Properties add and set:
Column to 0
Row to 1
Layout Height to 170
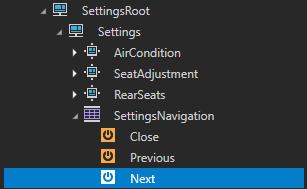
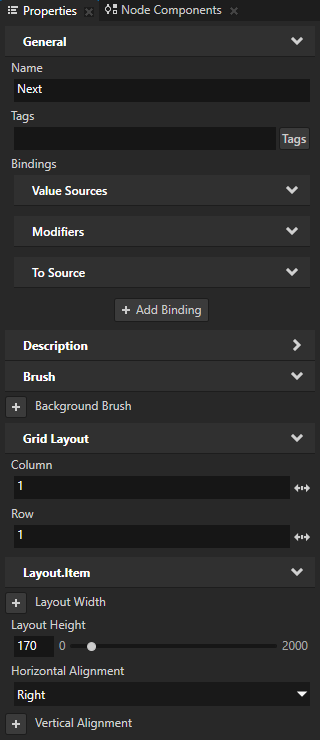
In the Node Tree right-click the Previous node, select Duplicate, press the F2 key, rename the new node to Next, and in the Properties set:
Column to 1
Horizontal Alignment to Right
Create aliases for nodes you need to access in the Kanzi Engine API:
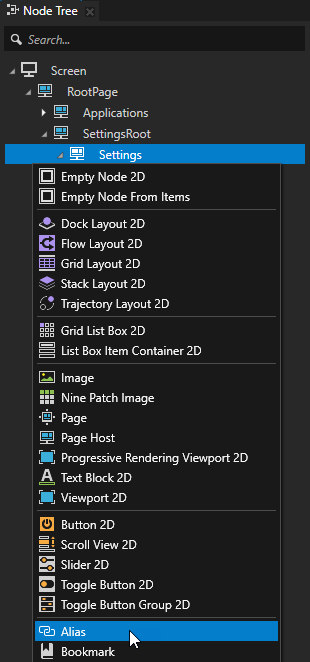
In the Node Tree press Alt and right-click the Settings node, and select Alias.
Use an Alias to get consistent access to a Kanzi node. You can use aliases to access nodes both in Kanzi Studio and using the Kanzi Engine API or scripting.
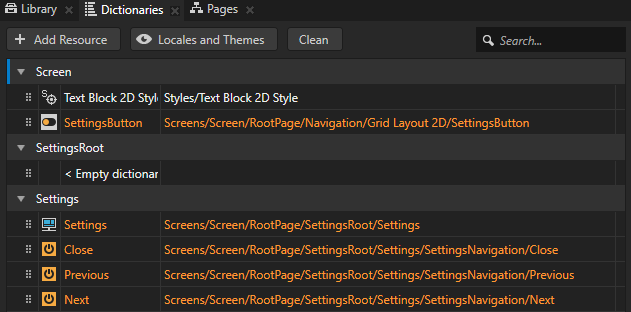
Repeat the previous step to create aliases for:
SettingsButton node
Close node
Previous node
Next node
You can see the aliases in your project in the Dictionaries window.
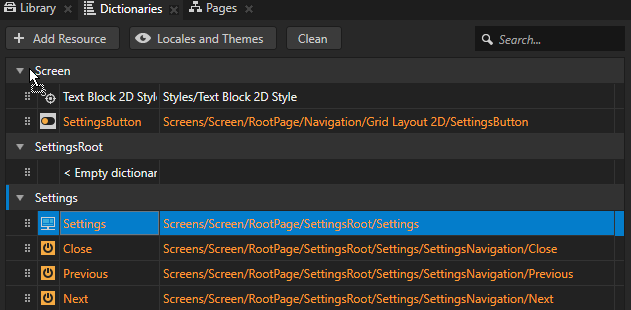
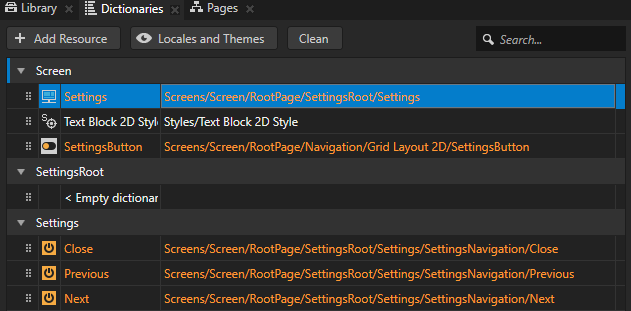
In the Dictionaries from the resource dictionary of the Settings node drag the Settings alias to the resource dictionary of the Screen node.
That way you can access the alias from the Screen node.
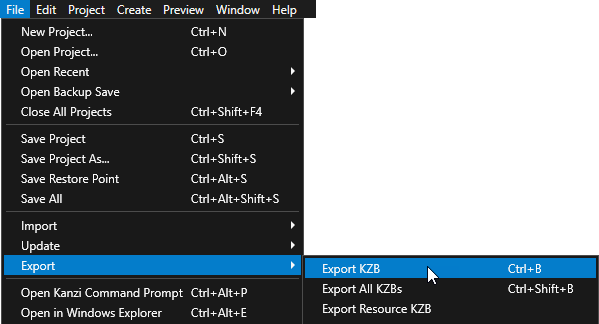
Select File > Export > Export KZB.
Kanzi Studio creates the kzb file and configuration files from your Kanzi Studio project. Kanzi Studio stores the exported files in the
<ProjectName>/Application/bindirectory or the location you set in Project > Properties in the Binary Export Directory property. The kzb file contains all nodes and resources from your Kanzi Studio project, except the resources you mark in a localization table as locale packs.When you run your Kanzi application from Visual Studio, your application loads the kzb file and configuration files.
Use the Kanzi Engine API to show the Settings node as a popup window
In this section you add code to your application to show the contents of the Settings node as a popup window and print to the Kanzi debug console the names of the Page nodes from and to which the user navigates.
To use the Kanzi Engine API to show the Settings node as a popup window:
Open the command line in the
<ProjectName>/Applicationdirectory and rungenerate_cmake_vs2017_solution.bat
This script generates a Visual Studio solution for the application in the directory
<ProjectName>/Application/build_vs2017.Tip
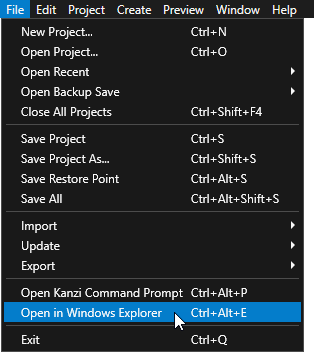
You can open the project directory from Kanzi Studio by selecting File > Open in Windows Explorer.
In Visual Studio open the
<ProjectName>/Application/build_vs2017/<ProjectName>.slnVisual Studio solution.For example, if you named your Kanzi Studio project Pages, the Visual Studio solution is called
Pages.sln.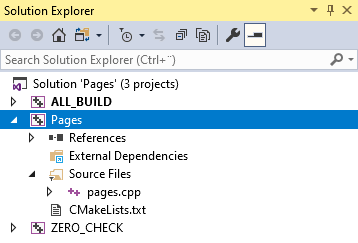
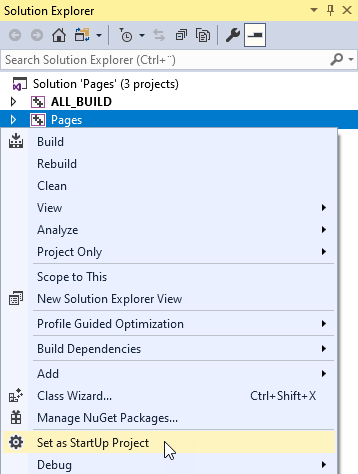
In Visual Studio in the Solution Explorer right-click the Pages project and select Set as StartUp Project.
In the
pages.cppfile in theonConfigurefunction set the size of the application window:class Pages : public ExampleApplication { public: void onConfigure(ApplicationProperties& configuration) override { // Set the size of the application window to match the size of the Screen node. configuration.defaultWindowProperties.width = 1200; configuration.defaultWindowProperties.height = 720; ... }
In the
pages.cppprivate section of thePagesclass add pointers for the Settings node and the SettingsButton node:private: Node2DSharedPtr m_settingsButton; PageHostSharedPtr m_settingsPageHost;
In the
onProjectLoadedfunction get the nodes you need to navigate in the Settings popup window:void onProjectLoaded() override { // Get the Screen node. ScreenSharedPtr screen = getScreen(); // Get the button which navigates to the Settings node. m_settingsButton = screen->lookupNode<Node2D>("#SettingsButton"); // Get the Settings node using the alias of that node. m_settingsPageHost = screen->lookupNode<PageHost>("#Settings"); }
In the private section of the
Pagesclass register the message handler for the SettingsButton node:private: // Define the handler for the ToggledOn message from the SettingsButton node. // When the user clicks the SettingsButton, navigate to the Settings page. void onSettingsButtonToggledOn(ButtonConcept::ToggledOnMessageArguments& /*message*/) { // Send a Navigate message to the Page Host node Settings to show that page. PageHost::NavigateMessageArguments args; m_settingsPageHost->dispatchMessage(PageHost::NavigateMessage, args); } // Define the handler for the ToggledOff message from the SettingsButton node. // When the user clicks the SettingsButton, close the Settings page. void onSettingsButtonToggledOff(ButtonConcept::ToggledOffMessageArguments& /*message*/) { // Send a NavigateParent message to the Page Host of the Page Host node Settings to close the Settings page. PageHost::NavigateParentMessageArguments args; m_settingsPageHost->dispatchMessage(PageHost::NavigateParentMessage, args); }
In the private section, after the message handlers for the SettingsButton node, add the message handlers for the Next, Previous, and Close buttons:
private:
    ...

    // Define the handler for the Button.Pressed message from the Next button.
    // When the user clicks the Next button, navigate to the next subpage of the Page Host node Settings.
    void onNextButtonClicked(ButtonConcept::PressedMessageArguments&)
    {
        // Send a NavigateNext message to the Page Host node Settings to navigate to the next subpage of that Page Host.
        PageHost::NavigateNextMessageArguments args;
        m_settingsPageHost->dispatchMessage(PageHost::NavigateNextMessage, args);
    }

    // Define the handler for the Button.Pressed message from the Previous button.
    // When the user clicks the Previous button, navigate to the previous subpage of the Page Host node Settings.
    void onPreviousButtonClicked(ButtonConcept::PressedMessageArguments&)
    {
        // Send a NavigatePrevious message to the Page Host node Settings to navigate to the previous subpage of that Page Host.
        PageHost::NavigatePreviousMessageArguments args;
        m_settingsPageHost->dispatchMessage(PageHost::NavigatePreviousMessage, args);
    }

    // Define the handler for the Button.Pressed message from the Close button.
    // When the user clicks the Close button, close the Settings node and navigate to the
    // Page node that is active.
    void onCloseButtonClicked(ButtonConcept::PressedMessageArguments&)
    {
        // Toggle off the SettingsButton. When the SettingsButton is toggled off, it sends a ToggledOff message
        // which the Application::onSettingsButtonToggledOff() function handles. This
        // handler function closes the Settings page by sending the NavigateParent message.
        m_settingsButton->setProperty(ButtonConcept::ToggleStateProperty, 0);
    }
In the
onProjectLoadedfunction register the message handlers you created in the previous step:void onProjectLoaded() override { ... // Define the handlers for the ToggledOnMessage and ToggledOffMessage messages from the SettingsButton node. m_settingsButton->addMessageHandler(ButtonConcept::ToggledOnMessage, bind(&Pages::onSettingsButtonToggledOn, this, placeholders::_1)); m_settingsButton->addMessageHandler(ButtonConcept::ToggledOffMessage, bind(&Pages::onSettingsButtonToggledOff, this, placeholders::_1)); // Register message handlers for the Button.Pressed messages from the navigation buttons in the Page Host node Settings. // Subscribe to the Button.Pressed message at the Next node. The Button 2D node Next generates this message when the user presses that button. Button2DSharedPtr gotoNextPageButton = m_settingsPageHost->lookupNode<Button2D>("#Next"); gotoNextPageButton->addMessageHandler(ButtonConcept::PressedMessage, bind(&Pages::onNextButtonClicked, this, placeholders::_1)); // Subscribe to the Button.Pressed message at the Previous node. The Button 2D node Previous generates this message when the user presses that button. Button2DSharedPtr gotoPreviousPageButton = m_settingsPageHost->lookupNode<Button2D>("#Previous"); gotoPreviousPageButton->addMessageHandler(ButtonConcept::PressedMessage, bind(&Pages::onPreviousButtonClicked, this, placeholders::_1)); // Subscribe to the Button.Pressed message at the Close node. The Button 2D node Close generates this message when the user presses that button. Button2DSharedPtr closeButton = m_settingsPageHost->lookupNode<Button2D>("#Close"); closeButton->addMessageHandler(ButtonConcept::PressedMessage, bind(&Pages::onCloseButtonClicked, this, placeholders::_1)); }
In the private section after the
onCloseButtonClickedfunction add handlers which print to the Kanzi debug console the name of the Page and Page Host nodes between which the user navigates:private: ... // Define the handler for the Page.NavigationStarted message from each Page Host node. // When page navigation starts, print to the Kanzi debug console // the name of the Page Host node from which that navigation starts. void onPageNavigationStarted(PageHost::NavigationStartedMessageArguments& message) { kzLogInfo(KZ_LOG_CATEGORY_GENERIC, ("Page navigation started: {}", message.getSource()->getName())); } // Define the handler for the Page.NavigationFinished message from each Page Host node. // When page navigation finishes, print to the Kanzi debug console // the name of the Page Host node to which that navigation finishes. void onPageNavigationFinished(PageHost::NavigationFinishedMessageArguments& message) { kzLogInfo(KZ_LOG_CATEGORY_GENERIC, ("Page navigation finished: {}", message.getSource()->getName())); } // Define the handler for the Page.Activated message from each Page node. // When a Page node becomes active, print to the Kanzi debug console // the name of that Page node. void onPageActivated(Page::ActivatedMessageArguments& message) { kzLogInfo(KZ_LOG_CATEGORY_GENERIC, ("Page activated: {}", message.getSource()->getName())); } // Define the handler for the Page.Deactivated message from each Page node. // When a Page node is deactivated, print to the Kanzi debug console // the name of that Page node. void onPageDeactivated(Page::DeactivatedMessageArguments& message) { kzLogInfo(KZ_LOG_CATEGORY_GENERIC, ("Page deactivated: {}", message.getSource()->getName())); }
In the
onProjectLoadedfunction add the message filters that you use to keep track of the page navigation:void onProjectLoaded() override { ... // Add message filters to listen to the navigation between the Page and Page Host nodes. // These message filters allow Kanzi to keep track of the page navigation in the application, // which is useful for debugging. screen->addMessageFilter(PageHost::NavigationStartedMessage, bind(&Pages::onPageNavigationStarted, this, placeholders::_1)); screen->addMessageFilter(PageHost::NavigationFinishedMessage, bind(&Pages::onPageNavigationFinished, this, placeholders::_1)); screen->addMessageFilter(Page::ActivatedMessage, bind(&Pages::onPageActivated, this, placeholders::_1)); screen->addMessageFilter(Page::DeactivatedMessage, bind(&Pages::onPageDeactivated, this, placeholders::_1)); }
Select the solution configuration that you want to use and run your application.
During development select the Debug configuration. When you are ready to create a version for production, select the Release configuration.
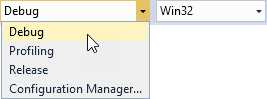
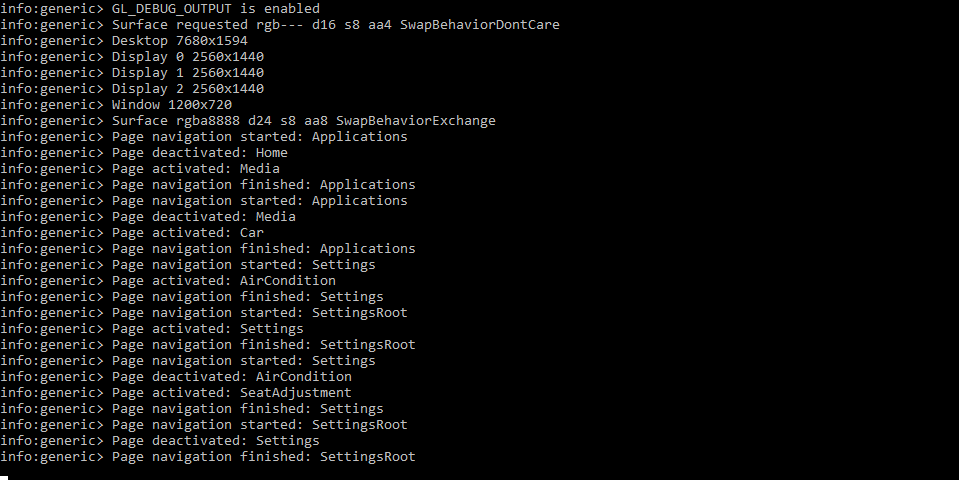
To see the page navigation messages in the Kanzi debug console, select the Debug configuration.
When you run the application, you can navigate to the Settings popup page and browse the subpages of that page. Each time you navigate to a page in the application, Kanzi prints the names of the Page Host nodes between which you navigate as well as the Page or Page Host nodes which are activated and deactivated.
What’s next?
In this tutorial you learned how to create application flow and structure with the Page and Page Host nodes using the Pages tools. To continue learning Kanzi you can:
Learn how to define an XML data source and how to use the data from that data source in a Kanzi Studio project to provide the data to a Kanzi application. See Tutorial: Get application data from a data source.
Learn how to create user interfaces that respond to the changes of the device screen resolution. See Tutorial: Making applications with dynamic layout.
Learn how to use the Kanzi Engine API to create an application. See Tutorial: Kanzi Engine API advanced use.
See also
To find out more about the Page and Page Host nodes, see Using the Page and Page Host nodes.
To find out more about working with the state managers, see Using state managers.
To find out more about working with triggers and actions, see Triggers.