Tutorial: Use JavaScript to control your application state
In this tutorial you learn how to set the state of your application using a JavaScript script. In the tutorial you create a fuel gauge, add a state manager which sets the gauge color, and use a JavaScript script to control the gauge state.
Note
This tutorial contains JavaScript. You can use JavaScript only on Windows operating system and only for prototyping.
This video shows the result of the tutorial.
This tutorial assumes that you understand the basics of working with Kanzi Studio. The best entry points for getting familiar with Kanzi Studio are:
Assets for the tutorial
The starting point of this tutorial is the Scripting states.kzproj Kanzi Studio project file stored in the <KanziWorkspace>/Tutorials/Scripting states/Start directory.
The <KanziWorkspace>/Tutorials/Scripting states/Completed directory contains the completed Kanzi Studio project of this tutorial.
Create the fuel level indicator
In this section you create the fuel level indicator which displays the amount of fuel on the fuel gauge. You create the brushes that you use for the colors on the fuel level indicator. In the next section you create a state manager that sets a brush for each state.
To create the fuel level indicator for the fuel gauge:
Open the starting point project located in the
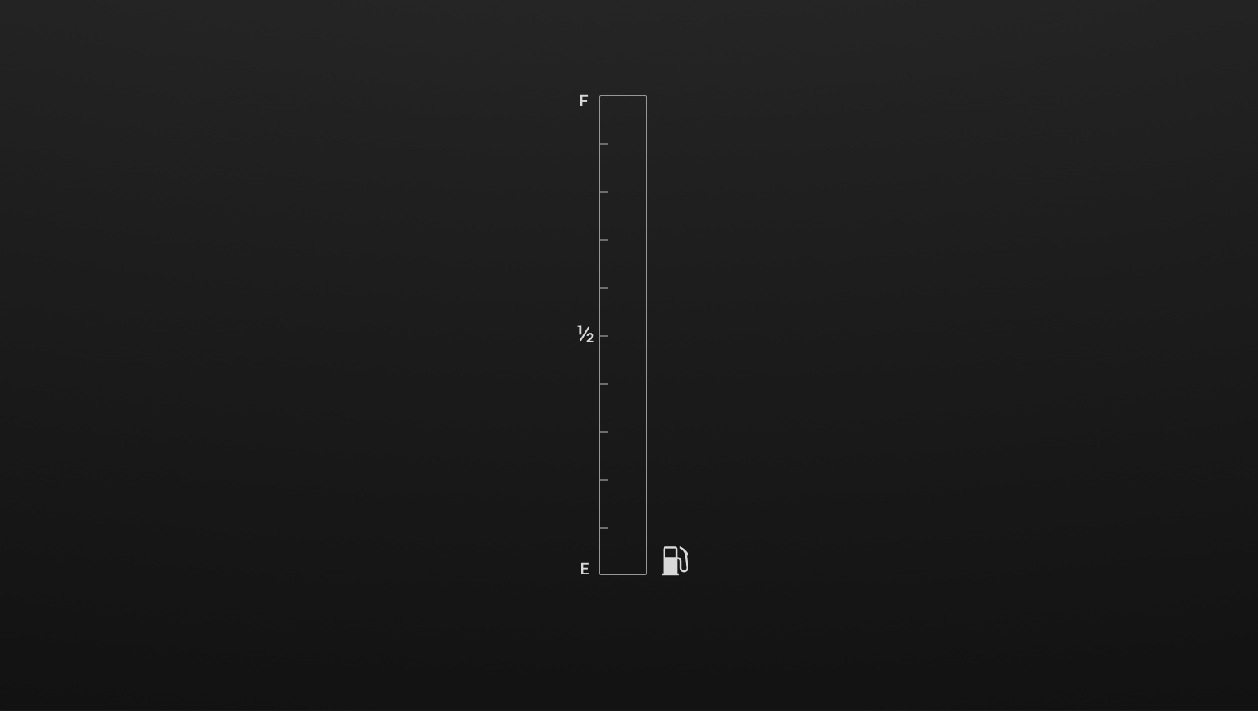
<KanziWorkspace>/Tutorials/Scripting states/Startdirectory.The starting point project contains an Image node called FuelGauge, which sets the appearance of the fuel gauge.
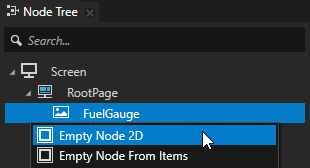
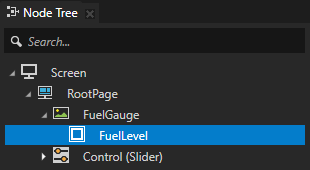
In the Node Tree press Alt and right-click the FuelGauge node, select Empty Node 2D, and name it FuelLevel.
You use the FuelLevel node to create the fuel level indicator for the gauge.

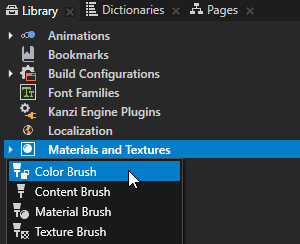
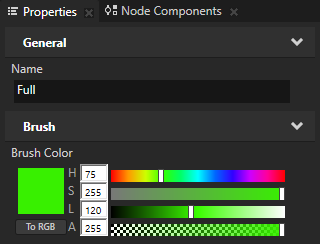
In the Library press Alt and right-click Materials and Textures, select Color Brush, name it Full, and in the Properties set:
Hue (H) to 75
Saturation (S) to 255
Lightness (L) to 120
You use this brush to set the color of the fuel gauge when it is full.
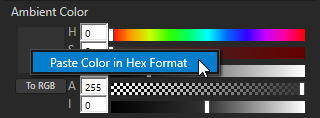
Tip
In Kanzi Studio you can apply color in hexadecimal format to all properties that set a color. In a tool that you use to set the color, copy the hexadecimal code of a color, in Kanzi Studio in the Properties right-click the color swatch of the property for which you want to use that color, and select Paste Color in Hex Format.
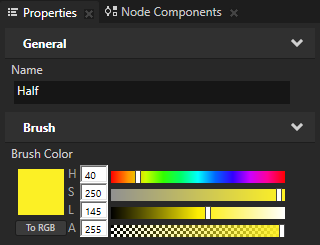
Repeat the previous step twice to create two more color brushes, but name them Half and Empty, and in the Properties:
For the Half brush set the Brush Color property to:
Hue (H) to 40
Saturation (S) to 250
Lightness (L) to 145
For the Empty brush set the Brush Color property to:
Hue (H) to 5
Saturation (S) to 255
Lightness (L) to 140
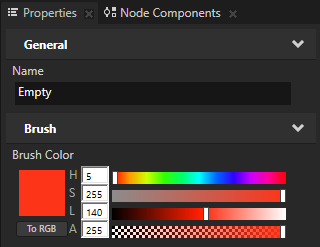
You use these brushes to set the color of the fuel level indicator when it is half full or empty.
Define the states for the fuel indicator
In this section you create a state manager with states that set how the fuel indicator looks when the level of fuel is full, half full, and empty. To indicate the amount of fuel, in each of the states you use one of the color brushes you created in the previous section.
To define the states for the fuel indicator:
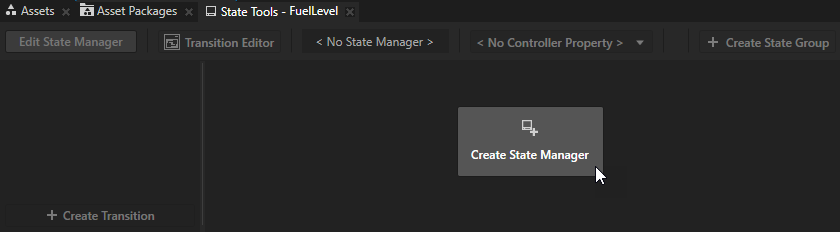
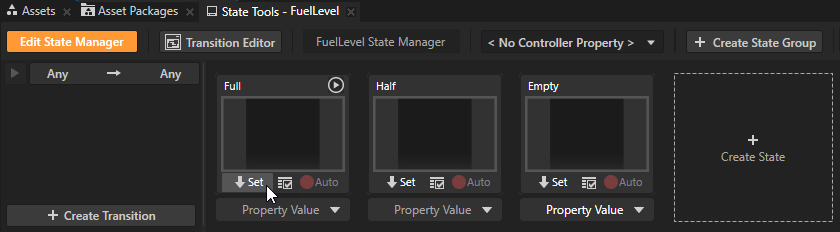
In the Node Tree select the RootPage > FuelGauge > FuelLevel node, in the State Tools click Create State Manager to create and add the state manager to the FuelLevel node.
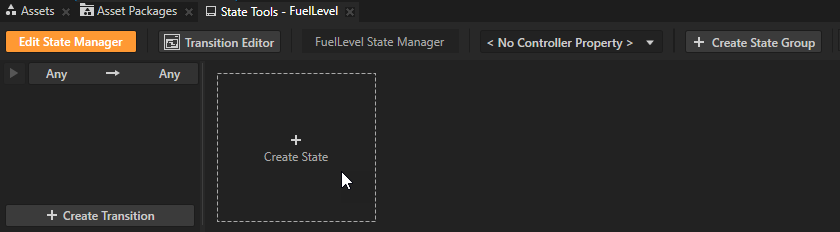
In the State Tools click Create State three times to create three states, and double-click the name of each state to rename them Full, Half, and Empty.
You use each state to set the color of the fuel indicator when the application is in that state.

In the Node Tree select the FuelLevel node, in the Properties click
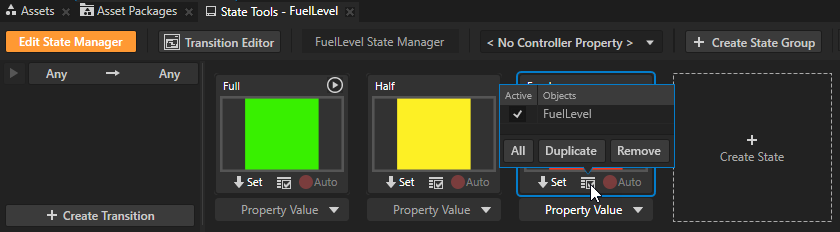
 next to the Background Brush property to add that property, set it to Full, and in the State Tools click
  in the Full state to set the value of the Background Brush property to that state.
You set the fuel indicator color to green in the Full state.
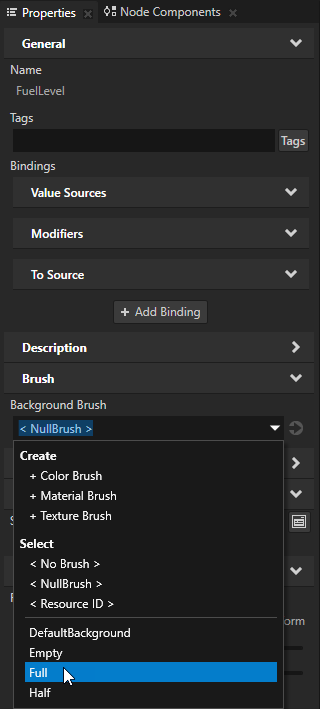
Repeat the previous step for the Half and Empty states, but set the Background Brush to the Half Color Brush in the Half state, and to the Empty Color Brush in the Empty state.
You set the fuel indicator color to yellow in the Half state, and red in the Empty state. Kanzi sets the first state you create, in this case the Full state, as the initial state. The initial state is the state that Kanzi uses when the application first starts. In the State Tools the initial state has the
 icon.
icon.Tip
You can set a state as the initial state by right-clicking the state and selecting Set as initial state in this group.
In the State Tools click Edit State Manager to deactivate the State Tools.
Tip
When State Tools are switched on Kanzi Studio keeps track of all property changes in your project. For this reason it is a good practice to switch the State Tools off when you are done setting the states in a specific state manager.
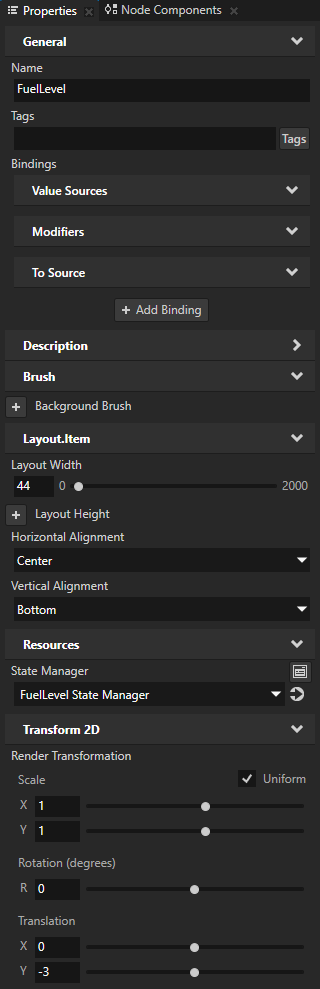
In the Node Tree select the FuelLevel node, and in the Properties add and set:
Layout Width to 44
This way you set the width of the fuel level indicator to fit the fuel gauge.
Horizontal Alignment to Center
This way you position the fuel level indicator inside the fuel gauge.
Vertical Alignment to Bottom
This way you position the fuel level indicator to the bottom of the fuel gauge.
Render Transformation property Translation Y property field to -3
This way you position the fuel level indicator to fit exactly in the fuel gauge.
Tip
To add a property, right-click in the Properties, select Add Property, and then select the property you want to add.
For example, to add the Render Transformation property, right-click in the Properties, and select Add Property > Transform 2D > Render Transformation.
Create a slider to simulate the fuel level
In this section you create a slider, which you use to simulate the fuel level. You bind the Layout Height property of the FuelLevel node to the value of the slider so that when you move the slider knob, you change the height of the fuel level indicator.
To create a slider to simulate the fuel level:
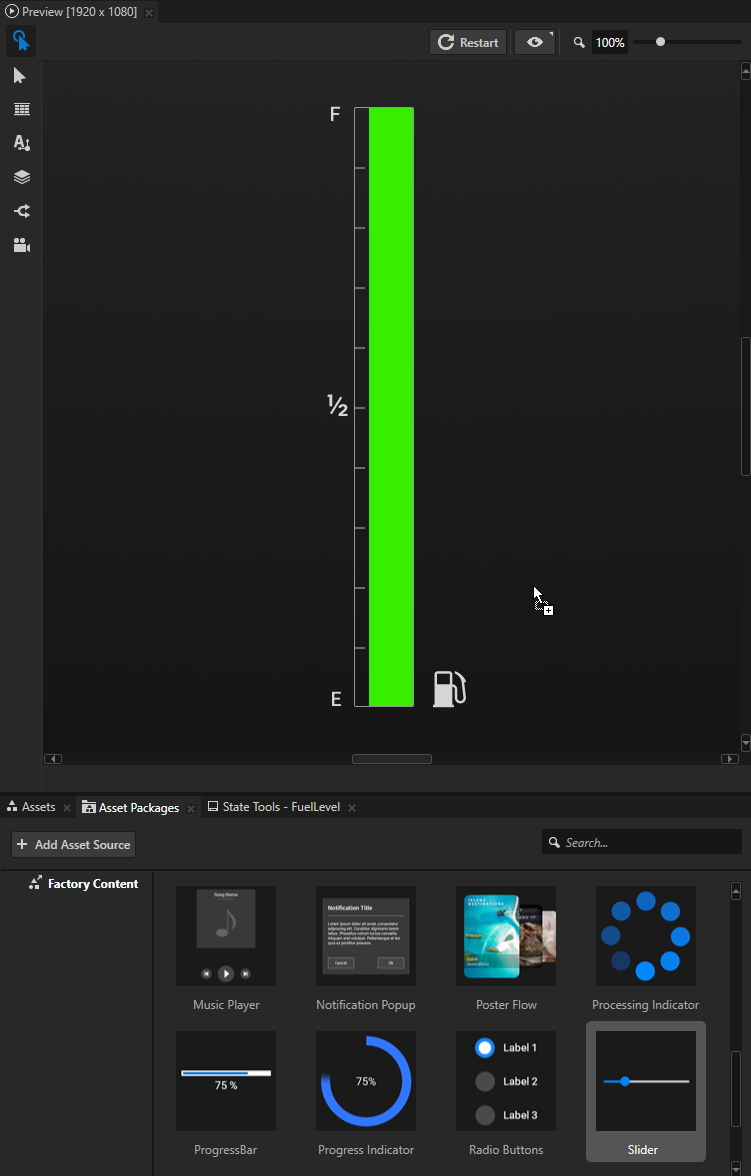
In the Asset Packages window select the Factory Content asset source.
The Factory Content asset packages contain ready-made components and materials that you can use to create prototype projects faster.
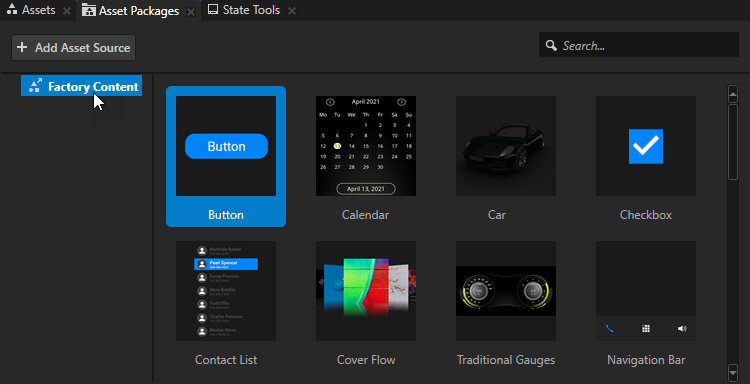
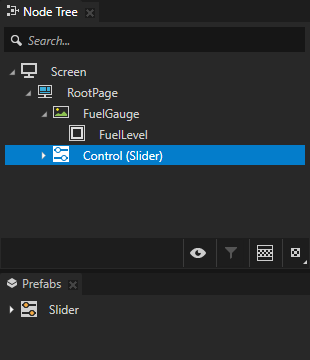
From the Asset Packages > Factory Content drag the Slider to the Preview, in the Node Tree select the Slider node, press F2, and rename it to Control.
The Slider asset is a ready-made component, which you can use to create a slider which receives user input.
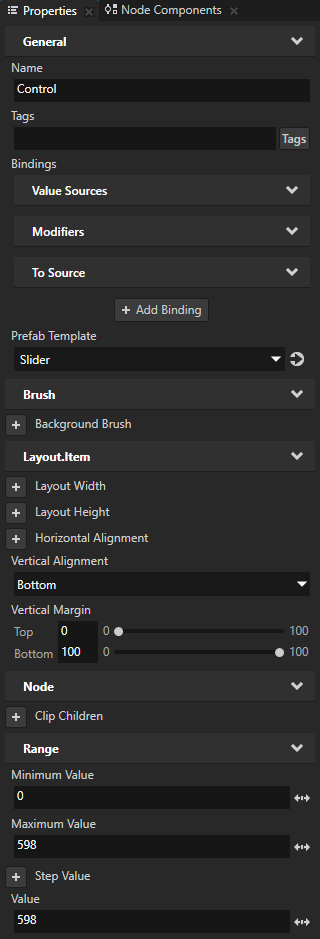
In the Node Tree select the Control node, and in the Properties add and set:
Vertical Alignment to Bottom
Vertical Margin Bottom property field to 100
Minimum Value to 0
This way you set the lowest value of the slider.
Maximum Value to 598
This way you set the highest value of the slider to match the height of the fuel level indicator.
Value to 598
This way you set the default value of the slider to the highest value to set the initial state of the fuel level indicator to Full.
Default Color property Lightness (L) property field to 76
This way you make the inactive slider rail dark gray.
Fill Color and Knob Color properties:
Hue (H) property field to 0
Saturation (S) property field to 0
Lightness (L) property field to 216
This way you make the slider knob and the active slider rail light gray.

Control the fuel level indicator using the slider:
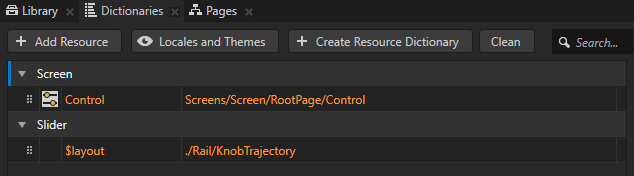
In the Node Tree press Alt and right-click the Control node, and select Alias.
Kanzi Studio creates an alias pointing to the node from which you created the alias and adds it to the resource dictionary of its nearest ancestor node that contains a resource dictionary.
Here you use the alias to access the Control node when you bind the position of the slider to the height of the FuelLevel node.
Tip
You can see in the Dictionaries window the list of resources in the resource dictionaries that the node selected in the Node Tree can access.

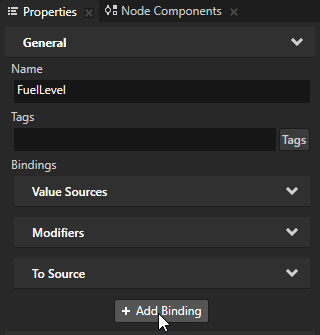
In the Node Tree select the FuelLevel node, and in the Properties click + Add Binding to add a binding.
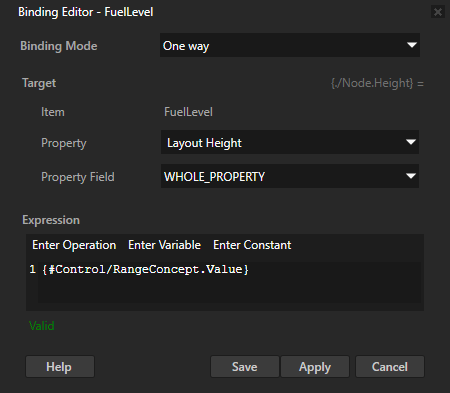
In the Binding Editor set:
Property to Layout Height
Expression to
{#Control/RangeConcept.Value}
Click Save.
With this binding you bind the Value property of the Control slider component to the Layout Height property of the fuel level indicator.
Tip
You can retrieve alias target nodes with bindings, the Kanzi Engine API, or scripting using the hash sign (
#) followed by the name of the alias, regardless of the node location in the project.For example, use #Control to access the Control slider node using its alias.
Tip
When you write expressions for bindings in the Binding Editor, the fastest and most accurate way to add nodes and their properties to an expression is to drag them from the Properties to the Expression editor in the Binding Editor.
For example, to add the Value property of the Slider node, in the Node Tree select the Slider node and from the Properties drag the Value property to the Expression field in the Binding Editor.
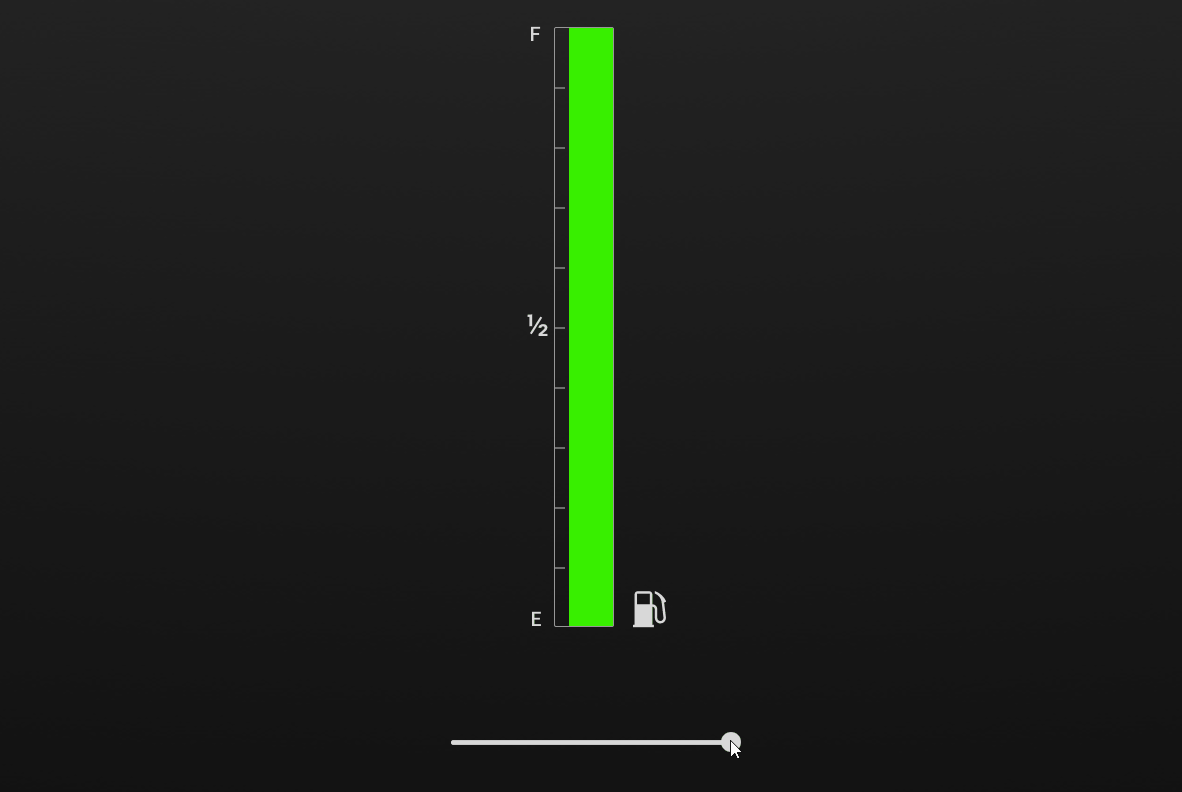
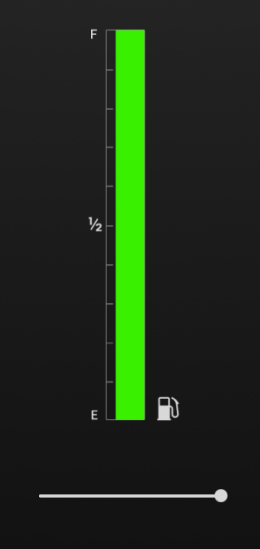
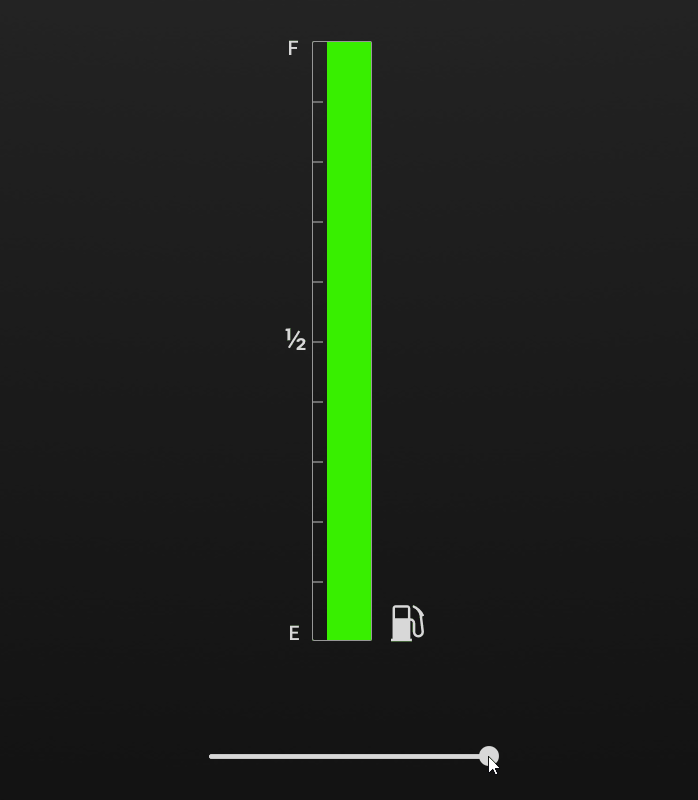
In the Preview when you drag the slider knob, you change the value of the Layout Height property in the FuelLevel node. You set the height of the fuel level indicator based on the position of the slider knob.
Create a JavaScript script to control the state of the fuel gauge
In this section you create a JavaScript script to control the state of the fuel gauge. The script sets the application state to either Full, Half, or Empty every time you move the slider.
To create a JavaScript script to control the state of the fuel gauge:
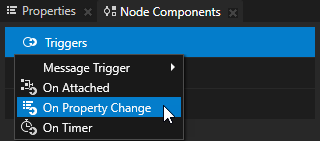
In the Node Tree select the RootPage > FuelGauge > FuelLevel node, in the Node Components press Alt and right-click Triggers, and select On Property Change.
Kanzi executes the On Property Change trigger when the set property value changes.
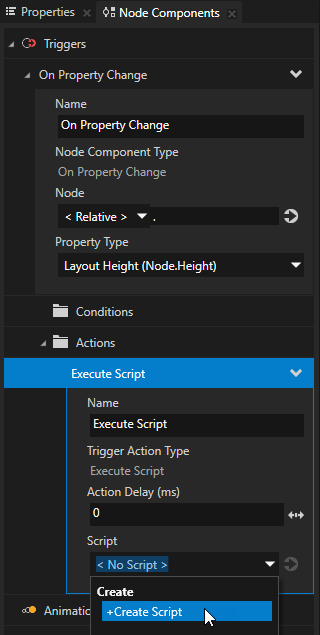
In the Node Components in the On Property Change trigger set Property Type to Layout Height.
You set Kanzi to execute the On Property Change trigger when the value of the Layout Height property in the FuelLevel node changes.

In the Node Components press Alt and right-click the On Property Change trigger, and select the Execute Script action.
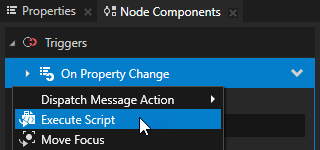
In the Execute Script action in the Script dropdown menu select + Create Script to create a script.
In the Script Editor enter this script and click Save.
// Get the Layout Height property of the FuelLevel node.
var height = node.getProperty("Node.Height");

// Set the state to Empty if the Layout Height is less than or equals 60 pixels.
// Set the state to Half if the Layout Height is more than 60 but
// less than or equals 300 pixels.
// If the Layout Height is more than 300 pixels, set the state to Full.
if (height <= 60)
{
    node.goToState("StateGroup.Empty");
}
else if (height > 60 && height <= 300)
{
    node.goToState("StateGroup.Half");
}
else
{
    node.goToState("StateGroup.Full");
}
Kanzi executes the JavaScript script, which sets the application state to either Full, Half, or Empty every time you move the slider.
In the Preview when you drag the knob on the slider, the FuelLevel state changes based on the value of the Layout Height property of the FuelLevel node.
When the height of the FuelLevel node is:
300 pixels or more, set the state to Full.
between 60 and 299, set the state to Half.
60 pixels or less, set the state to Empty.
What’s next?
In this tutorial you learned how to use a JavaScript script to control the state of an application. Now you can:
Learn the basics about using state managers. See Using state managers and Tutorial: Use state managers to control your application.
Learn the basics of using scripts in Kanzi. See Using scripts.
Learn how to use JavaScript scripts in Kanzi Studio to create a demo mode of your application. See Tutorial: Use JavaScript to create a demo mode.
Learn more about using state managers and creating transitions between states. See Tutorial: Use state managers to control your application.
See also
Tutorial: Use JavaScript to create a demo mode