Step 1 - Create the demo mode
In this step of the tutorial you create scripts which run the application in this tutorial in the demo mode. The scripts move the gauge needles, switch turn indicators on and off, and get the current time from the device that is running the application.
Assets for the tutorial
The starting point of this tutorial is the Demo.kzproj Kanzi Studio project file stored in the <KanziWorkspace>/Tutorials/Demo/Start directory.
The <KanziWorkspace>/Tutorials/Demo/Completed directory contains the completed project of this tutorial.
The starting point project contains the content that you need to complete this tutorial:
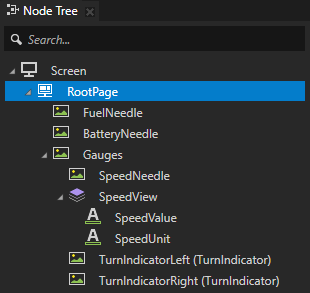
2D cluster with working speed, fuel, and battery gauge needles, and turn indicators.
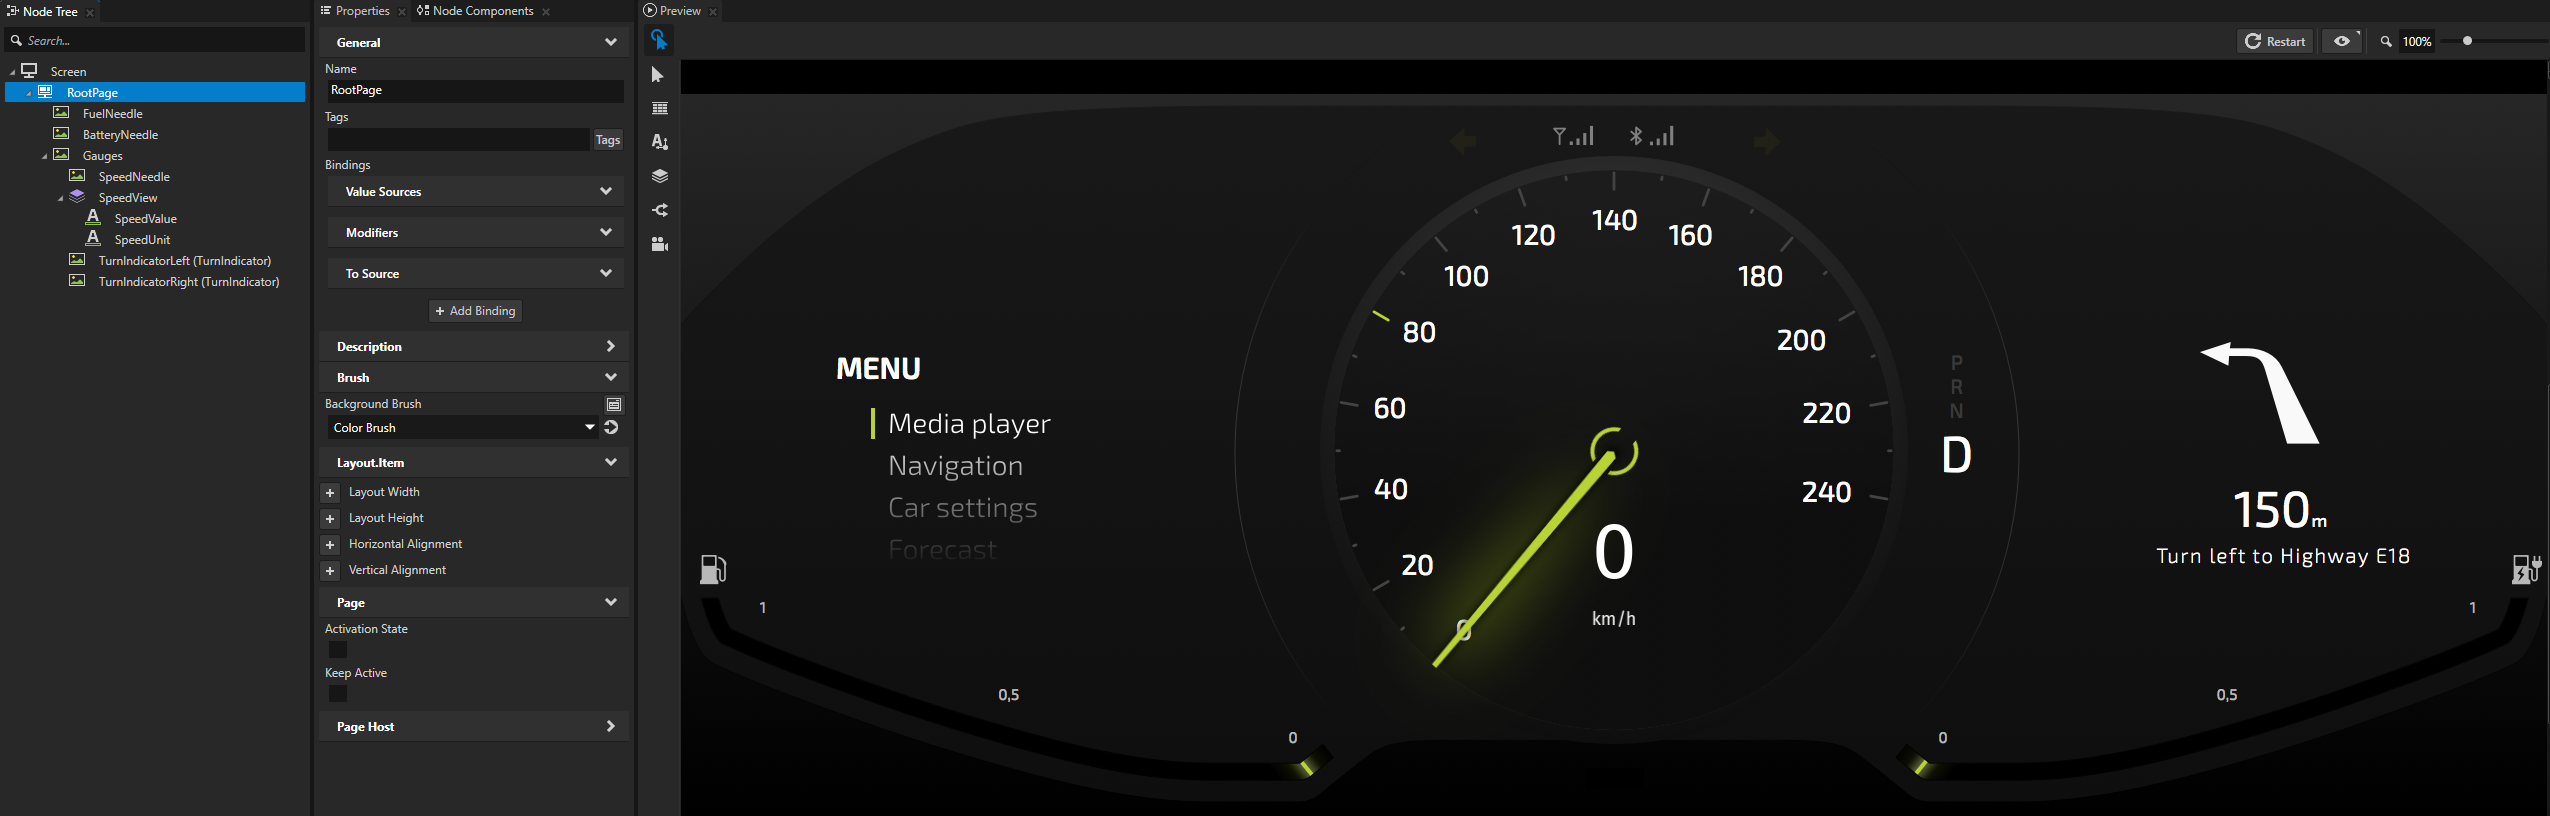
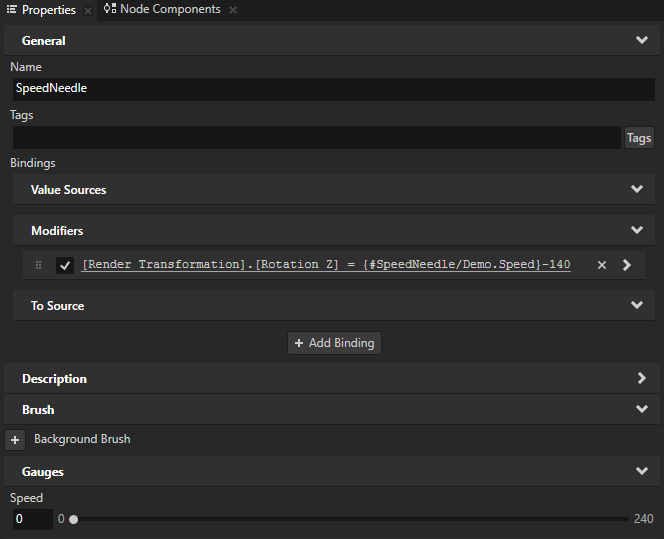
The FuelNeedle, BatteryNeedle, and SpeedNeedle nodes each have a binding that binds the Render Transformation property Rotation Z property field of these nodes to the Fuel, Battery, and Speed properties in these nodes.
For example, in the SpeedNeedle node when you change the value of the Speed property, the SpeedNeedle node rotates.
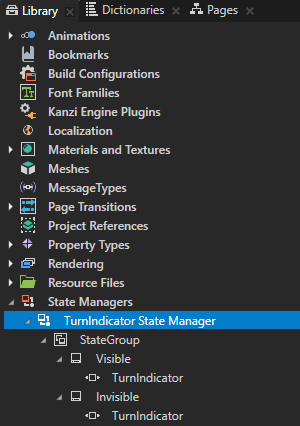
The TurnIndicator prefab uses the TurnIndicator State Manager that controls the visibility of the turn indicators.

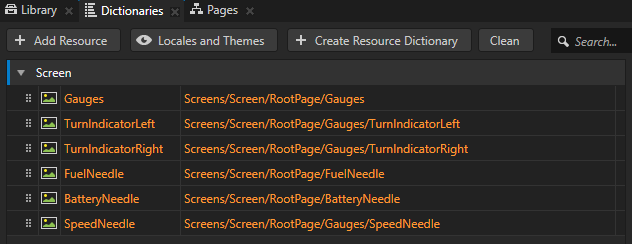
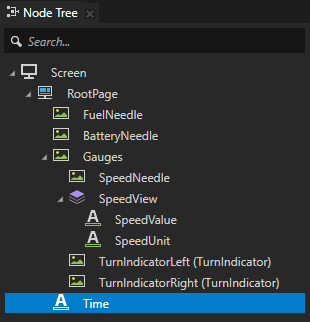
The resource dictionary of the Screen node contains aliases that point to the nodes that show the needles and turn indicators. You use these aliases in this tutorial to access those nodes in state managers, scripts, and bindings.
Move the speed, fuel, and battery needles
In the starting point project of this tutorial the FuelNeedle, BatteryNeedle, and SpeedNeedle nodes each have a binding that binds the Render Transformation property Rotation Z property field of these nodes to the Speed, Battery, and Fuel properties in these nodes.
In this section of the tutorial you use the On Timer trigger to execute a JavaScript script which modifies the values of the Speed, Battery, and Fuel properties in the SpeedNeedle, BatteryNeedle, and FuelNeedle to change the position of the needles.
To move the speed, fuel, and battery needles:
In Kanzi Studio open the project stored in
<KanziWorkspace>/Tutorials/Demo/Start.Tip
If you cannot see all three gauges in the Preview, you can adjust the Preview zoom level in the upper right corner of the Preview.

Tip
The background of the Preview is by default black. To make your content stand out from the background when the Preview is in the Interact mode
 , select Edit > User Preferences and in the Preview tab set the Preview Background Color property to the desired color.

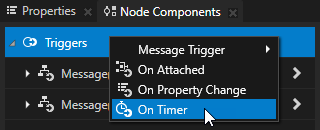
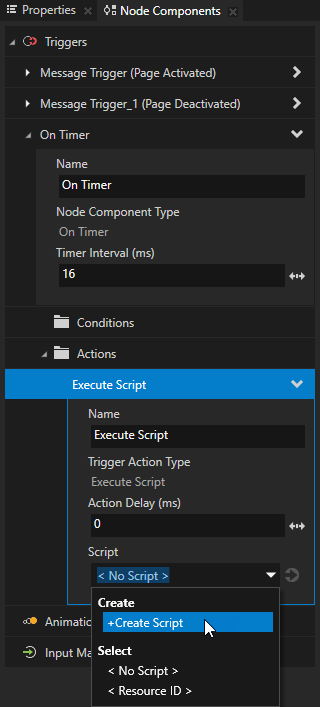
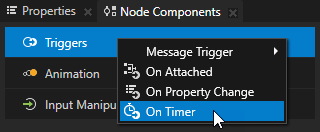
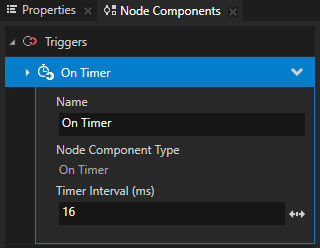
In the Node Tree select the RootPage node, in the Node Components press Alt and right-click Triggers, and select On Timer.
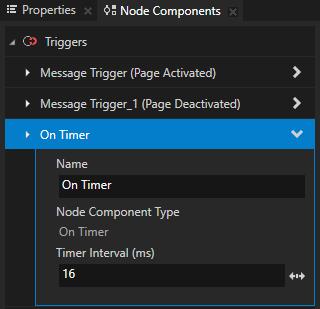
Kanzi sets off the actions in the On Timer trigger in the time interval that you set in the trigger. You set this time interval in the next step.
In the Node Components in the On Timer trigger set the Timer Interval (ms) to 16.
By setting the time interval to 16 ms the trigger sets off the action that you define in the next step every 16 ms, which is about 60 frames every second.
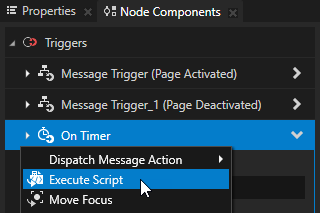
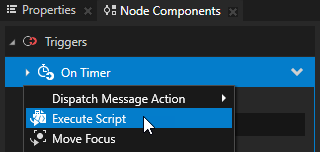
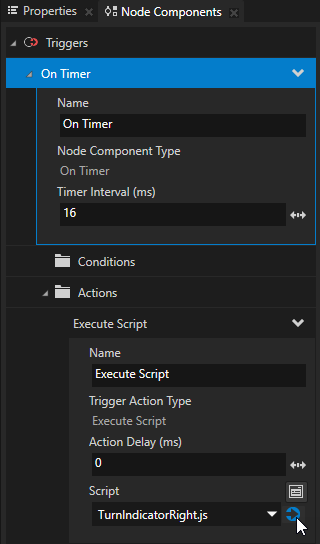
In the Node Components press Alt and right-click the On Timer trigger, and select the Execute Script action.
In the Execute Script action click the Script dropdown menu, select + Create Script, and name the script MoveNeedles.
The Script Editor opens.
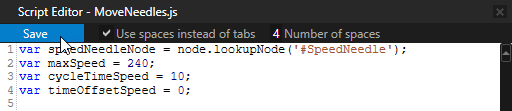
In the Script Editor enter this JavaScript script that moves the needles in the cluster:
// Get the SpeedNeedle node.
var speedNeedleNode = node.lookupNode('#SpeedNeedle');
// Set the highest value for the speed needle.
var maxSpeed = 240;
// Set the number of seconds it takes for the needle to go from the lowest to the highest value and back.
var cycleTimeSpeed = 10;
var timeOffsetSpeed = 0;

var fuelNeedleNode = node.lookupNode('#FuelNeedle');
var maxFuel = 100;
var cycleTimeFuel = 10;
var timeOffsetFuel = 3;

var batteryNeedleNode = node.lookupNode('#BatteryNeedle');
var maxBattery = 100;
var cycleTimeBattery = 10;
var timeOffsetBattery = 0;

// Calculate the current position of each gauge needle.
function calculateNeedlePosition (maxValue, cycleTime, timeOffset)
{
    var halfCycleTime = cycleTime / 2;
    var now = (Date.now() + timeOffset * 1000) / 1000;

    var needleValue = 0;
    var percentOfHalfCycle = (now % halfCycleTime) / halfCycleTime;
    if (now % cycleTime < halfCycleTime)
    {
        needleValue = maxValue * percentOfHalfCycle;
    }
    else
    {
        needleValue = maxValue - maxValue * percentOfHalfCycle;
    }

    return needleValue;
}

// Set the value of each property which controls the position of each gauge needle
// to move that needle based on its current position.
speedNeedleNode.setProperty('Demo.Speed', calculateNeedlePosition(maxSpeed, cycleTimeSpeed, timeOffsetSpeed));
fuelNeedleNode.setProperty('Demo.Fuel', calculateNeedlePosition(maxFuel, cycleTimeFuel, timeOffsetFuel));
batteryNeedleNode.setProperty('Demo.Battery', calculateNeedlePosition(maxBattery, cycleTimeBattery, timeOffsetBattery));
When you are done writing the script, in the Script Editor click Save.
Kanzi uses the JavaScript script to set the values of the Speed, Fuel, and Battery properties every 16 ms. Kanzi Studio starts executing a script when you save it. In the Preview you can see how the script is moving the needles.
Tip
Kanzi Studio stores the scripts that you use in the project in the
<ProjectName>/scriptsdirectory. You can open and edit the scripts in any text editor.
Make the turn indicators blink
In the starting point project of this tutorial the TurnIndicator State Manager controls the turn indicators. The TurnIndicatorLeft and TurnIndicatorRight nodes each have the Turn Indicator property which the state manager uses to switch on or off each indicator.
In this section you use a JavaScript script to set the value of the Turn Indicator controller property that the Turn Indicator State Manager uses to control whether a turn indicator is switched on or off.
To make the turn indicators blink:
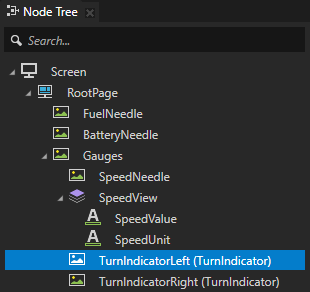
In the Node Tree select the TurnIndicatorLeft node, in the Node Components create an On Timer trigger, and set the Timer Interval (ms) property to 16.
In the Node Components in the On Timer trigger create an Execute Script action, click the Script dropdown menu, select + Create Script, and name the script TurnIndicatorLeft.

In the Script Editor enter this script to switch the left turn indicator on and off:
// Set the length of one blink.
var blinkTime = 2;
// Set how many times you want the turn indicator to blink.
var blinkCountOneIndicator = 5;
var blinkCountTwoIndicators = blinkCountOneIndicator * 2;
var cycleTime = blinkTime * blinkCountTwoIndicators;
var timeOffset = cycleTime / 2;

// Check whether the turn indicator is switched on or off.
function calculateIndicatorState()
{
    var halfCycleTime = cycleTime / 2;
    var now = (Date.now() + timeOffset * 1000) / 1000;

    var indicatorState = false;
    if (now % cycleTime < halfCycleTime)
    {
        indicatorState = false;
    }
    else
    {
        var offTime = blinkTime / 2;
        if (now % blinkTime < offTime)
        {
            indicatorState = false;
        }
        else
        {
            indicatorState = true;
        }
    }

    return indicatorState;
}

// Set the Turn Indicator property of the node on which you execute this script.
node.setProperty('Demo.TurnIndicator', calculateIndicatorState());
When you are done writing the script, in the Script Editor click Save.
Kanzi uses the JavaScript script to switch on and off the left turn indicator. Kanzi Studio starts executing a script when you save it. In the Preview you can see how the script makes the left turn indicator blink five times.

Repeat the procedure for the TurnIndicatorRight node:
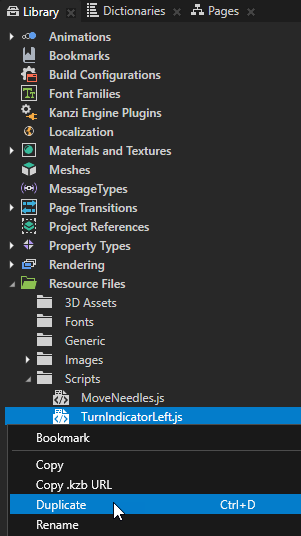
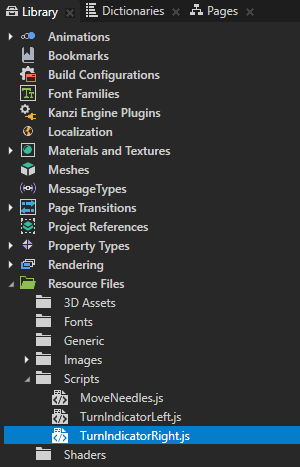
In the Library > Resource Files > Scripts right-click the TurnIndicatorLeft.js script, select Duplicate, and rename the script to TurnIndicatorRight.js.
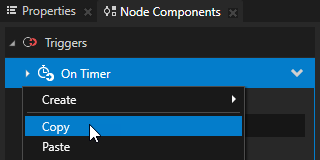
In the Node Tree select the TurnIndicatorLeft node, in the Node Components right-click the On Timer trigger, and select Copy.
You copy the On Timer trigger and the Execute Script action that you created in the TurnIndicatorLeft node.
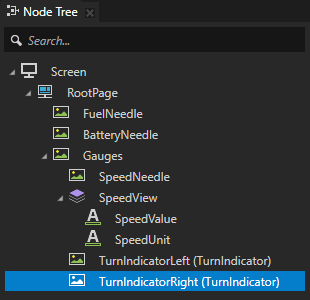
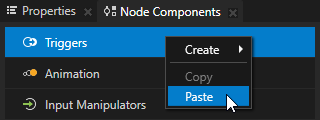
In the Node Tree select the TurnIndicatorRight node, in the Node Components right-click Triggers, and select Paste.
You paste the On Timer trigger and the Execute Script action to the TurnIndicatorRight node.
In the Preview you can now see the right turn indicator blink.
In the Node Components > Triggers > On Timer > Actions in the Execute Script action set the Script property to the TurnIndicatorRight.js script, and click
 next to the dropdown menu to open the script in the Script Editor.
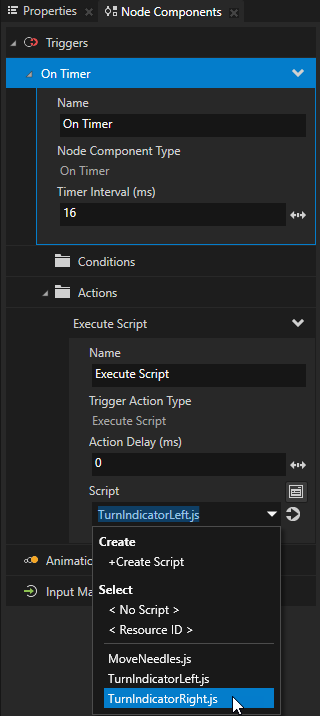
In the Script Editor edit the TurnIndicatorRight.js script to make the right turn indicator blink at a different time. Replace
var timeOffset = cycleTime / 2;
with
// Make each turn indicator blink at a different time.
var timeOffset = 0;
When you are done writing the script, in the Script Editor click Save.
In the Preview you can see how the TurnIndicatorLeft.js and TurnIndicatorRight.js scripts are switching the turn indicators on and off.
Show the current time
In this section you use a script to get the current time from the target device and show it in the cluster.
To show the current time:
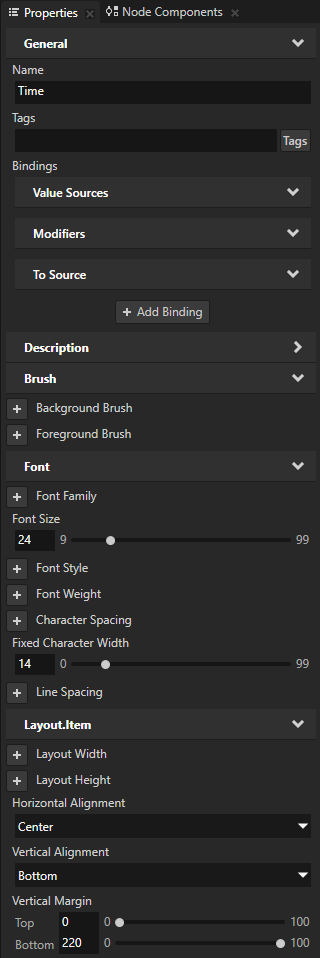
In the Node Tree press Alt and right-click the RootPage node, select Text Block 2D, and name it Time.
In the Properties add and set:
Font Size to 24
Fixed Character Width to 14.
Use the Fixed Character Width property to turn any font into a monospaced font.
Horizontal Alignment to Center
Vertical Alignment to Bottom
Vertical Margin property Bottom property field to 220
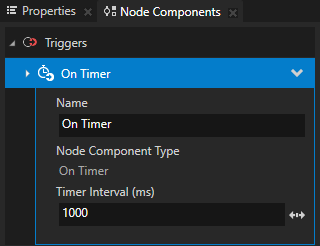
In the Node Tree select the Time node, in the Node Components > Triggers create an On Timer trigger, and configure it so that Kanzi sets off the trigger every 1000 milliseconds.
In the Node Components in the On Timer trigger create an Execute Script action.
In the Execute Script action in the Script dropdown menu select + Create Script, name it ShowTime, and in the Script Editor enter this script to show the current time in the cluster:
// Get the current time from the device.
var time = new Date();
// Show the preceding 0 when minutes are a single digit.
var minutes = String(time.getMinutes()).length < 2 ? '0' + time.getMinutes() : time.getMinutes();
// Show the preceding 0 when seconds are a single digit.
var seconds = String(time.getSeconds()).length < 2 ? '0' + time.getSeconds() : time.getSeconds();
// Set the Text property of the node on which you execute this script to show the current time in format H:MM:SS.
node.setProperty('TextConcept.Text', time.getHours() + ':' + minutes + ':' + seconds);
See also
To find out more about using JavaScript scripts, see Using scripts and Scripting reference.
To learn more about triggers and actions, see Triggers.
To learn more about using bindings, see Using bindings and Bindings expressions reference.