Using the Map View node
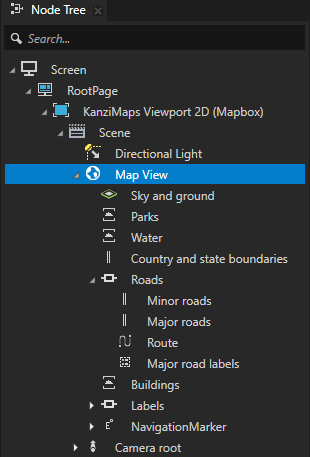
A Map View node is the root of a Kanzi Maps map. For example, the Map View node defines the size, geographic location, and zoom level of a map.
To show map content, in a Map View node, create Renderer nodes. The Renderer nodes in a Map View node take the map geometry and render map features. See Renderer nodes.
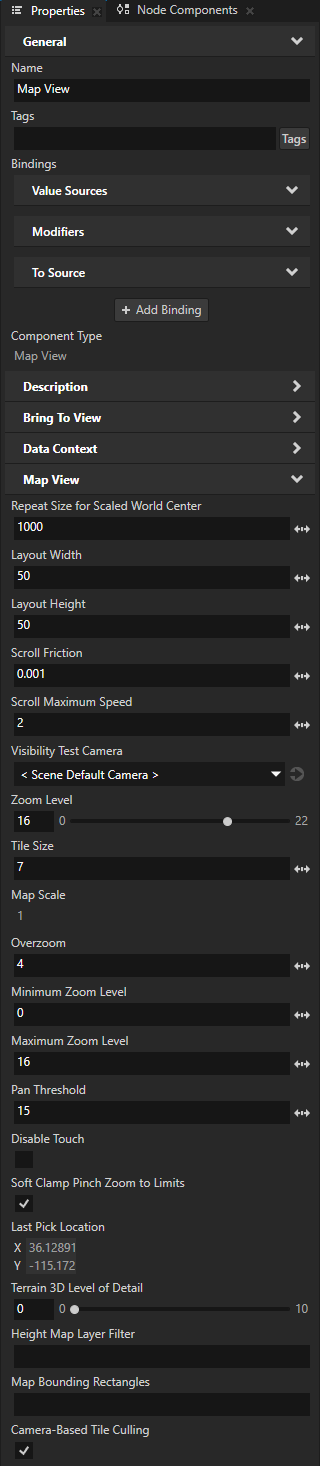
In the Map View node, you can use these properties to configure a map:
World Center X sets the x component of the current world center in 2 cm integer coordinates in the target projection, such as the Web Mercator projection.
World Center Y sets the y component of the current world center in 2 cm integer coordinates in the target projection, such as the Web Mercator projection.
World Center Latitude and Longitude sets the latitude and longitude of the current world center in WGS84 degrees. The world center is at the origin of the Map View node.
Repeat Size for Scaled World Center sets the repeat size for the scaled world center in projected meters.
World Center Scaled reports the looped coordinates of the world center, repeated in the size that you set with the Repeat Size for Scaled World Center property.
For example, use this value to generate global looping UVs for a ground plane.
Layout Width sets the width of the map viewport and of the bounding box of the Map View node.
Layout Height sets the height of the map viewport and of the bounding box of the Map View node.
Scroll Friction sets the amount of friction to apply to the scrolling of the map. The higher the value, the quicker the map scrolling animation slows down.
Scroll Maximum Speed sets the maximum speed for the map scrolling.
Visibility Test Camera sets the Camera node to use for visibility testing and culling map tiles. By default, the Map View node uses the default camera of its parent Scene node.
Zoom Level sets the zoom level of the map. The zoom level affects the map scale reported by the Map Scale property, and the content that Kanzi Maps uses to render the map.
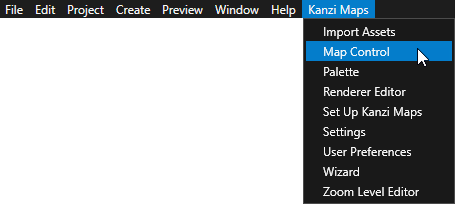
Tip
Use the Map Control to adjust the zoom level of a map in the Kanzi Studio Preview.

Tile Size sets the size of the map tiles relative to the Layout Width and Layout Height.
In a map that consists of square-shaped tiles, the number of tiles is \(x * y\), where:
\(x = LayoutWidth / TileSize\)
\(y = LayoutHeight / TileSize\)
Map Scale reports the scale of the map at the current zoom level. For example, use the map scale to convert from relative map world coordinates to the local coordinates of the Map View node, or the other way around.
Overzoom sets the number of allowed zoom levels beyond the levels supported by the map backend.
When the map backend supports \(N\) zoom levels, setting this property allows zooming up to the \(N + OverZoom\) level.
Minimum Zoom Level sets the minimum level to which it is possible to zoom out the map.
Maximum Zoom Level sets the maximum level to which it is possible to zoom in the map.
Pan Threshold sets the threshold in pixels on the horizontal and vertical axes that the pointer must move to trigger a pan gesture.
Disable Touch sets whether to disable all input manipulators.
When you enable this property, the Map View node does not react to user input.
Soft Clamp Pinch Zoom to Limits sets whether to soft-clamp the pinch zoom to the minimum and maximum zoom levels.
Last Pick Location reports the latitude-longitude coordinates of the last-picked location.
Tip
You can get the last-picked location also from the message arguments of the Map View: Pick Map Element message trigger. See Reacting when the user clicks a map.
Terrain 3D Level of Detail sets the level of detail at which a Terrain 3D Renderer node renders its content. See Setting the level of detail in the terrain.
Height Map Layer Filter sets the layer filter for the Height Component node component. See Using elevation data.
Map Bounding Rectangles sets the bounding rectangles for the map.
Camera-Based Tile Culling sets whether to cull map tiles based on the camera view.
Reacting when the user clicks a map
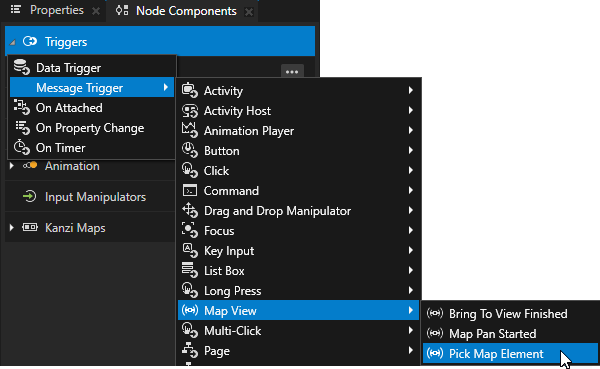
Use the Map View: Pick Map Element message trigger to find out when the user clicks a map.
To react when the user clicks a map:
In the Node Tree, select a Map View node. In the Node Components, press Alt and right-click Triggers and select Message Trigger > Map View > Pick Map Element.
The Map View: Pick Map Element message has these message arguments:
Latitude-longitude Position contains the WGS84 latitude-longitude coordinates of the click relative to the map.
Latitude-longitude Position String contains the latitude-longitude coordinates as a string.
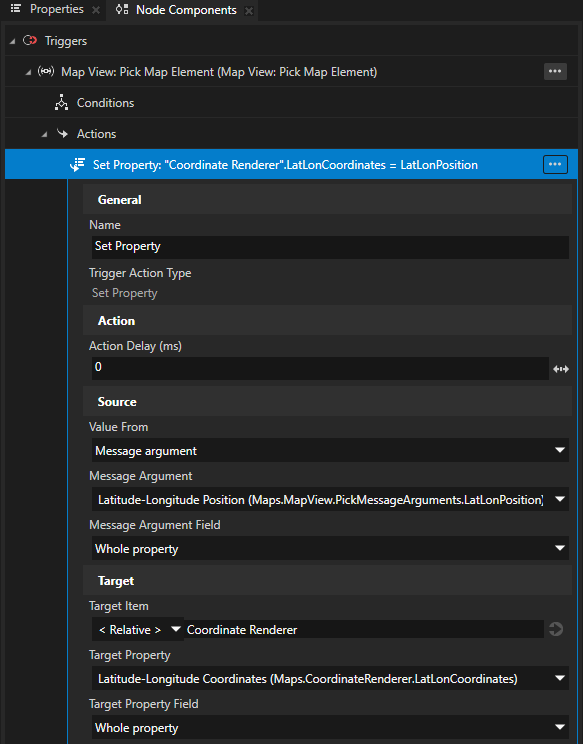
In the Pick Map Element trigger, create the action that you want to execute when the user clicks the map.
For example, create a Set Property action that sets the Latitude-Longitude Coordinates property of a Coordinate Renderer node to the location that the user clicked.
Reacting when the user pans a map
Use the Map View: Map Pan Started message trigger to find out when the user pans a map.
For example, you can disable map animations when the user starts to pan the map manually.
Learn how to use the Map View: Map Pan Started trigger by completing a tutorial. See Tutorial: Navigation camera.
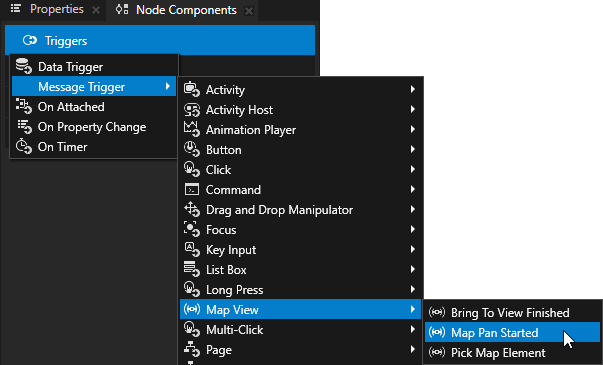
To react when the user pans a map:
In the Node Tree, select a Map View node. In the Node Components, press Alt and right-click Triggers and select Message Trigger > Map View > Map Pan Started.
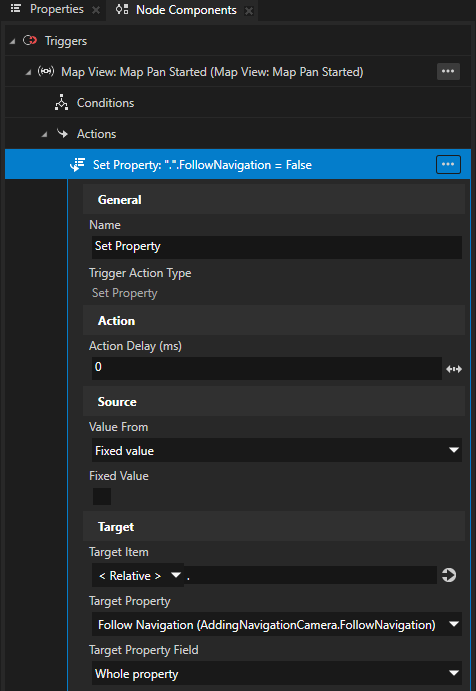
In the Map View: Map Pan Started trigger, create the action that you want to execute when the user starts to pan the map.
For example, create a Set Property action that disables a controller property that sets whether the camera follows navigation.
Resetting the rotation of a map
Use the Reset Rotation action to reset the internal rotation of a Map View.
For example, you can reorient of a map that the user rotated with the pinch gesture.
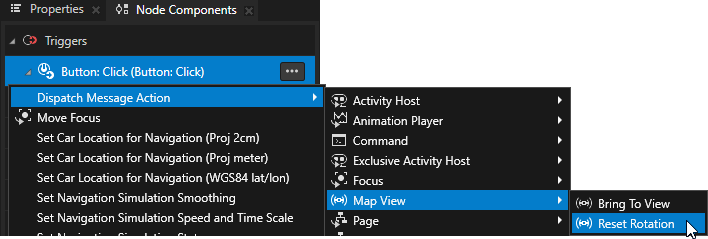
To reset the rotation of a map:
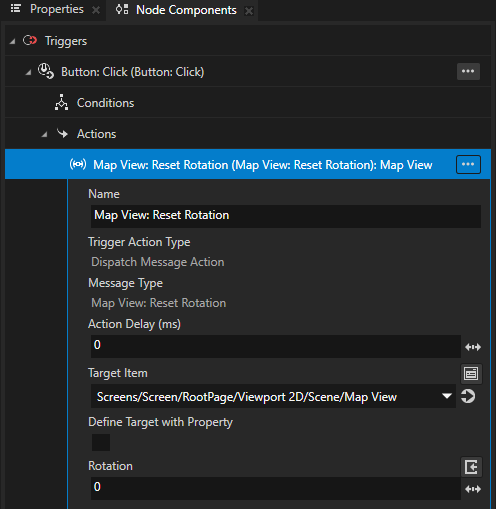
In the Node Components > Triggers, press Alt and right-click a trigger that you want to use to reset the rotation of a map and select Dispatch Message Action > Map View > Reset Rotation.
In the Map View: Reset Rotation action, set:
Target Item to the Map View node whose rotation you want to set
Rotation to the angle in degrees to which you want to set the rotation
Bringing map content to a view area
In a Map View node, you can set a view area and bring specific map content to that view area.
You can bring to view the content rendered by these Renderer nodes:
Coordinate Renderer. See Using the Coordinate Renderer node.
Prefab Feature Renderer. See Using the Prefab Feature Renderer node.
Prefab Object Renderer. See Using the Prefab Object Renderer node.
Route Renderer. See Using the Route Renderer node.
To bring map content to a view area:
Select the node whose content you want to bring to a view area that you define.
For example, select a Route Renderer node that renders a route. See Using the Route Renderer node.
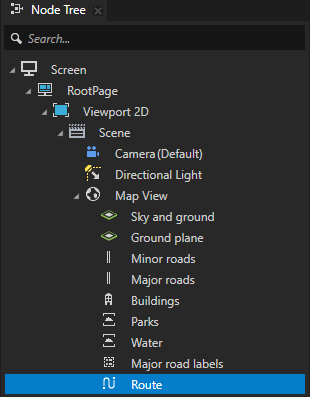
In the Properties, add and set:
Bring To View Groups to one or more group names that you want to use to mark the content. Separate the names with commas.
For example, set it to route.
(Optional) Wait for Content Update to enabled when you execute the bring-to-view calculation at the same time with a content update and want the calculation to wait for the content to update first.
When you do not enable the wait, the bring-to-view calculation waits for ongoing content updates to finish. For example, if in a Route Renderer node, the value of the Route Geometry property changes, Kanzi Maps first generates the geometry and then calculates the bounds of the route. When you enable the wait for content update, the bring-to-view calculation waits for the next change in the Route Geometry property or any other route update, and ignores the ongoing update.
In those nodes whose content you do not update, leave this property disabled. This way you exclude the nodes from the wait.
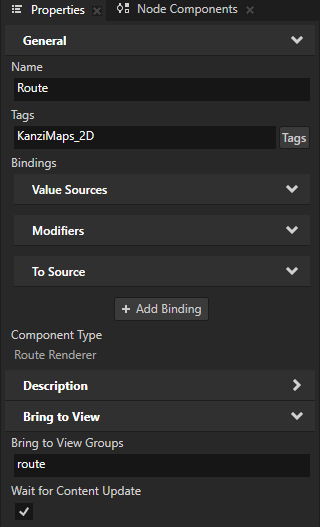
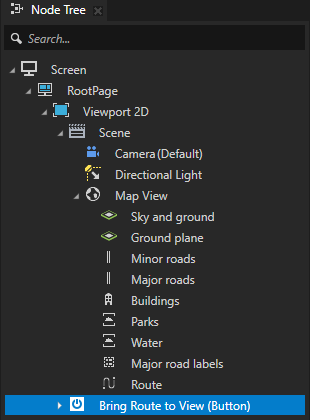
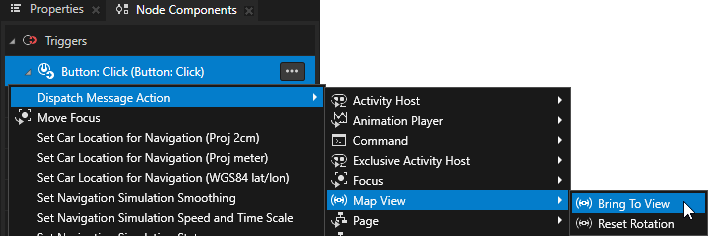
In a trigger that you want to use to execute the bring-to-view calculation, create a Map View: Bring To View action.
For example, in the Node Tree, create a Button node. In the Node Components > Triggers, press Alt and right-click the Button: Click trigger and select Dispatch Message Action > Map View > Bring To View.
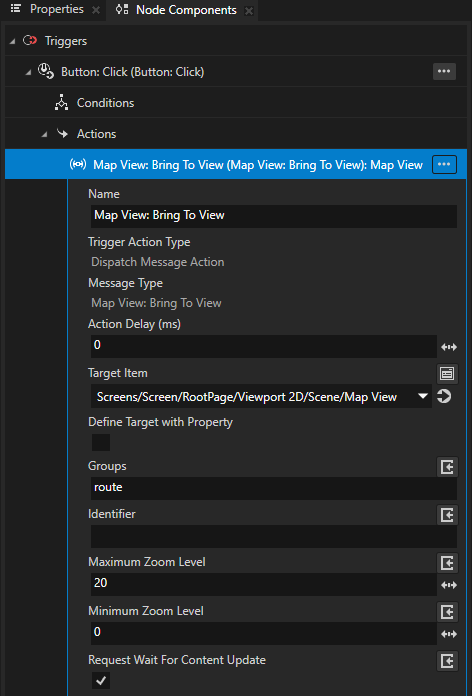
In the Map View: Bring To View action, set:
Target Item to the Map View node that contains the Renderer nodes whose content you want to bring to view.
Groups to the groups that you set in the Bring To View Groups property of the Renderer nodes whose content you want to bring to view.
For example, set it to route.
(Optional) Identifier to an identifier that you want to use identify this Map View: Bring To View action.
For example, you can use the identifier in a trigger condition of a Bring To View Finished message trigger.
Request Wait For Content Update to enabled if you want to bring the content to view only after Kanzi Maps updates the content of the nodes in the groups that have the Wait For Content Update property enabled. By default, the Map View: Bring To View action finishes as soon as the ongoing update is complete.
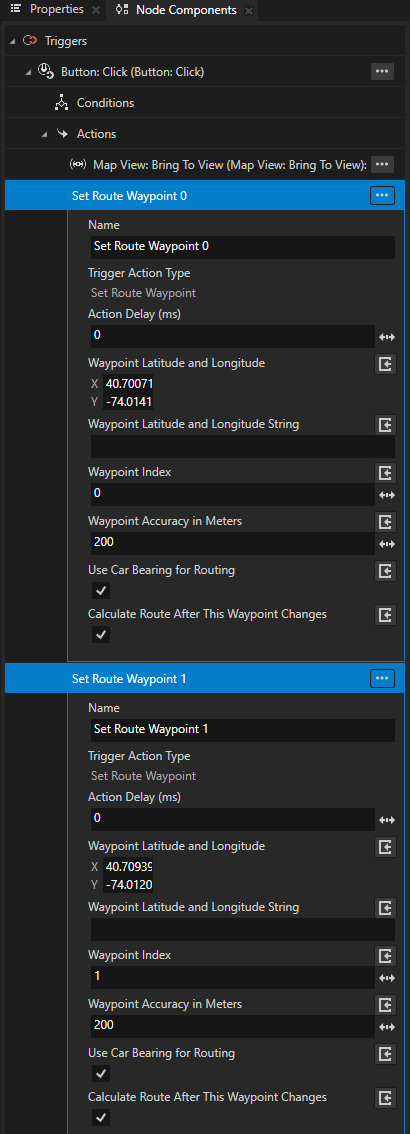
(Optional) If you enabled the wait for content update, in the same trigger in which you created the Map View: Bring To View action, create Set Route Waypoint actions that set the start and end points of the route.
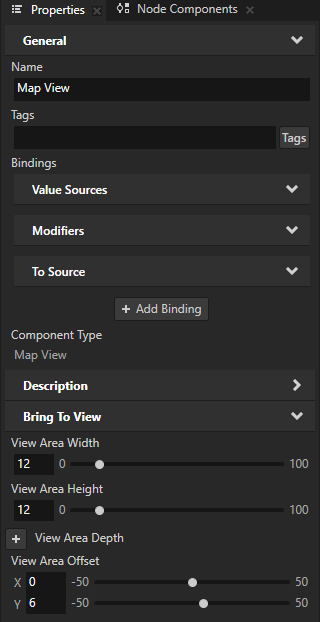
In the Node Tree, select the Map View node. In the Properties, add and set the Bring To View properties to define the size of the view area:
View Area Width and View Area Height set the size of view area in the object space of the Map View node. The size of the view area is typically smaller than the size of the Map View node.
View Area Offset sets the offset of the view area from the center of the Map View node along the x and y axes.
View Area Depth sets the maximum elevation of the view area.
By default, the view area calculation does not consider elevation. When you set the View Area Depth property, Kanzi Maps adjusts the zoom level to ensure that the content does not exceed the object space elevation set by the View Area Depth property.
The elevation of content is available only when the geometry is defined in map scale, that is, when the content scales with the zoom level. Sometimes content such as point-of-interest visualizations have constant size independent of the zoom level, and in such cases the view area calculation considers only the 2D center coordinate. In the Coordinate Renderer, Prefab Feature Renderer, and Prefab Object Renderer nodes you can use the Scaling property to set the content to be in map scale or object scale.
Kanzi Maps assumes the elevation of the content to be constant. The bring-to-view calculation considers the elevation and does not account for it correctly in all situations. For example, the calculation does not account for the elevation correctly when:
A binding dynamically changes the elevation or size of the content.
The elevation is not available during the calculation.
For example, this happens when you use the Height Component node component in a location where height information is not yet available.
Tip
To see the view area, in the Preview, click
 to enter the Analyze mode. Right-click
  and select Debug objects.
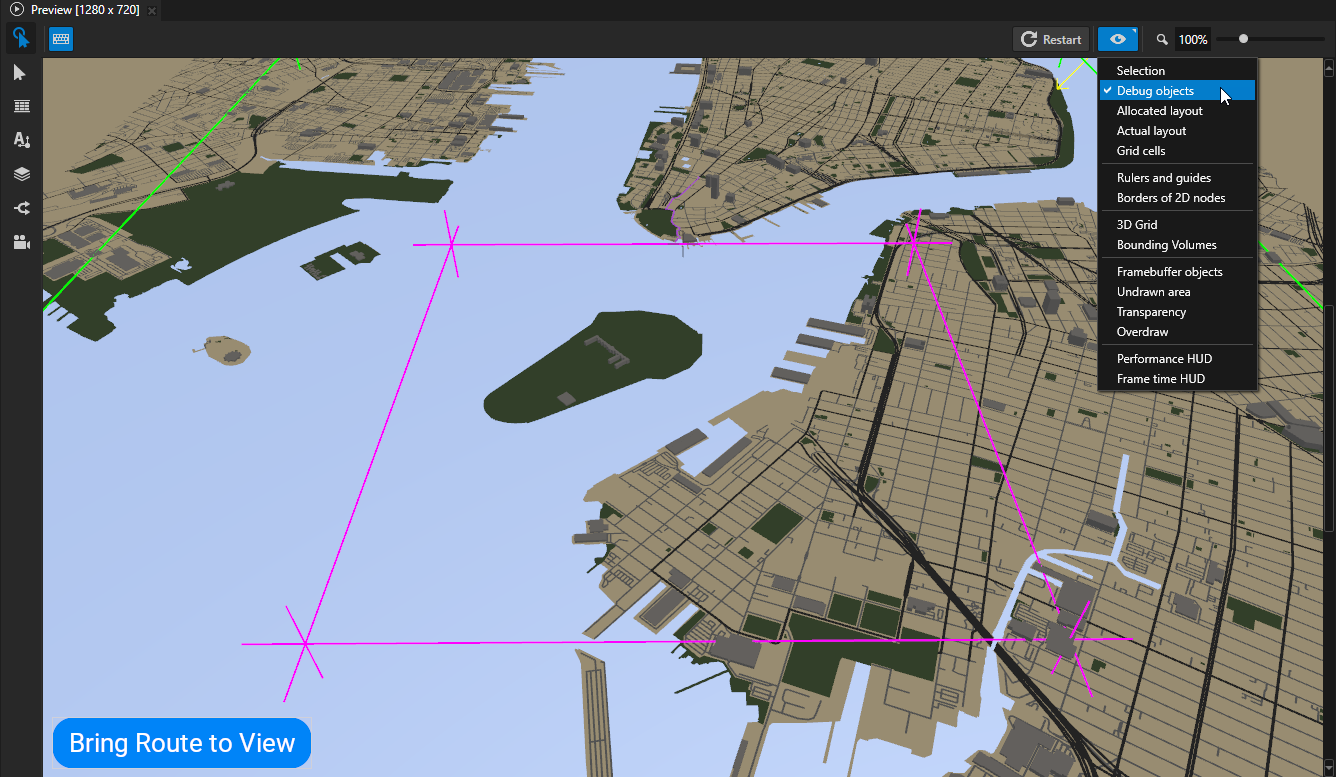
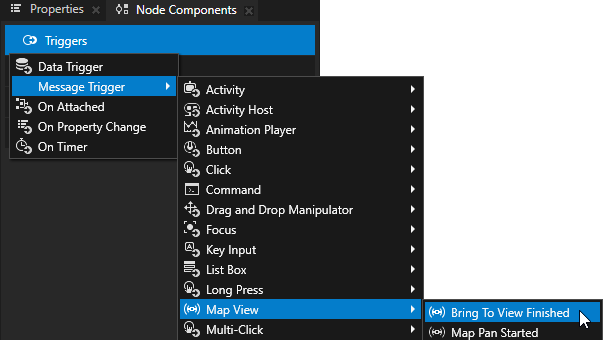
In the Node Components, press Alt and right-click Triggers and select Message Trigger > Map View > Bring To View Finished.
The Map View: Bring To View Finished message has these message arguments:
Identifier contains the identifier of the Map View: Bring To View action.
Latitude Longitude Center contains the latitude-longitude coordinates of the map center.
Zoom Level contains the zoom level of the map.
To use the results of the bring-to-view calculation, in the Map View: Bring To View Finished message trigger, create the actions that you want to execute when the bring-to-view calculation finishes.
For example, you can:
Use the Kanzi animation features to animate the center and zoom level of the Map View node to the calculated values.
Set the map center and zoom level values in the Map View.
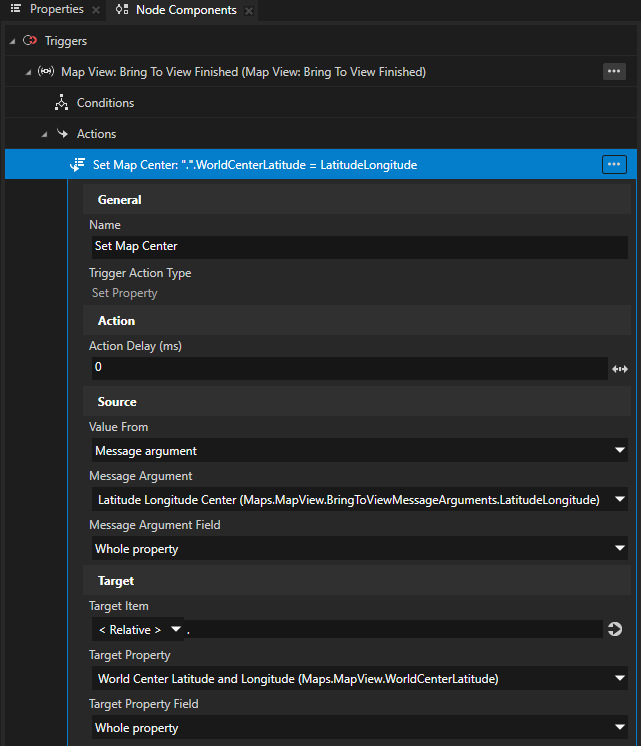
To set the map center and zoom level values in the Map View:
Create a Set Property action and set:
Name to Set Map Center
Value From to Message argument
Message Argument to Latitude Longitude Center
Target Property to Map View > World Center Latitude and Longitude
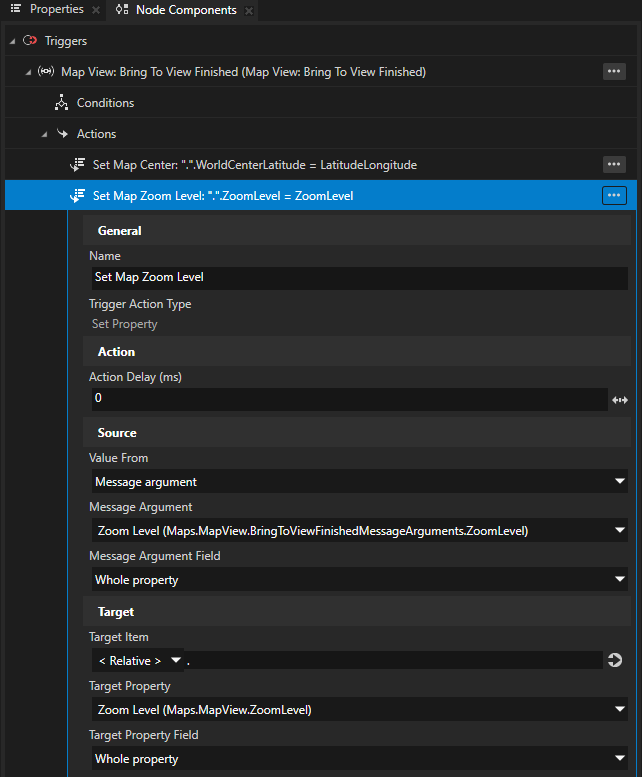
Create another Set Property action and set:
Name to Set Map Zoom Level
Value From to Message argument
Message Argument to Zoom Level
Target Property to Map View > Zoom Level
See also
Using the Terrain 3D Renderer node
Using the Coordinate Renderer node
Using the Prefab Feature Renderer node