Using the Grid Layout nodes
Use the Grid Layout nodes to arrange nodes in a grid.
You can let a Grid Layout node arrange its child nodes automatically from the top-left towards the bottom-right corner, or you can manually assign each child node to a specific row and column in the grid.
Note that the depth of a Grid Layout 3D node is the maximum depth for all the child nodes in that Grid Layout 3D node.

Creating a Grid Layout node
To create a Grid Layout node:
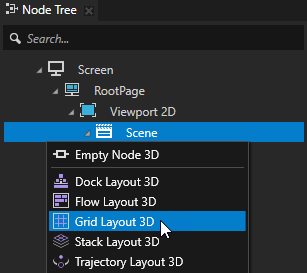
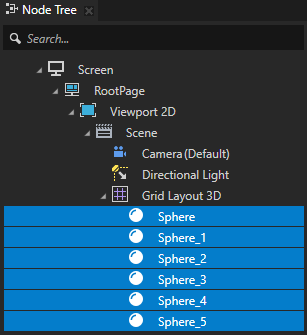
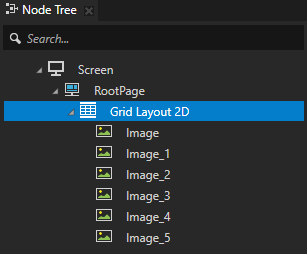
In the Node Tree press Alt and right-click the node where you want to create a Grid Layout node and select either Grid Layout 3D or Grid Layout 2D.
Note that you can create a 3D node only inside 3D nodes, and a 2D node only inside 2D nodes.
Tip
In the Preview tools use the Grid Layout 2D tool
 to click and drag in the Preview to create a Grid Layout 2D node. To scale the columns and rows click and drag those columns and rows in the Preview.
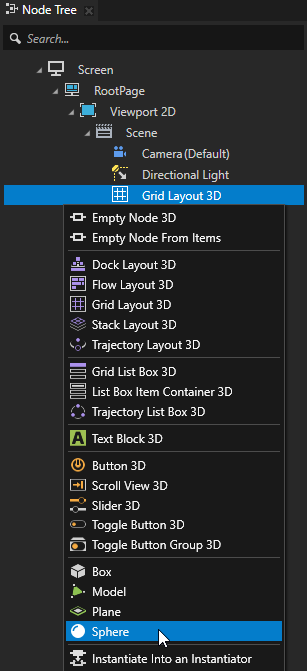
In the Node Tree add child nodes to the layout you created in the previous step.
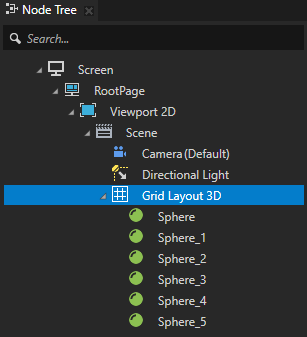
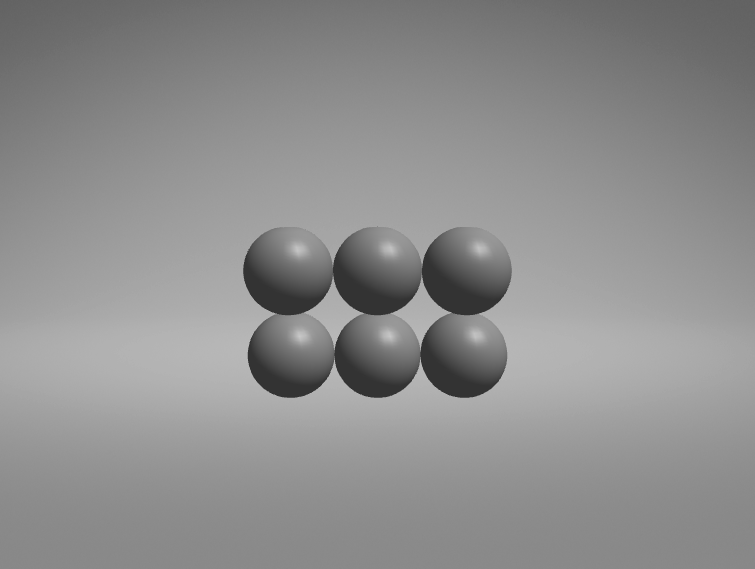
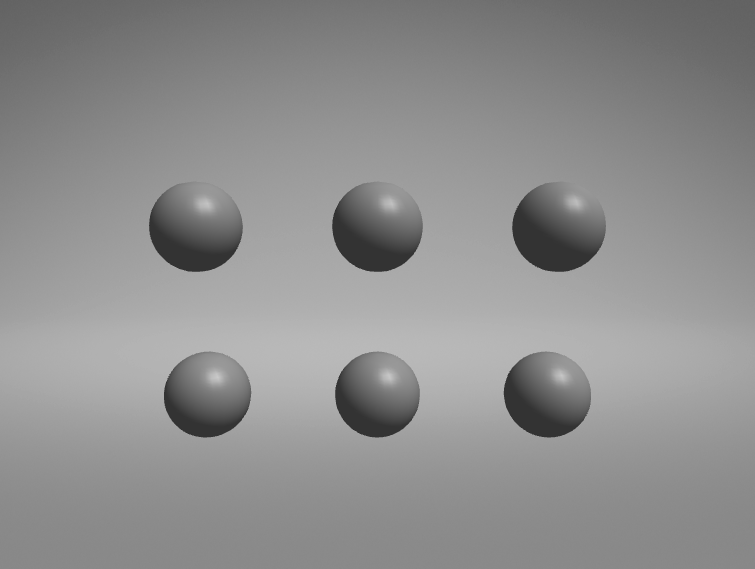
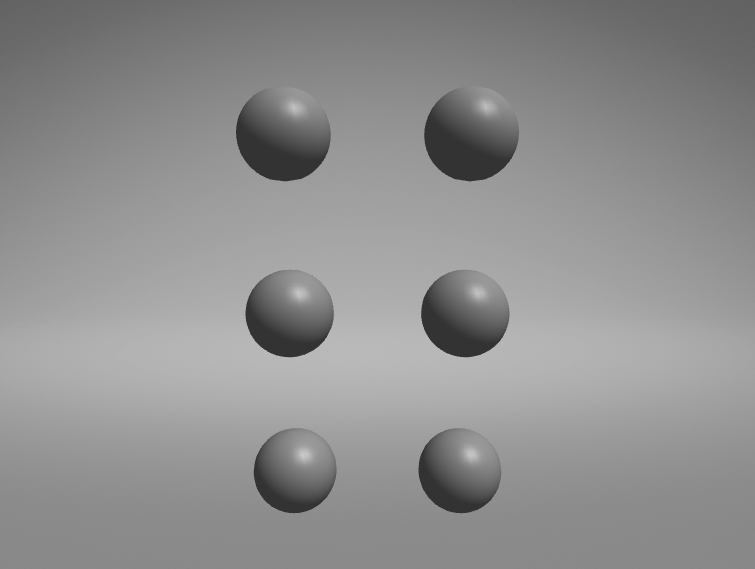
For example, if you created a Grid Layout 3D node, add several Sphere nodes, if you created a Grid Layout 2D node, add several Image nodes. As you add child nodes, the Grid Layout node positions them in the grid from the top-left towards the bottom-left corner of the grid. The exact location of each object in the Grid Layout node is defined by the Column and Row properties in each child node.
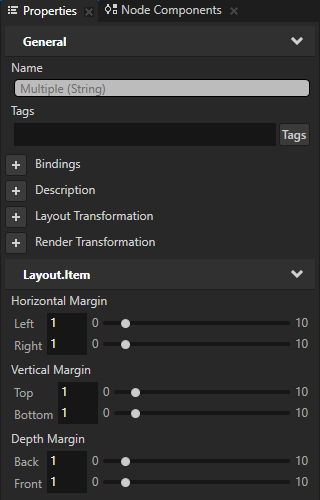
(Optional) To clear the area around child nodes in a layout, in the Node Tree select child nodes in the layout, in the Properties click
 , and add and set the margin properties:
Depth Margin to clear the area in the back and the front of a child node.
Horizontal Margin to clear the area on the left and the right sides of a child node.
Vertical Margin to clear the area on the bottom and the top of a child node.
Setting the direction in which a Grid Layout node arranges its child nodes
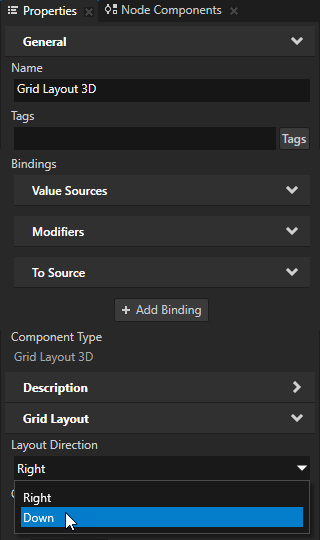
When you let a Grid Layout node to arrange its child nodes automatically, you can set the direction in which the Grid Layout node arranges its child nodes.
To set the direction in which a Grid Layout node arranges its child nodes, in the Node Tree select the Grid Layout node for which you want to set the direction, in the Properties add and set the Layout Direction property.
For example, when you set the Layout Direction property to Down, the Grid Layout node first places its child nodes in the rows of the first column. When all the rows in the first column are full, the Grid Layout node starts placing its child nodes in the rows of the second column, and so on.
Setting how a Grid Layout node calculates the size of its columns and rows
When you create columns and rows in a Grid Layout node you can specify how the Grid Layout node calculates the size of its columns and rows. For example, you can use a Grid Layout node with proportional sizes for rows and columns to equally distribute content in a Grid Layout node.
To set how Grid Layout node calculates the size of its columns and rows:
Create a Grid Layout node and add several child nodes to it. See Creating a Grid Layout node.
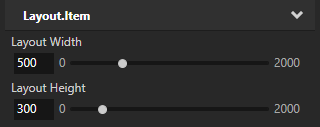
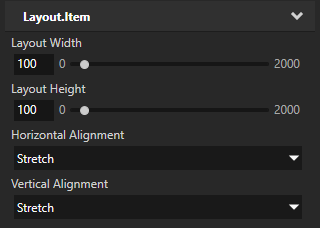
In the Properties set the size of the Grid Layout node by setting its Layout Width and Layout Height properties.
For example, set Layout Width to 500 and Layout Height to 300.
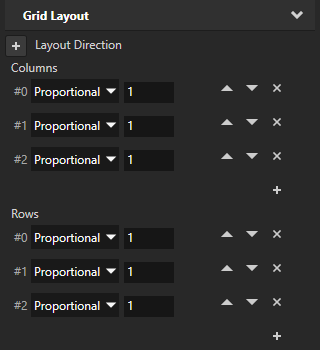
Set the values of Columns and Rows properties in the Grid Layout node to:
Automatic to let the Grid Layout node automatically calculate the size of its columns and rows based on the size of the largest child node in that column and row.
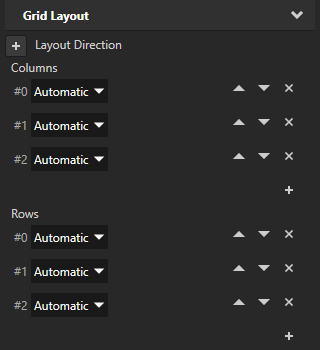

Fixed to set the exact size of a column and row, regardless of the size of the child nodes in that column and row.
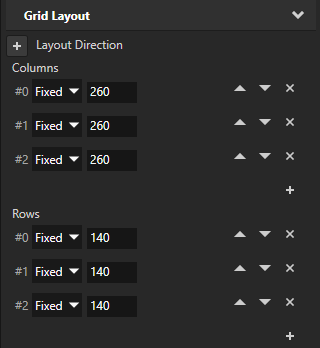

Proportional to set the size of a column and row in proportion to the remaining size of other columns and rows that use this same setting, and the size of the entire Grid Layout node.
For example:
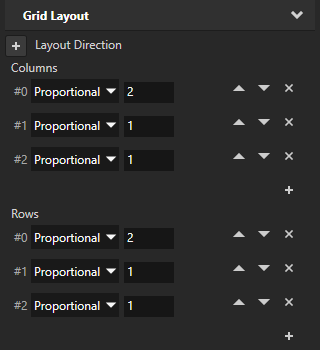
To equally distribute the content in columns, select Proportional and for each column use the same value.
If you have three columns and you want the first one to occupy half of the Grid Layout node width, select Proportional, use value 2 for the first column, and 1 for the other two columns.
Spanning cells and rows in a Grid Layout node
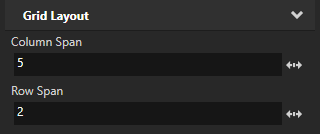
For each cell in a Grid Layout node you can set the number of columns and rows it spans.
To span a cell across columns and rows of a Grid Layout node:
Create a Grid Layout node and add several child nodes to it. See Creating a Grid Layout node.
In the Node Tree select a child node you want to span across cells and rows in the Grid Layout node.
In the Properties add the Column Span and Row Span properties.
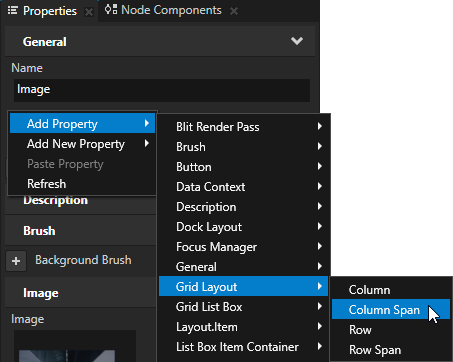
In the Properties set the number of columns and rows you want that cell to span.
The cell spans across columns to its right and rows below.
Using Grid Layout nodes to create user interfaces for different screen sizes
You can use Grid Layout nodes to create applications with consistent user interfaces across devices with different screen sizes. A Grid Layout node can distribute its child nodes so that they occupy the same relative amount of space in the application interface, regardless of screen size or device orientation. For example, with a Grid Layout node you can place the user interface controls in the top-left and bottom-right corners, with strictly defined distances from the edges of the screen.
For a more advanced approach to creating user interfaces for different screen sizes, see Tutorial: Making applications with dynamic layout.
To use Grid Layout nodes to create consistent user interface for different screen sizes:
Create a Grid Layout node and add several child nodes to it. See Creating a Grid Layout node.
Select the Grid Layout node and in the Properties set:
Columns and Rows properties to Proportional.
Horizontal Alignment and Vertical Alignment properties to Stretch.
Note that to keep images pixel perfect, instead of setting the Horizontal Alignment and Vertical Alignment properties to Stretch, add the Snap to Pixel property to child nodes whose position changes with the application layout.

With these settings you set the Grid Layout node to equally distribute its content across its entire width and height, and set the Grid Layout node to stretch across the entire screen.
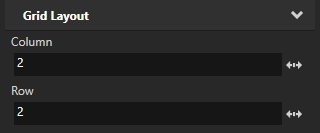
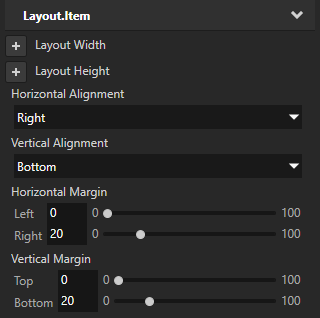
In the Node Tree select the third child in the Grid Layout node and in the Properties add and set:
Column to 2
Row to 2
Horizontal Alignment to Right
Vertical Alignment to Bottom
Horizontal Margin property Right property field to 20
Vertical Margin property Bottom property field to 20
With these settings you position the third child node of the Grid Layout node in the third column and third row of the Grid Layout node, and place it 20 pixels from the bottom-right corner of the screen. The third child node in the Grid Layout node stays in that position regardless of the screen size or orientation.

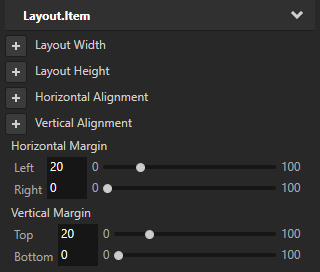
In the Node Tree select the first child node of the Grid Layout node and in the Properties add and set:
Horizontal Margin property Left property field to 20
Vertical Margin property Top property field to 20
With these settings you create a 20 pixel margin between the first child node and the edge of the screen.

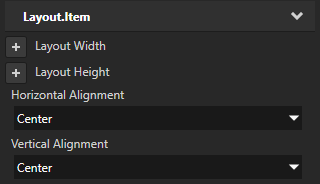
In the Node Tree select the second child node of the Grid Layout node and in the Properties add and set:
Column to 1
Row to 1
Horizontal Alignment to Center
Vertical Alignment to Center
With these settings you position the second child node in the second column and second row of the Grid Layout.

Setting the appearance of a Grid Layout 2D node
To set the appearance of 2D nodes:
You can fill 2D nodes with a solid color, a texture, or a material. See Adjusting the appearance of 2D nodes.


You can apply a post-processing effect to a 2D node. See Effects for 2D nodes.


You can rotate a 2D node around all three axes to create a 3D perspective effect. See Creating a 3D perspective effect for 2D nodes.

You can apply custom rendering to 2D nodes to create post-processing effects. See Applying custom rendering to 2D nodes.
Using the Grid Layout 3D node in the API
To create a Grid Layout 3D node with two columns and two rows with automatic cell size, and set the grid to arrange the items in the grid columns from top to bottom:
// Create a GridLayout3D named Grid.
GridLayout3DSharedPtr grid = GridLayout3D::create(domain, "Grid");

// Set the grid so that it arranges the items in the grid by first adding them
// in the rows of the first column. When all the rows in the first column are full,
// grid starts adding the items in the rows of the second column, and so on.
grid->setDirection(GridLayoutConcept::GridDirectionDown);

// Set the grid to have two automatic columns and rows that get their size from
// the size of their content.
grid->addAutomaticColumn();
grid->addAutomaticColumn();
grid->addAutomaticRow();
grid->addAutomaticRow();

// Create and add four cubes, one to each cell in the grid. Let the grid
// automatically set which cells the child nodes occupy. Since #GridDirection is
// set to GridDirectionDown, the grid automatically arranges the items in the grid
// by first adding items to both rows in the first column from top to bottom,
// then both rows in the second column from top to bottom.
Model3DSharedPtr child1 = Model3D::createBox(domain, "Box1", Vector3(2.0f, 2.0f, 2.0f), ThemeRed);
grid->addChild(child1);
Model3DSharedPtr child2 = Model3D::createBox(domain, "Box2", Vector3(3.0f, 3.0f, 3.0f), ThemeBlue);
grid->addChild(child2);
Model3DSharedPtr child3 = Model3D::createBox(domain, "Box3", Vector3(1.0f, 1.0f, 1.0f), ThemeOrange);
grid->addChild(child3);
Model3DSharedPtr child4 = Model3D::createBox(domain, "Box4", Vector3(4.0f, 4.0f, 4.0f), ThemeGreen);
grid->addChild(child4);
This example creates a Grid Layout 3D node with two columns and two rows, using both fixed and automatic cell size. By default the Grid Layout 3D node automatically sets which cells its items occupy.
// Create a GridLayout3D named Grid.
GridLayout3DSharedPtr grid = GridLayout3D::create(domain, "Grid");

// Set the grid to have two columns and two rows.
// Set the size of the first column to five units, but let the second column adapt
// its size from the size of its content.
grid->addFixedColumn(5.0f);
grid->addAutomaticColumn();
// Set the size of the first row to four units, but let the second row adapt its size
// from the size of its content.
grid->addFixedRow(4.0f);
grid->addAutomaticRow();

// Create and add three cubes to the grid and let the grid automatically set
// which cells the child nodes occupy. In this example, the three child nodes occupy
// the entire first row and the first column of the second row. The last cell (bottom-right)
// of the grid stays empty.
Model3DSharedPtr child1 = Model3D::createBox(domain, "Box1", Vector3(2.0f, 2.0f, 2.0f), ThemeOrange);
grid->addChild(child1);
Model3DSharedPtr child2 = Model3D::createBox(domain, "Box2", Vector3(3.0f, 3.0f, 3.0f), ThemeBlue);
grid->addChild(child2);
Model3DSharedPtr child3 = Model3D::createBox(domain, "Box3", Vector3(1.0f, 2.0f, 1.0f), ThemeGreen);
grid->addChild(child3);
This example creates a Grid Layout 3D node with two columns and three rows whose sizes the Grid Layout 3D node calculates in proportion to the sizes of other columns and rows in the grid. The example manually sets which cells each item in the grid occupies.
// Create a GridLayout3D named Grid.
GridLayout3DSharedPtr grid = GridLayout3D::create(domain, "Grid");

// Set the width and height of the entire grid to six units.
grid->setWidth(6.0f);
grid->setHeight(6.0f);

// Set the grid to have two weighted columns and three weighted rows.
// The first column gets one third and the second column two thirds
// of the entire grid width.
grid->addWeightedColumn(1.0f);
grid->addWeightedColumn(2.0f);
// Each row gets one third of the entire grid height.
grid->addWeightedRow(1.0f);
grid->addWeightedRow(1.0f);
grid->addWeightedRow(1.0f);

// Create an orange cube named Box1 and add it to the cell in the first row and the first column
// (the upper-left corner of the grid).
Model3DSharedPtr child1 = Model3D::createBox(domain, "Box1", Vector3(2.0f, 2.0f, 2.0f), ThemeOrange);
GridLayout3D::setColumn(*child1, 0);
GridLayout3D::setRow(*child1, 0);
grid->addChild(child1);
// Create a blue cube named Box2 and add it so that it spans the second and third cells in the first column.
Model3DSharedPtr child2 = Model3D::createBox(domain, "Box2", Vector3(3.0f, 3.0f, 3.0f), ThemeBlue);
GridLayout3D::setColumn(*child2, 0);
GridLayout3D::setRow(*child2, 1);
GridLayout3D::setRowSpan(*child2, 2);
grid->addChild(child2);
// Create a green cube named Box3 and add it to the cell in the third row and the second column.
// (the bottom-right corner of the grid).
Model3DSharedPtr child3 = Model3D::createBox(domain, "Box3", Vector3(1.0f, 1.0f, 1.0f), ThemeGreen);
GridLayout3D::setColumn(*child3, 1);
GridLayout3D::setRow(*child3, 2);
grid->addChild(child3);
For details, see the GridLayout3D class in the Kanzi Engine API reference.
Using the Grid Layout 2D node in the API
To create a Grid Layout 2D node with two columns and two rows with automatic cell size, and set the grid to arrange the items in the grid columns from top to bottom:
// Create a GridLayout2D named Grid.
GridLayout2DSharedPtr grid = GridLayout2D::create(domain, "Grid");

// Set the grid so that it arranges the items in the grid by first adding them
// in the rows of the first column. When all the rows in the first column are full,
// grid starts adding the items in the rows of the second column, and so on.
grid->setDirection(GridLayoutConcept::GridDirectionDown);

// Set the grid to have two automatic columns and rows that get their size from
// the size of their content.
grid->addAutomaticColumn();
grid->addAutomaticColumn();
grid->addAutomaticRow();
grid->addAutomaticRow();

// Create and add four empty nodes, one to each cell in the grid. Let the grid
// automatically set which cells the child nodes occupy. Since #GridDirection is
// set to GridDirectionDown, the grid automatically arranges the items in the grid
// by first adding items to both rows in the first column from top to bottom,
// then both rows in the second column from top to bottom.
EmptyNode2DSharedPtr child1 = EmptyNode2D::create(domain, "Empty1", 128.0f, 128.0f, ThemeRed);
grid->addChild(child1);
EmptyNode2DSharedPtr child2 = EmptyNode2D::create(domain, "Empty2", 256.0f, 256.0f, ThemeBlue);
grid->addChild(child2);
EmptyNode2DSharedPtr child3 = EmptyNode2D::create(domain, "Empty3", 128.0f, 128.0f, ThemeOrange);
grid->addChild(child3);
EmptyNode2DSharedPtr child4 = EmptyNode2D::create(domain, "Empty4", 128.0f, 128.0f, ThemeGreen);
grid->addChild(child4);
This example creates a Grid Layout 2D node with two columns and two rows, using both fixed and automatic cell size. By default the Grid Layout 2D node automatically sets which cells its items occupy.
// Create a GridLayout2D named Grid.
GridLayout2DSharedPtr grid = GridLayout2D::create(domain, "Grid");

// Set the grid to have two columns and two rows.
// Set the size of the first column to 200 units, but let the second column adapt
// its size from the size of its content.
grid->addFixedColumn(200.0f);
grid->addAutomaticColumn();
// Set the size of the first row to 100 units, but let the second row adapt its size
// from the size of its content.
grid->addFixedRow(100.0f);
grid->addAutomaticRow();

// Create and add three empty nodes to the grid and let the grid automatically set
// which cells the child nodes occupy. In this example, the three child nodes occupy
// the entire first row and the first column of the second row. The last cell (bottom-right)
// of the grid stays empty.
EmptyNode2DSharedPtr child1 = EmptyNode2D::create(domain, "Empty1", 128.0f, 128.0f, ThemeRed);
grid->addChild(child1);
EmptyNode2DSharedPtr child2 = EmptyNode2D::create(domain, "Empty2", 256.0f, 256.0f, ThemeBlue);
grid->addChild(child2);
EmptyNode2DSharedPtr child3 = EmptyNode2D::create(domain, "Empty3", 128.0f, 128.0f, ThemeOrange);
grid->addChild(child3);
To create a Grid Layout 2D node with two columns and three rows whose sizes the grid calculates in proportion to the sizes of other columns and rows in the grid. For each item in the grid manually set which cells in the grid it occupies:
// Create a GridLayout2D named Grid.
GridLayout2DSharedPtr grid = GridLayout2D::create(domain, "Grid");

// Set the width and height of the entire grid to six hundred units.
grid->setWidth(600.0f);
grid->setHeight(600.0f);

// Set the grid to have two weighted columns and three weighted rows.
// The first column gets one third and the second column two thirds
// of the entire grid width.
grid->addWeightedColumn(1.0f);
grid->addWeightedColumn(2.0f);
// Each row gets one third of the entire grid height.
grid->addWeightedRow(1.0f);
grid->addWeightedRow(1.0f);
grid->addWeightedRow(1.0f);

// Create an empty node named Empty1 and add it to the cell in the first row and the first column
// (the upper-left corner of the grid).
EmptyNode2DSharedPtr child1 = EmptyNode2D::create(domain, "Empty1", 128.0f, 128.0f, ThemeRed);
GridLayout2D::setColumn(*child1, 0);
GridLayout2D::setRow(*child1, 0);
grid->addChild(child1);
// Create an empty node named Empty1, add it to the cell in the second row and the first column
// and make it span across the second and third rows of the first coloumn in the grid.
EmptyNode2DSharedPtr child2 = EmptyNode2D::create(domain, "Empty2", 256.0f, 256.0f, ThemeBlue);
GridLayout2D::setColumn(*child2, 0);
GridLayout2D::setRow(*child2, 1);
GridLayout2D::setRowSpan(*child2, 2);
grid->addChild(child2);
// Create an empty node named Empty3, add it to the cell in the third row and the second column
// (the bottom-right corner of the grid).
EmptyNode2DSharedPtr child3 = EmptyNode2D::create(domain, "Empty3", 128.0f, 128.0f, ThemeOrange);
GridLayout2D::setColumn(*child3, 1);
GridLayout2D::setRow(*child3, 2);
grid->addChild(child3);
For details, see the GridLayout2D class in the Kanzi Engine API reference.
Grid Layout property types and messages
For lists of the available property types and messages for the Grid Layout nodes, see Grid Layout 2D and Grid Layout 3D.