Using styles
Use styles to set the property values of one or more nodes of a certain type.
In a style you set the values of properties the style applies to a node. For example, use a style to define the font type, size, and color of the text for all Text Block 3D nodes in your project.
To override a property defined in a style, add that property to the node to which the style applies.
Using styles you can:
Create a target style that applies to a specific branch of nodes in your Kanzi Studio project. See Applying a style that applies to a node type in the selected scope.
Create a named style that applies to selected instances of a certain node type, or overrides the target styles. See Applying a style to selected instances of a node type.
Applying a style that applies to a node type in the selected scope
Target styles define the look and feel for a selected node type in a specific part of the node tree in a Kanzi Studio project.
For example, to use different font sizes for the text at different levels of navigation, create a style for each navigation level, and add each style to the resource dictionary at each level of navigation.
To apply a style to descendants of a node type:
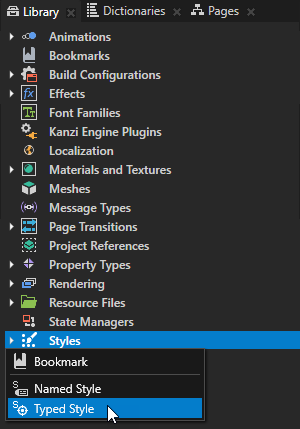
In the Library press Alt and right-click Styles and select Typed Style.
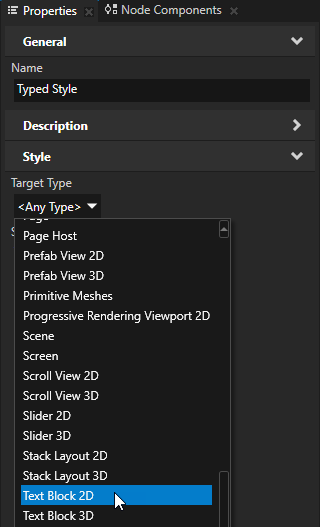
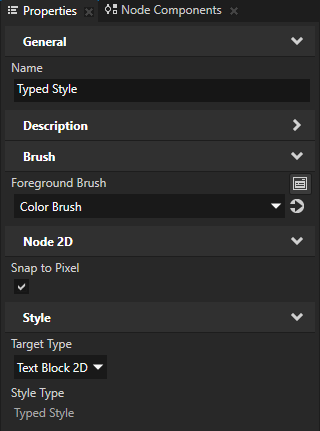
In the Properties set the Target Type property to the node type for which you want to define a style.
For example, set Target Type to Text Block 2D to define a style for Text Block 2D nodes in your project.
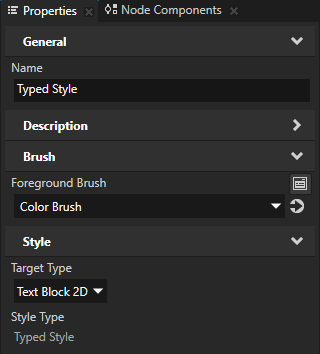
In the Properties click
 , and add and set the properties you want to define with the style.
For example, to define the color of font for a Text Block 2D node, add the Foreground Brush property, and set it to a brush you want to use to render the text in the Text Block 2D node.
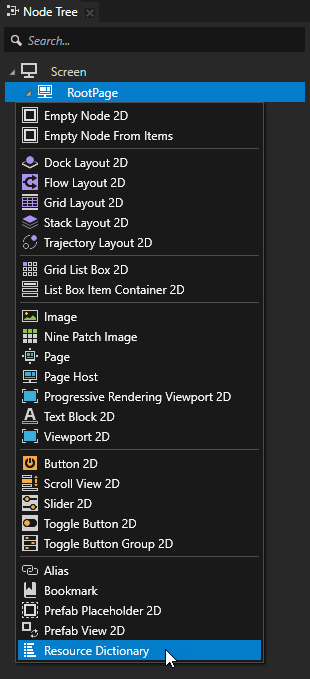
In the Node Tree press Alt and right-click the node to whose descendants you want to apply the style and select Resource Dictionary.
In the Dictionaries in the scope of the node to whose descendants you want to apply the style, click + Add Resource, select Add Existing, and select the style you created.
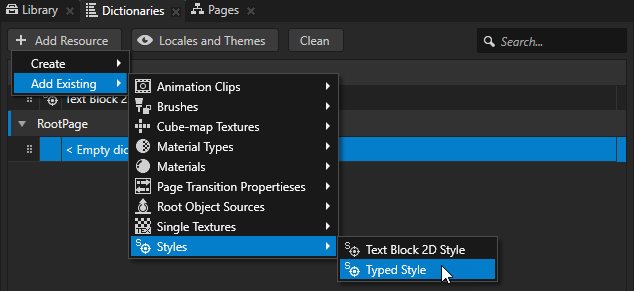
If the properties you defined in the style exist in the target nodes, remove them from the target nodes so that the style can take effect.
By default the Text Block 2D nodes use the Text Block 2D Style which sets the Snap to Pixel property.
The Snap to Pixel property rounds the translation and scale of a Text Block 2D or Text Box 2D node to a full pixel, which enables Kanzi to render pixel-perfect text.
To enable the Snap to Pixel property for the Text Block 2D node you created, add the Snap to Pixel property to the Typed Style you created.
Applying a style to selected instances of a node type
Named styles define the look and feel only for the selected instances of a node type, or override the target styles. For example, if you create a target style for the Text Block 3D, you can override that style with a named style.
To apply a style to only selected instances of a node type:
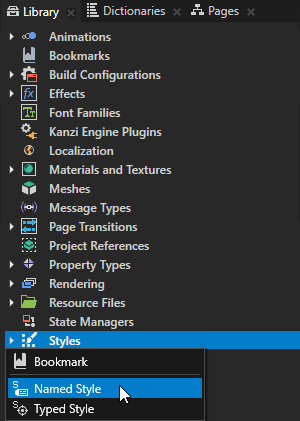
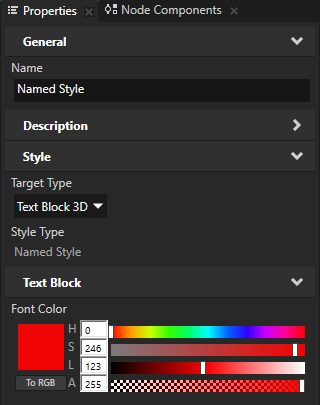
In the Library press Alt and right-click Styles and select Named Style.
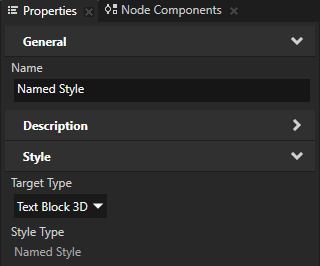
In the Properties set the Target Type property to the node type for which you want to define a style.
For example, set Target Type to Text Block 3D to define a style for Text Block 3D nodes in your project.
In the Properties click
 , and add and set the properties you want to define with the style.
For example, to define the color of font for a Text Block 3D node, add the Font Color property and set it to red.
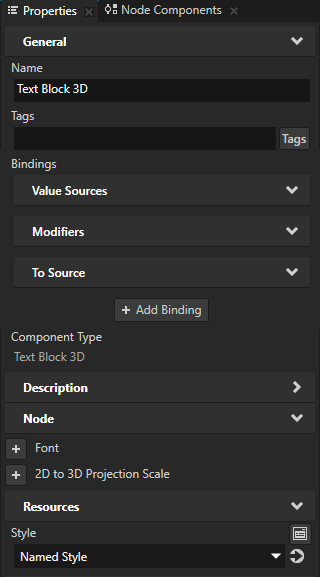
In the Node Tree select the node to the instance of which you want to apply the style, in the Properties click
 , add the Style property, and set it to a named style.
If the properties you defined in the style exist in the target nodes, remove them from the target nodes so that the style can take effect.
Using styles in the API
For details, see the Style class in the Kanzi Engine API reference.