Editing shaders
In Kanzi Studio projects, shader programs are stored as files on the computer hard drive. When you add shaders to the <KanziWorkspace>/Projects/<ProjectName>/Shaders directory of your Kanzi Studio project, Kanzi Studio automatically shows them in the Library > Resource Files > Shaders.
Access to the shader files is useful when you want to change all the stock material types from fragment-based to vertex-based shaders, or the other way around. If the filenames are the same, to do this, replace the shader files with the correct versions on the file system.
The fastest way to generate your own shading is to find a similar use case in the Kanzi material library, and then modify the shader and material properties, or use shaders from the VertexPhong or VertexPhongTextured material types as a template.
Kanzi Studio Shader Source Editor
You can use the Kanzi Studio Shader Source Editor to edit the shader source code. When working with the Kanzi Studio Shader Source Editor keep in mind that:
The editor saves the changes to disk, which means that when you close a project without saving the changes, the changes saved in shader files persist on the hard disk.
When editing shaders in the Kanzi Studio Shader Source Editor use the Uniforms and Attributes buttons to quickly add code snippets for declaring uniforms and attributes at the current cursor position.
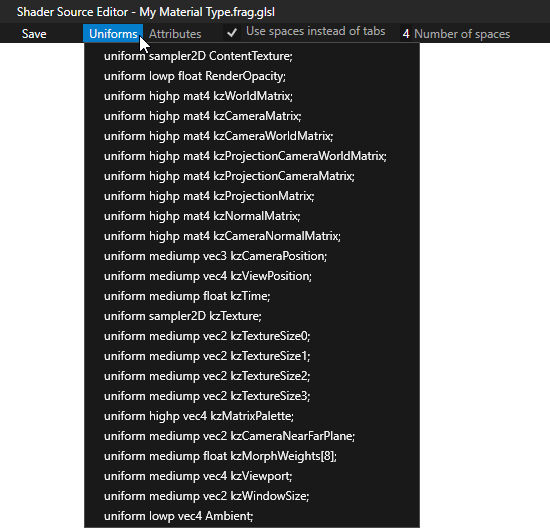
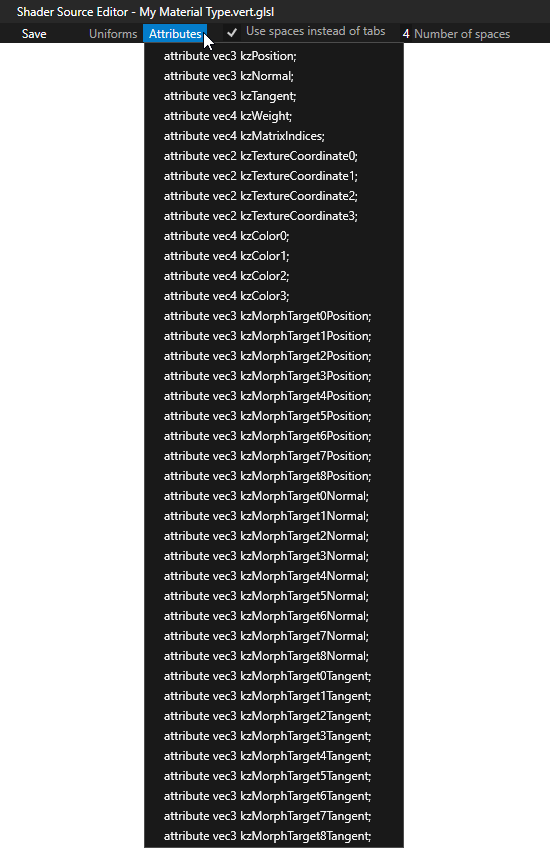
The status bar shows messages about the status of the editor, such as when the code is saved.
When you save a shader file, Kanzi Studio compiles it automatically. If you encounter a compiling error, you can see the error in the Log. In the Preview the objects containing materials with invalid shaders are shown in red.
Shader attributes
The input for shader programs are vertex attributes and uniforms. The attributes can vary per vertex and are provided to vertex shaders. You can use the uniforms as input to either vertex or fragment shaders.
The vertex buffer of a mesh contains also a set of attributes. These vertex buffer attributes are used for sending data to vertex shaders.
Kanzi can automatically pass attributes to shader programs, but you can configure these settings manually too.
Vertex attributes always have one of these semantics and Kanzi automatically recognizes these names:
Attribute |
Data type |
Description |
|---|---|---|
kzPosition |
vec3 |
Position |
kzNormal |
vec3 |
Normal |
kzTangent |
vec3 |
Tangent |
kzWeight |
vec4 |
Weight |
kzMatrixIndices |
vec4 |
Matrix palette |
kzTextureCoordinate0 |
vec2 |
Texture coordinate 0 |
kzTextureCoordinate1 |
vec2 |
Texture coordinate 1 |
kzTextureCoordinate2 |
vec2 |
Texture coordinate 2 |
kzTextureCoordinate3 |
vec2 |
Texture coordinate 3 |
kzColor0 |
vec4 |
Color 0 |
kzColor1 |
vec4 |
Color 1 |
kzColor2 |
vec4 |
Color 2 |
kzColor3 |
vec4 |
Color 3 |
kzMorphTargetXPosition |
vec3 |
Morph target position X, where X is 0…8 |
kzMorphTargetXNormal |
vec3 |
Morph target normal X, where X is 0…8 |
kzMorphTargetXTangent |
vec3 |
Morph target tangent X, where X is 0…8 |
You can also add custom attributes.
If there is a one-to-one relation between shader attributes and vertex attributes, the attributes are automatically mapped against each other. You can configure the mappings manually to work differently in mesh data. You must use manual mappings if you are using shader attribute names that are not in the default list.
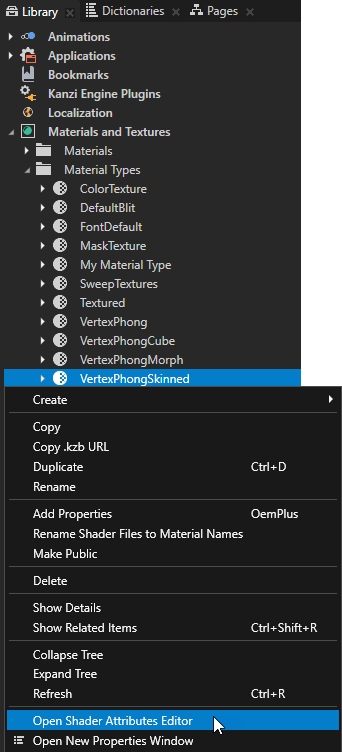
To view and edit the semantics of the shader attributes of a material type, in the Library > Materials and Textures > Material Types right-click a material type and select Open Shader Attributes Editor.

Shader uniforms
Shader uniforms can receive their data from these data sources:
Kanzi default uniforms
Property types defined in a material type.
If the name of the uniform matches any of the Kanzi default uniforms, Kanzi Engine automatically sends its value to the shader program. These uniforms are available by default:
Uniform |
Data type |
Description |
|---|---|---|
ContentTexture |
sampler2D |
A texture provided by the rendered node when rendering, for example the image displayed in an Image node. See Applying custom rendering to 2D nodes and Applying custom rendering to an Image node. |
RenderOpacity |
float |
Opacity of the rendered 2D node. See Applying custom rendering to 2D nodes and Applying custom rendering to an Image node. |
kzWorldMatrix |
mat4 |
A matrix that transforms from local coordinates to world (global) coordinates. |
kzCameraMatrix |
mat4 |
A matrix that transforms from world (global) coordinates to view (camera) coordinates, that is, applying camera. |
kzCameraWorldMatrix |
mat4 |
A premultiplied matrix: |
kzProjectionCameraWorldMatrix |
mat4 |
A premultiplied matrix: |
kzProjectionCameraMatrix |
mat4 |
A premultiplied matrix: |
kzProjectionMatrix |
mat4 |
A matrix that projects view coordinates into screen coordinates. |
kzNormalMatrix |
mat4 |
A matrix that transforms object normals to world coordinates. |
kzCameraNormalMatrix |
mat4 |
A premultiplied matrix: |
kzCameraPosition |
vec3 |
A camera location in world coordinates. |
kzViewPosition |
vec4 |
A homogeneous position for calculating the view direction: |
kzTime |
float |
Debug timer, 1.0f = 1000 milliseconds. |
kzTexture |
sampler2D |
A texture to apply to a brush or material. |
kzTextureSize0 |
vec2 |
The size of the form |
kzTextureSize1 |
vec2 |
The size of the form |
kzTextureSize2 |
vec2 |
The size of the form |
kzTextureSize3 |
vec2 |
The size of the form |
kzMatrixPalette |
vec4 |
An array of 4x3 matrices that Kanzi uses in vertex skinning. Each matrix is of the form:
|
kzCameraNearFarPlane |
vec2 |
The near and far plane distances from camera. |
kzMorphWeights[8] |
float |
An array of mesh weights that Kanzi uses in morphing. |
kzViewport |
vec4 |
A vector of the form
By default,
When Kanzi renders to a composition target or to a 3D scene that accompanies a sub-rectangle of a larger area, |
kzWindowSize |
vec2 |
The size |
Material uniforms
If the name of the uniform matches any of the property types defined in the material type of the shader, the value is supplied using the properties. At runtime the values for the properties are collected from the rendered material and the lights that match the light properties defined in the material type with possible property overriding.
The names and data types of the uniforms must match the names and data types of the property types in a material type. Note that the display name of a property type can be different from its real name that is used in this context. See Property types. For example, if the material type has a color property type Diffuse, the shader code must have this definition:
uniform mediump vec4 Diffuse;
The letters and the case must match in the names. These are the compatible data types from property data type to shader uniform data type:
Property data type |
Shader uniform data type |
|---|---|
Float |
float |
Vector 2D |
vec2 |
Vector 3D |
vec3 |
Color |
vec4 |
Vector 4D |
vec4 |
Matrix 2D |
mat2 |
Matrix 3D |
mat3 |
Matrix 4D |
mat4 |
Texture |
|
Uniform arrays for light property types
Light property types support uniform arrays. This enables you to use multiple lights of the same type. For example, if one shader program uses two directional lights, you must add an array property type into that shader of the material type:
uniform mediump vec4 DirectionalLightColor[2];
uniform mediump vec3 DirectionalLightDirection[2];
These property types support uniform arrays:
DirectionalLightColor
DirectionalLightDirection
PointLightColor
PointLightAttenuation
PointLightPosition
PointLightRadius
SpotLightColor
SpotLightPosition
SpotLightDirection
SpotLightAttenuation
SpotLightCutoffAngle
SpotLightConeParameters
SpotLightExponent
SpotLightRadius
Setting the OpenGL ES version
In your shader source files, use the #version directive to declare the version of the OpenGL ES shading language that your shader code uses.
For example, to set your shader source file to use OpenGL ES 3.0, in the beginning of the file, add:
#version 300 es
If you declare the version 100 and Kanzi detects that the code in your shader source file requires OpenGL ES 3, Kanzi automatically sets the version to 300.
For a material type, you can override the version that you declare in the shader source files of that material type.
To override the OpenGL ES version in a material type:
In the Library > Materials and Textures > Material Types, select the material type for which you want to set the OpenGL ES version.
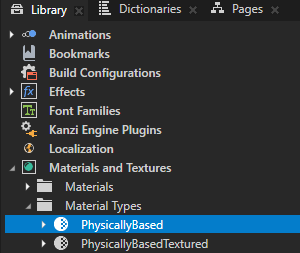
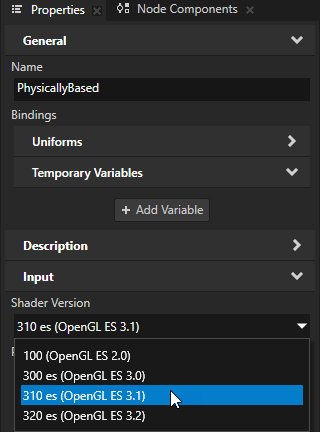
In the Properties, add the Input > Shader Version property and set it to the OpenGL ES version that you want the material type to use.
Reusing shader code
You can reuse shader code by placing into separate shaders the functionality that you want to use in more than one shader. For example, that way you can include in a shader helper functions that you use in several shaders.
To reuse shader code:
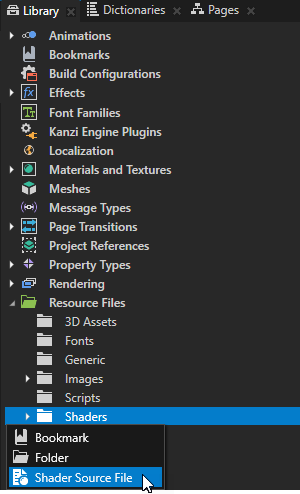
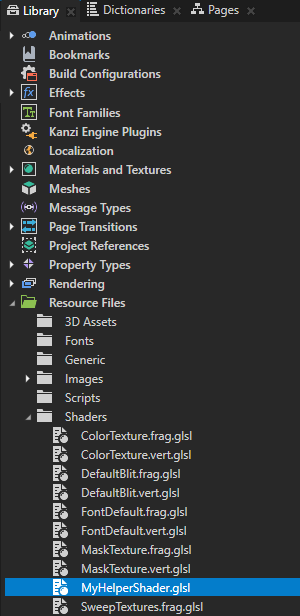
In the Library > Resource Files press Alt and right-click Shaders, select Shader Source File, and name the shader file.
For example, name the shader file MyHelperShader.
Double-click the shader file that you created and in the Shader Source Editor add the code that implements the functionality that you want to include in another shader file.
For example, add a function that converts an RGB color value to grayscale:
float colorToLuma(vec3 col)
{
    return col.r * 0.2126 + col.g * 0.7152 + col.b * 0.0722;
}
In the Library > Resource Files > Shaders double-click the shader file where you want to include another shader, and in the Shader Source Editor add the
#includedirective followed by a shader filename.Kanzi replaces the line where you add the
#includedirective with the content of the shader.For example, to include the shader
MyHelperShader.glsl:... #include "MyHelperShader.glsl" ...
Using shaders in the API
For details, see the ShaderProgram class.