Tutorial: Load and deploy resources asynchronously
In this tutorial you learn how to asynchronously load resources that you want to show in a List Box node. When you load resources asynchronously, your Kanzi application stays responsive because asynchronous loading does not block the user interface. When the user scrolls a list, you load each item when that item becomes visible instead of keeping all the items in working memory. In this tutorial, you set the application to show placeholder content while the application is loading resources.
Load resources asynchronously when you want to:
Show in a List Box node content that can take a long time to load, but want to keep your application responsive. For example, to load parts of a map on demand when the user scrolls that map or to show a loading screen while a part of your application is loading.
Save memory by loading content only when your application needs that content and removing the content when the application no longer needs it.
This tutorial shows how to asynchronously load resources using a list item generator. To asynchronously load resources for single prefabs, in Kanzi Studio use triggers and actions. See Loading node prefab resources asynchronously.
This video shows the result of the tutorial.
Before you start this tutorial, make sure you have your Kanzi development environment set up. Install:
CMake 3.15 or newer
Visual Studio 2017 with latest updates
Android Studio. See Deploying Kanzi applications to Android.
You use Android Studio to deploy your Kanzi application to an Android device.
This tutorial assumes you understand the basics of working with Kanzi Studio. The best entry points for getting familiar with Kanzi are:
Assets for the tutorial
The starting point of this tutorial is the Loading.kzproj Kanzi Studio project file stored in the <KanziWorkspace>/Tutorials/Loading/Start/Tool_project directory.
The <KanziWorkspace>/Tutorials/Loading/Completed directory contains the completed project of this tutorial.
The starting point project contains the content that you need to complete this tutorial:
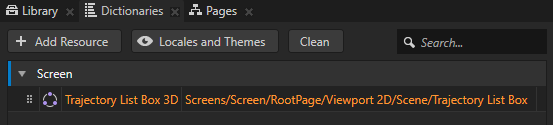
The Trajectory List Box 3D node holds the items that you load asynchronously.
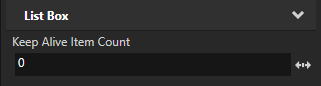
The Keep Alive Item Count property of the Trajectory List Box 3D node sets how many items at a time the node keeps in the working memory. The Keep Alive Item Count property is set to 0 to load each item when the user scrolls the Trajectory List Box 3D and that item becomes visible.
For example, if you set the value of the Keep Alive Item Count property to 5, the node keeps the visible items and the next five items loaded in the working memory. When the user scrolls the List Box, the application loads the items after the fifth item when those items become visible.

The resource dictionary of the Screen node contains an alias for the Trajectory List Box 3D node. Aliases provide a convenient way to access nodes from the application code.
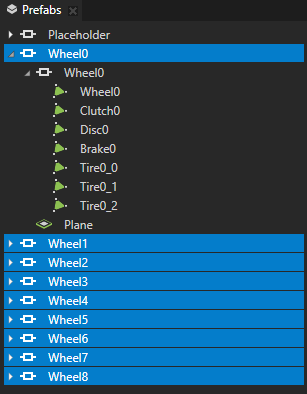
The Wheel0 to Wheel8 prefabs contain the 3D models the application asynchronously loads and shows in the Trajectory List Box 3D node. Each prefab represents one item that the Trajectory List Box 3D node shows.

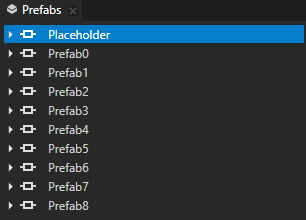
The Placeholder prefab is what the Trajectory List Box 3D node shows while the application is asynchronously loading an item.

Create a list item generator
In this section you use the Kanzi Engine API to create a list item generator that provides the items for the Trajectory List Box 3D node. You use the list item generator to define how your application loads and displays the list items.
To create a list item generator:
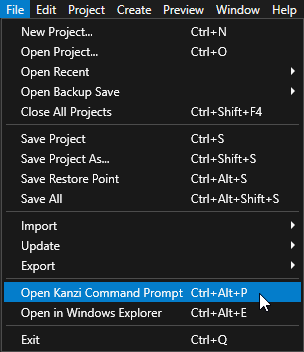
In Kanzi Studio select File > Open Kanzi Command Prompt.
This way you launch a Windows command prompt with the Kanzi environment variables set for the version of Kanzi based on the version of Kanzi Studio from which you opened a Kanzi Command Prompt.
Use the Kanzi Command Prompt to build Kanzi projects, and access build tools and Kanzi utilities without writing absolute paths.
Tip
You can find the Kanzi Command Prompt in the Windows Start Menu in the Rightware directory.
When you have more than one verions of Kanzi installed, make sure that you launch a Kanzi Command Prompt for the version of Kanzi with which you want to work in that command prompt.
In the Kanzi Command Prompt in the
<KanziWorkspace>/Tutorials/Loading/Start/Applicationdirectory rungenerate_cmake_vs2017_solution.bat
This script generates a Visual Studio solution for the application in the directory
<KanziWorkspace>/Tutorials/Loading/Start/Application/build_vs2017.In Visual Studio open the
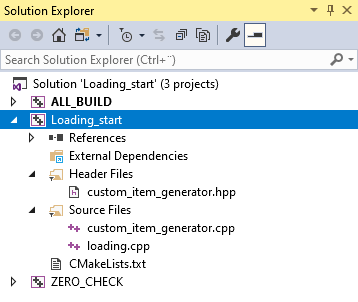
<KanziWorkspace>/Tutorials/Loading/Start/Application/build_vs2017/Loading_start.slnVisual Studio solution.In the Visual Studio solution the Loading_start project contains the template files that you need to complete this tutorial:
In the
custom_item_generator.hppheader file you create the class for the list item generator and implement the callback functions for that class.In the
custom_item_generator.cppfile you define the body for each function you implement in thecustom_item_generator.hppheader file. You display the Placeholder prefab while you asynchronously acquire the resources for the Wheel0 to Wheel8 prefabs as you scroll the Trajectory List Box 3D.In the
loading.cppfile you set the Trajectory List Box 3D node to use the list item generator that you create here.
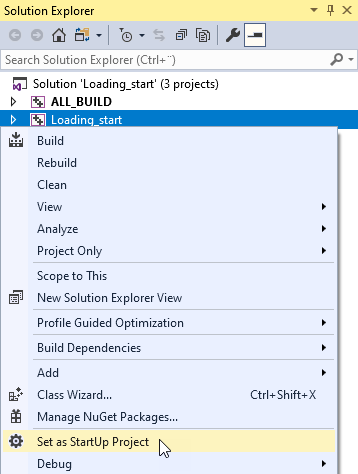
In Visual Studio in the Solution Explorer right-click the Loading_start project and select Set as StartUp Project.
In the
custom_item_generator.hppheader file create the class for the list item generator:#ifndef CUSTOM_ITEM_GENERATOR_HPP #define CUSTOM_ITEM_GENERATOR_HPP #include <kanzi/kanzi.hpp> using namespace kanzi; // Create a list item generator which you use to asynchronously load the list items for the Trajectory List Box 3D node. class CustomListBoxItemGenerator : public ListBoxItemGenerator3D, public enable_shared_from_this<CustomListBoxItemGenerator> { // Define the struct which holds the information about each list item. struct ItemInfo { // Define the root node of the prefab instance which displays each list item. Node3DSharedPtr m_item; }; // Define the type for the vector which stores both the visible and hidden list items. typedef vector<ItemInfo> ItemInfoVector; }; #endif
In the
CustomListBoxItemGeneratorclass after you define the type for the vector which stores the information about each list item, implement the callback functions that the base class of the list item generator needs:// Create a list item generator which you use to asynchronously load the list items for the Trajectory List Box 3D node. class CustomListBoxItemGenerator : public ListBoxItemGenerator3D, public enable_shared_from_this<CustomListBoxItemGenerator> { ... public: // Constructor for the list item generator. explicit CustomListBoxItemGenerator(Domain* domain); // Implement the callback function which attaches the list item generator to a Trajectory List Box 3D node. void attach(Node3D& node) override; // Implement the callback function which detaches the list item generator from a Trajectory List Box 3D node. void detach(Node3D& node) override; // Implement the callback function which acquires and instantiates the Placeholder prefab. // You show the Placeholder prefab while the application is asynchronously loading the resources for list items. ItemSharedPtr acquireItem(size_t index) override; // Implement the callback function which removes the smart pointer to the item that the Trajectory List Box 3D // returns from the acquireItem() function. In this tutorial you do not define the item management which // releases list items. For example, release list items to unload the resources for items when they // become invisible. void releaseItem(ItemSharedPtr object) override; // Implement the callback function which gets the index of the list item that the Trajectory List Box 3D // node returns from the acquireItem() function. The application uses the index of that list item in // the updateItem() function to replace the Placeholder prefab with the list item. optional<size_t> getItemIndex(ItemSharedPtr object) override; // Implement the callback function which gets the size of a list item to display at the given index. // If you do not set the size of list items, the application uses the size you return from this function. Vector3 getItemSize(size_t index) override; // Implement the callback function which gets the number of items in the list item generator. // If you add or remove an item from the Trajectory List Box 3D node, the application uses the value you return from this function. size_t getCount() override; private: // Implement the callback function that a Trajectory List Box 3D node calls each time // your application finishes loading a prefab. You use this function to replace the // Placeholder prefab with a list item. void updateItem(size_t index, string url); // The Trajectory List Box 3D node to which you attach the list item generator. TrajectoryListBox3D* m_listBox; // The vector which stores both the visible and hidden list items. ItemInfoVector m_items; };
In the
custom_item_generator.cppfile add the constructor for theCustomListBoxItemGeneratorclass and define theattach()anddetach()callback functions that you implemented in the header file:CustomListBoxItemGenerator::CustomListBoxItemGenerator(Domain* domain) : ListBoxItemGenerator3D(domain) { } // Define the callback function which attaches the list item generator to a Trajectory List Box 3D node. void CustomListBoxItemGenerator::attach(Node3D& listBox) { // Store a pointer to a Trajectory List Box 3D node. TrajectoryListBox3D* trajectoryListBox = dynamic_cast<TrajectoryListBox3D*>(&listBox); // Check that a Trajectory List Box 3D node exists. if (!trajectoryListBox) { kzThrowException(logic_error("You can attach this item generator only to a Trajectory List Box 3D node.")); } m_listBox = trajectoryListBox; // Set the size of the vector which stores the list items. // You set the size to 9 because there are 9 items in the kzb file of this application. // When the number of list items is dynamic, you can define a data source which // the list item generator uses to provide the list items. When you use a data source // for this purpose, you must synchronize the list item generator with that data source. m_items.resize(9); } // Implement the callback function which detaches the list item generator from a Trajectory List Box 3D node. void CustomListBoxItemGenerator::detach(Node3D&) { // This callback function detaches the list item generator from a Trajectory List Box 3D node. // In this tutorial you do not uninitialize the list item generator. // In your application uninitialize the list item generator when you want to clean up memory. }
In the
custom_item_generator.cppfile after thedetach()callback function define the callback functions which return the index, size, and number of items in the list item generator:// Implement the callback function which gets the index of the list item that a Trajectory List Box 3D // node returns from the acquireItem() function. The application uses the index of that list item in // the updateItem() function to replace the Placeholder prefab with the list item. optional<size_t> CustomListBoxItemGenerator::getItemIndex(ItemSharedPtr item) { // Find the index of the next list item. // You get the index by searching the list item container. optional<size_t> itemIndex; for (size_t i = 0; i < m_items.size(); ++i) { ItemInfo& itemInfo = m_items[i]; if (itemInfo.m_item == item) { return i; } } return itemIndex; } // Define the callback function which gets the size of a list item to display at the given index. // If you do not set the size of list items, the application uses the size you return from this function. Vector3 CustomListBoxItemGenerator::getItemSize(size_t /*index*/) { // Set the item size to 0. // In Kanzi Studio in the Trajectory List Box 3D node you set the properties that set the size of items // in the Trajectory List Box 3D node. return Vector3(); } // Define the callback function which gets the number of items in the list item generator. // If you add or remove an item from the Trajectory List Box 3D node, the application uses the value you return from this function. size_t CustomListBoxItemGenerator::getCount() { // Get the number of both visible and hidden list items. return m_items.size(); }
In the
loading.cppfile include thecustom_item_generator.hppheader file to access the functions you implemented in that file:#include <kanzi/kanzi.hpp> #include "custom_item_generator.hpp"
In the
loading.cppfile add to theLoadingapplication class the initialization for the list item generator you created:class Loading : public ExampleApplication { ... void onProjectLoaded() override { // Get the Screen node. ScreenSharedPtr screen = getScreen(); // Get the Trajectory List Box 3D node. // The application kzb file contains an alias you use to get the Trajectory List Box 3D node. TrajectoryListBox3DSharedPtr listBox = screen->lookupNode<TrajectoryListBox3D>("#Trajectory List Box 3D"); // Initialize the list item generator and set the Trajectory List Box 3D node to use the functionality // you implement in that list item generator. shared_ptr<CustomListBoxItemGenerator> itemGenerator(new CustomListBoxItemGenerator(getDomain())); listBox->setItemGenerator(itemGenerator); } private: // Create a pointer for the Trajectory List Box 3D node. TrajectoryListBox3DSharedPtr m_listBox; };
Asynchronously load the list items
In this section you learn how to asynchronously load the resources for each item that becomes visible as the user scrolls the Trajectory List Box 3D node. You set the application to show a placeholder item until the application loads the resources for that item.
To asynchronously load the list items:
In the
custom_item_generator.cppfile after thedetach()callback function define theacquireItem()function:// Define the callback function which acquires and displays the Placeholder prefab for each list item // until the application loads the resources for that item. // The function asynchronously acquires the resources for each list item from a prefab and // calls the updateItem() function to tell the Trajectory List Box 3D node when an item changes. CustomListBoxItemGenerator::ItemSharedPtr CustomListBoxItemGenerator::acquireItem(size_t index) { // If an item already exists, return that item. if (m_items[index].m_item) { return m_items[index].m_item; } // Acquire and instantiate the Placeholder prefab you use as the placeholder for list items that are loading. PrefabTemplateSharedPtr itemPrefabTemplate = m_listBox->acquireResource<PrefabTemplate>(ResourceID("kzb://loading/Prefabs/Placeholder")); Node3DSharedPtr item = itemPrefabTemplate->instantiate<Node3D>("Placeholder"); // Save the Placeholder as the current item in the item container. // You replace the placeholder with the item when application loads that item. m_items[index].m_item = item; // Create the kzb URL for each list item from kzb path and item index. string url = string("kzb://loading/Prefabs/Wheel") + to_string(index); // Acquire the prefab for the list item. PrefabTemplateSharedPtr prefab = m_listBox->acquireResource<PrefabTemplate>(ResourceID(url)); // Start asynchronously loading resources for a prefab. ResourceManager::UrlContainer urls; collectResourceUrls(*prefab, urls); m_listBox->getResourceManager()->acquireResourcesAsync(urls, bind(&CustomListBoxItemGenerator::updateItem, this, index, url)); return item; } // Implement the callback function which removes the smart pointer to the item that the Trajectory List Box 3D // returns from the acquireItem() function. // In this tutorial you do not define item management where you release the list item. void CustomListBoxItemGenerator::releaseItem(ItemSharedPtr item) { // In this tutorial the list item generator does not implement any caching or complex item management. // You leave this function empty because the shared_ptr destructor releases the list item. // For example, you can release the list item to unload the resources for that item each time that item becomes invisible. }
In the
custom_item_generator.cppfile define theupdateItem()function which replaces the Placeholder prefab with the list item and tells the List Box that an item changed each time you call theacquireItem()function:// Define the callback function that a Trajectory List Box 3D node calls each time // the application finishes loading the resources for a prefab. // You use this function to replace the Placeholder prefab with a list item. void CustomListBoxItemGenerator::updateItem(size_t index, string url) { // Get the prefab that finishes loading and replace the Placeholder with the next item. PrefabTemplateSharedPtr prefab = m_listBox->acquireResource<PrefabTemplate>(ResourceID(url)); Node3DSharedPtr item = prefab->instantiate<Node3D>("item"); m_items[index].m_item = item; // Notify the Trajectory List Box 3D node that the list item changed. // The Trajectory List Box 3D calls the acquireItem() function which returns the next item. m_listBox->notifyItemReplaced(index); }
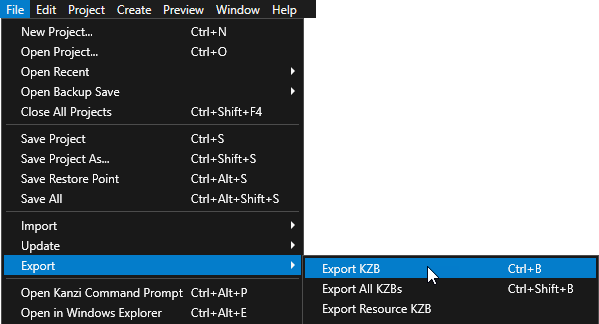
In Kanzi Studio select File > Export > Export KZB.
Kanzi Studio creates the kzb file and configuration files from your Kanzi Studio project. Kanzi Studio stores the exported files in the
<ProjectName>/Application/bindirectory or the location you set in Project > Properties in the Binary Export Directory property. The kzb file contains all nodes and resources from your Kanzi Studio project, except the resources you mark in a localization table as locale packs.When you run your Kanzi application from Visual Studio, your application loads the kzb file and configuration files.
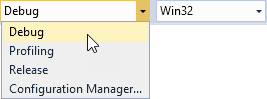
Select the solution configuration that you want to use and run your application.
During development select the Debug configuration. When you are ready to create a version for production, select the Release configuration.
When you run the application and scroll the Trajectory List Box 3D, the application shows the Placeholder prefab while it asynchronously loads the resources for each list item.
What's next?
In this tutorial you learned how to asynchronously load resources that you want to show in a List Box node when the user scrolls that List Box. Now you can:
Learn how to use a List Box node to create a list of contacts which receives data from a data source. See Tutorial: Create a contacts list with a Grid List Box.
Learn how to define a data source in Kanzi and get the data for your Kanzi application from a data source. See Tutorial: Get application data from a data source.