Step 5 - Create the interaction for the widget description panel
In this step of the tutorial you implement the functionality that handles the interactions in the description panel of the application:
Create an event handler for the Back button in the Widget Description Layer node that runs in reverse the widget highlight animations.
Make invisible the Widget Description Layer that represents the widget description panel when the user clicks the Back button.
To create the interaction for the widget description panel:
In the
onProjectLoaded()function add the event handler for the Back button.void onProjectLoaded() override { ... // Add the handler for the Back button. m_backButton->addMessageHandler(Button3D::PressedMessage, bind(&ProgrammerTutorialApplication::onBackButtonClicked, this, placeholders::_1)); }
In the
ProgrammerTutorialApplicationclass after theonListBoxItemSelected()function implement the event handler for the Back button click message.When the user clicks the Back button, the event handler runs the camera and widget highlight animation in reverse order, and hides the Widget Description Layer node.
Besides being a container for the description panel, the Widget Description Layer node also prevents interaction with the Widget Grid List Box node while it is visible.
You first run the animation, which sets the node visibility to
falsewhen the animation is finished. Next you make the node transparent by setting its opacity to0.0f. The Widget Description Layer node is hidden, but remains visible to block user input until the animation is finished.class ProgrammerTutorialApplication : public ExampleApplication { ... // The handler for the Button.Pressed message from the Back button. // Moves the selected list box item back to its position. void onBackButtonClicked(ButtonConcept::PressedMessageArguments& /*messageArguments*/) { // De-select the previously selected list box item. m_widgetList->selectItem(nullopt); // Remove old playbacks to reset the values. removePlaybacks(); // Start the animation for the camera in reverse direction. PropertyAnimationTimelineSharedPtr cameraTimeline = PropertyAnimationTimeline::create(getDomain(), ".", Node3D::RenderTransformationProperty, m_cameraAnimation); cameraTimeline->setDirectionBehavior(Timeline::DirectionBehaviorReverse); SceneGraphTimelinePlaybackContext cameraContext(*m_camera); m_cameraPlayback = cameraTimeline->createPlayback(cameraContext); getDomain()->getRootTimelineClock()->addTimelinePlayback(m_cameraPlayback); // Start the animation for the selected item in reverse direction. PropertyAnimationTimelineSharedPtr selectedItemTimeline = PropertyAnimationTimeline::create(getDomain(), ".", Node3D::LayoutTransformationProperty, m_selectedItemAnimation); selectedItemTimeline->setDirectionBehavior(Timeline::DirectionBehaviorReverse); SceneGraphTimelinePlaybackContext selectedItemContext(*m_selectedItem); m_widgetHighlightPlayback = selectedItemTimeline->createPlayback(selectedItemContext); getDomain()->getRootTimelineClock()->addTimelinePlayback(m_widgetHighlightPlayback); // Start the animation to hide the Widget Description Layer. PropertyAnimationTimelineSharedPtr widgetDescriptionVisibilityTimeline = PropertyAnimationTimeline::create(getDomain(), ".", Node::VisibleProperty, m_widgetDescriptionVisibilityAnimation); SceneGraphTimelinePlaybackContext listBoxContext(*m_widgetDescriptionNode); m_widgetDescriptionVisibilityPlayback = widgetDescriptionVisibilityTimeline->createPlayback(listBoxContext); getDomain()->getRootTimelineClock()->addTimelinePlayback(m_widgetDescriptionVisibilityPlayback); // Make the Widget Description Layer transparent. m_widgetDescriptionNode->setProperty(Node::OpacityProperty, 0.0f); } };
Because in the previous step you made the Widget Description Layer node transparent, make it opaque again in the event handler to enable the user to select the widgets.
void onListBoxItemSelected(ListBoxConcept::itemSelectedMessageArguments& messageArguments)
{
...
    if (selectedItemIndex)
    {
    ...
        // Show the widget description by setting the Widget Description Layer visible.
        if (m_widgetDescriptionVisibilityPlayback)
        {
        ...

        }
        ...
        // Make the Widget Description Layer opaque.
        m_widgetDescriptionNode->setProperty(Node::OpacityProperty, 1.0f);
    }
}
After the
onBackButtonClicked()function add a function which removes the old playbacks from the timeline clock to reset the camera values:// Remove old playbacks from the timeline clock. void removePlaybacks() { TimelineClockSharedPtr timelineClock = getDomain()->getRootTimelineClock(); if (m_cameraPlayback) { timelineClock->removeTimelinePlayback(*m_cameraPlayback); m_cameraPlayback.reset(); } if (m_widgetHighlightPlayback) { timelineClock->removeTimelinePlayback(*m_widgetHighlightPlayback); m_widgetHighlightPlayback.reset(); } if (m_backButtonEnablePlayback) { timelineClock->removeTimelinePlayback(*m_backButtonEnablePlayback); m_backButtonEnablePlayback.reset(); } if (m_widgetDescriptionVisibilityPlayback) { timelineClock->removeTimelinePlayback(*m_widgetDescriptionVisibilityPlayback); m_widgetDescriptionVisibilityPlayback.reset(); } }
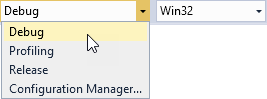
Select the solution configuration that you want to use and run your application.
During development select the Debug configuration. When you are ready to create a version for production, select the Release configuration.
When you click the Back button in the Widget Description Layer node, the application plays the highlight animation in reverse and initiates the animation that brings the Camera node back to show the entire Widget Grid List Box. Note that the functionality of the Buy button is not covered in this tutorial.