Developing with the Kanzi Android framework
Use the Kanzi Android framework when you want to create an application for the Android platform, and you intend to use Android APIs and services extensively.
Kanzi Android framework is a framework dedicated for developing Kanzi applications for Android. It exposes the Kanzi Java API, which allows you to write application and plugin code entirely in Java or Kotlin. You do not need to write any C++ or JNI code, but you can still use native Kanzi plugins. Kanzi Android framework provides strong integration with the Android UI, including support for multiple simultaneous Kanzi-based Views and flexible composition of Kanzi and Android UI elements.
Creating an Android application in Kanzi Studio
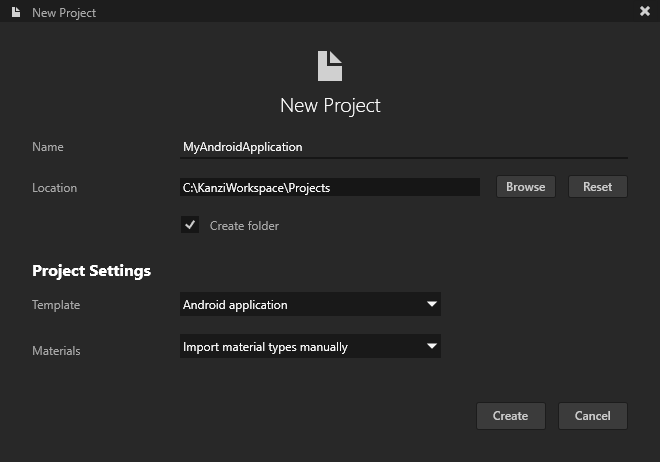
In Kanzi Studio in the New Project window, select the template for your Android application:
Android application template creates a Kanzi Studio project with a Kanzi Android framework-based application.
Android application with Java plugin template creates a Kanzi Studio project with a Kanzi Android framework-based application that contains a Kanzi Engine Java plugin.
See Creating a Java Kanzi Engine plugin using a template and Using Java and Kotlin.
When you create a project with one of these templates, Kanzi Studio creates a complete Android application project in the <ProjectName>/Application/configs/platforms/Android_gradle directory.
To learn how to build and deploy your application, see Deploying Kanzi applications to Android.
Adding the Kanzi Android framework to an existing Android application
This procedure assumes that your Android application project uses the default directory structure.
Note
The Kanzi Gradle plugin 0.6.2 supports only Android Gradle plugin 4.1.3 and Gradle 6.7.1 and lower. If you created a project with the Android Studio Gradle plugin newer than 4.1.3, you must downgrade your tooling.
To add the Kanzi Android framework to an existing Android application:
Copy the contents of
<ProjectName>/Application/bindirectory of your Kanzi Studio project to theapp/src/main/assetsdirectory of your Android Studio project.This way you import your kzb files into an Android package.
Introduce cmake to your project. This way you can link native Kanzi Engine plugins to your application.
Add to the
app/src/main/cpp/CMakeLists.txtfile:cmake_minimum_required(VERSION 3.5.1) project(<ProjectName>) if(NOT KANZI_ENGINE_BUILD) find_package(Kanzi REQUIRED CONFIG CMAKE_FIND_ROOT_PATH_BOTH HINTS "$ENV{KANZI_HOME}/Engine/lib/cmake") endif() include(kanzi-common) add_executable(<ProjectName> # This file is only needed because cmake does not allow an executable without any sources. <ProjectName>.cpp) target_link_libraries(<ProjectName> -Wl,--whole-archive Kanzi::kzdroidfw -Wl,--no-whole-archive) target_link_libraries(<ProjectName> Kanzi::kzui Kanzi::kzcoreui Kanzi::kzjava Kanzi::kzinterop) target_link_font_engine_backends(<ProjectName>) set_target_properties(<ProjectName> PROPERTIES VS_DEBUGGER_WORKING_DIRECTORY "${PROJECT_SOURCE_DIR}/bin") set_target_properties(<ProjectName> PROPERTIES VS_DEBUGGER_ENVIRONMENT "${KANZI_VS_DEBUGGER_ENVIRONMENT}") install_kanzi_libs_to_output_directory() install_kzbs_to_output_directory(${CMAKE_SOURCE_DIR}/bin) install_target_to_output_directory(<ProjectName>)
Add to the
app/src/main/cppdirectory an empty<ProjectName>.cppfile.
Copy the
getkanzi.gradlefile from the<KanziWorkspace>/Templates/Android_application_template/Application/configs/platforms/android_gradledirectory to your Android project root directory.Gradle uses the
getkanzi.gradlefile to find Kanzi Engine and Kanzi Gradle plugins.In the
build.gradlefile in the Android project root directory, get the Kanzi Gradle plugins and add Kanzi as a dependency:buildscript { apply from: 'getkanzi.gradle' repositories { google() mavenCentral() flatDir { dirs getKanziPlugins().toString() } } dependencies { classpath "com.android.tools.build:gradle:4.1.3" classpath "com.rightware.gradle:kanzi:0.6.2" }
In the
app/build.gradlefile of your Android Studio project, add the Kanzi Gradle plugin, and import the Kanzi Android framework and its dependencies:apply plugin: 'com.rightware.gradle.kanzi' ... android { ... defaultConfig { ... externalNativeBuild { cmake { arguments "-DKANZI_LINK_FREETYPE=ON" arguments "-DKANZI_LINK_ITYPE=OFF" } } } ... externalNativeBuild { cmake { path file('src/main/cpp/CMakeLists.txt') } } } ... kanzi { appFramework 'kanziruntime-droidfw' } dependencies { ... implementation 'com.rightware.kanzi:kzjava@aar' }
Adding a Kanzi view
Kanzi exposes the KanziSurfaceView and KanziTextureView view types derived from the Android SurfaceView and TextureView respectively.
KanziSurfaceViewrenders directly to a surface obtained from hardware composer, which makes its performance better. But it comes with the restriction that an application can render it only behind or on the top of the rest of the views in an Activity.KanziTextureViewrenders to a texture like a regular view. This allows an application to mix its content freely with Android content and you can move, transform, animate, and even make it translucent.
See Android SurfaceView vs TextureView or Creating a transparent view.
You can declare a KanziView in the Android layout and inflate it anywhere in the same way as a regular Android view.
<LinearLayout xmlns:android="http://schemas.android.com/apk/res/android"
   xmlns:app="http://schemas.android.com/apk/res-auto">

   <com.rightware.kanzi.KanziSurfaceView
      android:id="@+id/view1"
      app:name="View1"
      app:kzbPathList="project1.kzb"
      app:startupPrefabUrl="kzb://project1/Prefabs/View1" />
Configuring a Kanzi view
These view types expose various configurations that you can assign directly from a layout.
Attribute |
Use |
Format |
Default value |
|---|---|---|---|
|
Name of the view. |
string |
|
|
Comma separated list of kzb files. When set, Kanzi automatically loads these files when the view is attached. |
string |
|
|
URL of the startup prefab. When set, Kanzi asynchronously loads and instantiates this prefab as a child of the view. |
string |
|
|
Color used to clear the surface. |
color |
|
|
Flag to enable the clearing of the surface. |
boolean |
|
Alternatively, you can assign these configuration options with setters after inflation.
public class Activity1 extends FragmentActivity {

    @Override
    protected void onCreate(Bundle) {
        ...

        // Inflate the content from the layout.
        setContentView(R.layout.activity1);

        // Get the reference to the view.
        KanziView view = findViewById(R.id.view1);

        // Set the name.
        view.setName("View1");

        // Set the kzb paths
        view.setKzbPathList(new String[]{"project1.kzb"});

        // Set the startup prefab.
        view.setStartupPrefabUrl("kzb://project1/Prefabs/View1");
class CarMenu : FragmentActivity() {

    override fun onCreate(icicle: Bundle?) {
        ...

        // Inflate the content from the layout.
        setContentView(R.layout.activity1)

        // Get the reference to the view.
        val view: KanziView = findViewById(R.id.view1)

        // Set the name.
        view.setName("View1")

        // Set the kzb paths
        view.setKzbPathList(arrayOf("project1.kzb"));

        // Set the startup prefab.
        view.setStartupPrefabUrl("kzb://project1/Prefabs/View1")
It is also possible to explicitly load kzb files during the activity onCreate function.
@Override
protected void onCreate(Bundle) {
   ...

   // Acquire a reference to the KanziRuntime.
   mRuntimeRef = KanziRuntime.acquire(this);

   // Load the kzb.
   try {
       mRuntimeRef.get().loadKzb("project1.kzb");
   } catch (FileNotFoundException e) {
       Log.e(e.getMessage());
       return;
   }

   // Inflate the content from the layout.
   setContentView(R.layout.activity1);
override fun onCreate(icicle: Bundle?) {
   ...

   // Acquire a reference to the KanziRuntime.
   mRuntimeRef = KanziRuntime.acquire(this)

   // Load the kzb.
   try {
       mRuntimeRef.get().loadKzb("project1.kzb")
   } catch (FileNotFoundException e) {
       Log.e(e.getMessage())
       return
   }

   // Inflate the content from the layout.
   setContentView(R.layout.activity1)
Accessing the Kanzi Java API
From the view, you can access the node tree root, from where you have access to the full Kanzi Java API.
// Get root.
Node root = view.getRoot();

// Look up a node using an alias.
Node button = root.lookupNode("#Button");

// Set property.
button.setProperty(ButtonConceptMetadata.ToggleStateProperty, 0);

// Add message handler.
button.addMessageHandler(ButtonConceptMetadata.ToggleStateMessage,
                           new Node.MessageSubscriptionFunction() {
                           @Override
                           public void handle(MessageArguments messageArguments) {
                              int toggleState = messageArguments.getArgument(ButtonConceptMetadata.ToggleStateProperty);
                              Log.i("Button State is " + toggleState);
                           }});
// Get root.
val root = view.getRoot();

// Look up a node using an alias.
val button = root.lookupNode("#Button");

// Set property.
button!!.setProperty(ButtonConceptMetadata.ToggleStateProperty, 0);

// Add message handler.
button.addMessageHandler(ButtonConceptMetadata.ToggleStateMessage,
    Node.MessageSubscriptionFunction { messageArguments ->
        val toggleState =
            messageArguments.getArgument(ButtonConceptMetadata.ToggleStateProperty)
        Log.i(TAG, "Button State is $toggleState")
    })
Observing state changes
You can implement KanziViewListener to listen for state changes in KanziView. Use this to inject custom initialization and un-initialization logic.
For example, when the startup prefab is set, access the node tree only after the startup prefab loading is complete. To do this, use the onStartupPrefabLoaded() callback.
view.addListener(new KanziViewListener() {

   @Override
   public void onStartupPrefabLoaded(KanziView view) {
      // Add your application code here.
view.addListener(object : KanziViewListener {

   @Override
   public void onStartupPrefabLoaded(KanziView view) {
      // Add your application code here.
Attaching Kanzi to an existing view
You can instantiate and attach a KanziViewAdapter to an existing Android SurfaceView or TextureView.
@Override
protected void onCreate(Bundle) {
   ...

   // Get reference to the view.
   SurfaceView view = findViewById(R.id.view1);

   // Instantiate an adapter and assign a view.
   mAdapter = new KanziViewAdapter(view, "View1");

   // Assign a startup prefab.
   view.setStartupPrefabUrl("kzb://project1/Prefabs/View1");
override fun onCreate(icicle: Bundle?) {
    ...

    // Get reference to the view.
    val view = findViewById(R.id.view1)

    // Instantiate an adapter and assign a view.
    mAdapter = KanziViewAdapter(view, "View1");

    // Assign a startup prefab.
    view!!.setStartupPrefabUrl("kzb://project1/Prefabs/View1");
Using Kanzi from view-less contexts
You can also instantiate and use a KanziViewAdapter without a view. For example, from a WallpaperService.
class WallpaperEngine1 extends WallpaperService.Engine {
    KanziViewAdapter mAdapter;

    @Override
    public void onCreate(SurfaceHolder) {
        ...
        // Instantiate an adapter.
        mAdapter = new KanziViewAdapter(getApplicationContext(), "WallpaperEngine1");

        // Assign a startup prefab.
        mAdapter.setStartupPrefabUrl("kzb://project1/Prefabs/Wallpaper");
private inner class WallpaperEngine1 : Engine() {
    private var mAdapter: KanziViewAdapter? = null

    override fun onCreate(surfaceHolder: SurfaceHolder) {
        ...
        // Instantiate an adapter.
        mAdapter = KanziViewAdapter(applicationContext, "WallpaperEngine1")

        // Assign a startup prefab.
        mAdapter!!.setStartupPrefabUrl("kzb://project1/Prefabs/Wallpaper")
Handling input
While KanziSurfaceView and KanziTextureView handle input events by default, an arbitrary view using KanziViewAdapter must manually forward any input events that it wants Kanzi to process, through the handleTouchEvent(), handlekeyEvent(), and handleFocusChange() interfaces.
All Kanzi views by default set focusableInTouchMode to True, unless otherwise set programmatically or through layout attributes. This makes them gain and keep focus when clicked on. See Android touch mode.
Handling orientation change
When the screen orientation changes, an Android application, by default, destroys and recreates the activity. This allows an application to use an alternate layout for portrait and landscape screens, but it also means that you lose all internal Kanzi states.
You can override this by adding the android:configChanges="orientation" property to the AndroidManifest.xml file. With this option, the activity is no longer destroyed on orientation changes, instead onConfigurationChanged() is called on the activity. Forward this event manually to handleOrientationChange(). This option avoids recreating the Kanzi controls and therefore all internal state is retained. See Android configuration changes.
Handling the Android lifecycle
While KanziSurfaceView and KanziTextureView handle window and surface events by default, an arbitrary view using KanziViewAdapter must manually forward the window and surface events it wants Kanzi to process, through the handleAttachedToWindow(), handleSurfaceCreated(), handleSurfaceChanged(), handleSurfaceDestroyed(), and handleDetachedFromWindow() interfaces.
Handling changes to visibility of views
KanziSurfaceView and KanziTextureView by default handle direct visibility changes. When you use KanziViewAdapter, you must manually forward the visibility changes using the handleVisibilityChange() function.
When you set a view to be invisible, Kanzi stops rendering the surface of that view.
Keep in mind that the visibility change in an Android view does not propagate down to its children. This means that when the visibility of a parent of a Kanzi-based view changes, Kanzi is not automatically notified about this. In such case, you must manually forward the visibility changes to the Kanzi-based view using the handleVisibilityChange() function.
Creating a transparent view
A KanziView can show transparent content that allows the content behind that view to be visible.
To create a transparent view:
To enable transparency for a
KanziView, edit theonCreatemethod of the view activity:For
KanziSurfaceViewcall thesetZOrderOnTopandsetFormatmethods.@Override protected void onCreate(Bundle) { ... // Get reference to the view. KanziSurfaceView view = findViewById(R.id.view1); // Add transparency support to the view. view.setZOrderOnTop(true); view.getHolder().setFormat(PixelFormat.TRANSPARENT);
override fun onCreate(icicle: Bundle?) {
    ...

    // Get reference to the view.
    val view = findViewById(R.id.view1);

    // Add transparency support to the view.
    view!!.setZOrderOnTop(true);
    view!!.getHolder().setFormat(PixelFormat.TRANSPARENT);
For
KanziTextureViewcall thesetOpaquemethod.@Override protected void onCreate(Bundle) { ... // Get reference to the view. KanziTextureView view = findViewById(R.id.view1); // Add transparency support to the view. view.setOpaque(false);
override fun onCreate(icicle: Bundle?) {
    ...

    // Get reference to the view.
    val view = findViewById(R.id.view1);

    // Add transparency support to the view.
    view!!.setOpaque(false);
In the Android layout file, update the
KanziViewclear color to have transparency.app:clearColor="@android:color/transparent"
Edit the
application.cfgto require a surface with alpha bits. See Surface properties.SurfaceBitsAlpha = 8
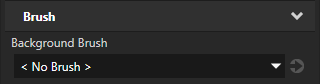
In Kanzi Studio select the node that shows the transparent content and in the Properties set the Background Brush property to < No Brush >.
Creating multiple views
You can activate multiple Kanzi-based views simultaneously within an app and access them across different Activities or Fragments.
Sharing resources between views
All views in the same app share a single KanziRuntime along with all the loaded kzb files and resources. KanziRuntime exposes the acquire() interface to access the current instance or create a new instance, if it has not already been created.
Unloading Kanzi Engine
When there are no active views that contain Kanzi content, you can unload Kanzi Engine from the memory.
The KanziRuntime.Reference class performs reference counting on the active KanziRuntime instance. Each attached KanziView automatically keeps a Reference to KanziRuntime, which is closed only when the view gets detached.
When all the Reference instances have been closed the KanziRuntime is unloaded.
If the KanziRuntime has been unloaded, the next call to acquire() initializes a new instance of KanziRuntime, requiring the reload of all kzb files and resources.
Using a native Kanzi Engine plugin
To use a native Kanzi Engine plugin:
Export the Kanzi Engine plugin:
In Kanzi Studio open the project that contains the plugin code.
For example, open
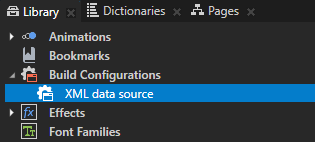
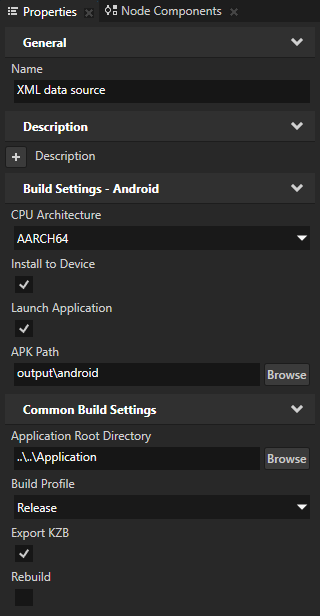
<KanziWorkspace>/Tutorials/Data sources/Completed/Tool_project/XML data source.kzproj.In the Library > Build Configurations select the plugin and in the Properties set:
CPU Architecture to match the architecture of your device
Build Profile to the configuration that you want to use
Select File > Export > Build Android Package.
Kanzi Studio builds the Kanzi Engine plugin in
<ProjectName>/Application/output/cmake/<PluginProjectName>/cmake/release/arm64-v8a/lib<PluginProjectName>.so.For example, if you use the XML data source plugin, Kanzi Studio builds the plugin in
<KanziWorkspace>/Tutorials/Data sources/Completed/Application/output/cmake/XML_data_source/cmake/release/arm64-v8a/libXML_data_source.so.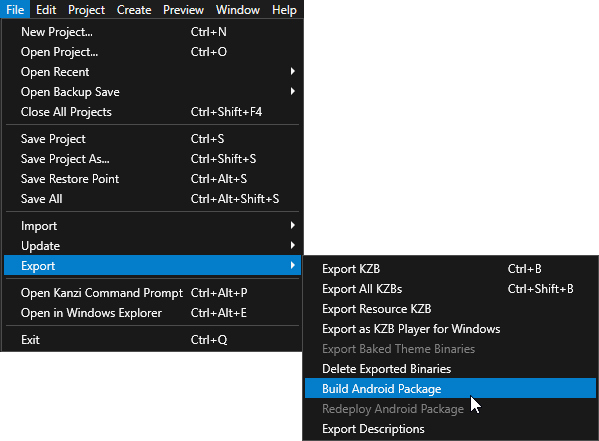
Add the built Kanzi Engine plugin to an application:
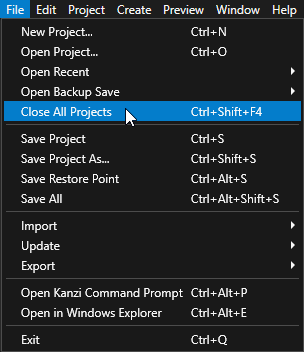
In Kanzi Studio select File > Close All projects and open or create a Kanzi Studio project using the Android application template.
Android application template creates a Kanzi Studio project with a Kanzi Android framework-based application.
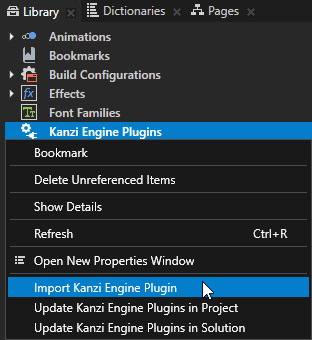
In the Library right-click Kanzi Engine Plugin, select Import Kanzi Engine Plugin, and select the dll of the built plugin.
For example, select the
<KanziWorkspace>/Tutorials/Data sources/Completed/Application/lib/Win64/GL_vs2017_Release_DLL/XML_data_source.dllplugin.This way you add Kanzi Engine plugin to a Kanzi Studio project.
In Windows Explorer in the project to which you want to add this Kanzi Engine plugin, create this directory structure
<ProjectName>/Application/lib/Android/release/arm64-v8a.Copy the Kanzi Engine so plugin file from
<ProjectName>/Application/output/cmake/<PluginProjectName>/cmake/release/arm64-v8a/lib<PluginProjectName>.soto the<ProjectName>/Application/lib/Android/release/arm64-v8adirectory.For example, copy the
<KanziWorkspace>/Tutorials/Data sources/Completed/Application/output/cmake/XML_data_source/cmake/release/arm64-v8a/libXML_data_source.sofile.Edit the
<ProjectName>/Application/CMakeLists.txtfile to add the Kanzi Engine plugin as an imported library dependency:add_library(<PluginProjectName> SHARED IMPORTED) set_target_properties(<PluginProjectName> PROPERTIES IMPORTED_LOCATION "${PROJECT_SOURCE_DIR}/lib/Android/release/${ANDROID_ABI}/lib<PluginProjectName>.so") target_link_libraries(<ProjectName> <PluginProjectName>)
For example, to add the XML data source plugin, use:
add_library(XML_data_source SHARED IMPORTED)
set_target_properties(XML_data_source PROPERTIES IMPORTED_LOCATION "${PROJECT_SOURCE_DIR}/lib/Android/release/${ANDROID_ABI}/libXML_data_source.so")
target_link_libraries(<ProjectName> XML_data_source)
This way you add the built native Kanzi Engine plugin to your Android application.
In Kanzi Studio select File > Export > Build Android Package.
Kanzi Studio builds and deploys your application to an Android device. When application starts running on your Android device, in the logcat you can see when the application loads the plugin.
For example, if you use the XML data source plugin, the logcat shows:
I/Kanzi: [info:generic] Loading plugin 'libXML_data_source.so'
Use the plugin in the Kanzi Android framework application.
For example, to learn how to use a Kanzi Engine data source plugin, see Using a data source.