Interpolating property values
Use the Property Target Interpolator when you want to dynamically set the target value for a property and want to interpolate the current value to the target value over time.
For example, use the Property Target Interpolator to interpolate the rotation of a gauge needle to a target value regardless of its current position.
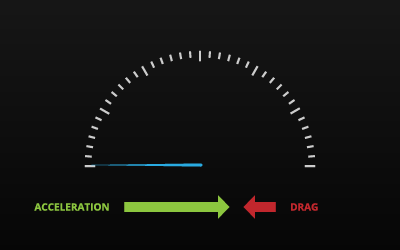
The Property Target Interpolator emulates the behavior of a spring-damper system which never overshoots. You use the Acceleration property to set the force with which the spring moves the object, and the Drag property to set the damping coefficient. The larger the value of the Acceleration property is, the faster the property reaches its new value. The larger the value of the Drag property is, the lower is the maximum interpolation speed.
Learn how to use the Property Target Interpolator by completing a tutorial. See Tutorial: Interpolate property values.
Interpolating a value of a property
To interpolate a value of a property:
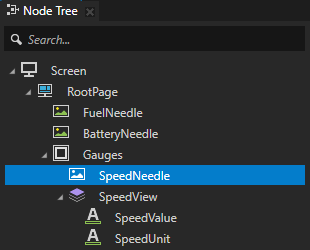
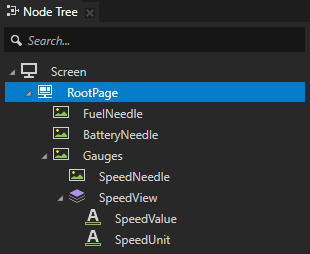
In the Node Tree select the node which contains the property that you want to interpolate.
For example, in Kanzi Studio open the project stored in the
<KanziWorkspace>/Tutorials/Data sources/Completed/Tool_projectdirectory and select the RootPage > Gauges > SpeedNeedle node. You use the Property Target Interpolator to gradually move the SpeedNeedle node from its previous to the current position when the value of the speed changes in the data source. To learn how to create that project, see Tutorial: Create gauges and Tutorial: Get application data from a data source.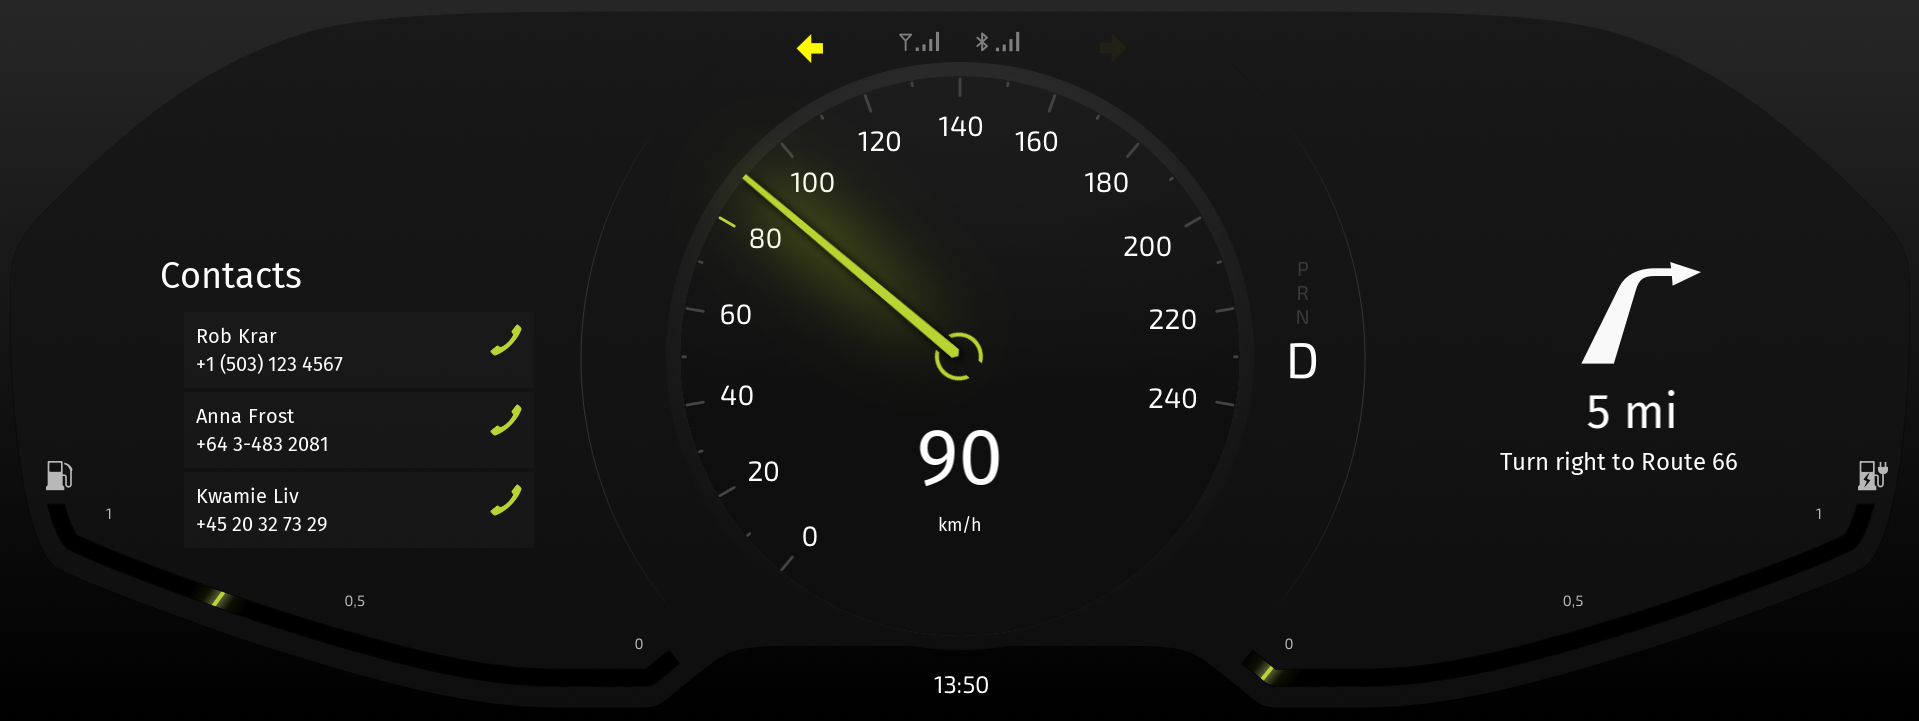
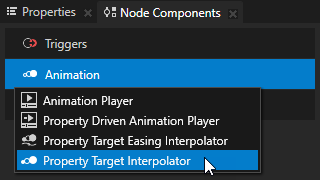
In the Node Components press Alt and right-click Animation, and select Property Target Interpolator.
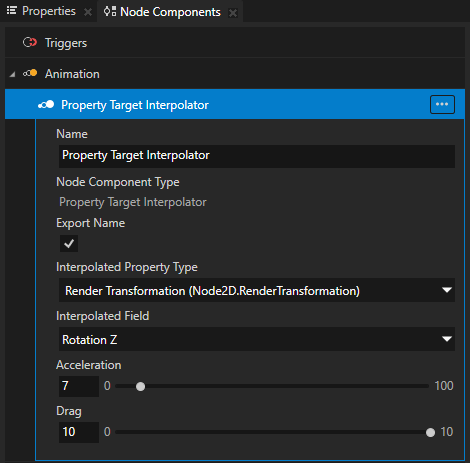
In the Property Target Interpolator that you created set:
Interpolated Property Type to the property that you want to interpolate
For example, select the Render Transformation property. If you want to interpolate a property whose data type is not a float, create a float property type and bind the property you want to interpolate to the float property you created. For example, use this approach if you want to interpolate rotation of 3D nodes. See Interpolating rotation of 3D nodes.
Interpolated Field to the property field of the property that you selected in the Interpolated Property Type
For example, select the Rotation Z property field.
Acceleration and Drag to set the interpolation behavior
The Property Target Interpolator emulates the behavior of a spring-damper system which never overshoots. You use the Acceleration property to set the force with which the spring moves the object, and the Drag property to set the damping coefficient. The larger the value of the Acceleration property is, the faster the property reaches its new value. The larger the value of the Drag property is, the lower is the maximum interpolation speed.
For example, set Acceleration to 7 and Drag to 10.
When you change the value of the property that you set in the Interpolated Property Type, the Property Target Interpolator interpolates the current value to the target value over time. In this example, the Property Target Interpolator interpolates the value of the Speed property to change the position of the Speed needle. To change the interpolation, in the Property Target Interpolator adjust the values of the Acceleration and Drag properties.
Interpolating rotation of 3D nodes
To interpolate rotation of 3D nodes:
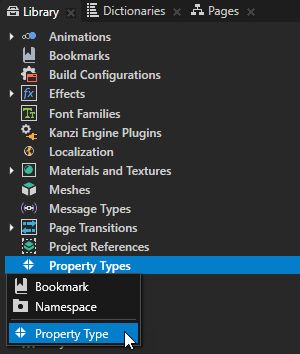
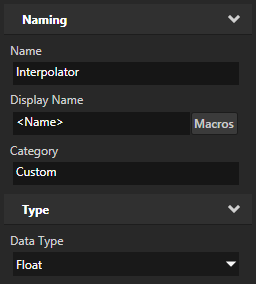
In the Library press Alt and right-click Property Types, select Property Type, and create a float property type.
For example, create a float property type called Interpolator.
In the Node Tree select or create the 3D node the rotation of which you want to interpolate.
For example, select the speed gauge needle in your project.
In the Node Components press Alt and right-click Animation, and select Property Target Interpolator.
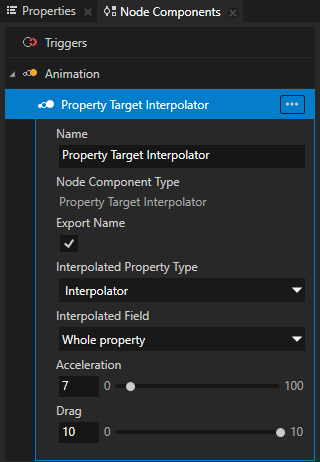
In the Property Target Interpolator that you created set:
Interpolated Property Type to the property type you created in the first step.
Acceleration and Drag to set the interpolation behavior
The Property Target Interpolator emulates the behavior of a spring-damper system which never overshoots. You use the Acceleration property to set the force with which the spring moves the object, and the Drag property to set the damping coefficient. The larger the value of the Acceleration property is, the faster the property reaches its new value. The larger the value of the Drag property is, the lower is the maximum interpolation speed.
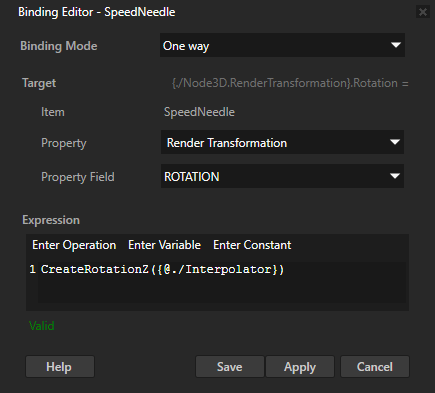
In the Node Tree select the 3D node the rotation of which you want to interpolate, in the Properties click + Add Binding, and in the Binding Editor set:
Property to either Layout Transformation or Render Transformation
Property Field to Rotation
Expression to
CreateRotationZ({@./Interpolator})
Click Save.
In the Properties click + Add Binding and in the Binding Editor set:
Property to the property type you set in the Property Target Interpolator in the Interpolated Property Type.
Expression to the property with which you want to control rotation.
For example:
If you get the value for the rotation from a data source, set it to the data object you want to use to control rotation.
If you get the value for the rotation from another property in the project, set it to that property.
Note
If this property is in the same node which contains the Property Target Interpolator, you can see the interpolation only when you run the application, but not in the Preview.
Click Save.

When you change the value of the property which you use to control the rotation, the Property Target Interpolator gradually changes the value to the target value over time. To change the interpolation, in the Property Target Interpolator adjust the values of the Acceleration and Drag properties.
Getting information about completion of an interpolation
When Property Target Interpolator completes the interpolation of the property it interpolates, it sends a message. You can intercept that message to find out when the property it interpolated reached its final value.
To get the information about completion of an interpolation:
Create and configure a Property Target Interpolator for a property that you want to interpolate. See Interpolating a value of a property.
In the Node Tree select a node where you want to get the information about the completion of an interpolation of that Property Target Interpolator.
For example, if you created the Property Target Interpolator in the SpeedNeedle node, but want to get the information about the completion of an interpolation in the RootPage node, select the RootPage node.
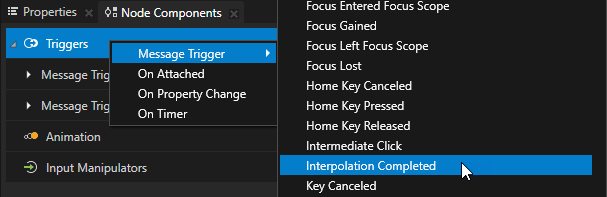
In the Node Components press Alt and right-click Triggers, and select Message Trigger > Interpolation Completed.
Interpolation Completed trigger intercepts the message a Property Target Interpolator sends when it finishes interpolating the value of the property it interpolates.
In the Interpolation Completed trigger that you created set the Message Source property to the node that has the Property Target Interpolator for which you want to find out when it completes the interpolation.
For example, if you want to find out in the RootPage node when the Property Target Interpolator finishes interpolating a property in the SpeedNeedle, set the Message Source to the SpeedNeedle node.
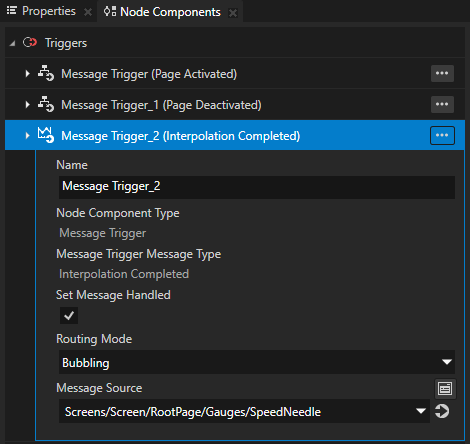
In the Interpolation Completed trigger create the action that you want to execute.
When the Property Target Interpolator sends a message about the completion of the interpolation, this trigger executes the action that you selected.
For example, add the Start Animation Playback action to start an animation, or add the Set Property action to set the value of a property.
Using Property Target Interpolator in the API
To create a Property Target Interpolator and set its target property and interpolation settings:
// Create property target interpolator.
PropertyTargetInterpolatorSharedPtr interpolator = PropertyTargetInterpolator::create(domain, "player");
// Set type name of property which should be interpolated on the node where interpolator will be attached.
interpolator->setInterpolatedPropertyType(Node2D::OpacityProperty.getName());
// Adjust interpolation settings.
interpolator->setAcceleration(2.0f);
interpolator->setDrag(1.0f);
To attach a Property Target Interpolator to a node:
node->addNodeComponent(interpolator);
To create property target interpolation timeline and set its target property and interpolation settings:
PropertyTargetInterpolationTimelineSharedPtr timeline = PropertyTargetInterpolationTimeline::create(domain, ".", Node2D::OpacityProperty, PropertyFieldWhole, 2.0f, 1.0f);
To create playback for property target interpolation timeline:
SceneGraphTimelinePlaybackContext context(*node);
TimelinePlaybackSharedPtr playback = timeline->createPlayback(context);
To add playback of property target interpolation timeline to the clock:
domain->getRootTimelineClock()->addTimelinePlayback(playback);
For details, see the PropertyTargetInterpolator, PropertyTargetInterpolationTimeline, and PropertyTargetInterpolationTimelinePlayback classes in the Kanzi Engine API reference.