Blending and compositing 2D nodes
Blending controls how to combine the color and alpha values of pixels in one layer or image (source) with the color and alpha values of pixels in the underlying layer or image (destination). By default Kanzi blends 2D nodes using the Alpha: Premultiplied blend mode which uses the alpha channel of the source pixels to blend the source pixels on top of the destination pixels. See Color blending modes.
Alpha compositing controls how to use the alpha channels of the source and destination pixels to merge those pixels. Kanzi supports the Porter-Duff blend modes for alpha compositing. See Alpha compositing modes.
How blend mode affects the rendering of 2D nodes
In a 2D node the Material > Blend Mode property sets how Kanzi:
Blends the node and its descendant nodes with the underlying layer
If the node has descendants and you set the Blend Mode property to a value other than the default Alpha: Premultiplied, Kanzi composites the nodes and renders the composition using the blend mode that you set.
Renders the foreground and background of the node
If you set both the Foreground Brush and Background Brush properties in a 2D node, the blend mode affects the combination of the brushes.
If the node has both background and foreground and the blend mode is not Alpha: Non-premultiplied or Opaque, Kanzi composites the node and renders the composition using the blend mode that you set.
Renders the combination of the node and a 2D effect assigned to that node
See Effects for 2D nodes.

Blend modes in Kanzi
Blend mode controls how Kanzi combines the color and alpha values of pixels in one layer or image (source) with the color and alpha values of the pixels in the underlying layer or image (destination).
The section describes the blend modes in Kanzi. Each description includes:
The equation that Kanzi uses to compute the result color (\(C_{out}\)) and alpha (\(α_{out}\)) of the composition of the source (\(src\)) and destination (\(dst\)).
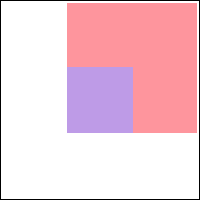
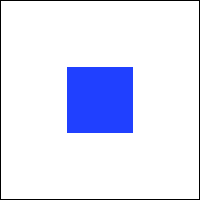
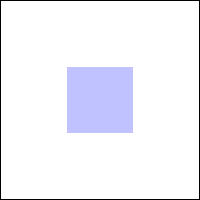
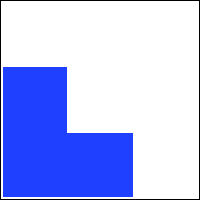
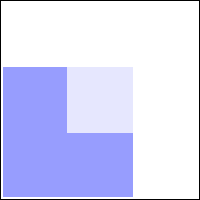
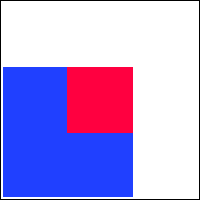
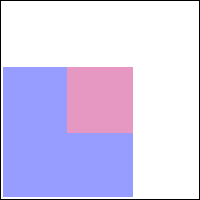
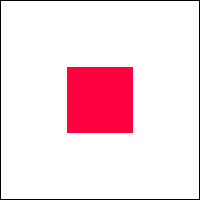
Visualization of how the blend mode operates on overlapping source and destination images with opaque (left) or partially transparent (right) content:
Opaque |
Partially transparent |
||
Destination (\(dst\)) |
|
|
|
Source (\(src\)) |
|

|
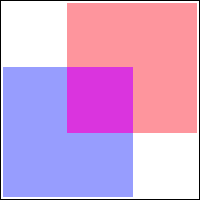
Color blending modes
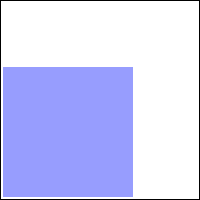
Alpha: Premultiplied
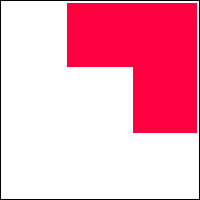
The Alpha: Premultiplied mode expects premultiplied alpha RGBA in the source pixels, and uses the alpha of the source pixels to blend the source pixels on top of the destination pixels. This mode is the default and recommended mode for alpha blending, and equivalent to the Porter-Duff Source Over mode.
\[\begin{split}&C_{out} = C_{src} + (1 - α_{src}) * C_{dst} \\
&α_{out} = α_{src} + (1 - α_{src}) * α_{dst}\end{split}\] |

|

|
Additive
The Additive mode adds the source pixels to the destination pixels. Use this mode for effects where you want a layer to add color, but not reduce the color of the underlying layer.
\[\begin{split}&C_{out} = C_{src} + C_{dst} \\
&α_{out} = α_{src} + α_{dst}\end{split}\] |

|
|
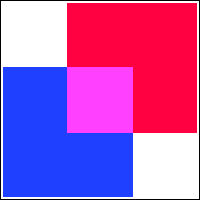
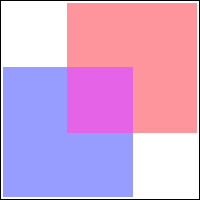
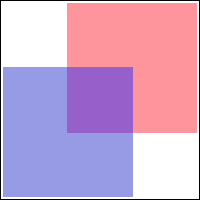
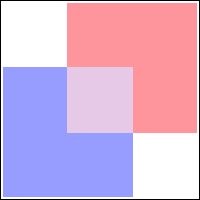
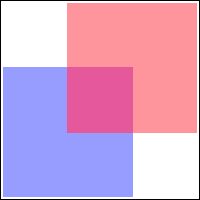
Multiply
The Multiply mode multiplies the source and destination pixels. This mode is the opposite of the Screen mode. For example, you can use this mode to create a partially transparent overlay that is darker than its backdrop. See Using color blending to create an overlay.
\[\begin{split}&C_{out} = C_{dst} * C_{src} \\
&α_{out} = α_{dst} * α_{src}\end{split}\] |
|
|
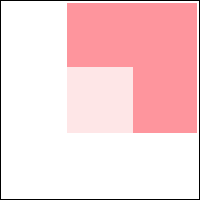
Screen
The Screen mode adds the source and destination pixels and subtracts from the result the product of the source and destination. This mode is the opposite of the Multiply mode. For example, you can use this mode to create a partially transparent overlay that is lighter than its backdrop. See Using color blending to create an overlay.
\[\begin{split}&C_{out} = C_{src} + (1 - C_{src}) * C_{dst} \\
&α_{out} = α_{src} + (1 - α_{src}) * α_{dst}\end{split}\] |
|
|
Alpha: Automatic
The Alpha: Automatic mode sets the blend mode to either:
Alpha: Premultiplied when the Premultiply Alpha property for the project or an image is enabled. This is the default value.
Alpha: Mixed when the Premultiply Alpha property for the project or an image is disabled.
Alpha: Non-premultiplied
Legacy mode. For non-premultiplied input use the Alpha: Mixed mode instead.
The Alpha: Non-premultiplied mode expects non-premultiplied alpha RGBA in the source pixels, and blends the source pixels with the destination pixels. Note that this results in an incorrect alpha channel in the destination framebuffer. You cannot use this mode when rendering to a texture which is later blended as a foreground.
Alpha: Mixed
The Alpha: Mixed mode expects non-premultiplied alpha RGBA in the source pixels, and blends the source pixels with the destination pixels. For example, use this mode when you dynamically load without preprocessing a texture that uses a fragment shader which does not perform alpha-premultiplication of the RGB color.
\[\begin{split}&C_{out} = α_{src} * C_{src} + (1 - α_{src}) * C_{dst} \\
&α_{out} = α_{src} + (1 - α_{src}) * α_{dst}\end{split}\] |
|
|
Alpha compositing modes
This section describes the Porter-Duff blend modes in Kanzi. The Porter-Duff blend modes were defined by Thomas Porter and Tom Duff in their 1984 paper Compositing Digital Images.
Use the Porter-Duff blend modes for alpha compositing. The Porter-Duff blend modes combine two layers based on the alpha channels of those layers. If the target framebuffer does not have alpha channel, or the alpha value is constant 1, many of the alpha compositing modes can produce unintuitive but correct results. For example, the Source Out mode produces the same result as the Clear blend mode.
When you use alpha compositing, make sure that the alpha channel of the render target is suitable for alpha compositing. For example:
Use a parent node which you composite by enabling the Node 2D > Force Composition property. This way you render the nodes to a cleared render target.
If the window surface is translucent, use the Clear blend mode to clear the target framebuffer.
By default Kanzi composites nodes using the Alpha: Premultiplied mode, which corresponds to the Porter-Duff Source Over mode.
In Kanzi to achieve the behavior of the Porter-Duff Destination or Source mode, in the destination or source node disable the Node > Visibility property.
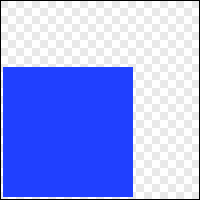
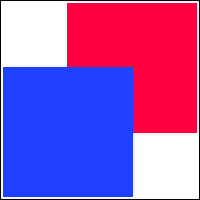
Opaque
The Opaque mode replaces the destination pixels with the source pixels. This mode is equivalent to the Porter-Duff Source mode.
\[\begin{split}&C_{out} = C_{src} \\
&α_{out} = α_{src}\end{split}\] |

|
|
Clear
The Clear mode sets the destination pixels to transparent black.
\[\begin{split}&C_{out} = 0 \\
&α_{out} = 0\end{split}\] |

|
|
Exclusive Or
The Exclusive Or mode draws the non-overlapping source and destination pixels. In the overlapping source and destination pixels reduces the source alpha by the inverse of the destination alpha, and the destination alpha by the inverse of the source alpha, then merges the pixels.
\[\begin{split}&C_{out} = (1 - α_{dst}) * C_{src} + (1 - α_{src}) * C_{dst} \\
&α_{out} = (1 - α_{dst}) * α_{src} + (1 - α_{src}) * α_{dst}\end{split}\] |
|
|
Source Atop
The Source Atop mode discards those source pixels that do not cover destination pixels, and draws the rest of the source pixels over destination pixels.
\[\begin{split}&C_{out} = α_{dst} * C_{src} + (1 - α_{src}) * C_{dst} \\
&α_{out} = α_{dst}\end{split}\] |
|
|
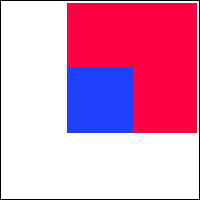
Source In
The Source In mode draws those source pixels that cover destination pixels, and discards all destination pixels.
\[\begin{split}&C_{out} = α_{dst} * C_{src} \\
&α_{out} = α_{dst} * α_{src}\end{split}\] |
|
|
Source Out
The Source Out mode draws the source pixels with alpha reduced by the inverse of the destination alpha, and discards all destination pixels.
\[\begin{split}&C_{out} = (1 - α_{dst}) * C_{src} \\
&α_{out} = (1 - α_{dst}) * α_{src}\end{split}\] |
|
|
Destination Atop
The Destination Atop mode discards those destination pixels that are not covered by source pixels, and draws the rest of the destination pixels over source pixels.
\[\begin{split}&C_{out} = α_{src} * C_{dst} + (1 - α_{dst}) * C_{src} \\
&α_{out} = α_{src}\end{split}\] |
|
|
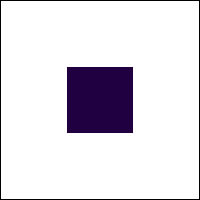
Destination In
The Destination In mode draws only those destination pixels that intersect with the source pixels, and discards all source pixels. You can use this blend mode to implement a mask effect. See Using alpha compositing to create a mask effect.
\[\begin{split}&C_{out} = α_{src} * C_{dst} \\
&α_{out} = α_{src} * α_{dst}\end{split}\] |
|

|
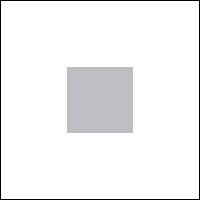
Destination Out
The Destination Out mode draws the destination pixels with alpha reduced by the inverse of the source alpha, and discards all source pixels. You can use this blend mode to implement an inverse mask effect.
\[\begin{split}&C_{out} = (1 - α_{src}) * C_{dst} \\
&α_{out} = (1 - α_{src}) * α_{dst}\end{split}\] |
|
|
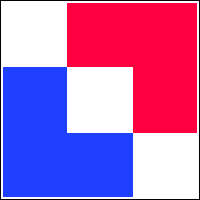
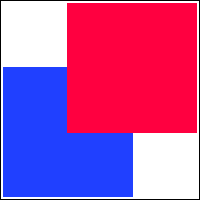
Destination Over
The Destination Over mode draws the destination pixels over the source pixels.
\[\begin{split}&C_{out} = (1 - α_{dst}) * C_{src} + C_{dst} \\
&α_{out} = (1 - α_{dst}) * α_{src} + α_{dst}\end{split}\] |
|
|
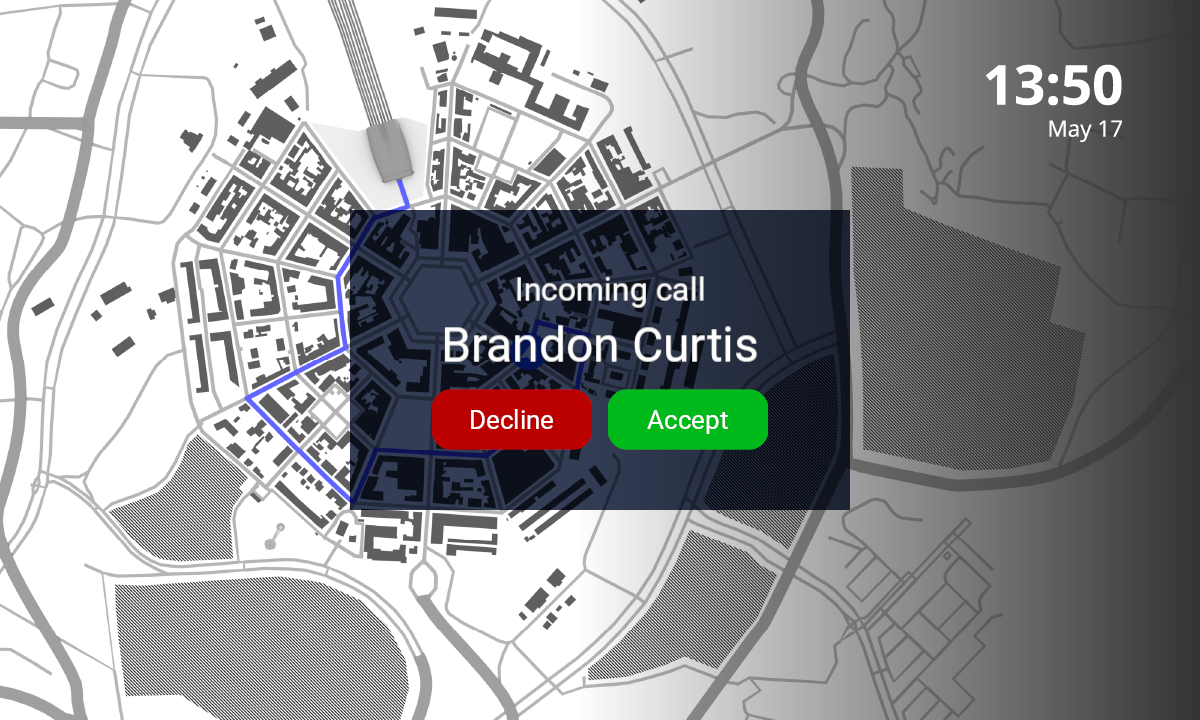
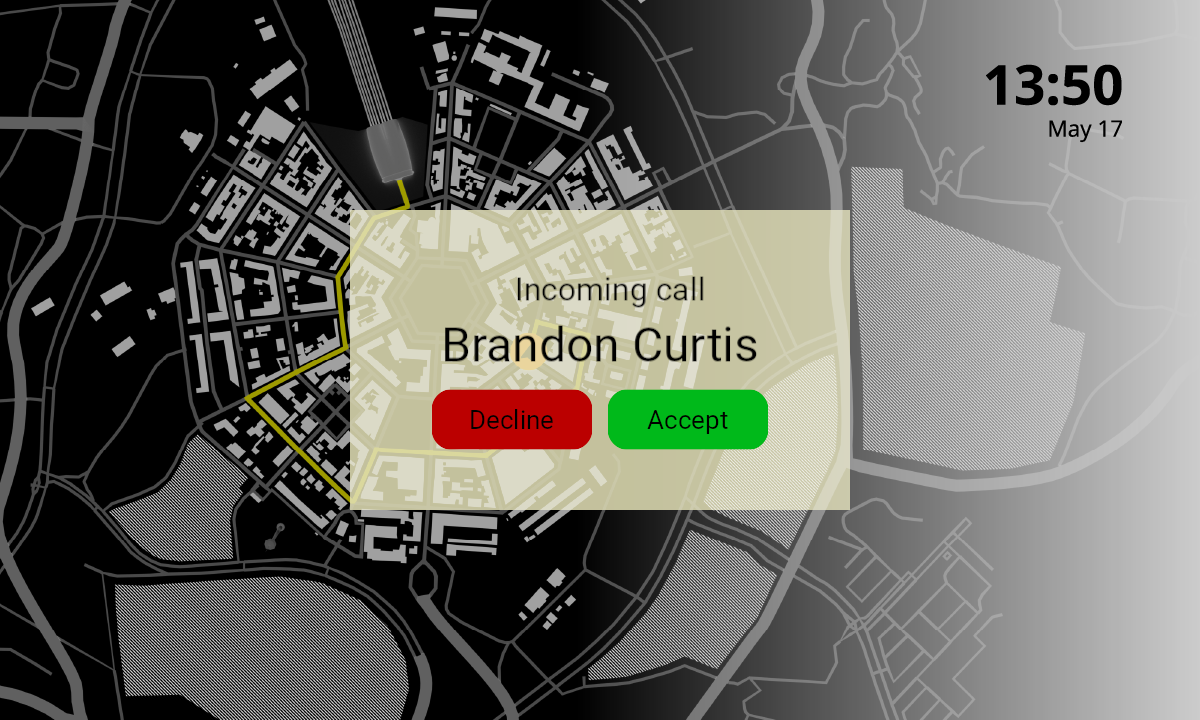
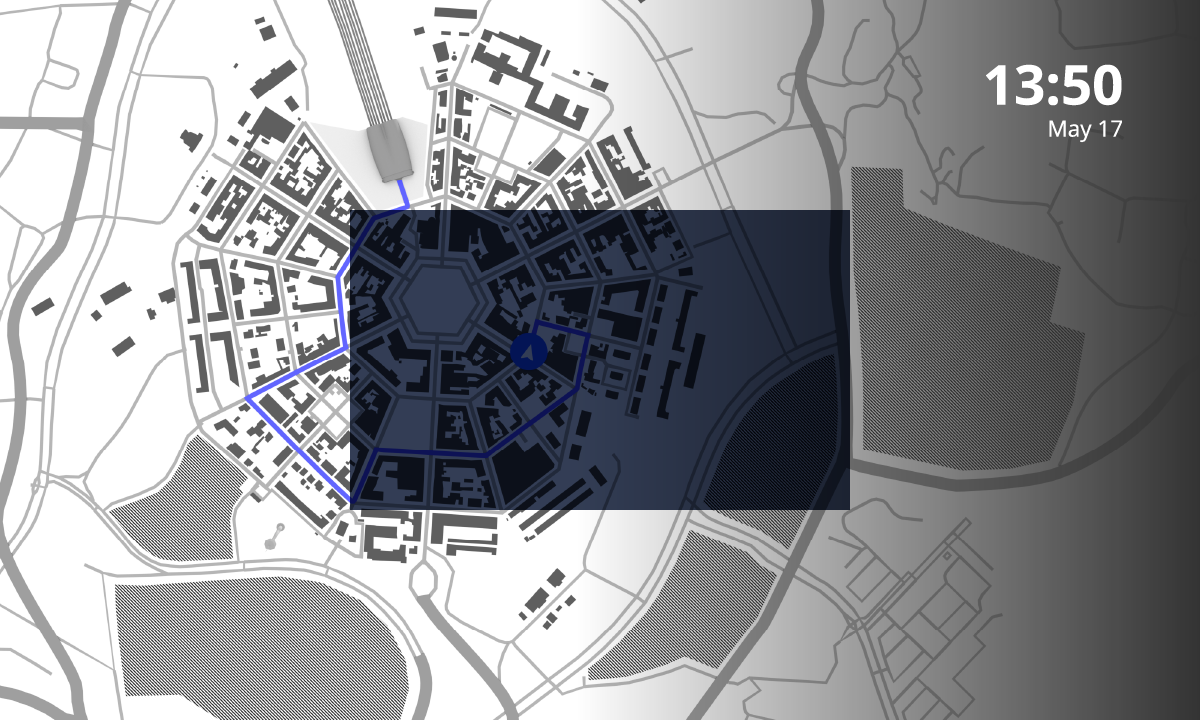
Using color blending to create an overlay
You can use color blending to create a partially transparent overlay that is darker or lighter than its backdrop.
To create an overlay to which you can apply post-processing effects, use effects. For example, you can use multiple effects to create the frosted glass effect. See Effects for 2D nodes and Using multiple effects.
To use color blending to create an overlay:
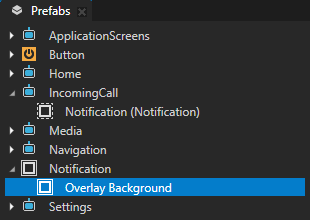
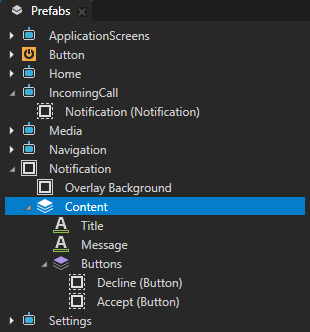
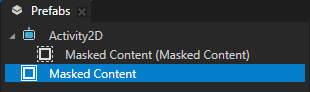
In the Prefabs create the prefab that you use as the root of the overlay.
For example, create an Empty Node 2D prefab, name it Notification, and add the Notification prefab to an Activity. This way you see the content of the prefab in the Preview when the Activity is activated.

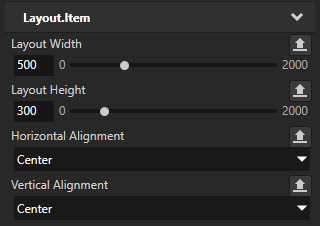
In the Prefabs select the prefab that you created or the Activity to which you added the prefab, and in the Properties set the size and positioning of the overlay.
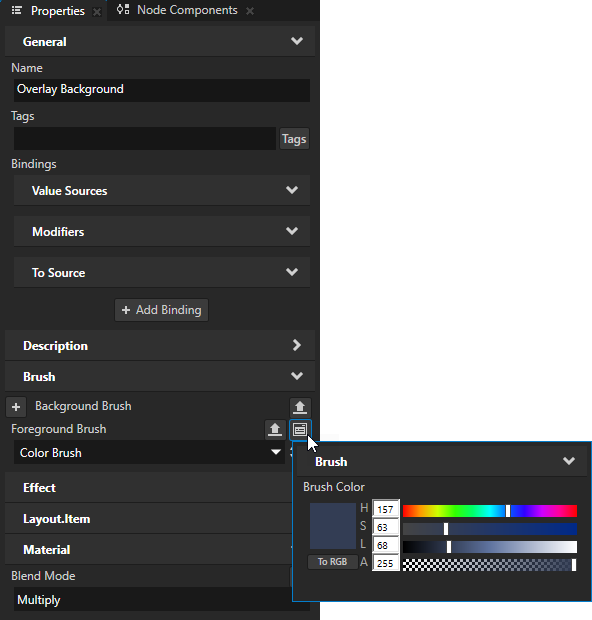
To draw the background of the overlay, in the prefab that you use as the root of the overlay create an Empty Node 2D node and in the Properties add and set:
Foreground Brush to the color brush that you want to use to set the color of the overlay
Material > Blend Mode to:
Multiply to create an overlay that is darker than its backdrop
The Multiply blend mode multiplies the source (overlay) and destination (backdrop) pixels.
Screen to create an overlay that is lighter than its backdrop
The Screen blend mode adds the source (overlay) and destination (backdrop) pixels and subtracts from the result the product of the source and destination.
Add to the root of the overlay prefab the content that you want to show on top of the overlay.
(Optional) To create fade-out and fade-in transitions for the overlay, use a state manager where in the state that does not show the overlay:
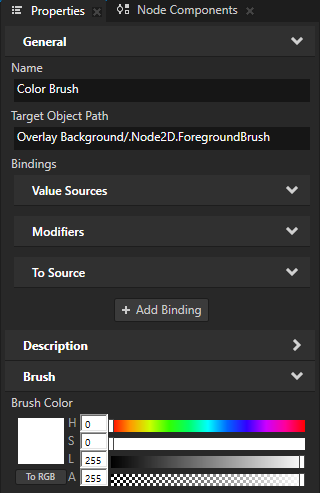
In the overlay background node set the Brush Color of the Foreground Brush:
If your overlay background uses the Multiply blend mode, set the Brush Color to white.
When you multiply a color with white, that color does not change.
If your overlay background uses the Screen blend mode, set the Brush Color to transparent black.
When you screen a color with transparent black, that color does not change.
In the node that contains the content that you want to show on top of the overlay, set the Node > Opacity property to 0.
You cannot adjust the opacity of the overlay prefab or the overlay background with the Node > Opacity property, because adjusting that property in a node causes Kanzi to composite that node. For the same reason you cannot assign a 2D effect to the overlay. For example, if your overlay background uses the Multiply blend mode and Kanzi composites the overlay prefab, Kanzi applies the Multiply blend mode against an empty composition render target, resulting in a fully transparent overlay.
Using alpha compositing to create a mask effect
You can use alpha compositing to implement a simple mask effect.

To create a more versatile mask effect, use the Mask Effect 2D effect. See Using the Mask Effect 2D effect.
To use alpha compositing to create a mask effect:
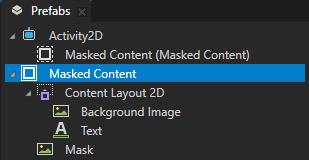
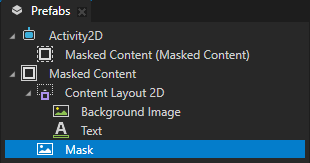
Create a 2D node that you use to host both the content, which you want to mask, and the mask.
For example, in the Prefabs create an Empty Node 2D prefab and add it to an Activity. This way you see the content of the prefab in the Preview when the Activity is activated.
In the node that you created, create:
The content that you want to mask.
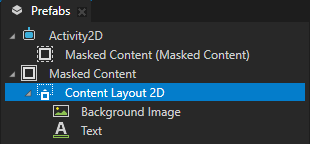

The node that you use as the mask.
For example, create an Image node and in the Properties add and set:
Image to the texture that you want to use as the mask
Horizontal Alignment and Vertical Alignment to Stretch
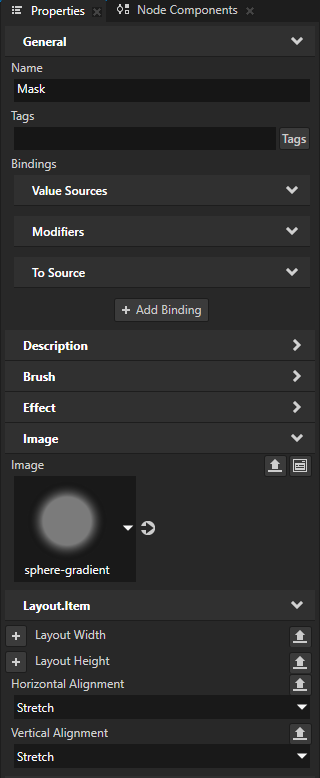
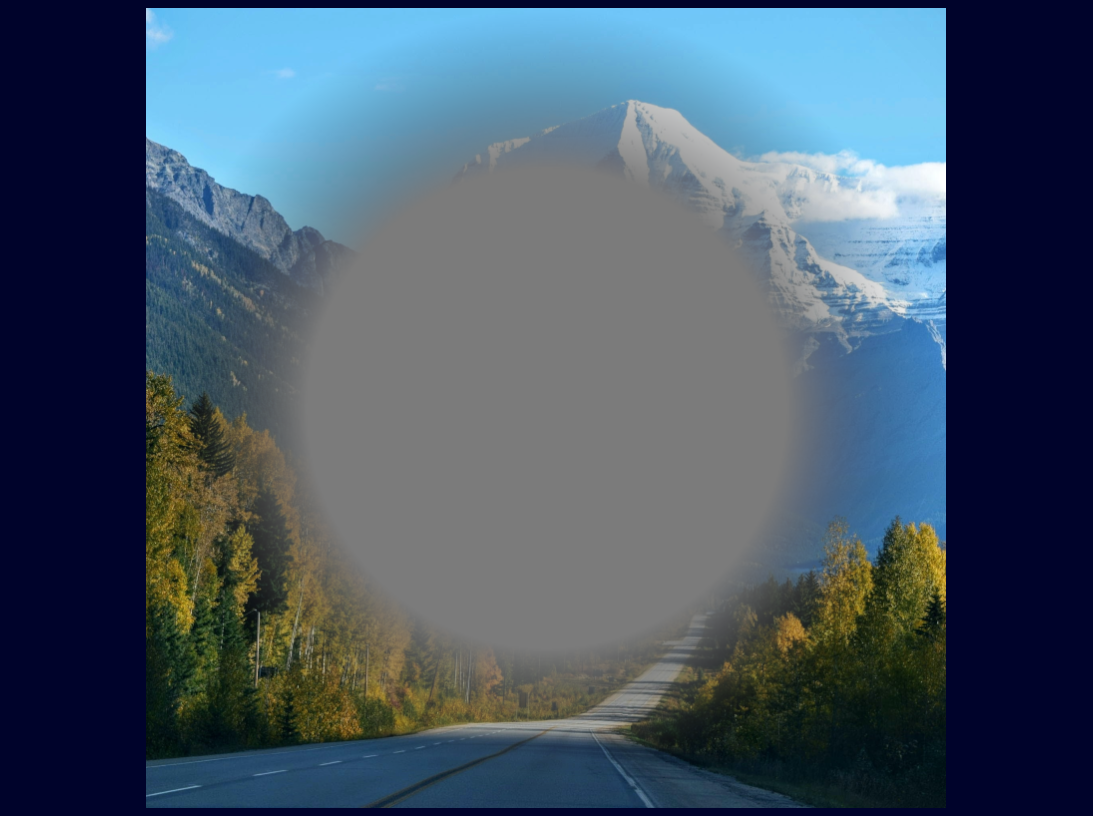
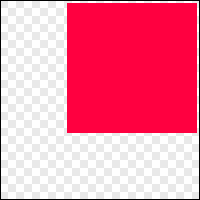
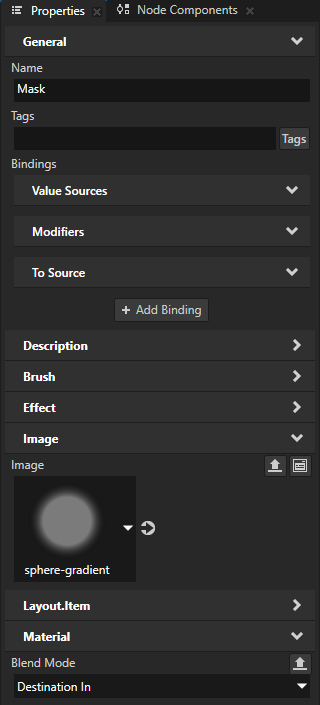
Select the node that you use as the mask, in the Properties add the Material > Blend Mode property, and set it to Destination In.
The Destination In mode draws those pixels of the content that intersect with the mask, using the alpha channel of the mask.
Tip
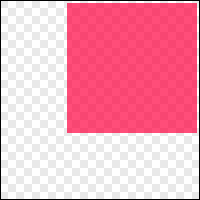
To create an inverse mask effect, use the Destination Out mode.

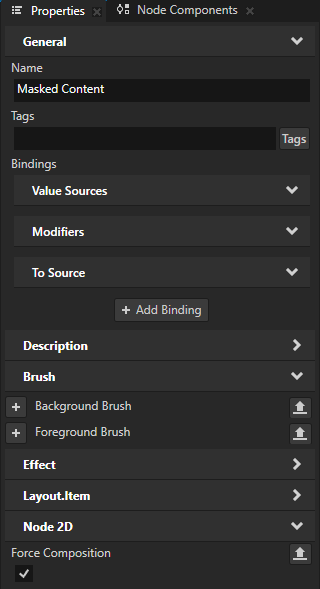
Select the node that hosts both the content and the mask, in the Properties add the Node 2D > Force Composition property, and enable it.
This way you set Kanzi to composite the node and render its content to a cleared render target.