Binding Render Pass node properties
These steps show how to bind properties on Render Pass nodes so the value of one property drives another.
For an introduction to Prism graphs, see Prism graphs.
Resource property bindings
A resource property binding is a line drawn directly between two resource properties of the same type. To create the binding, drag from the source property on one node onto the target property on another.
Example: connect Build Acceleration Structure to Draw Objects for raytraced shadows
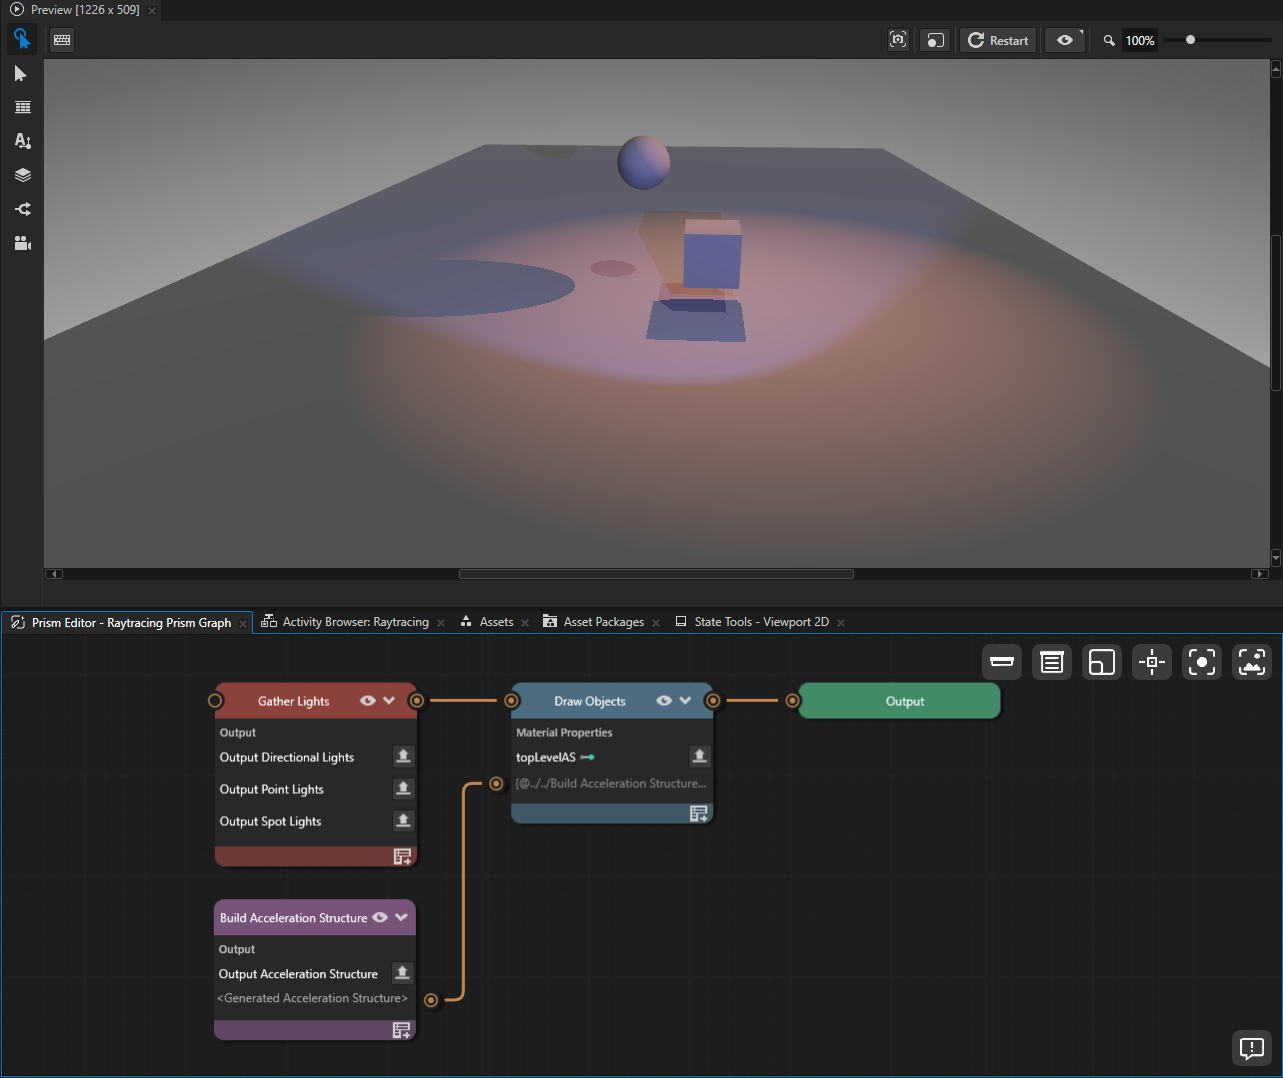
This example rebuilds an existing raytraced-shadow scene as a Prism graph. The original scene uses a manual render-pass setup to produce a top-level acceleration structure and pass it to the draw pass that consumes it. The Prism graph expresses the same dependency as a binding line between two resource properties.
To connect Build Acceleration Structure to Draw Objects for raytraced shadows:
In the Kanzi Studio Quick Start window, click Projects and select the Examples tab. If the Raytracing example is not yet downloaded, click
 next to it.
Kanzi Studio downloads the example to the
<KanziWorkspace>/Examples/Raytracingdirectory.Copy the
<KanziWorkspace>/Examples/Raytracingfolder to a new location to keep the original project unchanged.Open
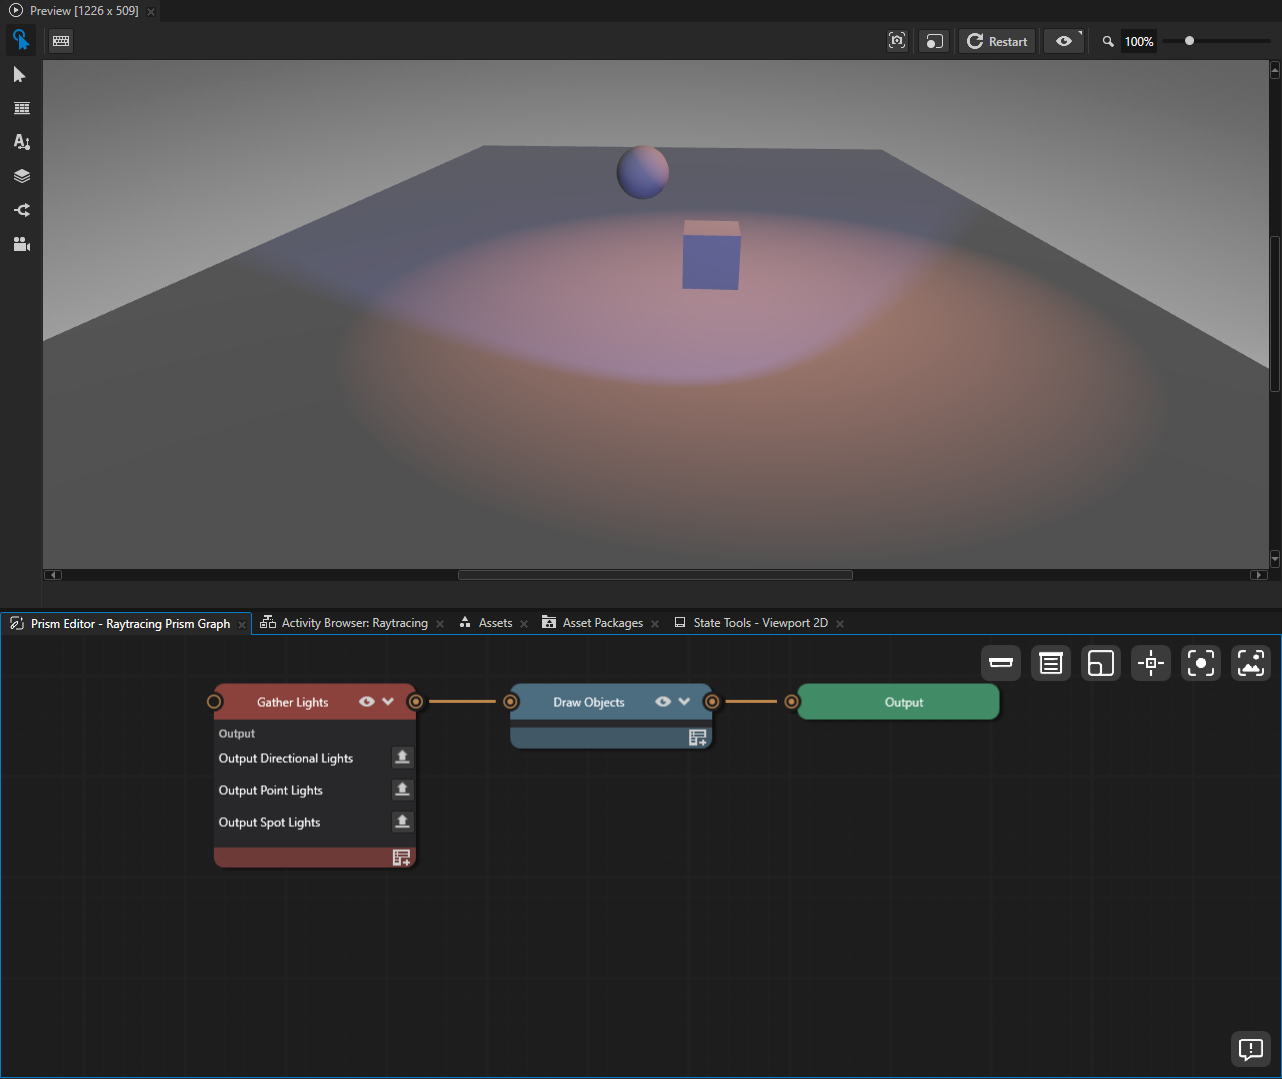
Raytracing.proj.kzmfrom your copy of the project and confirm raytraced shadows are visible in the Preview.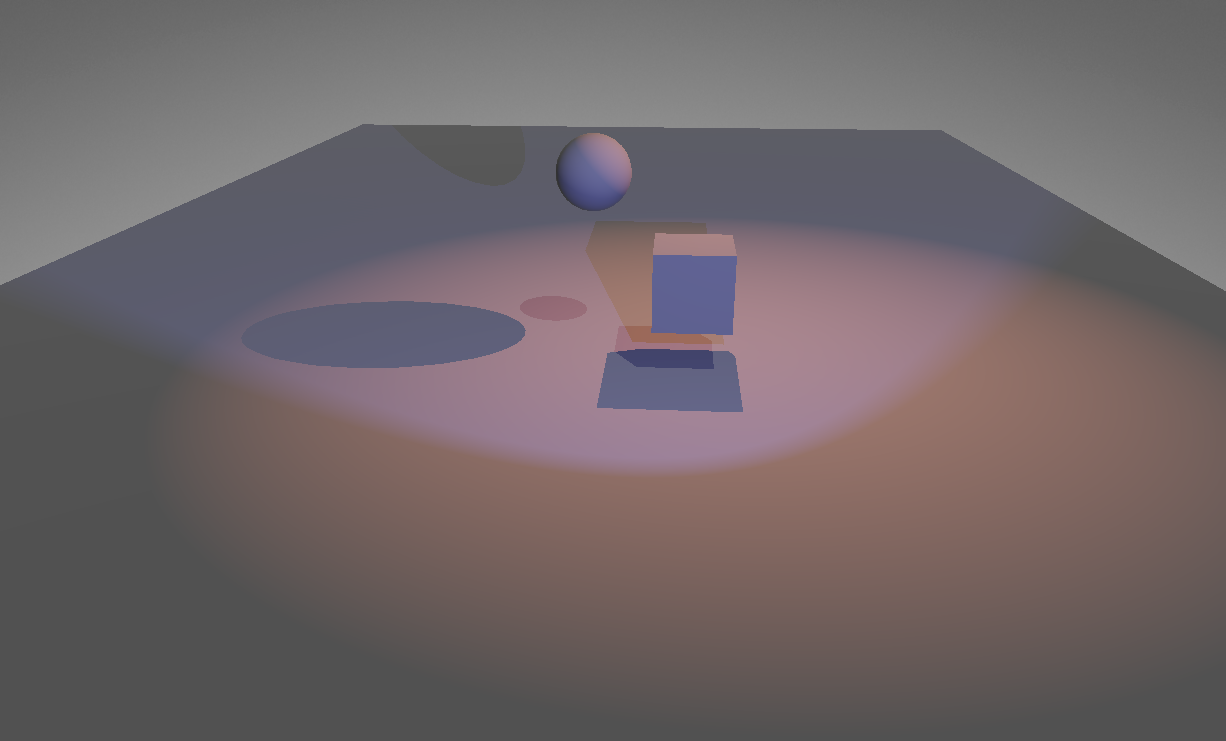
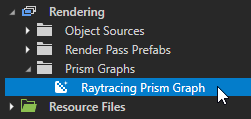
In the Library, go to Rendering > Prism Graphs. Right-click Prism Graphs and select Create > Empty Prism Graph. Name it
Raytracing Prism Graph.
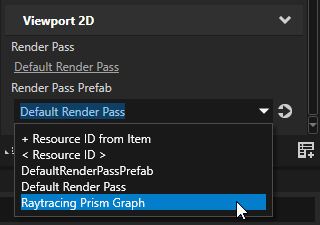
Select the Viewport 2D that renders the scene. In the Properties panel, set Render Pass Prefab to the new Prism graph. The viewport stops rendering until the graph is complete.
Open the Prism graph by double-clicking it in the Library. The Prism editor opens for the graph, showing the initial empty state with only the Output node.
Add the main rendering nodes. Right-click in the graph and add:
Gather Lights render pass node.
Draw Objects render pass node.
Connect Gather Lights to Draw Objects, and Draw Objects to the Output node.
The Preview now renders the scene objects under the scene lighting, but raytraced shadows are not yet visible. The next steps add and bind the acceleration structure that Draw Objects needs to render those shadows.
On the Draw Objects node, click
 to open the Add Properties window. In the search box, type
 topLevelASto locate the property under Material Properties.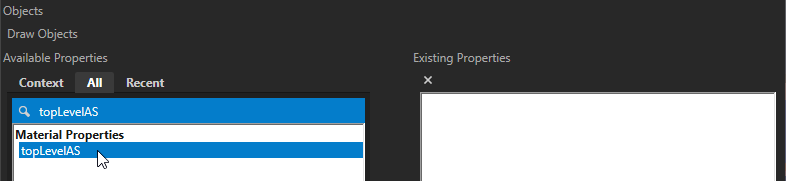
Double-click topLevelAS to add it. The property moves from Available Properties to Existing Properties.

Close the Add Properties window.
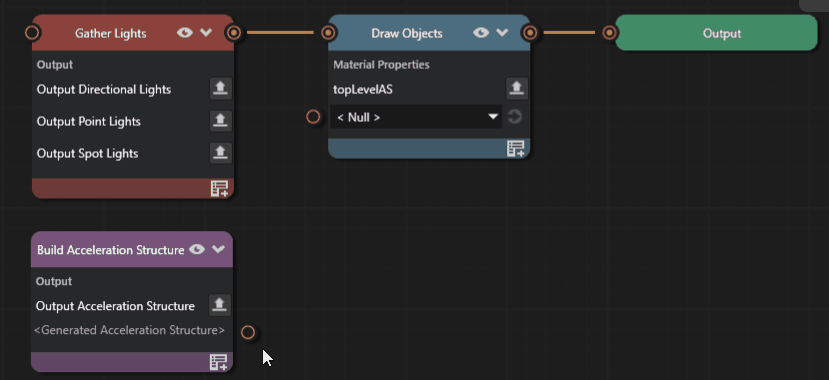
Right-click in the graph and add a Build Acceleration Structure render pass node. This node has no framebuffer socket because it produces an acceleration structure rather than a rendered image. Leave it unconnected to the other nodes. It reaches its consumer through the binding line added in the next step.
Drag a binding line from the OutputAccelerationStructure property on the Build Acceleration Structure node onto the topLevelAS property on the Draw Objects node.
This creates a resource property binding between the two properties. The binding copies the value from OutputAccelerationStructure into topLevelAS so the draw pass uses the acceleration structure that the build pass produced.
Confirm the Preview again renders the raytraced shadows. The binding gives Draw Objects the acceleration structure that Build Acceleration Structure produced.
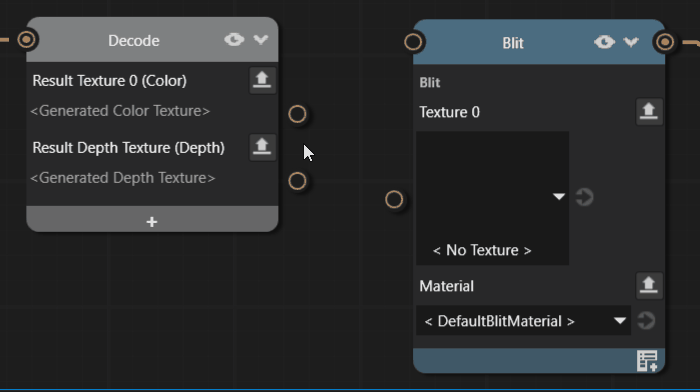
Example: use Decode to bind an offscreen framebuffer to a Blit Render Pass
This example uses the Decode adapter node to create a resource property binding.
Some Prism nodes expose bindable resource properties through the Decode adapter node. You need Decode to bind from a non-Render-Pass node’s offscreen framebuffer output to another resource property. Decode presents the framebuffer’s attachments as named texture properties (ResultTexture0, ResultDepthTexture) that a Render Pass node’s property can bind to.
To use Decode to bind an offscreen framebuffer to a Blit Render Pass:
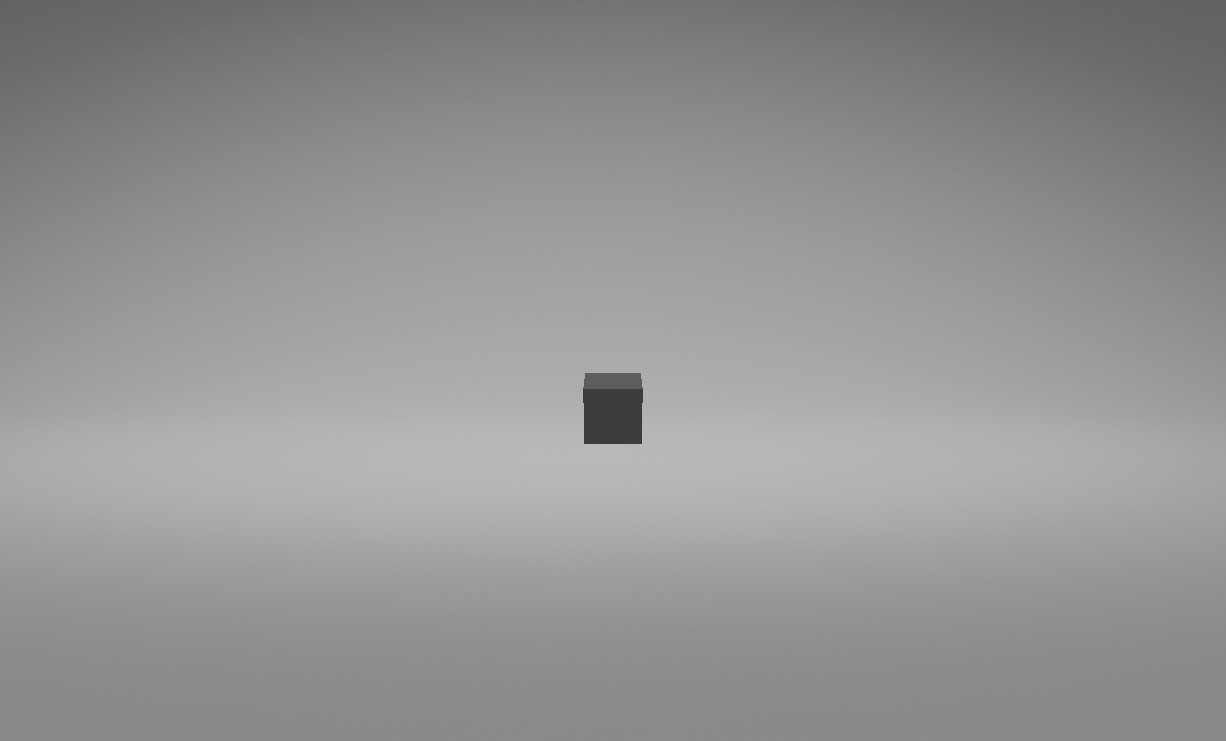
In your project, add a Box to the scene by right-clicking Scene > Create > Box so the graph has something to render.
In the Library, go to Rendering > Prism Graphs. Right-click Prism Graphs and select Create > Empty Prism Graph. Name it
Decode Bridge Prism Graph.Select the Viewport 2D that renders the scene. In the Properties panel, set Render Pass Prefab to the new Prism graph.
Open the Prism graph by double-clicking it in the Library.
Add the framebuffer-rendering nodes. Right-click in the graph and add:
Offscreen Framebuffer node.
Clear node.
Draw node.
Connect Offscreen Framebuffer to Clear, and Clear to Draw.
Continue with Render Pass nodes. Add:
Decode adapter node, which exposes the upstream framebuffer’s contents as a named texture property.
Blit Render Pass node.
Connect Draw to Decode. Then connect Blit to the Output node. Decode has no output socket, so it cannot connect to Blit via a node socket. The connection from Decode to Blit is made through a binding line in the next step.

On the Blit node, click
to open the Add Properties window. In the search box, type Texture 0and double-click the property to add it. Close the Add Properties window.Drag a binding line from the ResultTexture0 property on the Decode node onto the Texture 0 property on the Blit node.
This creates a resource property binding: the value of ResultTexture0 is copied into Texture 0 so the Blit Render Pass consumes the texture rendered into the offscreen framebuffer by the upstream nodes.
Confirm the Preview renders the box composited through the Blit Render Pass. The upstream nodes render the box into the offscreen framebuffer; Decode exposes that framebuffer as ResultTexture0; the binding hands the texture to Blit, which composites it to the Output.
Tip
In this example, dragging directly from the Draw node’s output connector onto the Texture 0 property on Blit inserts the Decode node and creates the binding in one step.
Text property bindings
A text property binding drives a non-resource property from a binding expression. Non-resource properties are values such as numbers, booleans, colors, or vectors. Use a text binding when you want the property value to come from a Kanzi binding expression instead of a direct value set in the editor. Unlike a direct value set, a binding expression can include arithmetic, function calls, and references to other properties. See Bindings expressions reference for the expression syntax.
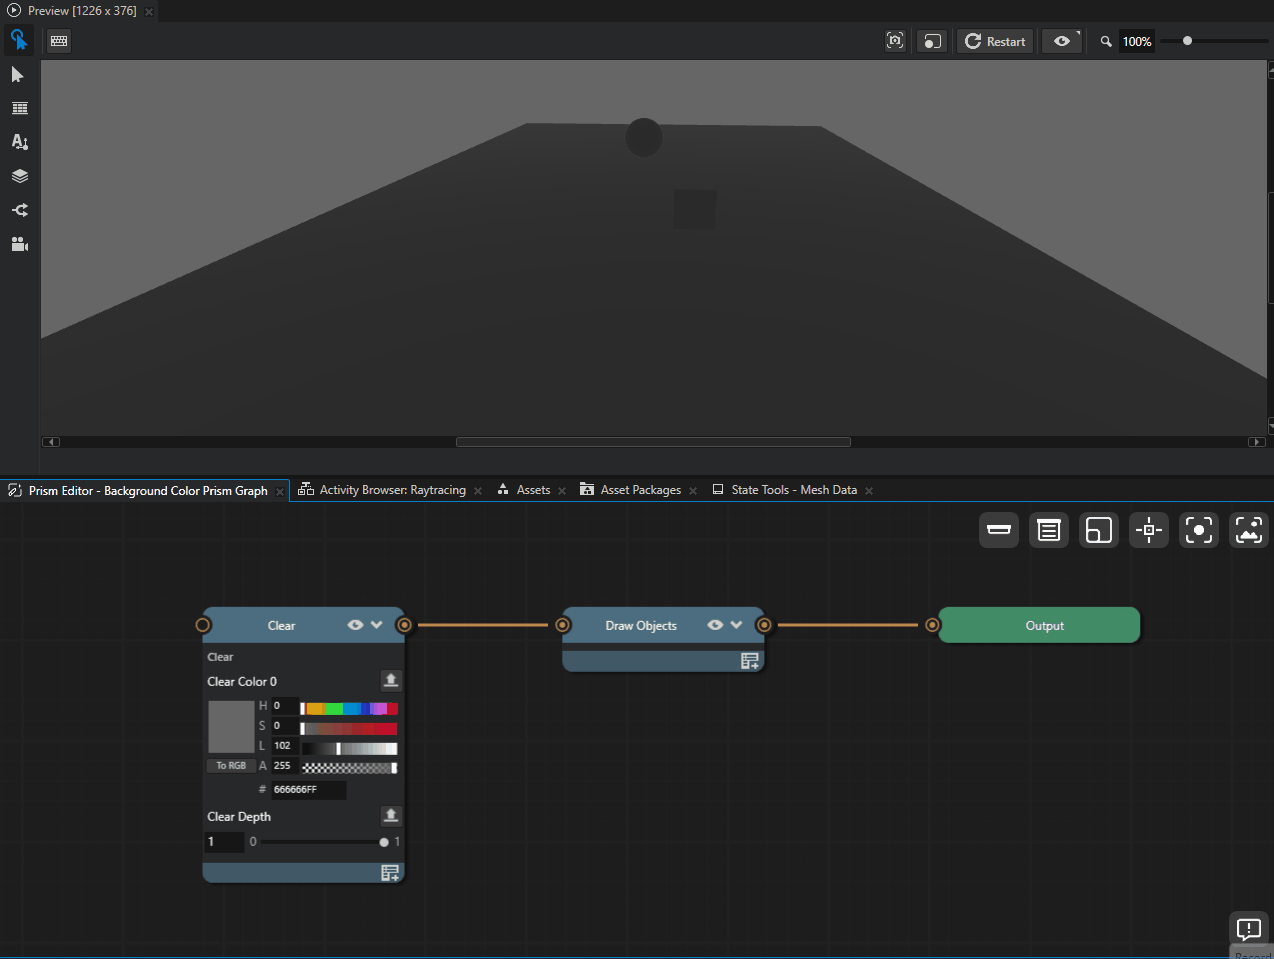
Example: set the background color of a Prism graph from a binding expression
This example reuses the Raytracing example project from the previous examples. It builds a small Prism graph that clears the screen to a color computed from a binding expression, then draws the scene on top. Use the same pattern to drive any non-resource property on a Render Pass node from a binding expression.
To set the background color of a Prism graph from a binding expression:
If you have not already, open
Raytracing.proj.kzmfrom your copy of the Raytracing example. See steps 1 to 3 of Example: connect Build Acceleration Structure to Draw Objects for raytraced shadows.In the Library, go to Rendering > Prism Graphs. Right-click Prism Graphs and select Create > Empty Prism Graph. Name it
Background Color Prism Graph.Select the Viewport 2D that renders the scene. In the Properties panel, set Render Pass Prefab to the new graph. The viewport stops rendering until the graph is complete.
Open the Prism graph by double-clicking it in the Library.
Right-click in the graph and add a Clear basic node and a Draw Objects Render Pass node. Connect Clear to Draw Objects, and Draw Objects to the Output node.
On the Clear node, click
to open the Add Properties window. In the search box, type Clear Color 0. Under Available Properties, double-click Clear Color 0 to add it. Close the Add Properties window.The Preview now renders the scene on the default black clear color.
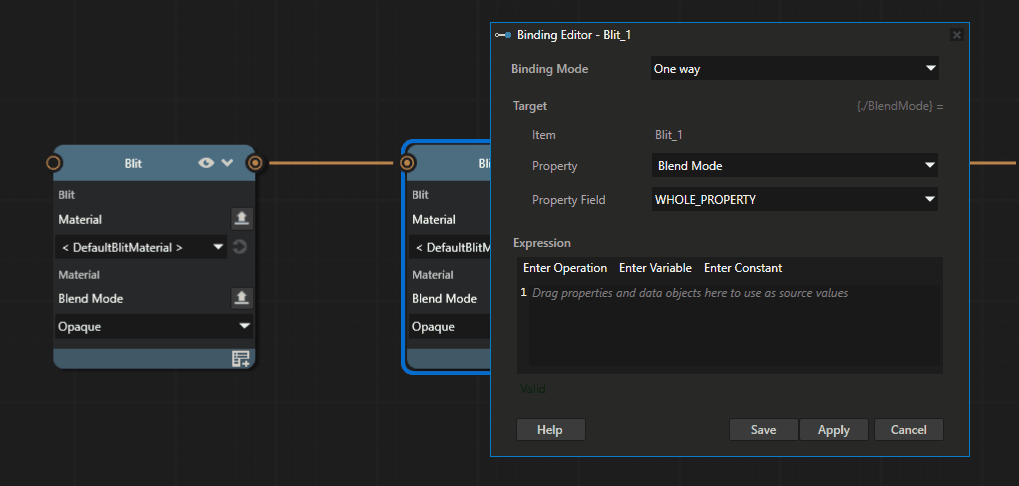
In the Prism property pane on the Clear node, right-click the Clear Color 0 row and select Edit binding….
Kanzi Studio opens the binding editor in a floating window with Clear Color 0 as the binding target.
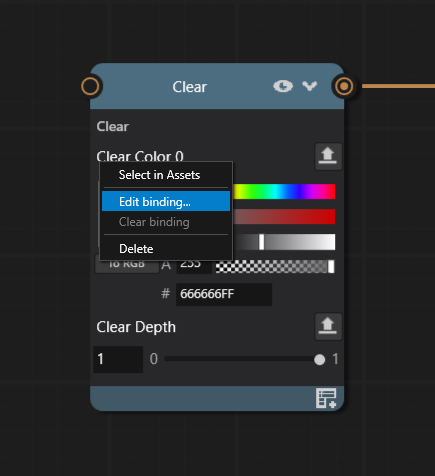
In the binding editor expression field, enter:
Color4(0.1, 0.1, 0.3, 1.0)
Click Save. The editor closes. The Preview shows the scene against a deep blue background. The Clear Color 0 row shows a binding indicator on the label and a read-only preview of the expression in place of the value editor.
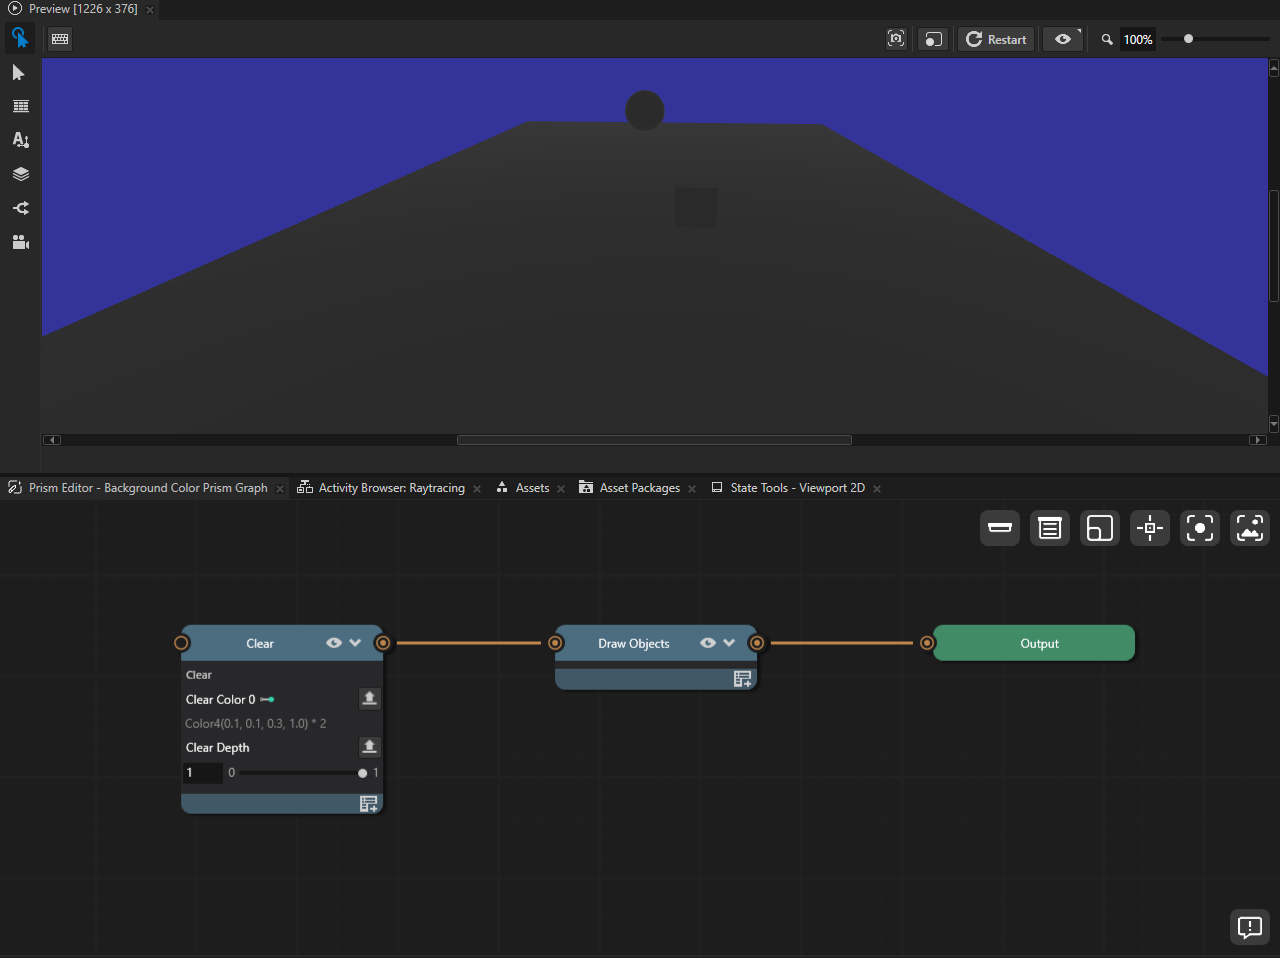
Open the binding editor again and replace the expression with one that scales the current expression:
Color4(0.1, 0.1, 0.3, 1.0) * 2
Save. The background becomes brighter. The row preview updates to show the new expression.
To remove the binding and restore a direct editable value, right-click the row and select Clear binding.
If the expression cannot be parsed, the inline preview turns red. Reopen Edit binding… to correct the expression.
Tip
You can also start a text binding by dragging from the display name of one Prism property row onto another non-resource property row. The binding editor opens prefilled with an expression that references the source row’s property.