Compressing textures
In Kanzi, you can use the ASTC, ATC, ETC, and PVRTC algorithms for compressing textures, as well as precompressed DXT textures.
If your application tries to read more data from the memory than the memory can handle, reading the memory becomes a performance bottleneck for your application. If your target hardware supports any of these compression methods, use texture compression to reduce the memory bandwidth and improve the performance of your application. You can achieve the relatively smallest file size and the best image quality with the modern ASTC algorithm.
The best performing compression level depends on your target device. High compression levels use more CPU but less memory bandwidth, whereas low compression levels use less CPU but more memory bandwidth.
Kanzi applications send compressed textures directly to the GPU, reducing the amount of interchanged data and without requiring preprocessing on the CPU side at runtime (for example, loading libJPEG or libPNG).
For example, an unpacked 256 by 256 pixel RGB texture uses 196 kb (256 * 256 * 3 bytes). When compressed:
With ASTC that texture uses 16 kb (((256/8)^2)*16)/1024 with a block size of 8 by 8. With a block size of 12 by 12, the texture uses 8 kb.
With ETC that texture uses 32 kb (256 * 256 / 2).
If your target hardware does not support any of these compression algorithms, in some cases raw image format can be faster than any compression algorithm. This is particularly true when processing single small images.
If your target hardware does not support the selected texture compression algorithm, when you run your Kanzi application on your target device, Kanzi prints a warning message to the log. Kanzi paints black the surfaces where you use compressed texture formats that your target hardware does not support.
Because OpenGL expects DXT texture data to have the bottom row first, compress DXT files vertically flipped. Note that you can use the DXT files in your Kanzi application, but the DXT files are not supported in the windows emulation because of GPU limitations. See Importing images.
Kanzi Studio compresses the images when you create the kzb file, but you can also compress them manually. See Preprocessing images manually.
Tip
When Kanzi Studio compresses images it by default uses all available CPU resources of your computer. To free up CPU resources for other applications while Kanzi Studio compresses multiple images, select Edit > User Preferences and in the Properties tab adjust the value of the Images to compress in parallel setting.
The Images to compress in parallel setting limits the number of logical cores Kanzi Studio uses when preprocessing multiple images. The number of logical cores in your computer determines the Maximum value.

Using the ASTC algorithm
If your target hardware supports ASTC algorithm, use the ASTC algorithm for the best results. The ASTC algorithm creates smaller files and results in better image quality than the older ATC, ETC, and PVRTC algorithms.
To use the ASTC algorithm:
In Kanzi Studio in the Library select Resource Files > Images, and select the image for which you want to apply compression.
In the Properties set the Target Format property to ASTC.
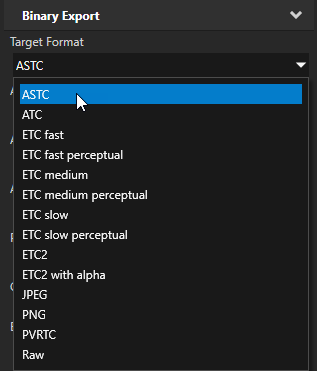
In the Properties set:
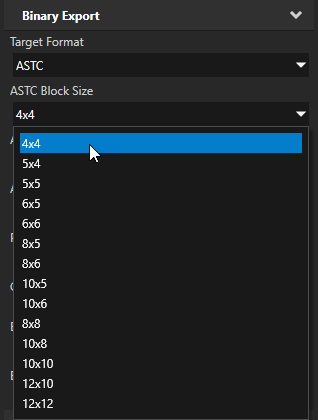
ASTC Block Size to the block size in pixels you want to use for compressing the image.
In ASTC the size of one compressed block is always 128 bits. Fewer pixels in a block result in better image quality of the compressed image, but create larger files. 4x4 pixels per block is the largest and best looking supported value, whereas 12x12 pixels per block creates the smallest file size output.
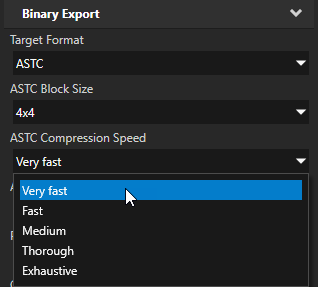
ASTC Compression Speed to the amount of time it takes to compress an image.
Very fast, Fast, Medium, Thorough, and Exhaustive refer to the amount of time it takes to compress an image and image quality, not the file size of compressed image or decompression time:
Very fast takes the least amount of time to compress an image.
Exhaustive takes the most amount of time to compress an image and results in the best quality.
Use fast compressions for fast and good results and slower compressions for better quality.
For example, for the best final result use Exhaustive. During development Very fast is the most useful.
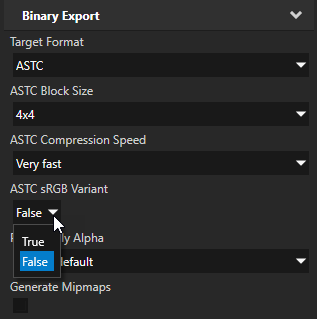
ASTC sRGB Variant to:
False to use linear space for the image format. This is the most common use case.
True to use the sRGB color space for the image format. This converts the image from the sRGB color space to linear space before compression and then back to the sRGB color space after decompression in the GPU.
Using the ATC algorithm
To use the ATC algorithm:
In Kanzi Studio in the Library select Resource Files > Images, and select the image for which you want to apply compression.
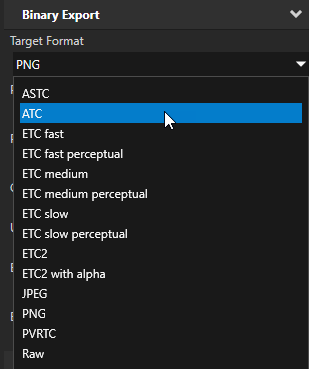
In the Properties set the Target Format property to ATC.
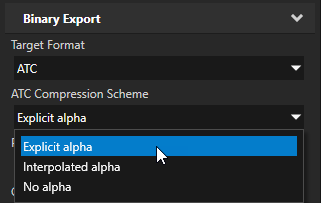
Set the ATC Compression Scheme property to:
Explicit alpha. RGBA image, where alpha component is explicit on each pixel, data compressed to pixel_count / 1, giving 1:4 compression ratio.
Interpolated alpha. RGBA image, where alpha component is interpolated between pixels, data compressed to pixel_count / 1, giving 1:4 compression ratio.
No alpha. RGB image, data compressed to pixel_count / 2, giving 1:6 compression ratio.
Using the ETC algorithm
To use the ETC algorithm:
In Kanzi Studio in the Library select Resource Files > Images, and select the image for which you want to apply compression.
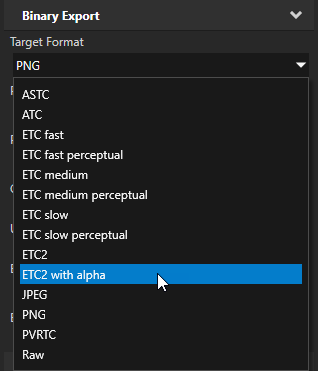
In the Properties set the Target Format property to the ETC compression you want to use:
ETC fast, medium, and slow refer to the speed of image compression and image quality, not the resulting size or decompression time. Slow returns the best image quality.
For the best final result with the ETC1 compression scheme use ETC slow perceptual.
ETC Perceptual refers to the emphasis of the green color channel over the red and blue color channels, based on the human visual system color affinity.
When using ETC1 compression scheme during development ETC fast is the most useful.
ETC2 to use the ETC2 compression scheme.
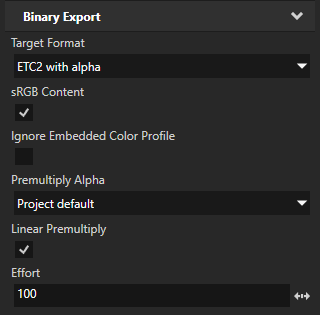
To set the quality of ETC2 compression use the Effort property.
The value of Effort corresponds to the compression time and image quality, not to the resulting size or decompression time. For the best image quality result set Effort to 100. During development 0 is the most useful because it gives the shortest compression time.
ETC2 with alpha to use the ETC2 compression scheme for images with alpha channel
Using the PVRTC algorithm
The PVRTC algorithm works best for photorealistic textures.
Kanzi supports the PVRTC compression according to the PVRTC1 and PVRTC2 schemes.
PVRTC2 has higher quality than PVRTC1, especially with textures requiring sharp alpha transitions, but it is not supported by all PowerVR hardware. Additionally, only Imagination Technologies hardware, or a desktop platform using a development emulator support PVRTC compression.
Note
When using the PVRTC algorithm to compress textures, to get correct results, the textures must be square and the power of two in size.
To use the PVRTC algorithm:
In Kanzi Studio in the Library select Resource Files > Images, and select the image for which you want to apply compression.
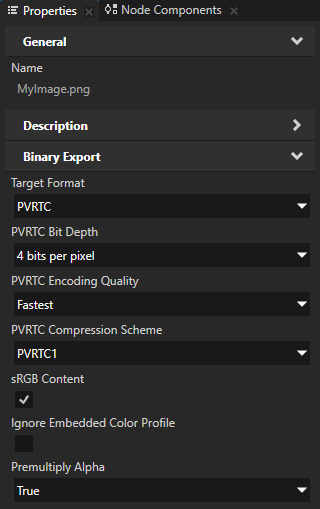
In the Properties set the Target Format property to PVRTC.
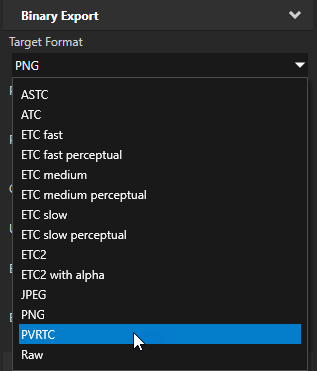
In the Properties set:
PVRTC Bit Depth to either:
2 bits/pixel results in smaller, but lower quality textures.
4 bits/pixel results in larger, but higher quality textures. With 4 bits/pixel bit depth the texture file size is twice as big as with 2 bits/pixel texture, but it results in a higher quality texture.
PVRTC Encoding Quality to either Fastest, Fast, Normal, High, or Best.
These values correspond to the compression time and image quality, not to the resulting size or decompression time. For the best final result use Best. During development Fastest is the most useful.
PVRTC Compression Scheme to either PVRTC1 or PVRTC2. Both schemes support RGB and RGBA textures. Kanzi automatically uses RGBA for all images that contain the alpha channel.
Premultiply Alpha. Select True if you want to premultiply the alpha channel into color channels in images that have an alpha channel, otherwise select False. Select Project default if you want to control the value of this property with the Kanzi Studio project property Use Premultiplied Alpha by Default. See Configuring Kanzi Studio projects.
Preprocessing images manually
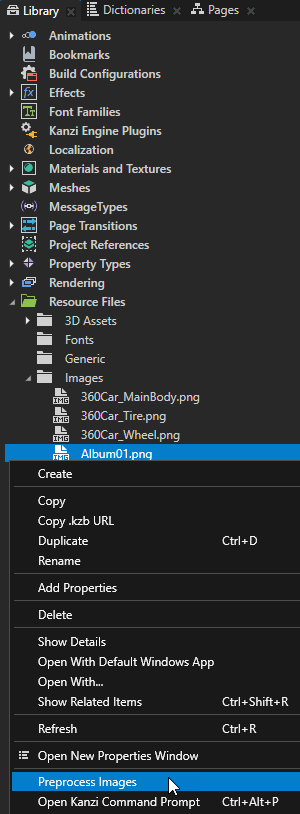
Kanzi Studio compresses the images when you create the kzb file, but you can also compress them manually. To manually preprocess images, in the Library > Resource Files > Images right-click one or more images you want to preprocess, and select Preprocess images.
Tip
When Kanzi Studio compresses images it by default uses all available CPU resources of your computer. To free up CPU resources for other applications while Kanzi Studio compresses multiple images, select Edit > User Preferences and in the Properties tab adjust the value of the Images to compress in parallel setting.
The Images to compress in parallel setting limits the number of logical cores Kanzi Studio uses when preprocessing multiple images. The number of logical cores in your computer determines the Maximum value.
