Exclusive Activity Host
An Exclusive Activity Host can have only one of its child Activities active at a time. When one child Activity of an Exclusive Activity Host is active, all other Activities of that Activity Host are inactive. For example, you can use an Exclusive Activity Host to toggle between views in your application.
Using an Exclusive Activity Host
To use an Exclusive Activity Host:
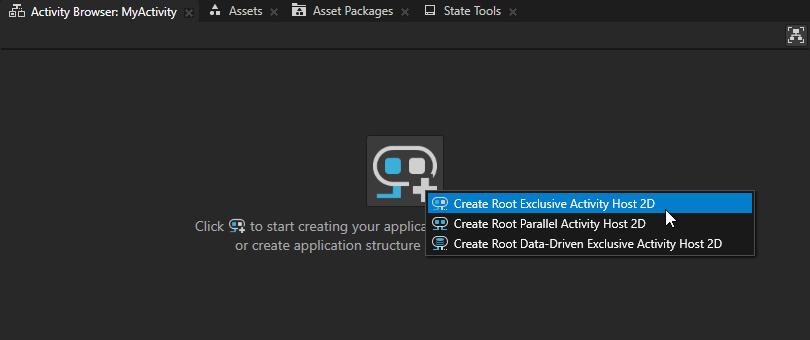
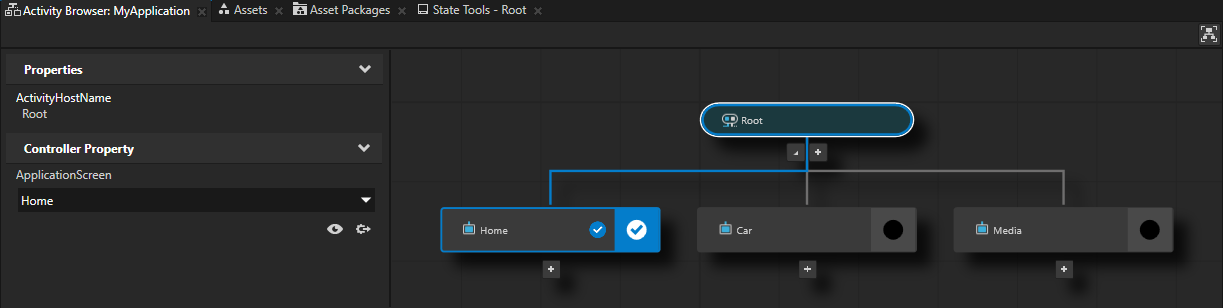
In the Activity Browser click
 and create the root Exclusive Activity Host.
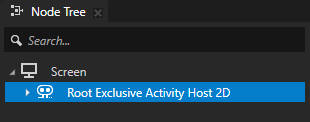
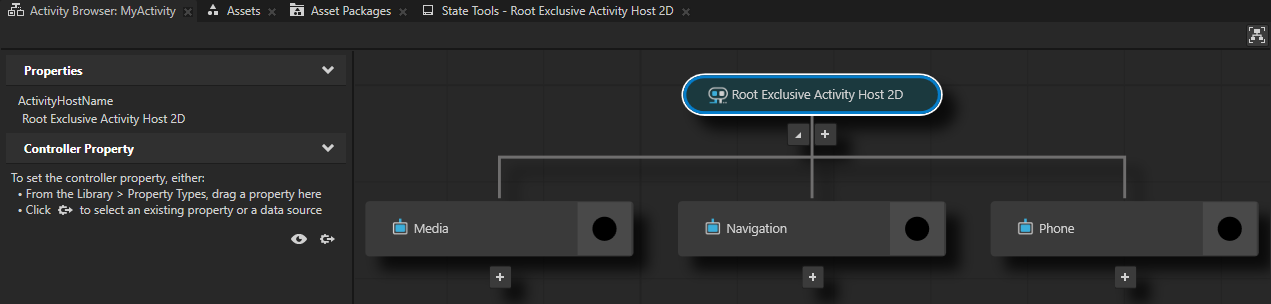
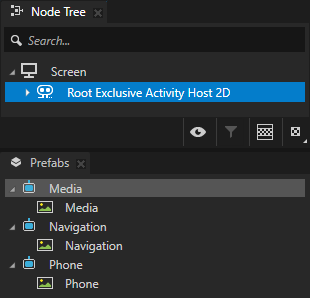
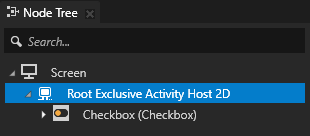
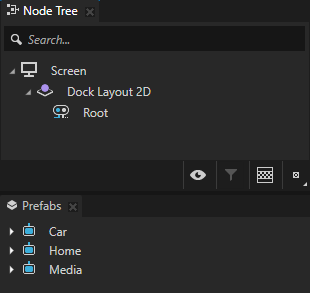
Kanzi Studio creates an Exclusive Activity Host as the first child node of the Screen node.
In the Activity Browser below the root Exclusive Activity Host click
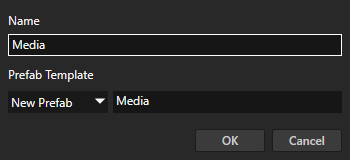
 to create an Activity and create or assign a prefab to that Activity.
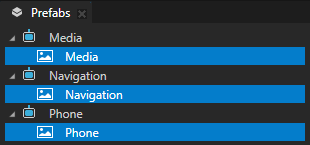
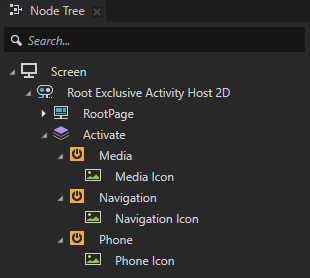
For example, create Activities named Media, Navigation, and Phone. For each Activity use the same name for the Activity prefab.
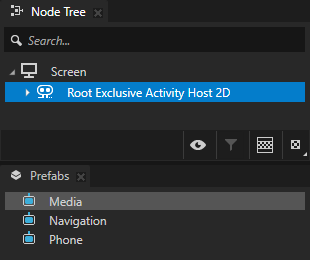
Kanzi Studio creates Activities, assigns them to the Exclusive Activity Host, and for each Activity creates a prefab in the Prefabs.
Every Activity in the Activity Browser has a prefab. In the Activity Browser when you add an Activity, you either select an existing prefab or create a prefab for your Activity. You can only select prefabs that are of the Activity node type.
Activities that you add in the Activity Browser are not nodes in the application node tree. They are only a visualization of the structure that Kanzi creates once you activate those Activities.
Create a property type that you use in the Activity Host to control which Activity is active:
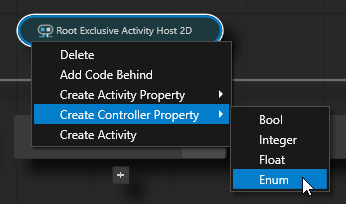
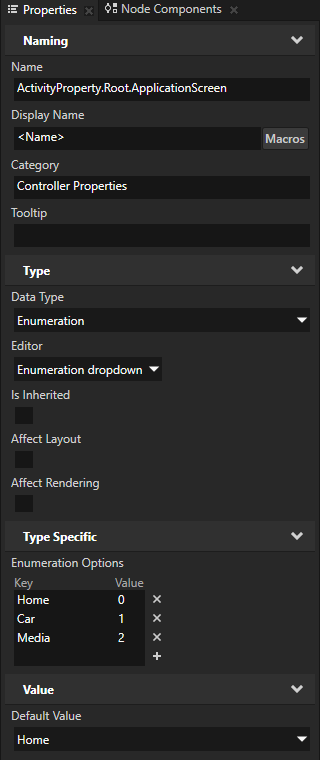
In the Activity Browser right-click the Exclusive Activity Host, select Create Controller Property, and then select the data type for the property type.
An Activity Host uses the Controller Property property to set and control which Activity in that Activity Host is active. To change the state of an Activity, you can also use any Trigger with the Activate Activity Message or a Data Trigger with the Apply Activation Action.
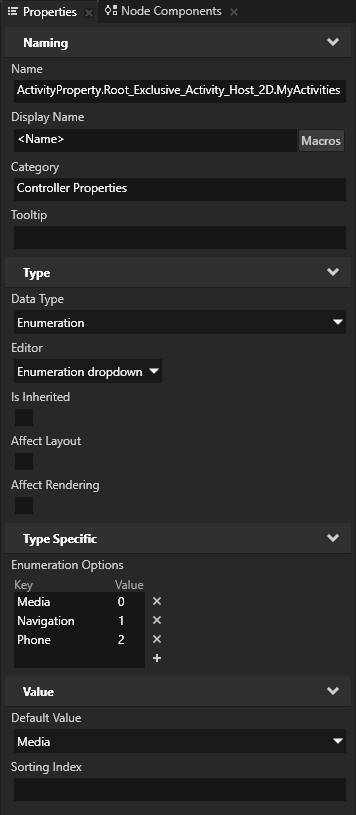
For example, select Create Controller Property > Enum to create a property type with the enumeration data type.
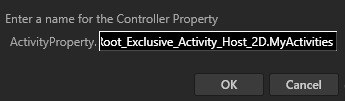
Name the property type, and click OK.
For example, name the property type MyActivities.
Kanzi Studio:
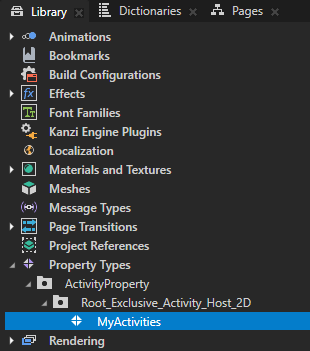
Creates the property type.
When you create a property type with the enumeration data type, Kanzi Studio creates a property type with enumeration keys with the names from the Activities from that Activity Host.
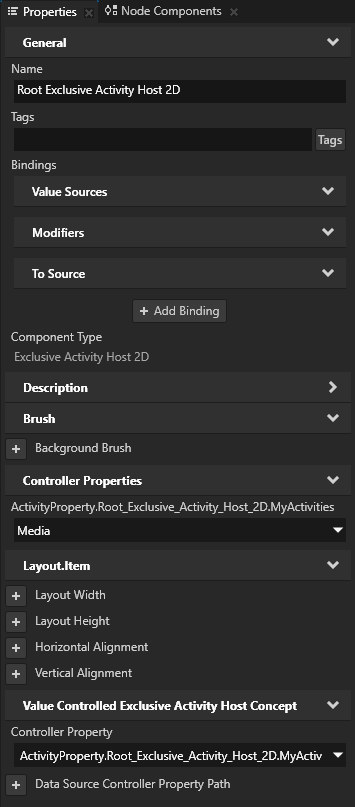
In the Activity Host adds the created property type and sets the Controller Property property to the created property type.
To set which Activity is active in this Activity Host, in the Activity Host you can set the value of the created property type.
In the Prefabs add content to each Activity prefab.
For example, in each Activity create an Image node with the name of that Activity.
In the Activity Browser set the Controller Property property to the Activity that you want to activate.
The Activity Browser simulates the activation of Activities in your application. To activate Activities in your Kanzi application, use triggers and actions. See Activating Activities.
When you activate an Activity, Kanzi:
Creates an Activity node using its prefab.
Attaches the Activity node to the node tree.
Makes the Activity visible.
Sets keyboard focus to the Activity if the Activity Host has keyboard focus, unless configured otherwise. Controlling whether to set focus to an activating Activity.
Activating Activities
When you activate an Activity, Kanzi:
Creates an Activity node using its prefab.
Attaches the Activity node to the node tree.
Makes the Activity visible.
Sets keyboard focus to the Activity if the Activity Host has keyboard focus, unless configured otherwise. Controlling whether to set focus to an activating Activity.
You can activate an Activity using:
An Activate Activity Message. See Activating Activities with an Activate Activity Message.
A Set Property Action. See Activating Activities with a Set Property Action.
An Navigate To Next Activity and Navigate To Previous Activity actions. See Activating the next or previous Activity.
An Apply Activation Action. See Activating Activities with an Apply Activation Action.
Finding out whether an Activity is active
To find out whether an Activity is active:
Check the value of the Activity Status property for that Activity.
Check the value of the Controller Property property in the Activity Host for that Activity.
Activating Activities with an Activate Activity Message
Use the Activate Activity Message when:
The condition for activating an Activity is too complex to be expressed with the value of a property
You do not know in advance the number of Activities in an Activity Host
To activate an Activity with the Activate Activity Message:
Create an Activity Host with several Activities the activation state of which you can control with a Controller Property.
Create a node with a trigger that you want to use to activate an Activity.
For example, create a Button node and use the Button: Click trigger.
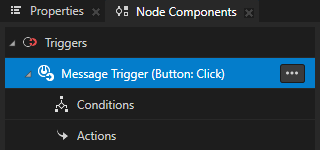
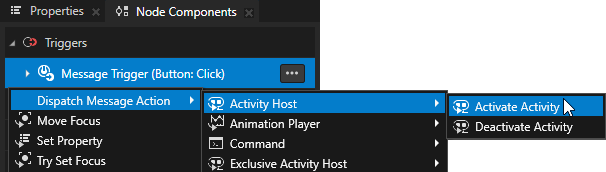
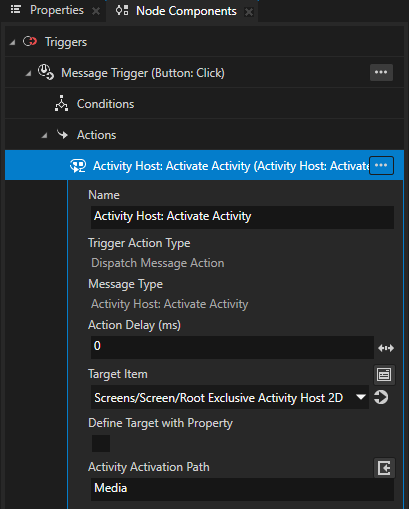
In the Node Tree select the node that you created in the previous step, in the Node Components > Triggers press Alt and right-click the trigger that you want to use to activate an Activity, select Dispatch Message Action > Activity Host > Activate Activity Message, and in the action set:
Target Item to the Activity Host that contains the Activity that you want to activate.
Activation Path to the path from the Activity Host to the Activity that you want to activate.
If you nest Activity nodes in other types of nodes, include in the path only the ancestor Activity nodes.
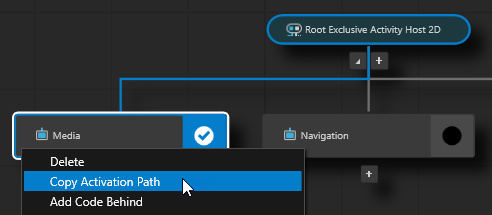
Tip
To get the full activation path to an Activity node, in the Activity Browser right-click an Activity node and select Copy Activation Path. This command copies the entire path from the top-level Activity Host node to that Activity node.
The Activity Activation Path contains only Activities and Activity Hosts.
To activate the Activities, in the Preview click the buttons that you created.
Activating Activities with a Set Property Action
Use the Set Property Action to activate Activity nodes when the logic of your application relies on the value of the Controller Property property to activate an Activity node.
To activate an Activity node with the Set Property Action:
Create an Activity Host with several Activities the activation state of which you can control with a Controller Property.
Create a node with a trigger that you want to use to activate an Activity node.
For example, create a Button node and use the Button: Click trigger.
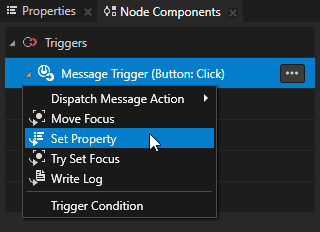
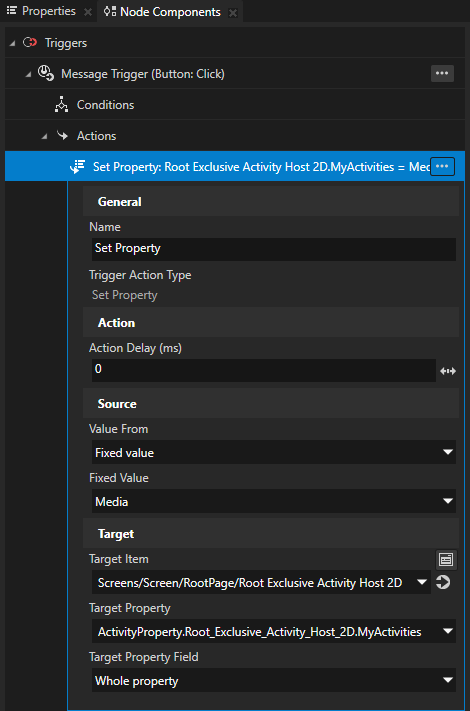
In the Node Tree select the node that you created in the previous step, in the Node Components > Triggers press Alt and right-click the trigger that you want to use to activate an Activity node, select the Set Property Action, and in the action set:
Target Item to the Activity Host node that contains the Activity node that you want to activate.
Target Property to the property type that you set in the Activity Host in the Controller Property property.
Fixed Value to the value of the Controller Property property that you use in the Activity that you want to activate.
To activate the Activities, in the Preview click the buttons that you created.
Activating the next or previous Activity
To activate the next or previous Activity:
Create an Activity Host with several Activities the activation state of which you can control with a Controller Property.
Create a node with a trigger that you want to use to activate an Activity.
For example, create a Button node and use the Button: Click trigger.
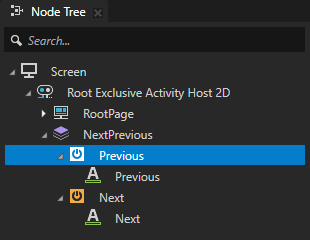
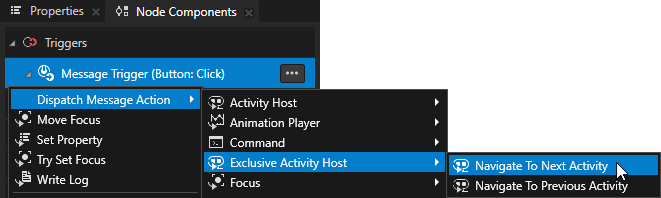
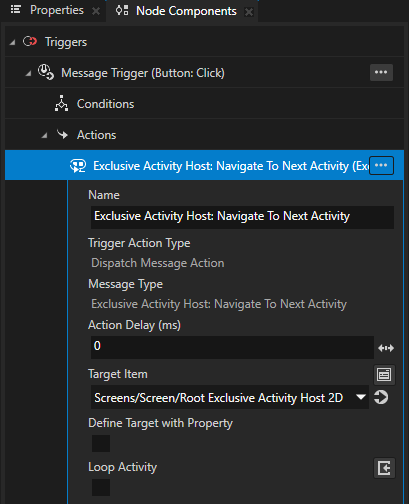
In the Node Tree select the node that you created in the previous step, in the Node Components > Triggers press Alt and right-click the trigger that you want to use to activate an Activity, select either Navigate To Next Activity or Navigate To Previous Activity action, and in the action set:
Target Item to the Activity Host that contains the Activities that you want to activate.
(Optional) If you want the Activity Host to activate the first or last Activity when you set off the trigger after you reach the last or first Activity in that Activity Host, set the Loop Activity property to enabled.
To activate the Activities, in the Preview click the buttons that you created.
Activating Activities with an Apply Activation Action
An Apply Activation Action keeps an Activity activated for as long as the condition is met in a Data Trigger that contains this action. When the trigger condition is no longer met, Kanzi rolls back the state of the Activity to the state before the action was applied. Use the Apply Activation Action only with a Data Trigger.
Use the Apply Activation Action when you want to synchronize the activation of an Activity with your application logic.
For example, use an Apply Activation Action to show a cluster indicator when a property has a specific value, and then hide the same indicator when the value of that property no longer has that value.
When using a Data Trigger, keep in mind that actions of a Data Trigger have a higher priority than the actions of any other trigger.
Learn how to use a Data Trigger with an Apply Activation Action to control the activation state of Activities by completing Tutorial: Control application UI.
To activate an Activity with an Apply Activation Action:
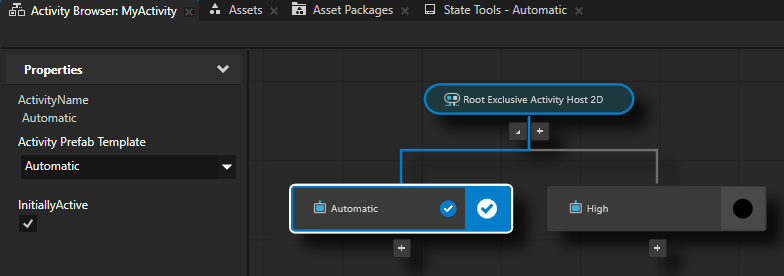
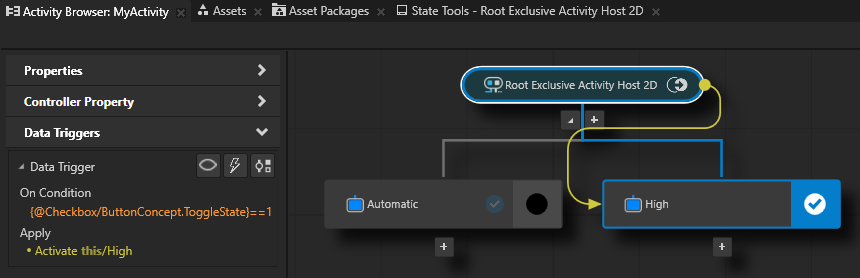
In the Activity Browser create an Exclusive Activity Host with Activities.
For example, create an Exclusive Activity Host node with two Activities, each with own content:
Automatic and in the side panel enable the InitiallyActive
This way you set the Automatic Activity to be active by default.
High
Create a node with which you want to control the activation state of one of the Activities that you created in the previous step.
For example, from the Asset Packages drag the Checkbox to the Preview.
Create a Data Trigger with an Apply Activation Action:
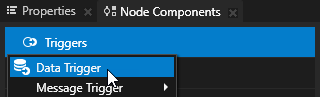
In the Node Tree select the Exclusive Activity Host node, in the Node Components press Alt and right-click Triggers, and select Data Trigger.
In the Data Trigger in the Expression click
 , in the Node Tree select the Checkbox, and from the Properties drag the Toggle State property to the Expression field and edit the expression to
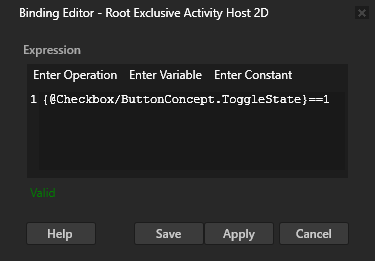
{@Checkbox/ButtonConcept.ToggleState}==1This condition expression must evaluate to either
TrueorFalse. As a source you can use either a property or a data object from a data source.Click Save.
This way you set the Data Trigger to execute the Apply Activation Action when the Checkbox is checked.
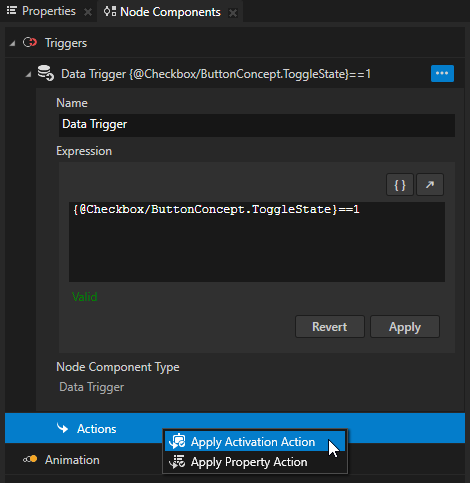
In the Data Trigger press Alt and right-click Actions, and select Apply Activation Action.
In the Apply Activation Action set:
Activity Host Path to .
Activity Activation Path to High
The path to the Activity that that you set in the Activity Activation Path property is relative to the Activity Host node that you set in the Activity Host Path property.
The Activity Browser indicates that an Activity Host has a Data Trigger with the
 icon.
icon.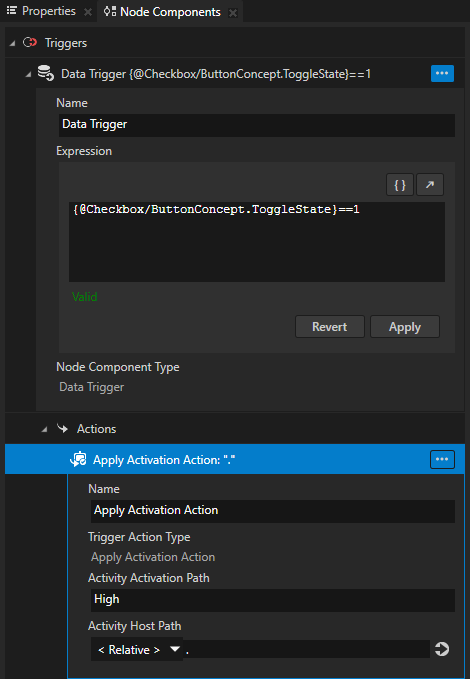
Tip
To get the full activation path to an Activity node, in the Activity Browser right-click an Activity node and select Copy Activation Path. This command copies the entire path from the top-level Activity Host node to that Activity node.
The Activity Activation Path contains only Activities and Activity Hosts.
In the Preview toggle the checkbox:
When the checkbox is checked, the value of the Toggle State property in the Checkbox is 1 and the Data Trigger activates the Activity that you set in the Apply Activation Action.
An Apply Activation Action keeps an Activity activated for as long as the condition is met in a Data Trigger that contains this action.
When the checkbox is not checked, the value of the Toggle State property in the Checkbox is 0 and the Data Trigger deactivates the Activity that you set in the Apply Activation Action.
When the trigger condition is no longer met, Kanzi rolls back the state of the Activity to the state before the action was applied.
Tip
During the application development, use these Data Trigger tools in the Activity Browser side panel:
Tool |
Description |
|---|---|

|
Shows where a Data Trigger is and where the source and target Activity nodes of that Data Trigger are. |

|
Simulates the state when you apply a Data Trigger. This enables you to see the state of your application when the conditions for a Data Trigger are met without having to change the property values in your application. |

|
Shows a Data Trigger in the Node Components window. |
Activating Activities with a Toggle Button Group
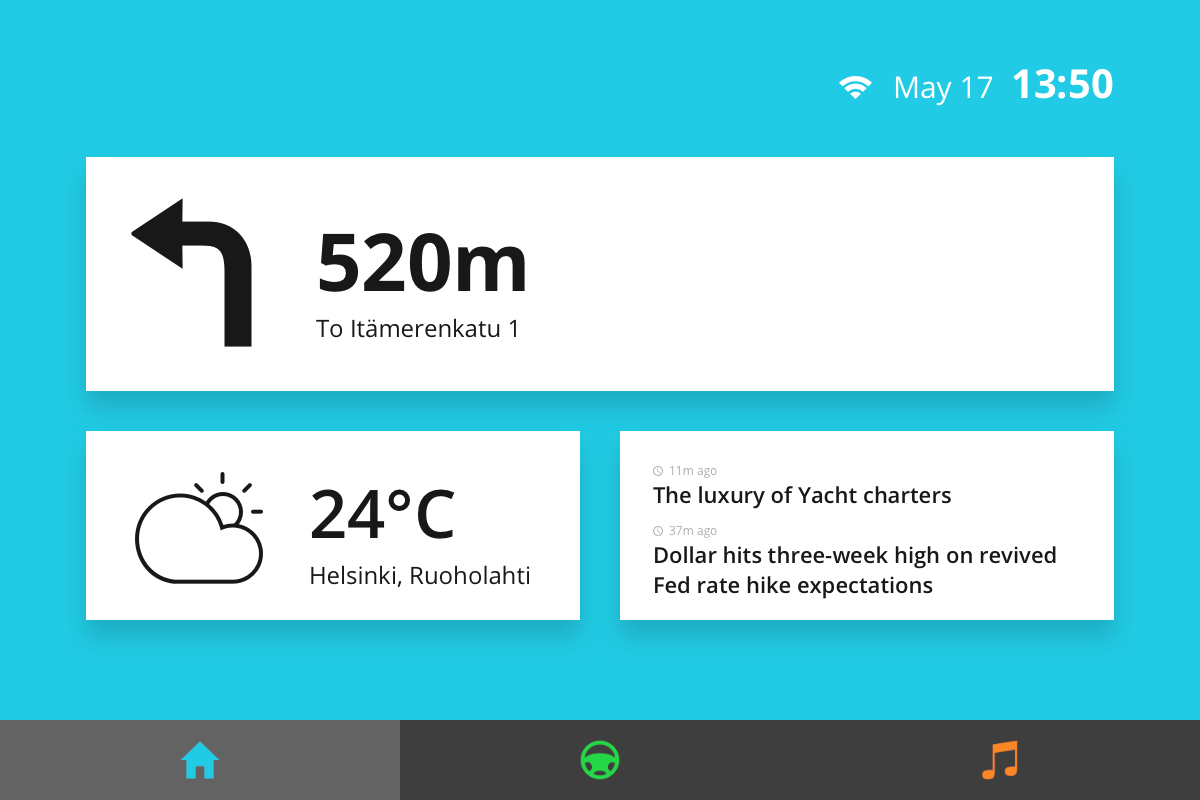
You can use the Toggle Button nodes in a Toggle Button Group to activate Activities in an Activity Host. For example, you can create an application navigation bar to allow the user to switch between application screens.
To activate Activities with a Toggle Button Group:
Create an Activity Host with several Activities whose activation state you control with a Controller Property.
For example, create an Exclusive Activity Host with Activities that show different application screens and use a Controller Property to control which Activity is active. See Using an Exclusive Activity Host.
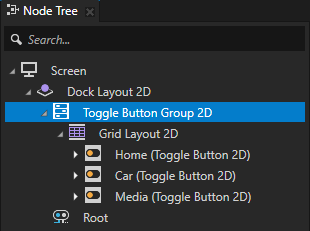
Create a Toggle Button Group with a Toggle Button node for each Activity that you created in the previous step. See Creating a toggle button group.
In the Toggle Button Group order the Toggle Button nodes in the same order as the enumeration options that you use to control the Activities.
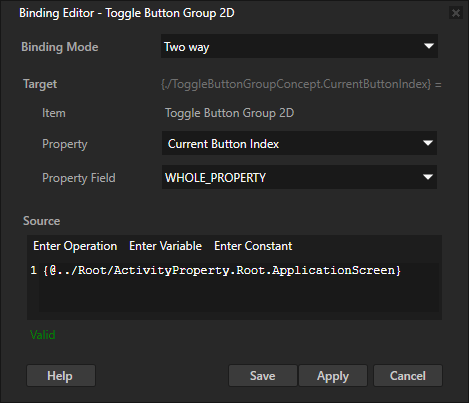
Select the Toggle Button Group, in the Properties click + Add Binding, and in the Binding Editor set:
Binding Mode to Two way
Property to Current Button Index
You use the Current Button Index property to access the index of the Toggle Button that is toggled on in the Toggle Button Group.
Source to the controller property in the Activity Host that controls which Activity is active in that Activity Host.
Click Save.
With this binding you create a two-way connection between the toggle button that is toggled on in the toggle button group and the Activity that is active in the Activity Host.
Now when you activate an Activity, Kanzi toggles on the corresponding Toggle Button, and when you toggle on a Toggle Button, Kanzi activates the corresponding Activity.
Using Activities in the API
For details, see the Activity2D, Activity3D, ExclusiveActivityHost2D, and ExclusiveActivityHost3D classes in the Kanzi Engine API reference.