Loading images from the file system
You can create textures from images in Kanzi Studio or load and use images in your Kanzi application from the file system of the device where you run the application.
To load images from the file system:
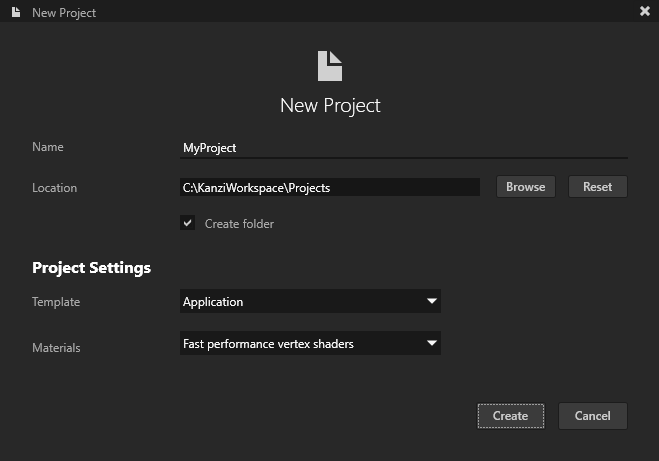
In Kanzi Studio create a project using the Application template.
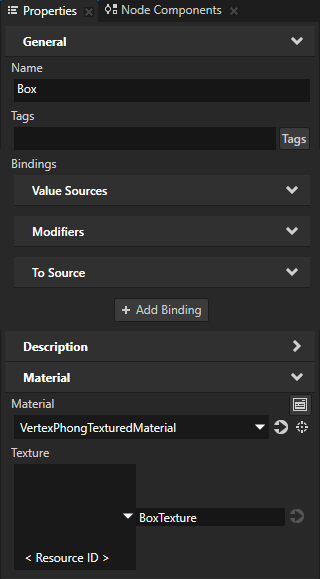
In the Node Tree create a node on which you want show a texture and in the Properties set the Material property to a material that supports textures. See Using material types and Using materials.
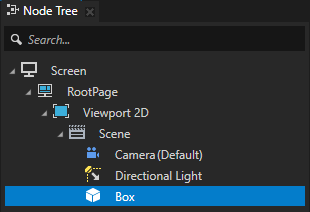
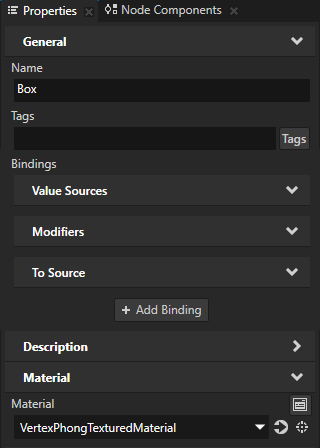
For example, in the Node Tree create a Box node and in the Properties set Material to VertexPhongTexturedMaterial.
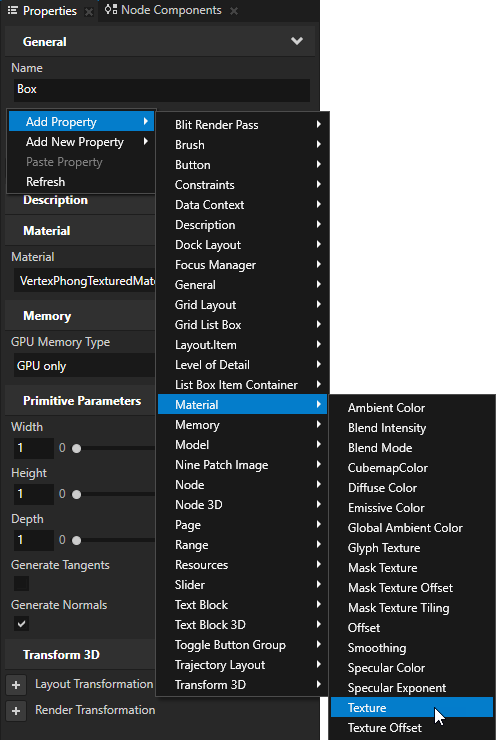
In the Node Tree select the node that you created in the previous step, in the Properties add the Texture property, and set it to a resource ID.
For example, set the Texture property to the resource ID BoxTexture.
This way you assign to the Texture property a resource ID which you later use to show a texture.
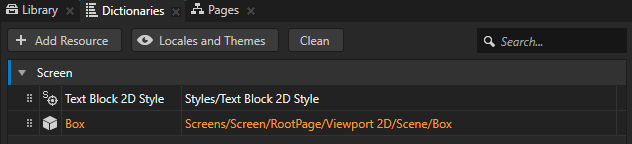
In the Node Tree press Alt and right-click the node you created and select Alias. See Using aliases.
Kanzi Studio creates an alias pointing to the node from which you created the alias and adds it to the resource dictionary of its nearest ancestor node that contains a resource dictionary.
Use an Alias to get consistent access to a Kanzi node. You can use aliases to access nodes both in Kanzi Studio and using the Kanzi Engine API.
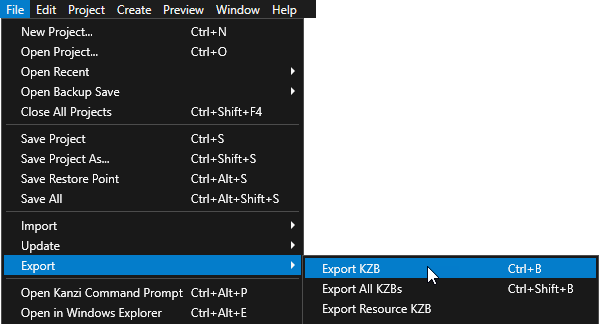
In Kanzi Studio select File > Export > Export KZB.
Kanzi Studio creates the kzb file and configuration files from your Kanzi Studio project. Kanzi Studio stores the exported files in the
<ProjectName>/Application/bindirectory or the location you set in Project > Properties in the Binary Export Directory property. The kzb file contains all nodes and resources from your Kanzi Studio project, except the resources you mark in a localization table as locale packs.When you run your Kanzi application from Visual Studio, your application loads the kzb file and configuration files.
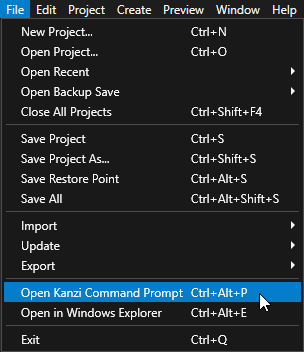
Place the image that you want to use in the texture to the
<ProjectName>/Application/bindirectory.In Kanzi Studio select File > Open Kanzi Command Prompt.
This way you launch a Windows command prompt with the Kanzi environment variables set for the version of Kanzi based on the version of Kanzi Studio from which you opened a Kanzi Command Prompt.
Use the Kanzi Command Prompt to build Kanzi projects, and access build tools and Kanzi utilities without writing absolute paths.
Tip
You can find the Kanzi Command Prompt in the Windows Start Menu in the Rightware directory.
When you have more than one version of Kanzi installed, make sure that you launch a Kanzi Command Prompt for the version of Kanzi with which you want to work in that command prompt.
In the Kanzi Command Prompt in the
<ProjectName>/Applicationdirectory run the script that generates a Visual Studio solution for the application.For example, if you use Visual Studio 2019, run
generate_cmake_vs2019_solution.bat
This script generates a Visual Studio solution for the application in the directory
<ProjectName>/Application/build_vs2019.In Visual Studio open the
<ProjectName>/Application/build_vs<Version>/<ProjectName>.slnVisual Studio solution.For example, if you named your Kanzi Studio project MyProject, the Visual Studio solution is called
MyProject.sln.
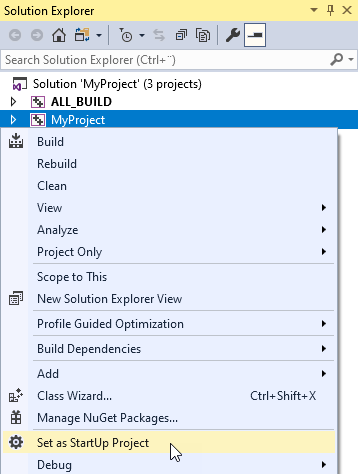
In Visual Studio in the Solution Explorer right-click the MyProject project and select Set as StartUp Project.
In the C++ application load the texture.
// In the main class of the application use the onProjectLoaded()
// virtual function to load a file from the file system.
virtual void onProjectLoaded()
{
    // Get the Screen node of your application.
    ScreenSharedPtr screenNode = getScreen();
    // Get the Box node using the #Box alias.
    Model3DSharedPtr box = screenNode->lookupNode<Model3D>("#Box");
    // Load the texture from the <ProjectName>/Application/bin directory.
    box->addResource(ResourceID("BoxTexture"), "file://./Red.png");
}
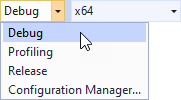
Select the solution configuration that you want to use and run your application.
During development select the Debug configuration. When you are ready to create a version for production, select the Release configuration.
When you launch the application, Kanzi loads the image stored in
<ProjectName>/Application/binand creates a texture from the image. When Kanzi loads the application kzb file, it sets the texture to the node you get in theonProjectLoadedfunction.