Step 1 - Create materials for the blur effect
In this step you create the materials which provide the Gaussian blur effect and enable you to set the strength of the blur.
Assets for the tutorial
The starting point of this tutorial is the Blur.kzproj Kanzi Studio project file stored in the <KanziWorkspace>/Tutorials/Blur/Start directory.
The <KanziWorkspace>/Tutorials/Blur/Completed directory contains the completed Kanzi Studio project of this tutorial.
Create a material for the blur effect
In this section you create a material type, which supports the directional Gaussian blur effect, and a material that you can use to apply the effect to 3D content.
To create a material for the blur effect:
In Kanzi Studio open the project stored in the
<KanziWorkspace>/Tutorials/Blur/Startdirectory.
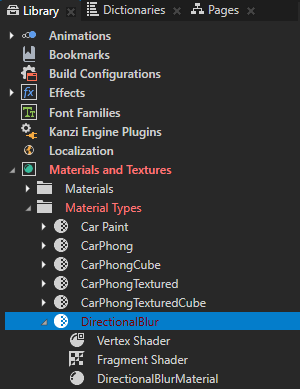
In the Library press Alt and right-click Materials and Textures, select Material Type, and name it DirectionalBlur.
Kanzi Studio creates the material type and a material named DirectionalBlurMaterial, which uses the DirectionalBlur material type. In step 2 of this tutorial you use this material to apply the Gaussian blur effect to the model of the car in the project.
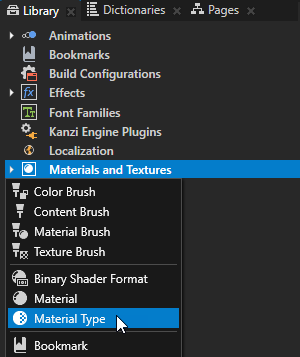
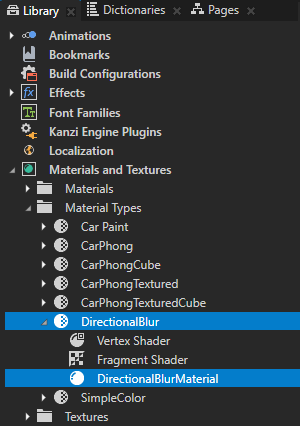
In the Library > Materials and Textures > Material Types > DirectionalBlur material type double-click the Vertex Shader to open it in the Shader Source Editor.
In the Shader Source Editor replace the content of the vertex shader file with the shader code in this step, and click Save.
#version 300 es
in vec3 kzPosition;
in vec2 kzTextureCoordinate0;

uniform highp mat4 kzProjectionCameraWorldMatrix;

out mediump vec2 vTexCoord;

void main()
{
    precision mediump float;

    vTexCoord = kzTextureCoordinate0;
    gl_Position = kzProjectionCameraWorldMatrix * vec4(kzPosition, 1.0);
}
In the Library > Materials and Textures > Material Types > DirectionalBlur material type double-click the Fragment Shader to open it in the Shader Source Editor, replace the content of the fragment shader file with the shader code in this step, and click Save.
This fragment shader implements the directional Gaussian blur.
#version 300 es
precision mediump float;

uniform sampler2D Texture0;
uniform mediump float kzTextureWidth0;
uniform mediump float kzTextureHeight0;
uniform mediump vec4 kzViewport;

// Defines the direction (x or y axis) along which to apply the blur.
uniform lowp vec2 BlurDirection;
// Determines the strength of the blur.
uniform mediump float BlurRadius;

out mediump vec4 outColor;

// Defines the one-dimensional Gaussian Kernel with 9 samples.
const float GAUSSIAN_KERNEL[9] = float[9]
(
    0.028532,0.067234,0.124009,0.179044,0.20236,0.179044,0.124009,0.067234,0.028532
);

vec4 gaussianBlur(mediump vec2 coord, lowp vec2 dir)
{

    vec2 texel = vec2(1.0/kzTextureWidth0, 1.0/kzTextureHeight0);
    vec4 sum = vec4(0.0);
    // Get the original texture coordinate for this fragment.
    vec2 tc = coord;
    // Get the amount to blur.
    float blur = BlurRadius;
    // Set the amount of blur in the horizontal direction.
    float hstep = dir.x*texel.x;
    // Set the amount of blur in the vertical direction.
    float vstep = dir.y*texel.y;

    // Sample the texture 9 times for every fragment.
    for(int i = 0; i < GAUSSIAN_KERNEL.length(); i++)
    {
        float pixelOffset = (float(i) - floor(float(GAUSSIAN_KERNEL.length()) * 0.5));
        sum += texture(Texture0, vec2(tc.x + pixelOffset * blur * hstep, tc.y + pixelOffset * blur * vstep)) * GAUSSIAN_KERNEL[i];
    }

    return sum;
}

void main()
{
    vec2 texCoord  = gl_FragCoord.xy / kzViewport.zw;
    outColor = gaussianBlur(texCoord, BlurDirection);
}
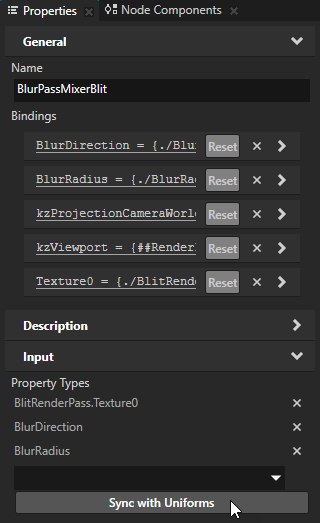
In the Library select the DirectionalBlur material type and in the Properties click Sync with Uniforms to create and add the properties you defined in the fragment shader to this material type and the materials that use it.
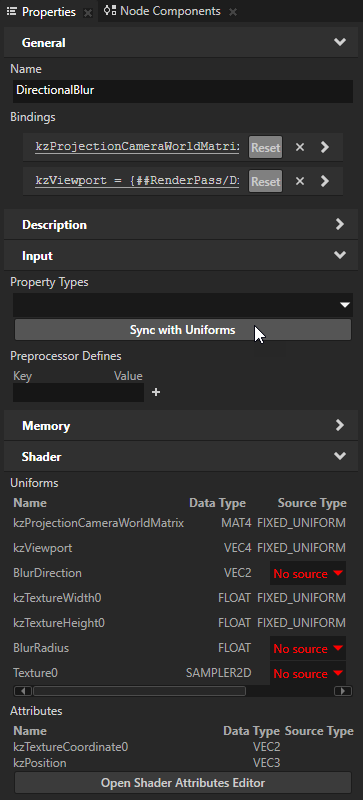
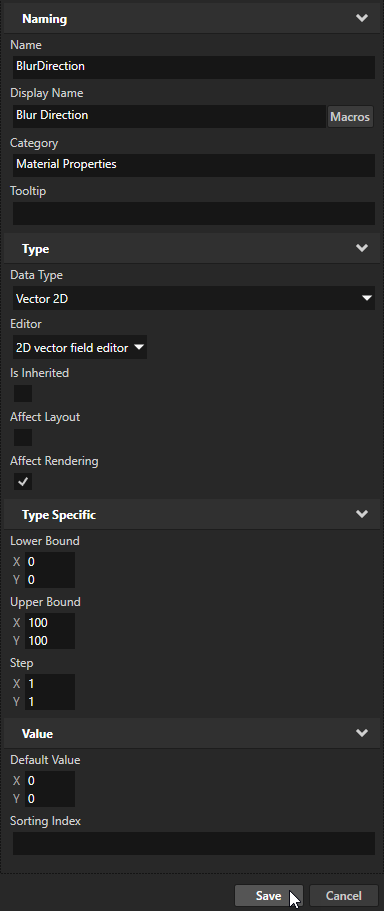
In the Create Property Type dialog click Yes to create the custom property type BlurDirection, in the Property Type Editor window set Display Name to Blur Direction, and click Save.
You use this property type to set the direction in which a render pass applies the blur effect.
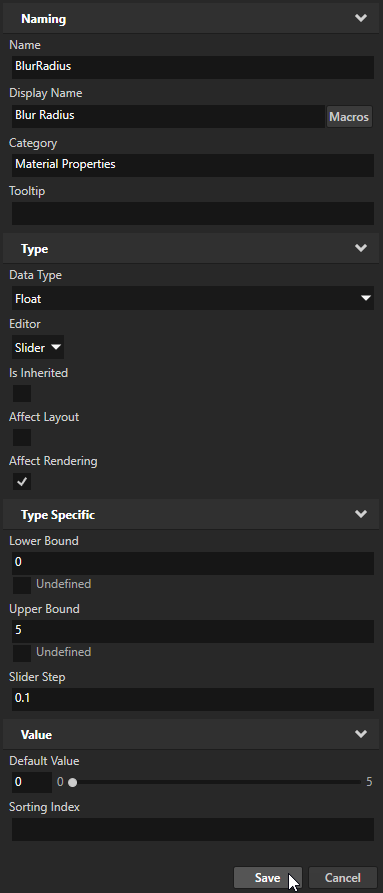
In the Create Property Type dialog click Yes to create the custom property type BlurRadius, and in the Property Type Editor window set:
Display Name to Blur Radius
Upper Bound to 5
Click Save.
You use this property type to set the strength of the blur effect.
Create a material for mixing blur passes
In this section you create a material that you can use to draw on the screen a mix of textures in which you have blurred the content by different amounts. You use the material in step 3 of this tutorial to control the amount of blur that you apply to the model of the car in the project. Mixing blur passes enables you to have a blur the amount of which you can adjust continuously.
To create a material for mixing blur passes:
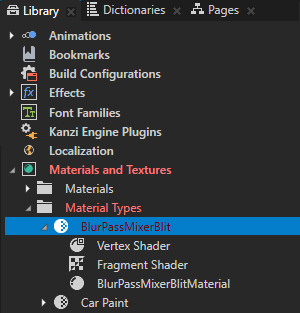
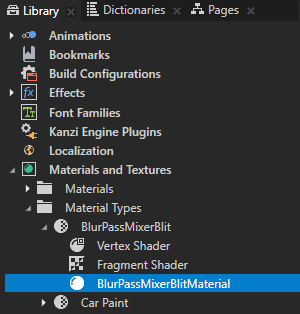
In the Library > Materials and Textures > Material Types select the DirectionalBlur material type, press the Ctrl D keys to duplicate the material type, press the F2 key, rename the material type to BlurPassMixerBlit, and rename the BlurPassMixerBlit > DirectionalBlur_1Material material to BlurPassMixerBlitMaterial.

In the Library > Materials and Textures > Material Types > BlurPassMixerBlit material type replace the content of the fragment shader file with the shader code in this step, and click Save.
#version 300 es
precision mediump float;

uniform sampler2D Texture0;
uniform sampler2D Texture1;
uniform sampler2D Texture2;
uniform sampler2D Texture3;
uniform sampler2D Texture4;
uniform sampler2D Texture5;
uniform mediump float BlurMixFactor;

in vec2 vTexCoord;

out vec4 outColor;

vec4 BLUR_LEVELS[6] = vec4[6]
(
    vec4(0.0), vec4(0.0), vec4(0.0), vec4(0.0), vec4(0.0), vec4(0.0)
);

// Gets the amount of blur based on the input value.
vec4 getMixedBlurLevel(lowp float x)
{
    // Six textures with different amounts of blur.
    // In this tutorial you use Texture0 to draw the content without blur, and textures
    // Texture1...Texture5 to draw the results of five passes of the blur effect.
    // Each pass blurs the content more than the previous pass.
    BLUR_LEVELS[0] = texture(Texture0, vTexCoord);
    BLUR_LEVELS[1] = texture(Texture1, vTexCoord);
    BLUR_LEVELS[2] = texture(Texture2, vTexCoord);
    BLUR_LEVELS[3] = texture(Texture3, vTexCoord);
    BLUR_LEVELS[4] = texture(Texture4, vTexCoord);
    BLUR_LEVELS[5] = texture(Texture5, vTexCoord);

    // On a scale of 0-5, get the desired level of blur.
    float blurLevel = min(x, 0.9999) * float(BLUR_LEVELS.length() - 1);

    // Get the fractional part of blurLevel.
    float fracLevel = fract(blurLevel);

    // Get the nearest integer that is less than or equal to blurLevel.
    // This is the index of the first texture that you mix to get the result.
    int level = int(floor(blurLevel));

    // Interpolate linearly between two textures and use fracLevel to weight between them.
    return mix(BLUR_LEVELS[level], BLUR_LEVELS[level + 1], fracLevel);
}

void main()
{
    outColor = getMixedBlurLevel(BlurMixFactor);
}
In the Library select the BlurPassMixerBlit material type and in the Properties click Sync with Uniforms to create and add the properties you defined in the fragment shader to this material type and the materials that use it.
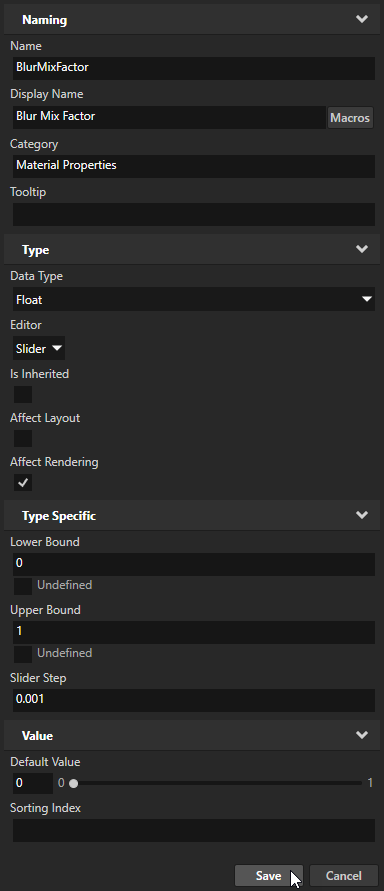
In the Create Property Type dialog click Yes to create the custom property type BlurMixFactor, and in the Property Type Editor window set:
Display Name to Blur Mix Factor
Slider Step to 0.001
Click Save.
You use this property type to set the amount of blur.
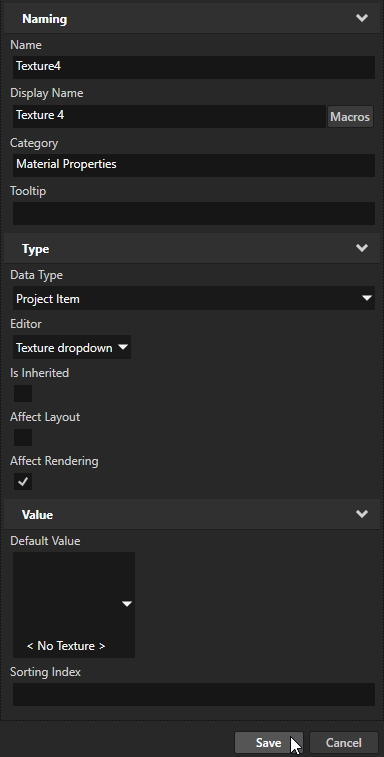
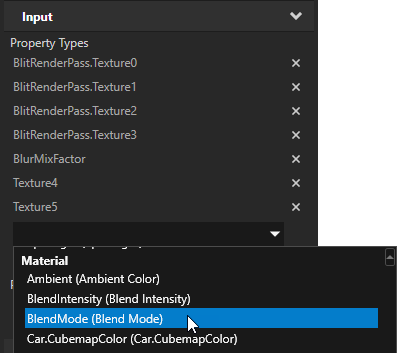
In the Create Property Type dialog click Yes to create the custom property type Texture4, in the Property Type Editor window set Display Name to Texture 4, and click Save.
Repeat the previous step to create the Texture5 property type.
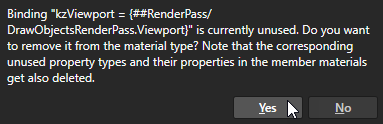
In the Delete Binding dialog click Yes to delete the bindings and property types that the BlurPassMixerBlit material type does not use.
In the Properties in the Input section from the dropdown menu select the Blend Mode property type.
You add the Blend Mode property to the BlurPassMixerBlit material type and to the BlurPassMixerBlitMaterial material, which uses the BlurPassMixerBlit material type.
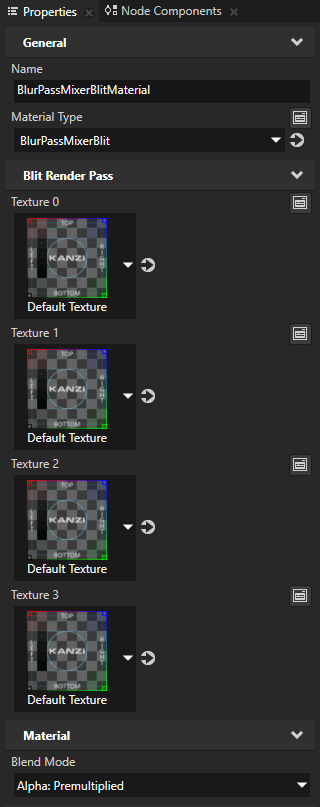
In the Library > Materials and Textures > Material Types > BlurPassMixerBlit select the BlurPassMixerBlitMaterial and in the Properties set the Blend Mode property to Alpha: Premultiplied.
In step 3 of this tutorial you use this material to control the amount of blur that you apply to the model of the car in the project.
See also
To learn more about materials and material types, see Material types and materials.
To learn more about shaders, see Shaders.