Step 2 - Fine-tune the animation
In the previous step, you created the animation in which the BeachBall bounces off the ground, but the animation looks very rigid. This is because the animation uses linear interpolation for the transition between the keyframes. You can use different easing functions to create different animations.
In this step, you:
Clean up the animation by removing the unused Animation Data items.
Make the bouncing ball animation smoother by changing the easing function between the keyframes.
Make the shadow react to the position of the BeachBall.
Clean up the animation
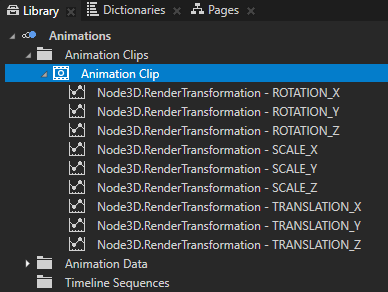
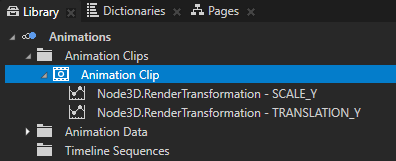
When you drag properties to the Animation Clip Editor to create keyframes, Kanzi Studio automatically adds the Animation Data items for each property field. Since you changed only the Translation Y and Scale Y property fields of the Render Transformation property, you can delete all the other Animation Data items.
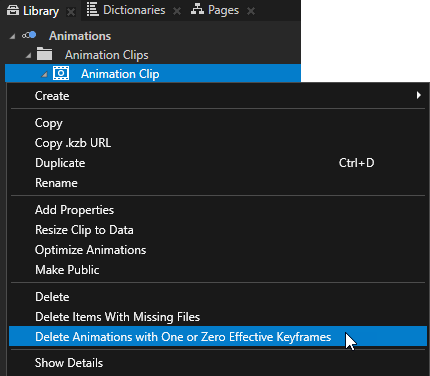
In the Library, in the Animations > Animation Clips, right-click the Animation Clip item that you want to clean up, and select Delete Animations with One or Zero Effective Keyframes.
This deletes all Animation Data items that do not contain information needed in your animation.
Make the animation smoother
In this section, you change the easing function between keyframes to make the animation smoother.
To make the animation smoother:
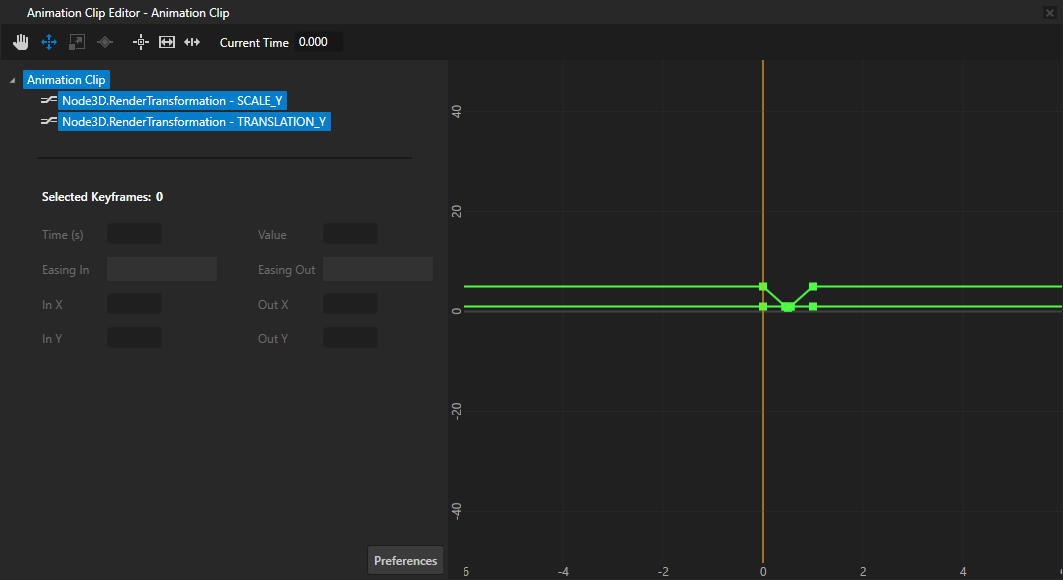
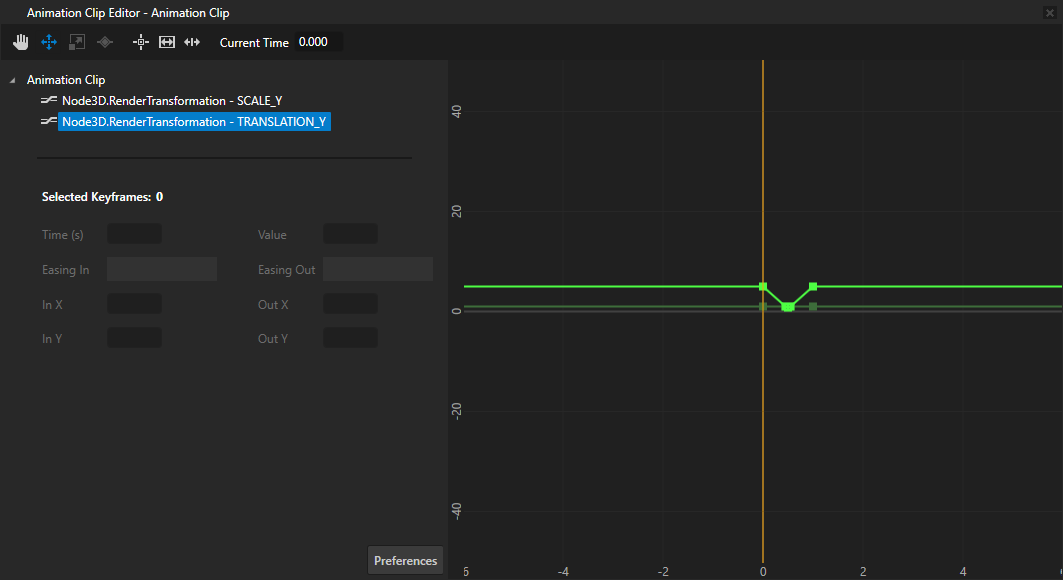
In the Animation Clip Editor, select only the Translation Y property field Animation Data item.
Use the mouse wheel to zoom-in on the animation canvas, and click
 to select the Move tool.
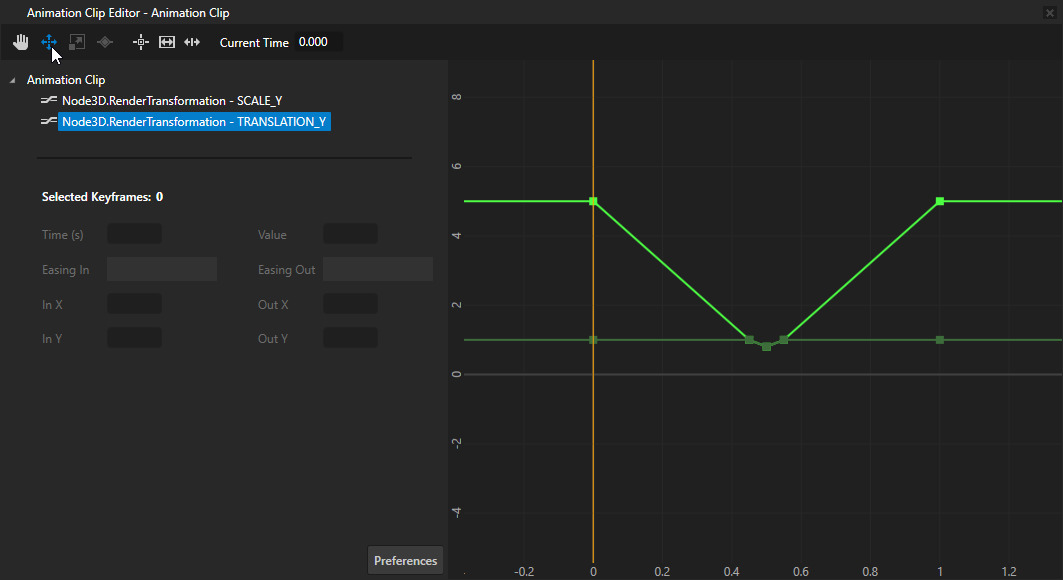
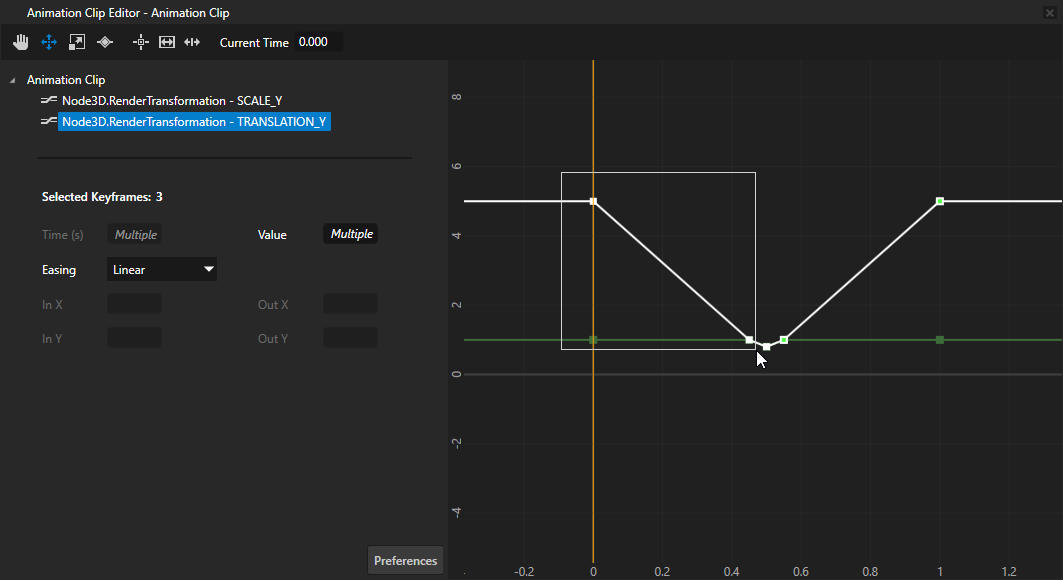
In the animation canvas, select the first two keyframes by clicking and dragging the area around the first two keyframes.
The selected keyframes turn white.
The first keyframe defines the starting position of the BeachBall node, and the second keyframe defines the position of the BeachBall as it hits the Ground node. These are the keyframes for which you want to change the easing function to make the animation smoother.
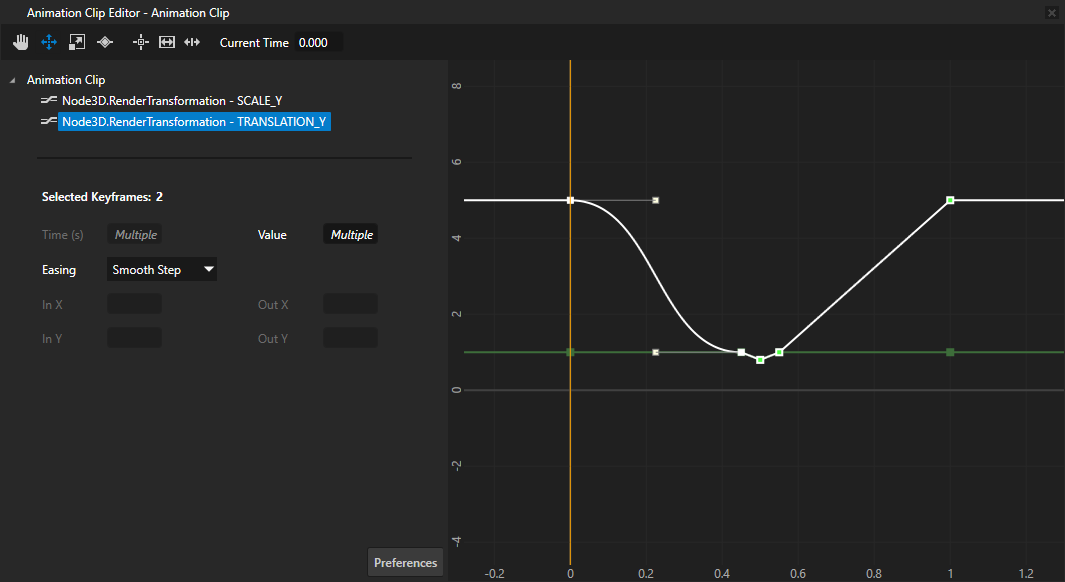
In the Animation Clip Editor left panel, set Easing to Smooth Step.
Use the Move tool
to select the last two keyframes and set Easing to Smooth Step.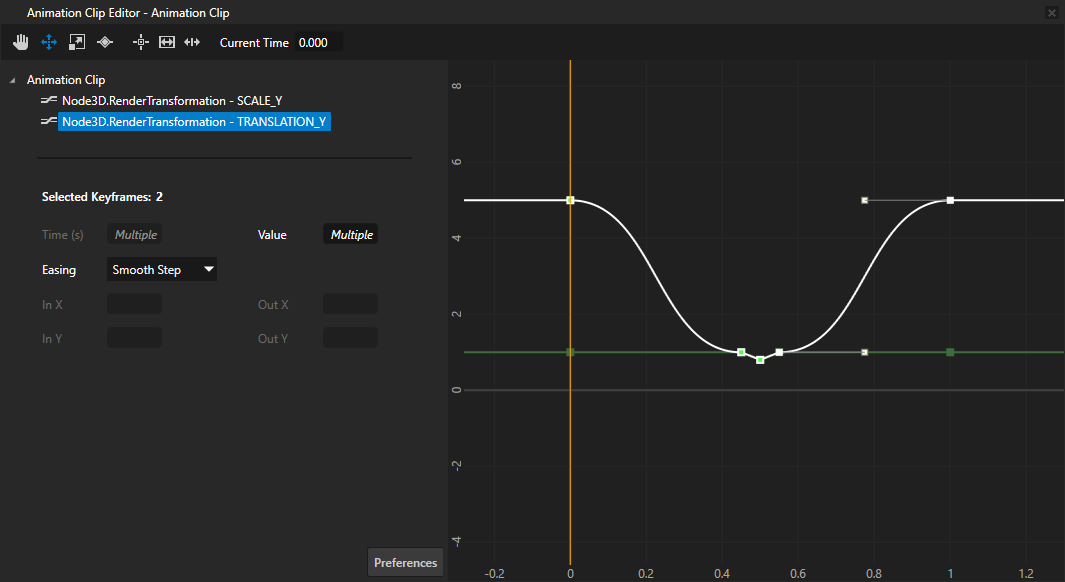
(Optional) You can further adjust the smoothness of the animation by adjusting the keyframe handles of each keyframe.
To create a looping animation, you get the best result by making the interpolation in starting and ending keyframes symmetrical.

To find more information on how to adjust keyframe handles, see Setting the easing function between keyframes.
Make the shadow react to the position of the BeachBall
In this section you connect the size of the shadow texture on the Ground node to the distance of the BeachBall node from the Ground node using Kanzi bindings. You make the shadow larger and more transparent when the BeachBall node is farther away from the Ground node.
To make the shadow react to the position of the BeachBall:
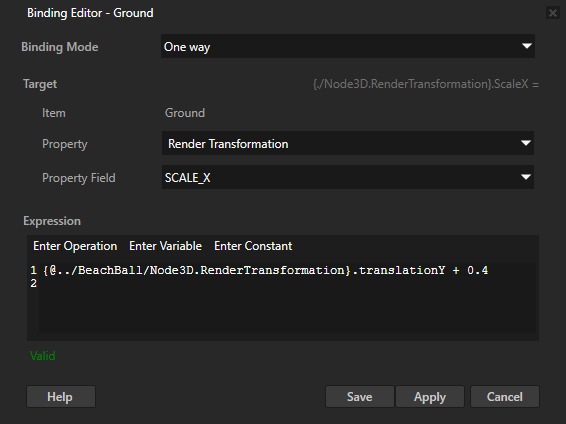
In the Node Tree select the Ground node, in the Properties click + Add Binding, and in the Binding Editor set:
Property to Render Transformation
Property Field to Scale X
Expression to
{@../BeachBall/Node3D.RenderTransformation}.translationY + 0.4
Click Save.
With this binding you control the scale of the Ground node on the x axis with the position of the BeachBall node on the y axis: the higher the BeachBall node is, the larger the shadow texture on the ground node is.
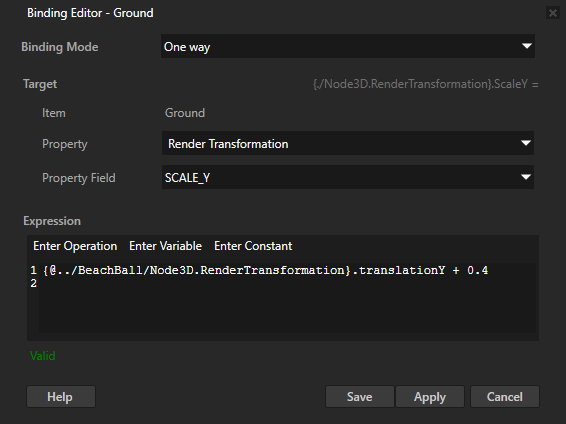
In the Properties click + Add Binding to add another binding. Use the same binding expression as in the previous step, but bind to the Scale Y property field of the Render Transformation property, instead of to the Scale X property field.
The only difference between this binding and the binding in the previous step is that with this binding you bind the scale of the Ground node on the y axis.
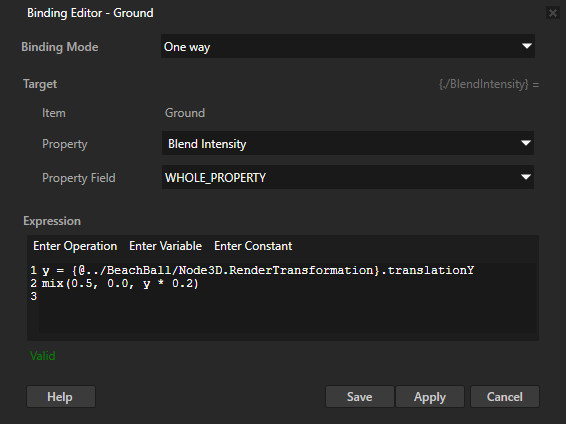
Add another binding and in the Binding Editor set:
Property to Blend Intensity
Expression to
y = {@../BeachBall/Node3D.RenderTransformation}.translationY
mix(0.5, 0.0, y * 0.2)
With this binding you control the strength of the shadow texture on the Ground node with the position of the BeachBall node on the y axis: the higher the BeachBall node is, the weaker the shadow texture on the ground node is. This binding uses the mix function to adjust the final value of the Blend Intensity property. You can use other binding functions to adjust the value. See Bindings expressions reference.
What’s next?
In this tutorial you learned how to create a simple keyframe animation in Kanzi Studio. Now you can learn how to:
Create reflections. See Tutorial: Create reflections tutorial.
Change the materials and textures of the ball and the ground. See Tutorial: Materials and textures.
Learn how to create Kanzi applications that use the Kanzi Engine API. See Tutorial: Hello world! tutorial.
Learn more about how to use bindings in Kanzi. See Using bindings.
See also
To learn more about using easing functions in keyframe animations, see Setting the easing function between keyframes.
To learn more about creating Kanzi applications, see Tutorials.
To learn more about how to control the playback of animations in Kanzi, see Using keyframe animations.
To find out more about the animations in Kanzi, see Animations.
To find out more about Kanzi Studio features, see Working with ….