Using the Nine Patch Image node
Use the Nine Patch Image node to create a scalable button background that scales with the size of the Nine Patch Image content.
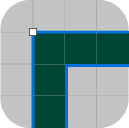
A Nine Patch Image scales its images in a controlled way, instead of scaling them as one unit. It places nine images in a 3x3 grid: the images on the edges form the frame, while the center image holds the content of a Nine Patch Image.
When you use Nine Patch Image, keep in mind:
The center image stretches in all directions. For the best results keep that image transparent or solid color.
The thickness of the corners defines the thickness of the frame for the central image. Kanzi does not scale the corners in a nine patch image.
By default as the size of a Nine Patch Image changes, the top, bottom, right, and left textures scale according to the change in space between the corner textures. You can control this setting with the Wrap Mode and the texture type properties for each texture. See Creating a Nine Patch Image node.
Creating a Nine Patch Image node
To create a Nine Patch Image node:
In a third-party tool, create images for each part of the Nine Patch Image node and save each in its own file.
You need to create the images for the:
Corners (top-left, top-right, bottom-right, and bottom-left)
Sides (top, right, bottom, and left)
Center
In Kanzi Studio in the Assets click Import Assets and import all images you want to use in the Nine Patch Image node.
In the Node Tree press Alt and right-click the node where you want to create a Nine Patch Image node and select Nine Patch Image.
You can create a 3D node only in a 3D node, such as the Scene node, and a 2D node only in a 2D node.
In the Properties set the Nine Patch Image properties to the images you want to use for each part of the Nine Patch Image node:
Top-Left Image to the texture for the top left corner
Top Image to the texture for the top border
Top-Right Image to the texture for the top right corner
Left Image to the texture for the left border
Center Image to the texture for the center
Right Image to the texture for the right border
Bottom-Left Image to the texture for the bottom left corner
Bottom Image to the texture for the bottom border
Bottom-Right Image to the texture for the bottom right corner
(Optional) You can control how a Nine Patch Image node displays the top, right, bottom, and left textures:
In the Library > Materials and Textures > Textures select each texture that the Nine Patch Image node uses, and set the Wrap Mode property you want to use for each texture.
In the Node Tree select the Nine Patch Image node and in the Properties set the texture type for the textures you want to control (Stretch Type Top, Stretch Type Bottom, Stretch Type Left, Stretch Type Right, Stretch Type Center).
Wrap Mode property value
Texture Stretch property value
Description
Clamp
Stretch
Default value. Scale the texture to fill the space between the corner textures of the Nine Patch Image.
Clamp
Wrap
Extend the last column or row of pixels of the selected texture, when the width or height of the space between the corner textures of the Nine Patch Image exceed the width or height of the selected texture.
Repeat
Stretch
Scale the texture to fill the space between the corner textures of the Nine Patch Image.
Repeat
Wrap
Tile the texture when the width or height of the space between the corner textures of the Nine Patch Image exceed the width or height of the selected texture.
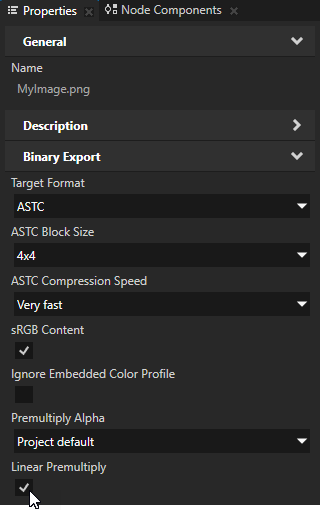
(Optional) For each image in a Nine Patch Image you can set the target format that is the most suitable for your application. See Setting the target format for images.
Setting the target format for images
When you export your project to a kzb file, Kanzi Studio reads the images in the project using the format of the original image and writes the images to a kzb file in the format you set with the Target Format property for each image.
If the file format of the original image is the same as the format you select in the Target Format property, Kanzi Studio does not modify the image when it writes the image to a kzb file under these conditions:
Premultiply Alpha is disabled, or the alpha channel does not need to be premultiplied
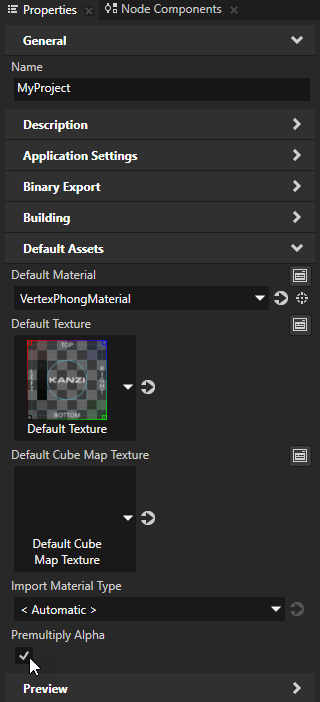
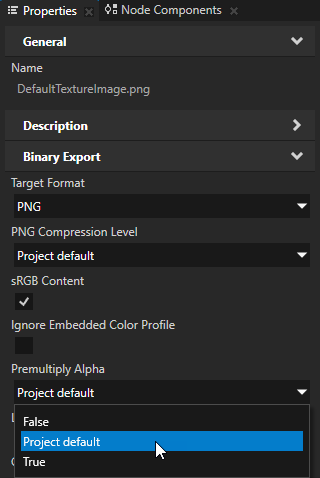
To change this setting, in the Project > Properties use the Premultiply Alpha property. You can override this value in the properties of the image file where you want to use a different setting.
Generate Mipmaps is disabled
You can set the value of the Generate Mipmaps property in each image file.
Round up Image Dimensions to Nearest Power of Two property is disabled
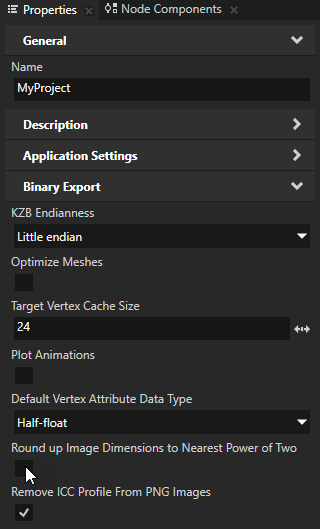
You can set the value of the Round up Image Dimensions to Nearest Power of Two property in the Project > Properties.
When you enable the Round up Image Dimensions to Nearest Power of Two property, Kanzi Studio rounds up the width and height of the images in your project to the nearest power of two during kzb file export. For example, Kanzi Studio exports an image of the size 40 by 30 pixels to the kzb file in the size 64 by 32 pixels.
If your image is in JPEG or PNG format and you do not want Kanzi Studio to modify the image that it exports to a kzb file, in the image Properties enable the Use Original Image property.
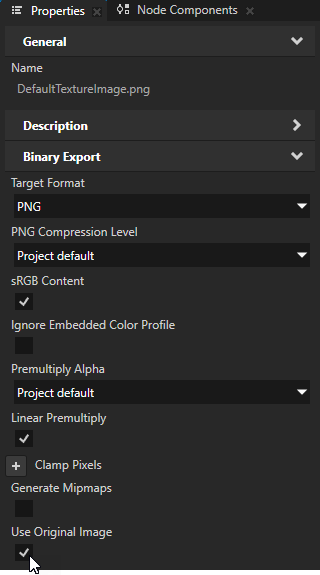
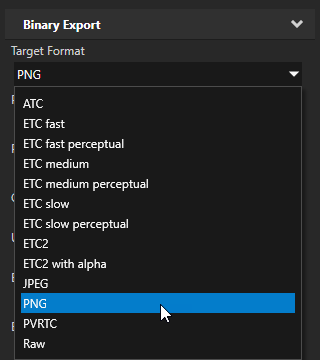
To set the image target format:
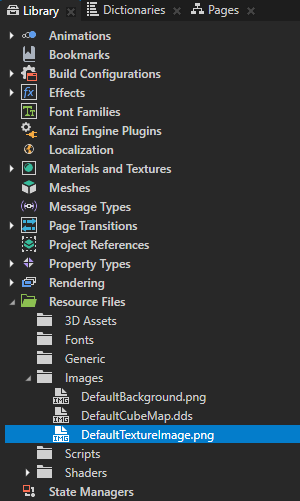
In the Library > Resource Files > Images select the image for which you want to set the target format.
In the Properties set the Target Format property to the image format you want to use in your Kanzi application.
The format you select is important because this influences the size of the kzb file and the loading time when your Kanzi application loads the image. Make sure that your target device supports the target format you select for the image. See Images and textures best practices and Compressing textures.
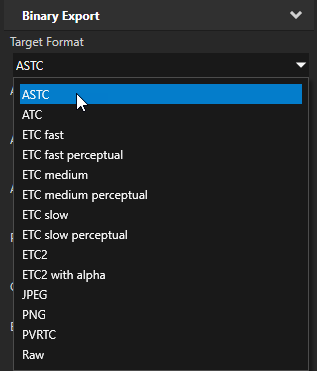
If the image format you selected in the previous step supports compression, configure the compression scheme you want to use. See Compressing textures.

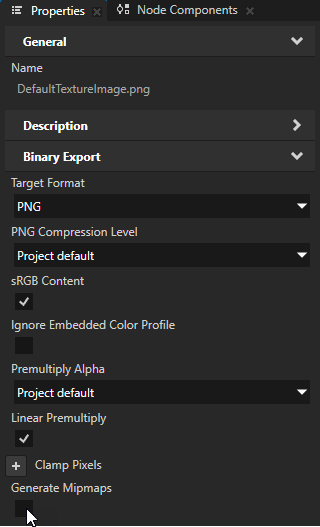
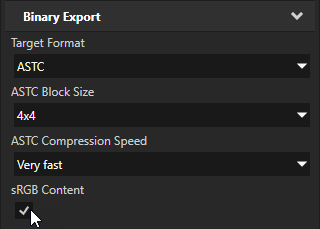
For image formats that support sRGB:
If the image contains sRGB color information, set the sRGB Content property to enabled. This is the default setting.
If you disable the sRGB Content property for an image that contains sRGB color information, Kanzi can render the textures that use the image brighter than expected.
If the image contains non-color information, such as a normal, roughness, or occlusion map, set the sRGB Content property to disabled.
Textures that contain non-color information are stored in linear format. By disabling the sRGB Content property you set Kanzi to pass the image data to a shader directly, without performing a color space conversion.
If you want Kanzi to premultiply the alpha channel in the:
Linear color space, set the Linear Premultiply property to enabled.
This is the default value and results in the fewest artifacts in sRGB images.
Color space of the image, usually sRGB, set the Linear Premultiply property to disabled.
This can give better results for images created for the legacy color workflow.
See Preparing images in third-party tools.
Using the PNG compression
When you use PNG compression keep in mind that because the compressed PNG images do not go to the GPU in compressed format, PNG compression affects the loading of a PNG image data from a kzb file to the device memory.
Use PNG compression to store and load images from a kzb file. To improve the performance of your application consider using an image format which Kanzi can send compressed directly to the device GPU. See Compressing textures.
To use the PNG compression:
In Kanzi Studio in the Library select Resource Files > Images, and select the image for which you want to apply compression.
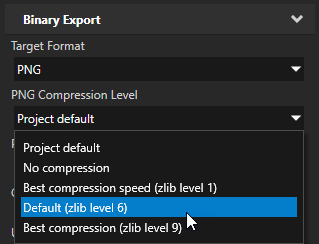
In the Properties set the Target Format to PNG.
In the Properties set the PNG Compression Level property to the compression you want to use for this image:
Project default to use the PNG compression set in the Project > Properties in the PNG Compression Level property
No compression to not use compression for the image
Best compression speed (zlib level 1) creates a larger file, but compresses quickly
Default (zlib level 6) creates a smaller file, but takes longer to compress. This is the default option of the FreeImage library which Kanzi Studio uses for PNG images.
Best compression (zlib level 9) creates the smallest file, but takes the most time to compress
Tip
You can set the value of the PNG Compression Level property in the Project > Properties and in the properties for each image file.
Setting the appearance of a Nine Patch Image
To set the appearance of 2D nodes:
You can fill 2D nodes with a solid color, a texture, or a material. See Adjusting the appearance of 2D nodes.


You can apply a post-processing effect to a 2D node. See Effects for 2D nodes.

You can rotate a 2D node around all three axes to create a 3D perspective effect. See Creating a 3D perspective effect for 2D nodes.
You can apply custom rendering to 2D nodes to create post-processing effects. See Applying custom rendering to 2D nodes.
You can render a 2D node as pixel-perfect. See Rendering pixel-perfect 2D nodes.
Nine Patch Image property types and messages
For a list of the available property types and messages for the Nine Patch Image node, see Nine Patch Image.
Using the Nine Patch Image node in the API
For details, see the NinePatchImage2D class.