Using the Trajectory Layout nodes
Use the Trajectory Layout nodes to arrange items along a trajectory path.
Kanzi Studio comes with several types of trajectories. When you need a different type of trajectory, create a spline trajectory in a third-party tool and import it to your Kanzi Studio project. See Trajectories.

Creating a Trajectory Layout node
To create a Trajectory Layout node:
In the Node Tree, press Alt and right-click the node where you want to create a Trajectory Layout node and select either Trajectory Layout 3D, or Trajectory Layout 2D.

You can create a 3D node only in a 3D node, such as the Scene node, and a 2D node only in a 2D node.
Tip
To see the trajectory, in the Preview click
 to enter the Analyze mode, right-click
  , and select Debug objects.
In the Node Tree, add child nodes to the layout that you created in the previous step.
For example, if you created a Trajectory Layout 3D node, add several Sphere nodes. If you created a Trajectory Layout 2D node, add several Image nodes.
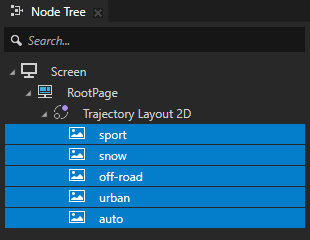
As you add child nodes, the Trajectory Layout node positions them along the trajectory used by the Trajectory Layout node.
(Optional)
Kanzi Studio creates and uses a circle trajectory by default. You can use an angle, arc, circle, ellipse, line, rectangle, spiral, spline, or a trapezoid trajectory. See Trajectories.
Stretching the trajectory to fill the layout
By default, the size of the trajectory used by a Trajectory Layout node determines the amount of space that the trajectory occupies in the layout. For example, in a Circle Trajectory, the Radius property determines the size of the trajectory.
To stretch the trajectory to fill the layout:
Select a Trajectory Layout node.
In the Properties, add and enable the Trajectory Layout > Stretch property.
Adjusting the distance between items in a Trajectory Layout node
A Trajectory Layout node automatically calculates the distance between its child nodes.
To adjust the distance between the child nodes in a Trajectory Layout node:
Select a Trajectory Layout node.
In the Properties, add and set the Trajectory Layout > Override Distance property.
Adjusting the position of items in a Trajectory Layout node
By default, a Trajectory Layout node arranges its child nodes from the start of the trajectory spline.
To adjust the starting position of the Trajectory Layout node child nodes on the trajectory:
Select a Trajectory Layout node.
In the Properties, add and set the Trajectory Layout > Start Offset property.
Setting the appearance of a Trajectory Layout 2D node
To set the appearance of 2D nodes:
You can fill 2D nodes with a solid color, a texture, or a material. See Adjusting the appearance of 2D nodes.


You can apply a post-processing effect to a 2D node. See Effects for 2D nodes.


You can rotate a 2D node around all three axes to create a 3D perspective effect. See Creating a 3D perspective effect for 2D nodes.

You can apply custom rendering to 2D nodes to create post-processing effects. See Applying custom rendering to 2D nodes.
You can render a 2D node as pixel-perfect. See Rendering pixel-perfect 2D nodes.

Using the Trajectory Layout node in the API
To create a Trajectory Layout 3D node:
// Create a Trajectory Layout 3D named Trajectory.
TrajectoryLayout3DSharedPtr trajectoryLayout = TrajectoryLayout3D::create(domain, "Trajectory");
To create a trajectory and use it in the Trajectory Layout 3D node:
// Create a circle trajectory named Circle with radius of 4 device independent units.
// Set the trajectory layout to use it.
TrajectorySharedPtr trajectory = Trajectory::createCircle(Vector3(), Vector3::positiveY(), 0.0f, 4.0f, domain, "Circle");
trajectoryLayout->setTrajectory(trajectory);
To add items to the Trajectory Layout 3D node:
// Create cube meshes and add them as items of the trajectory layout.
// Items on the trajectory appear in the order you add them to the trajectory layout.
Model3DSharedPtr item1 = Model3D::createCube(domain, "item1", 1.0f, ThemeRed);
trajectoryLayout->addChild(item1);
Model3DSharedPtr item2 = Model3D::createCube(domain, "item2", 1.0f, ThemeGreen);
trajectoryLayout->addChild(item2);
Model3DSharedPtr item3 = Model3D::createCube(domain, "item3", 1.0f, ThemeBlue);
trajectoryLayout->addChild(item3);
Model3DSharedPtr item4 = Model3D::createCube(domain, "item4", 1.0f, ThemeOrange);
trajectoryLayout->addChild(item4);
Model3DSharedPtr item5 = Model3D::createCube(domain, "item5", 1.0f, ThemeGray);
trajectoryLayout->addChild(item5);
To manually position items in the Trajectory Layout 3D node:
// Position an item in the middle of the trajectory.
TrajectoryLayout3D::setOverrideOffset(*item2, 0.5f);

// Set the distance between the items to one third of the length of the trajectory.
trajectoryLayout->setOverrideDistance(0.3f);
For details, see the TrajectoryLayout3D and TrajectoryLayout2D classes.
Trajectory Layout property types and messages
For lists of the available property types and messages for the Trajectory Layout nodes, see Trajectory Layout 2D and Trajectory Layout 3D.