Using the light nodes
Use the light nodes to create sources of light for a Scene in your Kanzi application.
Kanzi has these light node types:
Directional Light emits light only in one direction and is suitable for modeling the sunlight. |
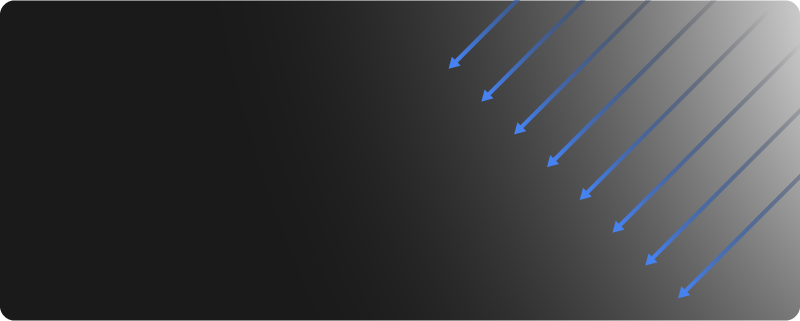
|
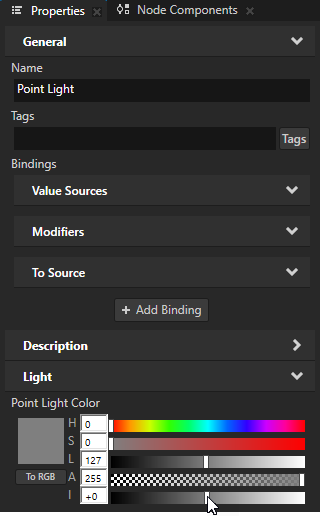
Point Light emits light from a specific location uniformly to all directions (360 degrees). |
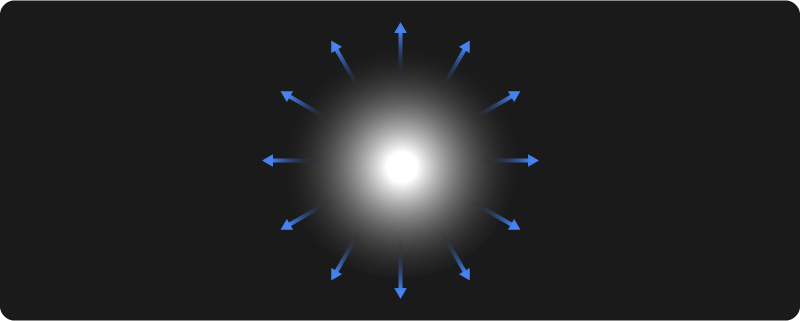
|
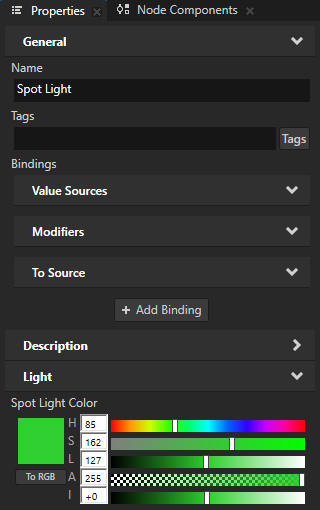
Spot Light emits light from a specific location towards a specified direction in the shape of a cone. |
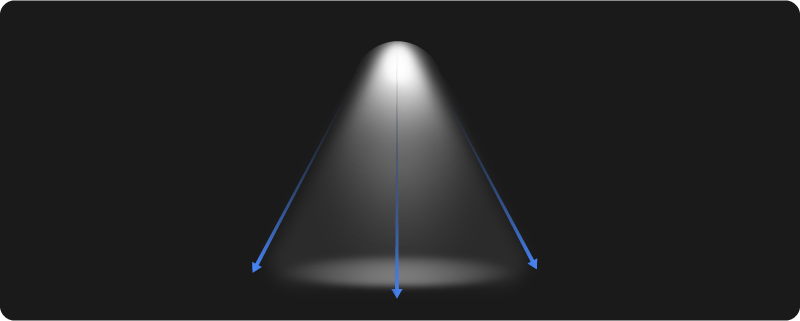
|
Lights contain properties that are passed as uniforms to shaders when Kanzi renders 3D nodes. Lights affect only the rendering of nodes which use materials with shaders that use those lights. In Kanzi the Phong material types by default support one directional light, two point lights, and one spot light. See Setting the number of lights for a material type.
You can use uniform bindings to control property types of light nodes. See Controlling light uniforms.
Creating a light node
To create a light node:
In the Node Tree, press Alt and right-click the node where you want to create a light node and select Directional Light, Point Light, or Spot Light.
For example, create a Spot Light.
You can create a light node only in a 3D node, such as the Scene node.

In the Preview, use the Node tool
 to position the light node.
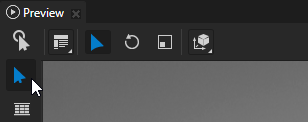
In the Properties, adjust the properties of the light node to create the light suitable for your needs.
For example, to adjust the color of a Spot Light, set the value of the Spot Light Color property.
Adjusting the brightness of a light
To adjust the brightness of a light, set the intensity of the light color.
For example, to set the brightness of a Point Light, set the value of the Point Light Color property Intensity (I) property field.
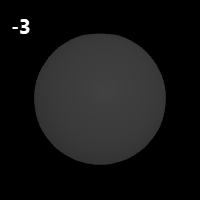
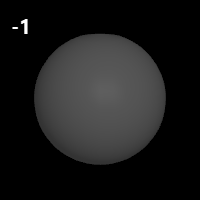
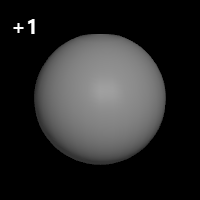
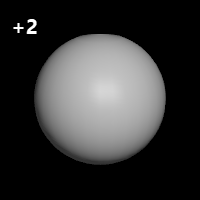
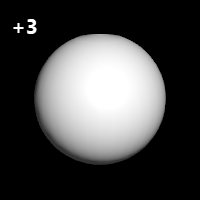
Light intensity in Kanzi works similarly to exposure in photography:
Increase of intensity by one unit doubles the amount of light.
Decrease of intensity by one unit halves the amount of light.
For example, when you change the intensity:
From 0 to +2, you quadruple the brightness.
From 0 to -3, you decrease the brightness to 1/8.


Turning off a light
To turn off a light, select the light node, and in the Properties add and disable the Node > Visible property.
Setting the number of lights for a material type
For each material type you can set the type and number of lights the materials which are based of these material types can use to render nodes.
To set the number of lights for a material type
In the Library > Materials and Textures > Material Types select the material type for which you want to set the lights.
For example, select the VertexPhong material type.
You can use this approach only for the Kanzi default VertexPhong, FragmentPhong, and PhysicallyBased material types. To modify the number of lights for other material types, you must manually edit the material shaders. See Editing shaders.

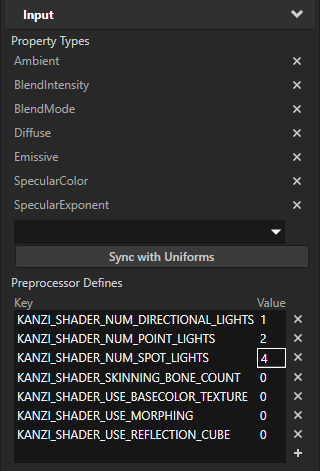
In the Properties in the Preprocessor Defines property for each light type set the Value to the number of lights you want to use:
KANZI_SHADER_NUM_DIRECTIONAL_LIGHTS to set the number of directional lights
KANZI_SHADER_NUM_POINT_LIGHTS to set the number of point lights
KANZI_SHADER_NUM_SPOT_LIGHTS to set the number of spot lights
For example, to set a material to use four spot lights set the KANZI_SHADER_NUM_SPOT_LIGHTS Value to 4 and press the Enter key. Now all the materials that use this material type can render four spot lights. If a scene contains more than four spot lights, only the first four lights in that scene affect the rendering of the nodes which use the material with that material type.
When you press the Enter key Kanzi Studio updates in the Uniforms the uniform arrays for the properties of the light types you changed.
Controlling light uniforms
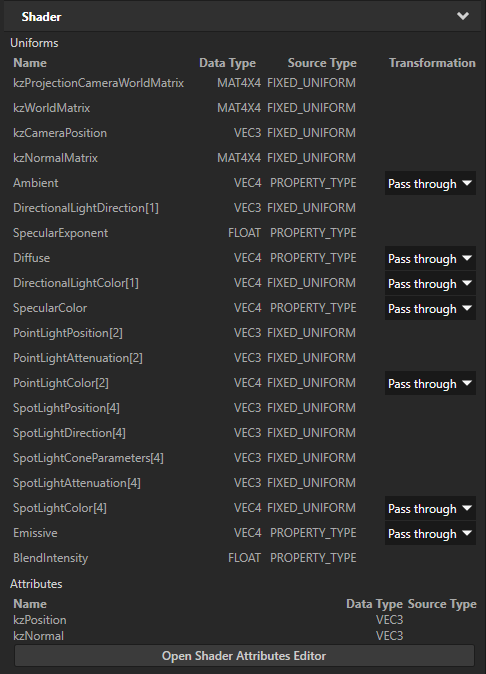
In a material type vertex and fragment shaders define the uniforms and property types that you can use in that material. When rendering 3D nodes with a specific material type, uniform bindings allow Kanzi to write values to the render state and use those values for uniforms and property types.
See Uniform bindings, Using material types, and Rendering.
Light property types support uniform arrays, which enables you to use multiple lights of the same type. See Uniform arrays for light property types.
A uniform binding for a light property type sets the uniform values in a render state based on the values extracted from lights that use that property type. For example, a uniform binding for the PointLightColor property type sets the render value based on the individual values of the Point Light Color property in all Point Light nodes in the scene that light those 3D nodes that use the material type which has the binding.
To use bindings to control light uniforms:
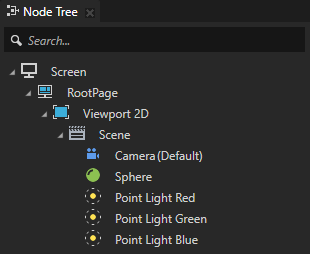
In the Node Tree create 3D content and the Light nodes that you use to light that content.
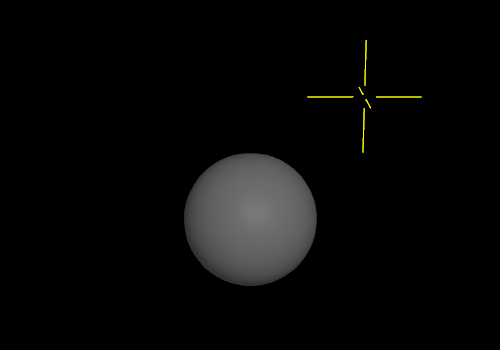
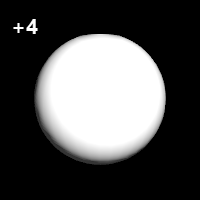
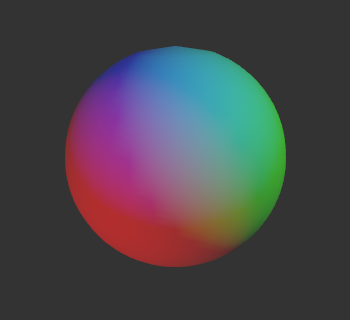
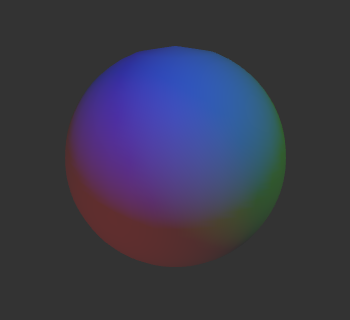
For example, here three Point Light nodes of different color light a gray Sphere node. Make sure that the material type, which your 3D content uses, supports the number of lights that you want to use. See Setting the number of lights for a material type.
In the Library > Materials and Textures > Material Types select the material type that your 3D content uses.
For example, select the
VertexPhongmaterial type.
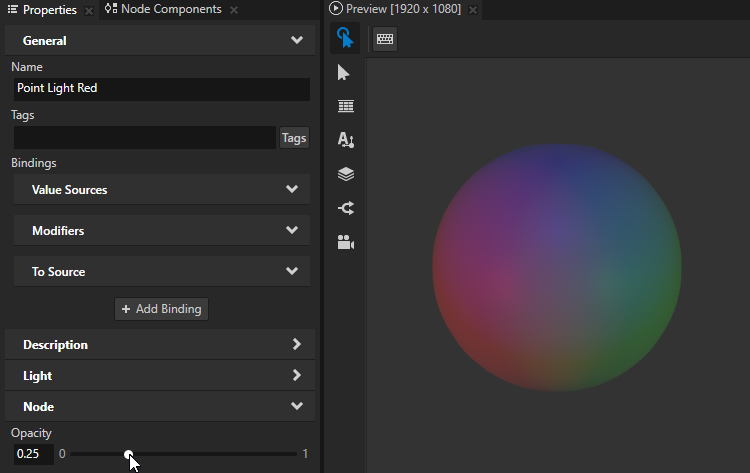
In the Properties in the Bindings > Uniforms click the binding that sets the render value of the uniform that you want to modify.
For example, click the binding that sets the value of the
PointLightColoruniform. This binding sets the render value of the uniform based on the individual values of the Point Light Color property in all Point Light nodes in a scene that light those 3D nodes that use the VertexPhong material type.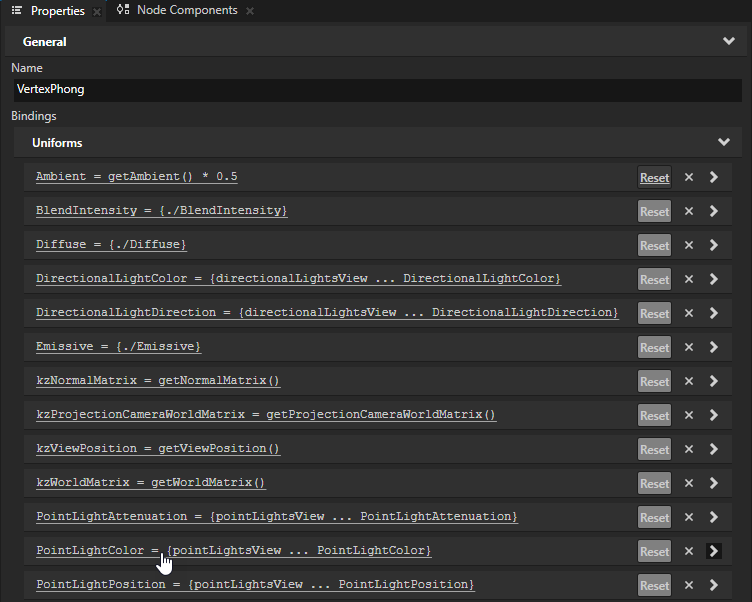
In the Binding Editor enter the binding expression that you want to use and click Save.
A uniform binding for a light property type sets the uniform values in a render state based on the values extracted from lights that use that property type. For example, a uniform binding for the
PointLightColorproperty type sets the render value based on the individual values of the Point Light Color property in all Point Light nodes in the scene that light those 3D nodes that use the material type which has the binding.You can use this syntax in the binding expression:
To get the range that contains each light node of a specific type used by a Draw Objects Render Pass or Draw Objects With Material Render Pass to draw the 3D nodes in a scene use
{##RenderPass/DrawObjectsRenderPass.[lightType]}.Kanzi has these light types:
DirectionalLights,PointLights, andSpotLights.To get the range that contains the value of a property in each light node of a specific type, in the binding expression enter in curly braces
##RenderPass/DrawObjectsRenderPass.[lightType], followed by ellipsis and the name of the property in the light nodes.To create a view over a range of lights use the createView function.
To perform accumulation operations on a range of lights use the
...operator followed by an arithmetic operator.To refer to the result of a temporary variable binding in the same material type, use the
{##Self/[temporaryVariableProperty]}syntax, wheretemporaryVariablePropertyis the target property of the temporary variable binding. See Temporary variable bindings.
For example:
To halve the value of the red and green color channels in the Point Light Color property of each Point Light node, multiply the result of the default binding by
Color4(0.5, 0.5, 1, 1):pointLightsView = createView<OutputSize>({##RenderPass/DrawObjectsRenderPass.PointLights}) {pointLightsView ... PointLightColor} * Color4(0.5, 0.5, 1, 1)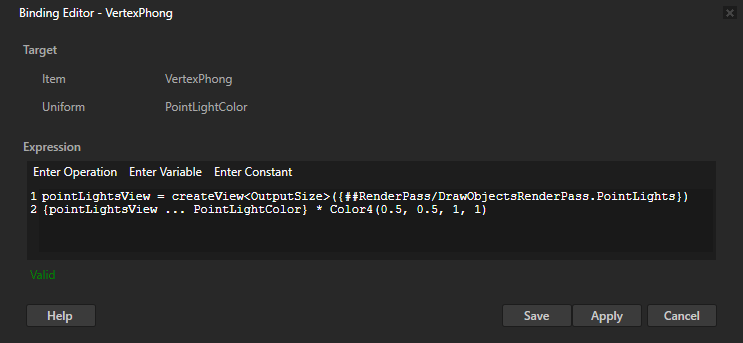
To dim all Point Light nodes based on the value of the Opacity property in any of those Point Light nodes:
# Get the range that contains the value of the Point Light Color property in each
# Point Light node.
rangeA = {##RenderPass/DrawObjectsRenderPass.PointLights ... PointLightColor}
# Get the range that contains the value of the Opacity property in each
# Point Light node.
rangeB = {##RenderPass/DrawObjectsRenderPass.PointLights ... Node.Opacity}
# Multiply the value of the Opacity property in each Point Light node.
totalOpacity = ...* rangeB
# For each Point Light node multiply the value of the Point Light Color property
# by the multiplied opacity.
rangeA * totalOpacity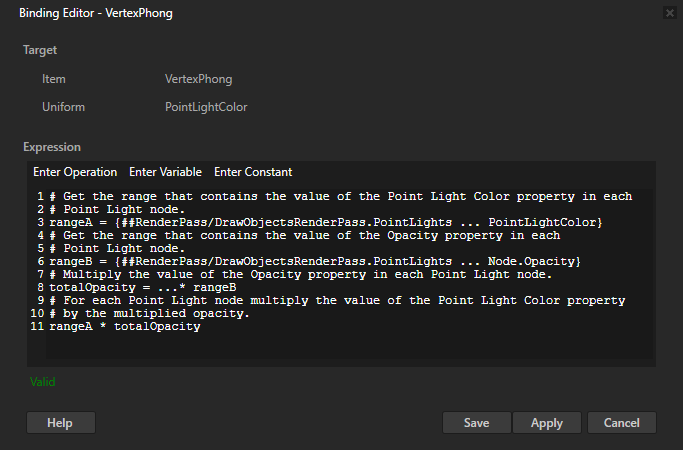
Using the light nodes in the API
To create and set a Directional Light:
// Create a directional light named Directional light.
LightSharedPtr directionalLight = Light::createDirectional(domain, "Directional light");
// Rotate the directional light node by -45 degrees around the x axis.
SRTValue3D layoutTransformation = directionalLight->getLayoutTransformation();
layoutTransformation.setRotation(Vector3(degreesToRadians(-45.0f), 0.0f, 0.0f));
directionalLight->setLayoutTransformation(layoutTransformation);
// Set the color of the directional light to red.
directionalLight->setDirectionalLightColor(ThemeRed);
To create and set a Point Light:
// Create a spot light named Spot light.
LightSharedPtr spotLight = Light::createSpot(domain, "Spot light");
// Move the spot light on x axis by 4 units and rotate it around the y axis by 90 degrees.
SRTValue3D layoutTransformation = spotLight->getLayoutTransformation();
layoutTransformation.setTranslation(Vector3(4.0f, 0.0f, 0.0f));
layoutTransformation.setRotation(Vector3(0.0f, degreesToRadians(90.0f), 0.0f));
spotLight->setLayoutTransformation(layoutTransformation);
// Set the color of the spot light to blue.
spotLight->setSpotLightColor(ThemeBlue);
// Set the angle of the spot light cone to 45 degrees.
spotLight->setSpotLightCutoffAngle(45.0f);
// Set how concentrated the spot light is.
spotLight->setSpotLightExponent(30.0f);
// Set the constant attenuation for the spot light to 1.3, and linear and quadratic attenuation to 0.
spotLight->setSpotLightAttenuation(Vector3(1.3f, 0.0f, 0.0f));
To create and set a Spot Light:
// Create a point light named Point light.
LightSharedPtr pointLight = Light::createPoint(domain, "Point light");
// Move the point light on y axis by 4 units.
SRTValue3D layoutTransformation = pointLight->getLayoutTransformation();
layoutTransformation.setTranslation(Vector3(0.0f, 4.0f, 0.0f));
pointLight->setLayoutTransformation(layoutTransformation);
// Set the color of the point light to green.
pointLight->setPointLightColor(ThemeGreen);
// Set the constant attenuation for the point light to 0.8, and linear and quadratic attenuation to 0.
pointLight->setPointLightAttenuation(Vector3(0.8f, 0.0f, 0.0f));
For details, see the Light class.
Light node property types
For lists of the available property types for the light nodes, see: