Editing your application in the Preview
Create and position 2D nodes, create and edit Text Block nodes, add triggers, create and position Camera nodes, and zoom and pan around the Preview.
To edit your application in the Preview use the Preview tools.
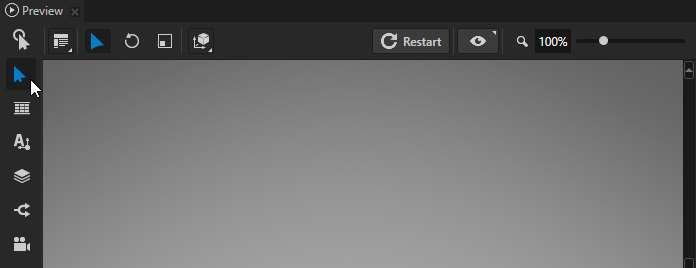
The Preview tools
You can use these tools to edit the content in your project:
Tool |
Control |
Description |
Shortcut key |
|---|---|---|---|

|
Use the Node tool to select any node. |
||

|
Move the selected node. |
1 |
|

|
Rotate the selected node. |
2 |
|

|
Scale the selected node. |
3 |
|

|
Click the square to align the selected 2D node to that side. For example, the setting in this image sets the Vertical Alignment property to Top and Horizontal Alignment property to Left. |
||

|
Stretch the selected 2D node horizontally. Sets the Horizontal Alignment property to Stretch. |
||

|
Stretch the selected 2D node vertically. Sets the Vertical Alignment property to Stretch. |
||
|
Stretch the selected 2D node horizontally and vertically. Sets the Horizontal Alignment and Vertical Alignment properties to Stretch. |
||
|
Use the Layout Transformation property fields to place the selected node. For 2D nodes enter the values for the X and Y property fields. See Optimizing the rendering of layouts. |
||
|
Use the Render Transformation property fields to place the selected node. For 2D nodes enter the values for the X and Y property fields. See Optimizing the rendering of layouts. |
||
|
Use the Layout Height and Layout Width properties to set the size of the selected 2D node. |
||
|
Snap the size or position of the selected 2D node to the nearest coordinates of a surrounding node. |
||
|
Use the Scale of the Layout Transformation or Render Transformation properties to set the size of the selected node. |
||
|
Use the world coordinates to position the selected 3D node. |
||
|
Use the local coordinates to position the selected 3D node. |
||
|
Grid Layout 2D tool. Click and drag in the Preview to create a Grid Layout 2D. The size of the area you create defines the size of the layout (Layout Width and Layout Height). See Using the Grid Layout nodes. |
||
|
Text Block 2D tool. Click and drag in the Preview to create a Text Block 2D. The size of the area you create defines the size of the layout (Layout Width and Layout Height). See Using the Text Block nodes. |
||
|
Enter the text that a Text Block 2D shows. |
||
|
Click the square to align the text to that side. For example, the setting in this image sets the Text Vertical Alignment property to Top and Text Horizontal Alignment property to Left. |
||
|
Select the font size in device independent pixels you want to use for the Text Block 2D node. |
||
|
Select the font you want to use for the Text Block 2D node. Note that the dropdown menu lists only the fonts in your current project. See Importing fonts. |
||
|
Stack Layout 2D tool. Click and drag in the Preview to create a Stack Layout 2D. The size of the area you create defines the size of the layout (Layout Width and Layout Height). To set the Stack Layout 2D to arrange its items along either x or y axis, create an area that is longer on the axis along which you want the Stack Layout 2D to arrange its items. See Using the Stack Layout nodes. |
||
|
Flow Layout 2D tool. Click and drag in the Preview to create a Flow Layout 2D. The size of the area you create defines the size of the layout (Layout Width and Layout Height). See Using the Flow Layout nodes. |
||
|
Use the Camera tool to move around the scene using the preview camera and to create and position cameras in your project. See Using the Camera node. |
||
|
Store the current position of the camera to the preview Camera node. |
||
|
Reset the camera to the current position of the preview Camera node. |
||
|
Create a new Camera node from the current position of the camera. |
J |
|
|
Orbit camera allows you to move around the nodes selected in the Node Tree or the node set in the Look At property of the camera. |
||
|
Free camera allows you to move around without attachment to any point. |
||
|
Bring the camera to the 3D object selected in the Node Tree or the Preview. |
||
|
Select the Camera node through which you want to view the current scene. |
||
|
Set the field of view for the camera in degrees when working with 3D nodes. |


Panning and zooming in the Preview
To pan and zoom in the Preview:
Action |
Shortcut |
|---|---|
Pan |
Click and drag the middle mouse button. |
Zoom |
|

Resetting the view in the Preview
When you want to return the Preview zoom level to 100% and position your application screen in the center of the Preview, click  or press Ctrl 1 to reset the view in the Preview.
Setting anti-aliasing in the Preview
By default, the Kanzi Studio Preview and the Kanzi Application Player on Windows apply anti-aliasing using 4 samples. For both, you can configure the amount of anti-aliasing that you want to use.
If you have a Kanzi application with a C++ application, to see your content in the Kanzi Studio Preview and Kanzi Application Player the same way as when running your Kanzi application on a target device, you can set anti-aliasing in an application.cfg file. See Applying anti-aliasing to an entire application.
To set anti-aliasing in the Kanzi Studio Preview for a Kanzi application without a C++ application:
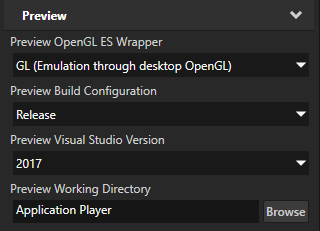
In the Kanzi Studio main menu, select Project > Properties. In the Properties in the Preview section, set the value of the Preview Working Directory property to the directory where you want to store the
application.cfgto configure the Preview.For example, set the Preview Working Directory property to
Application Player. This way, you can apply the same anti-aliasing setting to the Preview and the Kanzi Application Player on Windows. If the<ProjectName>/Application Playerdirectory does not yet exist, select File > Export > Export as KZB Player for Windows. See Building and deploying Kanzi applications to Windows from Kanzi Studio.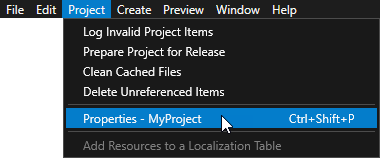
In the directory that you set in the previous step, create or open the
application.cfgfile. Add and set theSurfaceSamplesAntialiasingparameter to the number of anti-aliasing samples that you want the Preview to use.For example, to disable anti-aliasing in the Preview, in the
application.cfg, add:SurfaceSamplesAntialiasing = 0
In Kanzi Studio, restart the Preview.
