Step 2 - Create the application structure
In this step, you create the application structure in the Activity Browser window using Activity nodes. You also learn how to use the Activity Browser to transition between Activities.
Create Activity nodes
In this section, you use the Activity Browser window to create Activity nodes, each representing a different screen of your application user interface.
Use the Activity nodes to create the structure of the user interface in your application, and the Activity Host nodes to navigate between Activity nodes.
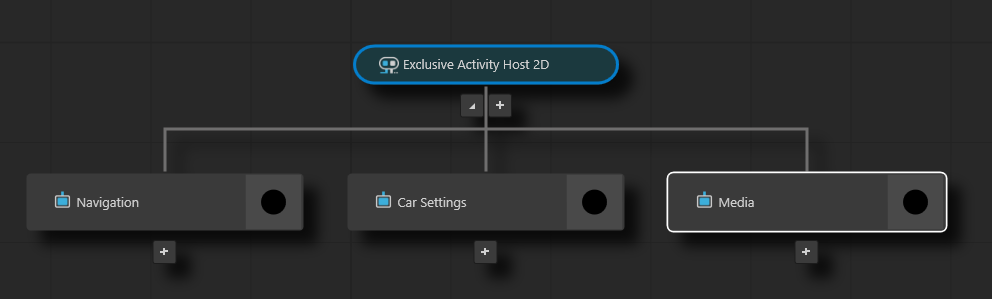
For example, in this way you can create a user interface where Activity nodes hold the content for Navigation, and Car Settings, and Media application screens. Each screen can have its own content and hierarchy of additional Activity and Activity Host nodes.
To create Activity nodes:
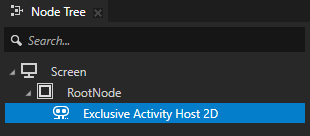
In the Node Tree, delete the Viewport 2D node. Then press Alt and right-click the RootNode node, and select Exclusive Activity Host 2D.
You use this Activity Host node as the root node that controls which Activity nodes are visible. The Exclusive Activity Host 2D ensures that only one Activity is active at a time.
When you create a Kanzi Studio project, it has a default Texture Brush called DefaultBackground and it paints the background of the RootNode node.
Use brushes to set the background of 2D nodes. In Kanzi, all 2D nodes by default have transparent background.
Create the Activity nodes, each representing an application screen:
In the Activity Browser window, next to the Assets and Asset Packages windows, below the Exclusive Activity Host 2D node, click
 , select Create Activity, and name it Navigation.
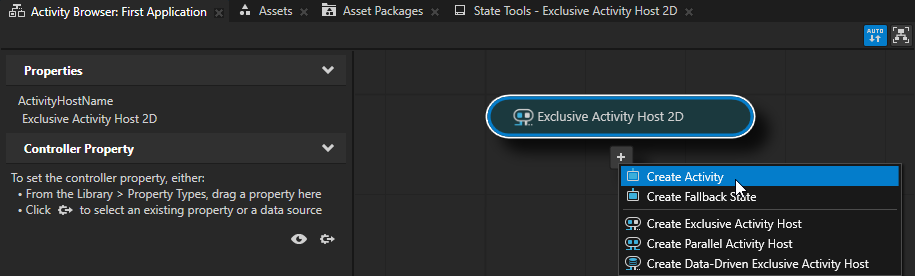

In the Activity Browser, create two more Activity nodes and name them Car Settings and Media.
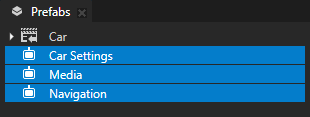
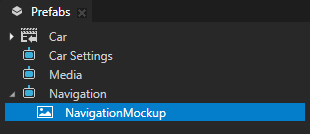
In the Prefabs window, you can see the prefabs of the Activities that you create in the Activity Browser.
In the Activity Browser, select the Navigation Activity. In the side panel, set the InitiallyActive property to enabled.
This way you set an Activity to be active when its Activity Host is active. To indicate this, the Activity Browser shows the
 icon for all such Activities.
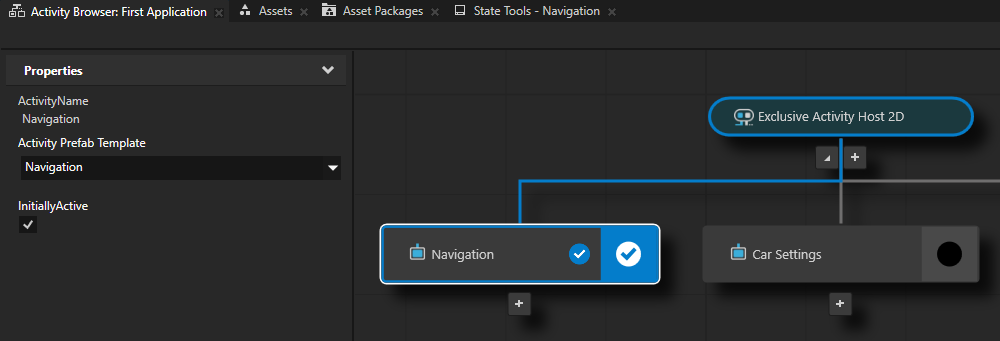
Add content Activities
In this section, you add content to the Navigation and Car Settings Activities.
To add content to Activities:
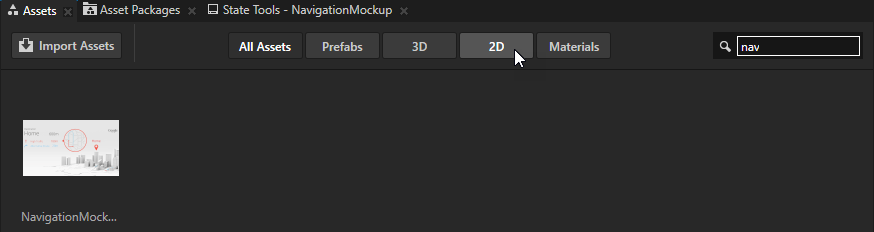
From the Assets window drag the NavigationMockup.png image to the Prefabs window, and drop it on the Navigation Activity node.
Kanzi Studio automatically creates an Image node that uses the image you dragged from the Assets and adds the Image node to the Activity node where you dropped the image.

Tip
In the Assets window you can search and browse the content in your project:
In the search box enter the word contained in the name of the item you are looking for.
Click the buttons to show only the content of a certain type.
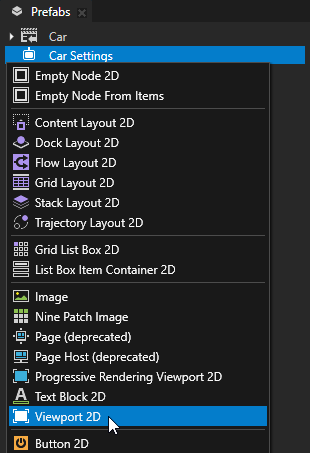
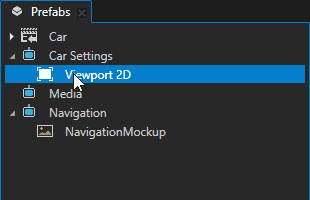
In the Prefabs window, press Alt and right-click the Car Settings node and select Viewport 2D.
Viewport 2D node can render both a Scene, which is a 3D node, and 2D nodes, such as Image or Button 2D.
When you create a Kanzi Studio project, that project contains a Viewport 2D node with a Scene that contains a Camera and a Directional Light. For Kanzi Engine, the Scene node is always the first child of a Viewport 2D node.
Tip
When you press Alt and right-click a node in the Node Tree window or a resource in the Library window, you get a direct access to the node and resource creation menu. If you only right-click a node or a resource, in the context menu select Create to access the creation menu.
In the Prefabs window, drag the Car prefab and drop it on the Viewport 2D node that you created in the Activity node Car Settings.
When you drag a prefab from the Prefabs window, Kanzi Studio creates an instance of that prefab in the node tree in the node where you drop the prefab.
Transitioning between Activities
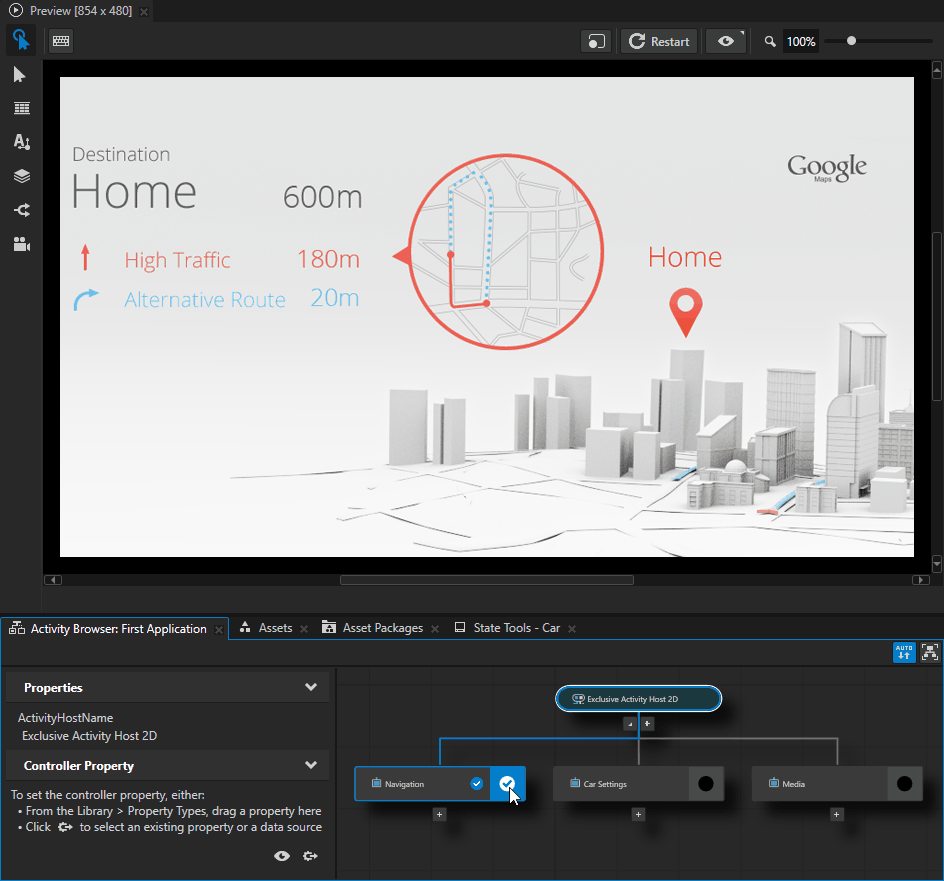
The Activity Browser simulates the activation of Activities in your application. To see the content of an Activity in the Preview, you can activate an Activity in the Activity Browser. In the Activity that you want to activate, click  .
.
In the Activity Browser, active Activities are marked with  and their border is blue.
By default, Kanzi uses instant transition between Activity nodes. However, you can add and define your own transitions.
In the next step, you create the buttons that use the Activate Activity action to move between the Activity nodes.
See also
To find out more about using Activity nodes, see Activities.
To find out about creating transitions between Activity nodes, see Creating transitions between Activities.
To find out more about using Brushes, see Using brushes.