Using Morphs
Note
Kanzi Graphics does no longer support separate Morph resources. See Introduction of Kanzi Graphics.
Morphing transforms a shape into another in a seamless transition. Use the Mesh resource containing morph data to morph between shapes.
Kanzi uses shaders to enable morphing. See Shaders.
Before you can morph between meshes in Kanzi, you need to create the 3D models in a third-party tool and import them to Kanzi Studio.
When you create in your third-party tool meshes between which you want to morph, first create the base mesh. From the base mesh, shape the meshes to which you want to morph. When creating the meshes, keep in mind:
All meshes must have the same amount of vertices and clusters.
Do not change the topology of meshes.
Adding a morph
Before you can add a morph to a Kanzi Studio project, in a third-party tool create a 3D model with the morph and export it to gltf, glb, fbx, or dae format.
To add a morph to your Kanzi Studio project:
In the Assets, click Import Assets and import the 3D model that uses a morph mesh with morph targets between which you want to morph.
Each morph target is a deformed version of the morph base shape.

If the model contains meshes that do not have normals, Kanzi Studio offers to generate the normals. Kanzi uses the normals in lighting calculations. When you do not let Kanzi Studio generate the normals, the meshes use the normals of the morph base mesh. See Using morph target normals.
When Kanzi Studio imports a morph, it creates:
In the Library > Meshes, the mesh containing its base vertex data and the differential morph data.
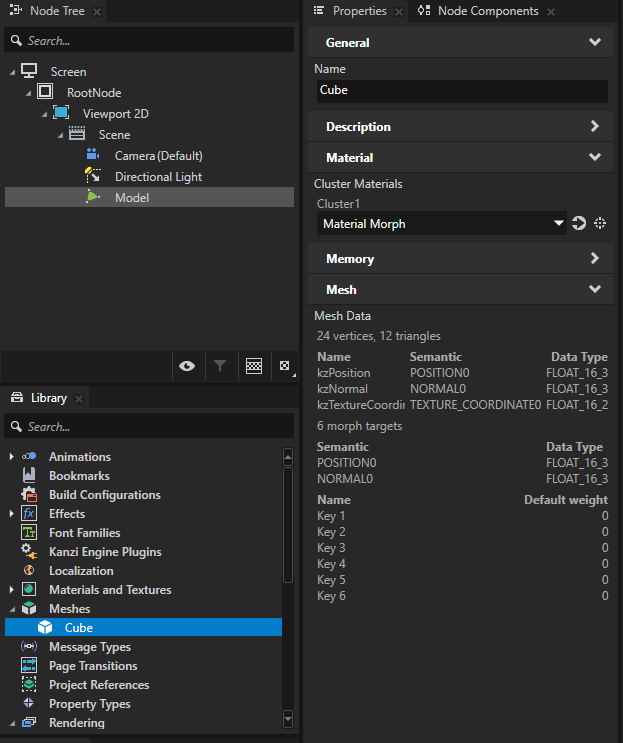
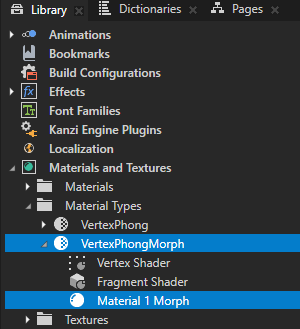
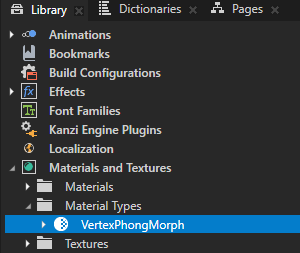
In the Library > Materials and Textures, a material type that supports morphing, if your project does not already contain such material type.
Kanzi Studio creates materials that use this material type, and sets the base mesh of your morph to use these materials.
In the material type, Kanzi Studio sets the maximum number of simultaneously active morph targets to match the number of meshes in the imported morph. To optimize performance, you can limit the number of simultaneously active morph targets. See Limiting the number of simultaneously active morph targets.
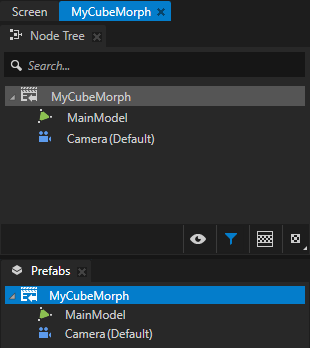
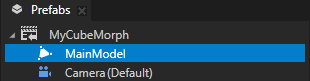
In the Prefabs, a Scene prefab that contains the Model nodes that use the Morph and Mesh resources.
To show the content of the Scene prefab in the Preview, in the Prefabs, double-click that prefab.
Kanzi Studio opens the prefab in a new Preview tab and shows the content of that prefab in the Preview.
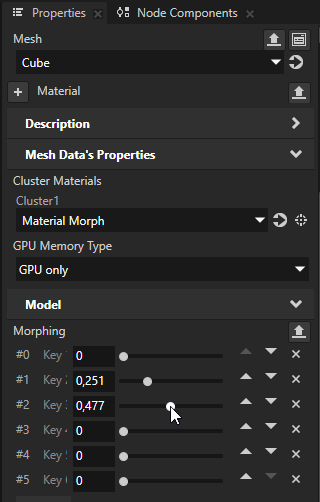
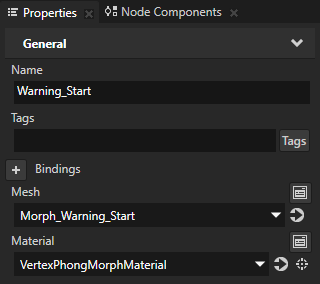
In the Prefabs, select a Model node that shows the Mesh resource containing the morph data. In the Properties in the Morphing property, you can adjust the weight of each mesh in the Morph resource.
This way, you control the shape of the Morph.
The higher the value, the closer the Mesh is to the given shape. The Kanzi morph shader uses the base channel data of the mesh, and adds all the shapes cumulatively to the base shape. Since the morph shapes are expressed as differences from the base shape, using weights in excess of 1, or giving multiple shapes in Morphing property high weights, may cause visual errors.
For example, to change the shape of a morph, use a keyframe animation. See Creating a morph weight animation.
Adding targets to a Morph
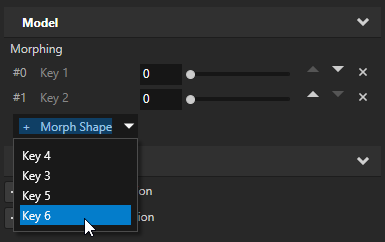
To add shapes between which you want to morph, add shapes to a morph using the dropdown in Morphing property in a Model node. You can only add morph targets from the selection of shapes that are associated with the Mesh assigned to the Model.
To add targets to a Morph:
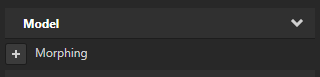
Click the + Morph shape button in the Morphing property of the Model node that you want to morph, and select the shape that you want to add to the morph.
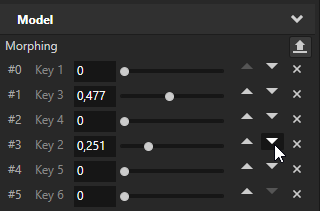
To rearrange the morph listing, use the up and down arrows associated with the shape in the Morphing property.
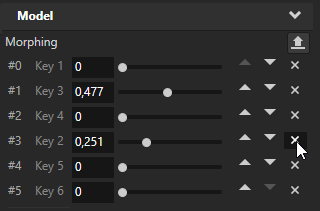
To remove a shape, use the cross button associated with the shape in the Morphing property.
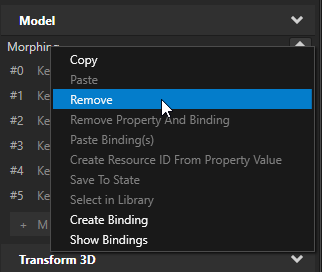
To start over from the beginning and add all shapes using their default weights, remove the Morphing property and add it again using the + button.
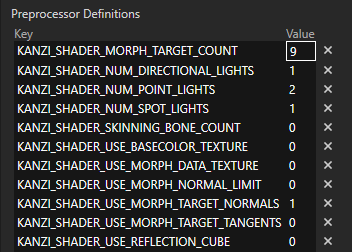
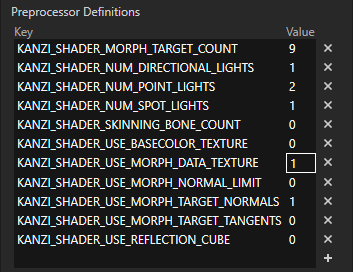
(Optional) In the Library > Materials and Textures > Material Types, select each material type that the base mesh of your morph uses. In the Properties in the Preprocessor Definitions, set the KANZI_SHADER_MORPH_TARGET_COUNT to the number of morph targets that you want to let Kanzi activate at once.
If you use the smart materials, Kanzi automatically sets the Preprocessor Definitions based on the properties that are set for the material.
When you import a Mesh with morphs, Kanzi automatically creates a suitable material for you and assigns it to the Mesh.
If the number of morph shapes in the morph data can fit within the GPU attribute channels without the use of Morph Data Texture, you should use the exact number of morph targets in the Mesh morph data, and should not need to change the KANZI_SHADER_MORPH_TARGET_COUNT. See Limiting the number of simultaneously active morph targets.
(Optional) If your graphics driver does not support the number of morph targets in the Mesh, in the Properties in the Preprocessor Definitions, set the KANZI_SHADER_USE_MORPH_DATA_TEXTURE to 1.
This way, you enable the material type to use a morph data texture. The data texture enables having an arbitrary number of active morph targets at once, but comes with a performance cost.
Kanzi will automatically detect if the Morph Data Texture is necessary, create the texture, and assign it to the Model. In this case, changing the order and number of morph targets assigned will modify the texture in place. You can reduce the performance cost by removing unnecessary morph shapes. See Limiting the number of simultaneously active morph targets.
Using morph target normals
When you import to Kanzi Studio a 3D model that uses a morph mesh and some of the meshes in that model do not have normals, Kanzi Studio automatically generates the normals for the morph targets. Kanzi uses the normals in lighting calculation.
Because the normals that Kanzi Studio generates for morph targets are likely to differ from those of the morph base shape, the difference accumulates errors as you activate more morph targets. This can cause incremental visual degradation. To avoid this, Kanzi Studio also regenerates the normals for the base mesh when generating them for the morph targets.
To avoid having Kanzi Studio generate or alter the normals, export the normals for all morph shapes from the 3D editing software.
Tip
To generate normals for a mesh manually, in the Library > Meshes right-click that mesh and select Generate Normals.

Controlling the use of morph target normals
To control the use of morph target normals:
In the Library > Materials and Textures > Materials Types, select the material type that the base mesh of your morph uses.
In the Properties in the Preprocessor Definitions, set the value of the KANZI_SHADER_USE_MORPH_TARGET_NORMALS to:
0 to set the morph targets to use the normals of the morph base mesh.
1 to set each morph target to use its own normals.

Limiting the number of simultaneously active morph targets
When you import to Kanzi Studio a 3D model that contains a morph, Kanzi Studio sets that morph to use a material type that supports activating all morph targets at once. If your morph contains a large number of targets, Kanzi sets the morph to store the vertex attributes of its morph targets in a data texture. The data texture enables having an arbitrary number of active morph targets at once, but comes with a performance cost. The more morph targets are active at once, the more time it takes to process the vertex shader. To optimize performance, you can:
Limit the number of morph targets that can be active at once.
Disable the use of the data texture.
Without a data texture, the maximum number of simultaneously active morph targets is
where:
\(MaxChannels\) is the maximum number of vertex attribute channels supported by your graphics driver.
For example, 16.
\(ConstantChannels\) is the number of channels that contain the same attribute data for all morph targets.
For example, texture coordinates, bone weights, and bone indices are the same for all morph targets.
\(PerTargetChannels\) is the number of channels that contain target-specific attribute data.
For example, vertex positions, normals, and tangents can be different for each morph target.
Kanzi Studio selects the mode of operation based on the actual mesh data:
If the number of channels is small enough to be used without Morph Data Texture, Kanzi always uses all morph data channels. Removing shapes has no effect on performance - unselected shapes have weight \(0.0\).
In the Library > Materials and Textures > Material Types, select each material type that the base mesh of your morph uses. In the Properties in the Preprocessor Definitions, set the KANZI_SHADER_USE_MORPH_DATA_TEXTURE to 0.
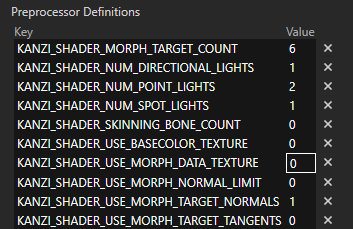
If you do this, make sure that the KANZI_SHADER_MORPH_TARGET_COUNT is set to the exact value of the morph targets in your Mesh. Otherwise, Kanzi Studio renders your model with a red error material and prints a warning in the log.

If the morph data has enough channels to potentially require the use of Morph Data Texture, Kanzi always uses a data texture. Removing shapes increases performance and makes the data texture smaller, decreasing memory requirements.
In the Library > Materials and Textures > Material Types, select each material type that the base mesh of your morph uses. In the Properties in the Preprocessor Definitions, set the KANZI_SHADER_USE_MORPH_DATA_TEXTURE to 1.
To optimize performance, when you do not need some of the morph shapes in your mesh data:
Remove the the shape from the shapes list in the Morphing property.
In Library > Materials and Textures > Material Types, select each material type that the base mesh of your morph uses.
In the Properties in the Preprocessor Definitions, set the KANZI_SHADER_MORPH_TARGET_COUNT to the number of morph targets that you need.
(Optional) If the mesh contains morph targets you will never use in any situation, it’s better to disable the export for those targets in the 3D editing software and simply not export them to begin with. This way those morph targets will never be used by Kanzi no matter what.
Creating a morph weight animation
To change the shape of a morph, use a keyframe animation. You can import the morph weight animation from gltf, glb, fbx, or dae files, or create the animation in Kanzi Studio.
To create a morph weight animation in Kanzi Studio:
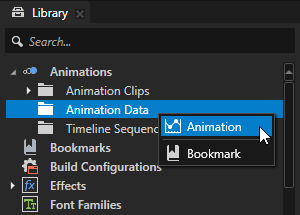
In the Library > Animation Data, press Alt and right-click Animation Data, and select Animation.
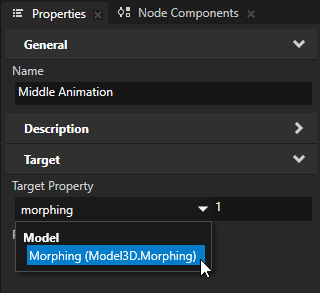
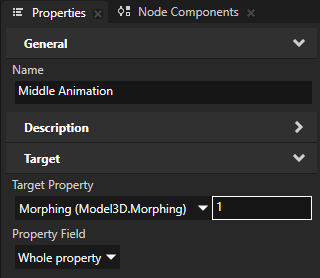
For example, name the animation Middle Animation and in the Properties, set:
Target Property to Model3D.Morphing property, and set the target shape index and set it to 1.
Property Field to Whole property
You use the Animation Clip to hold keyframe animations for the meshes in your morph. Each animation targets a specific morph shape and defines the weight of the mesh at different points in time. Middle Animation is the keyframe animation for the first mesh that you want to morph.
Repeat the previous step as many times as there are target shapes in the Mesh that you want to animate. For each animation in the range index n, set the n to the index of the shape in the Model whose weight you want to change with the animation. Do not add an animation for the base mesh.
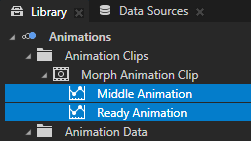
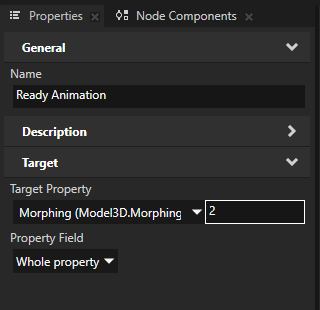
For example, to animate a morph with three meshes, create two animations. Name them Middle Animation and Ready Animation, and set:
Middle Animation Target Property to Model3D.Morphing index 1
Ready Animation Target Property to Model3D.Morphing index 2
You use the Middle Animation to set the weight of the second mesh in your morph. You use the Ready Animation to set the weight of the third mesh in your morph at different points in time. The Kanzi morph shader sets the weight of the first mesh.
Note
The index in the animation data targets the shape index in the Model3D being animated.
If the Mesh has a small enough number of morph targets to not need Morph Data Texture, this will target the exact shape in the morph data. If Morph Data Texture` is being used, this depends on the order and number of shapes selected for the Morphing property.
Create keyframes for the animations that you created in the previous step. See Creating keyframe animations for target property fields.
You use the keyframe values to set the Weight properties of the meshes in the morph at different points in time.
The higher the value, the closer the Mesh is to the given shape. The Kanzi morph shader uses the base channel data of the mesh, and adds all the shapes cumulatively to the base shape. Since the morph shapes are expressed as differences from the base shape, using weights in excess of 1, or giving multiple shapes in Morphing property high weights, may cause visual errors.
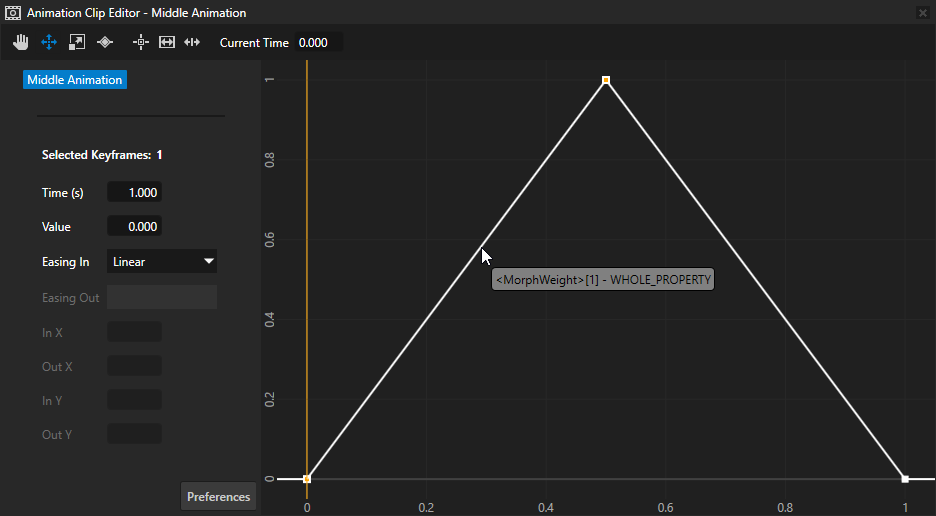
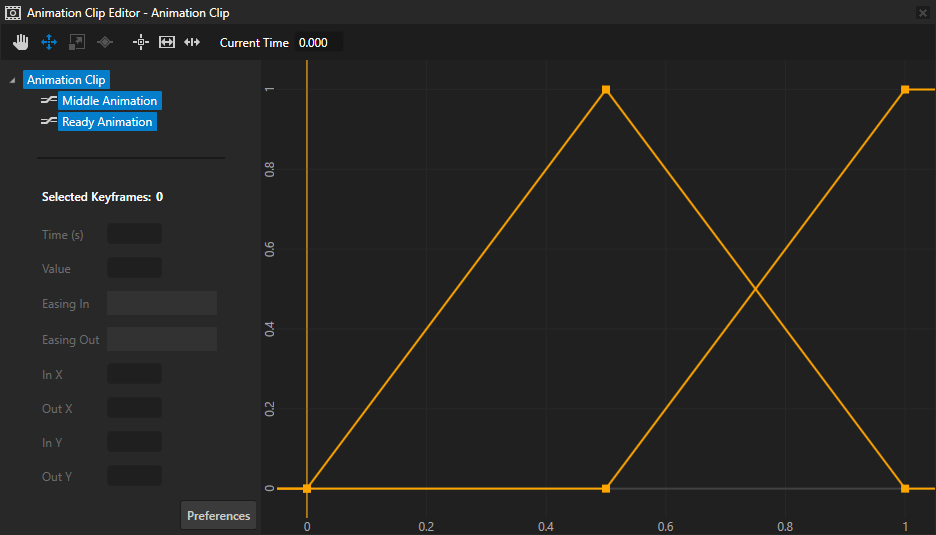
For example, to create a one-second linear animation of a morph with three meshes, in the Library double-click Middle Animation and in the Animation Clip Editor create these keyframes:
Middle Animation:
First keyframe:
Time to 0
Value to 0
Second keyframe:
Time to 0.5
Value to 1
Third keyframe:
Time to 1
Value to 0
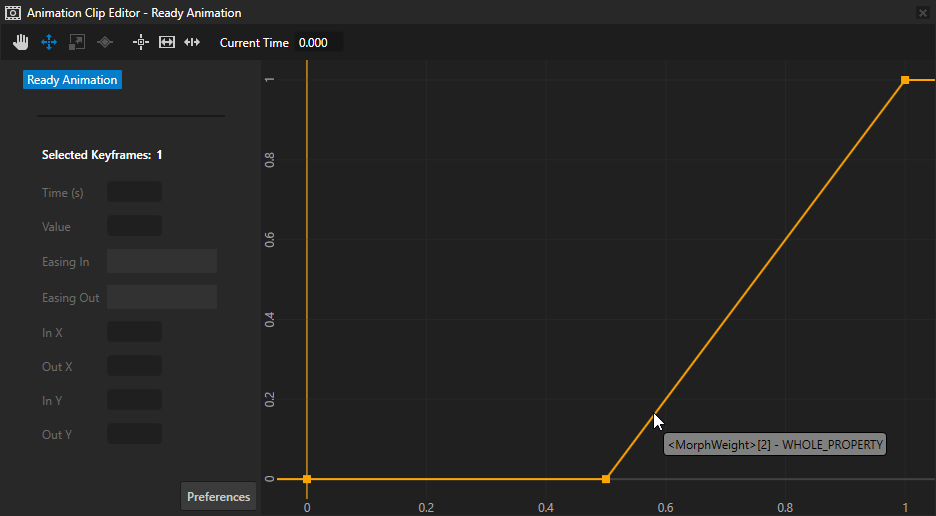
Ready Animation:
First keyframe:
Time to 0
Value to 0
Second keyframe:
Time to 0.5
Value to 0
Third keyframe:
Time to 1
Value to 1
Animate the morph with the keyframe animations that you created:
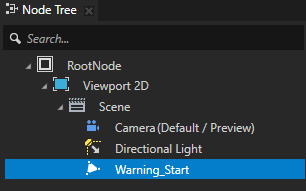
In the Node Tree, select the Model node whose Mesh property is set to the Mesh that you want to animate. See Adding a morph.
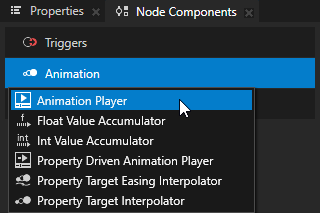
In the Node Components, press Alt and right-click Animation and select Animation Player.
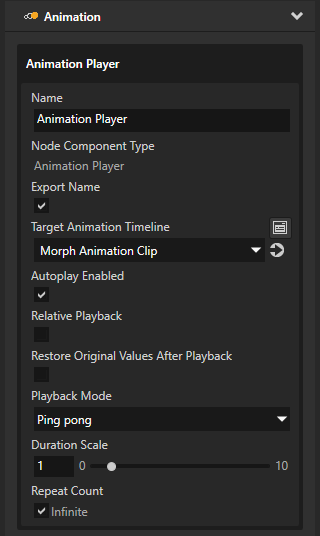
In the Node Components in the Animation Player that you created, set the Target Animation Timeline property to the Animation Clip that you created in the first step, and set the animation playback. See Playing keyframe animations.
For example, set:
Autoplay Enabled to enabled
Playback Mode to Ping pong
Repeat Count Infinite to enabled

Using morphs in the API
To manually create a morph timeline and create a playback for timeline clock:
// Create float animation and add two keyframes.
FloatKeyframeAnimationSharedPtr morphAnimation =
    FloatKeyframeAnimation::create(domain);
morphAnimation->addLinearKeyframe(chrono::milliseconds(0), 0.0f);
morphAnimation->addLinearKeyframe(chrono::milliseconds(100), 1.0f);

// Create a range index animation timeline and apply it to the Morphing property of the current node.
RangeIndexAnimationTimelineSharedPtr rangeIndexTimeline =
    RangeIndexAnimationTimeline::create(domain, ".", Model3D::MorphingProperty);

// Animate the first morph target using the keyframe animation (this animation goes from weight zero to one).
rangeIndexTimeline->addEntry(0, PropertyFieldWhole, morphAnimation);

// Create range index animation timeline playback.
RangeIndexAnimationTimelinePlaybackSharedPtr playback =
    RangeIndexAnimationTimelinePlayback::create(rangeIndexTimeline, context);
See also
Preparing 3D assets in third-party tools