Node3D plugin example
This example shows how to create custom 3D nodes and how to use those nodes in Kanzi Studio.
The example contains:
A Kanzi Engine plugin that defines custom nodes.
A Kanzi Studio project that uses the Kanzi Engine plugin to apply in the Kanzi Studio Preview the behaviors defined in the custom nodes.
You can find the example in the <KanziWorkspace>/Examples/Node3D_plugin directory.
To learn how to create a Kanzi Engine plugin, see Creating Kanzi Engine plugins.
Creating custom nodes
The example has these custom nodes:
Knob reacts to user input by sending messages about the current rotation angle of the knob. The Knob generates its own messages based on the pan gestures detected from user input. The Knob generates these message types intercepted in Kanzi Studio at the Knob:
Rotation of the knob is forwarded to the external visualization of the knob by passing the argument directly to its Z-rotation attribute.
Discrete level updates are treated by generating application events (also messages), which are passed to the Spinner node.
Spinner reacts to messages by updating the Text property of the Text Block node, to show the value from the Knob. The Spinner receives messages from the outside and reacts to those messages based on its own defined behavior.
Kanzi Studio reads from the plugin DLL the information about the messages and property types used by the custom nodes.
Kanzi Engine registers the plugin by calling a function with this signature from the plugin:
extern "C"
{
    __declspec(dllexport) Module* createModule(uint32_t kanziVersionMajor, uint32_t kanziVersionMinor);
}
The Knob and Spinner nodes are registered in the Module::getMetaclassesOverride function which is defined in the module that you create and that the createModule() function returns.
To register the Spinner node, the Spinner must contain a metaclass. By using the metaclass.hpp::KZ_METACLASS_BEGIN, you define a custom node and there you declare:
Base class (
Node3D)Unique ID (
"Spinner")Messages it uses (
SpinnerUpdateLevelMessage)Property types it uses (
TextBlockProperty)
The metadata declaration of the Spinner node in the spinner.hpp file looks like this:
KZ_METACLASS_BEGIN(Spinner, Node3D, "Spinner")
    KZ_METACLASS_MESSAGE_TYPE(SpinnerUpdateLevelMessage)
    KZ_METACLASS_PROPERTY_TYPE(TextBlockProperty)
KZ_METACLASS_END()
In this example, in the spinner.cpp file, the Spinner creates its message type SpinnerUpdateLevelMessage by specifying that it uses SpinnerUpdateLevelMessageArguments:
MessageType<Spinner::SpinnerUpdateLevelMessageArguments> Spinner::SpinnerUpdateLevelMessage(
    kzMakeFixedString("Message.Spinner.UpdateLevel"),
    KZ_DECLARE_EDITOR_METADATA(
        // Set the name of the message the way it is shown in Kanzi Studio.
        metadata.displayName = "Update Level";
        // Set the tooltip for the message.
        metadata.tooltip = "Updates the Spinner level and outputs the level to a text block.";
        // Do not show the message as a trigger.
        // Do this when you want to show a message in Kanzi Studio as an action.
        metadata.listenable = "False";
    ));
To register the message arguments for the SpinnerUpdateLevelMessage, the SpinnerUpdateLevelMessageArguments must contain the metaclass that defines the message arguments. By using the metaclass.hpp::KZ_MESSAGE_ARGUMENTS_METACLASS_BEGIN, you define the argument for the custom message and there you declare:
Base class (
MessageArguments)Unique ID (
"Spinner Update Level Message Arguments")Property type (
SpinnerLevelAlterationProperty)
KZ_MESSAGE_ARGUMENTS_METACLASS_BEGIN(SpinnerUpdateLevelMessageArguments, MessageArguments, "Spinner Update Level Message Arguments")
    KZ_METACLASS_PROPERTY_TYPE(SpinnerLevelAlterationProperty)
KZ_METACLASS_END()
Creating a debug visualization for a custom 3D node
For your custom 3D nodes, you can create debug visualizations that are visible in Kanzi Studio when the Preview is in the Analyze mode. Use these visualizations to render information that is helpful while you develop your plugin.
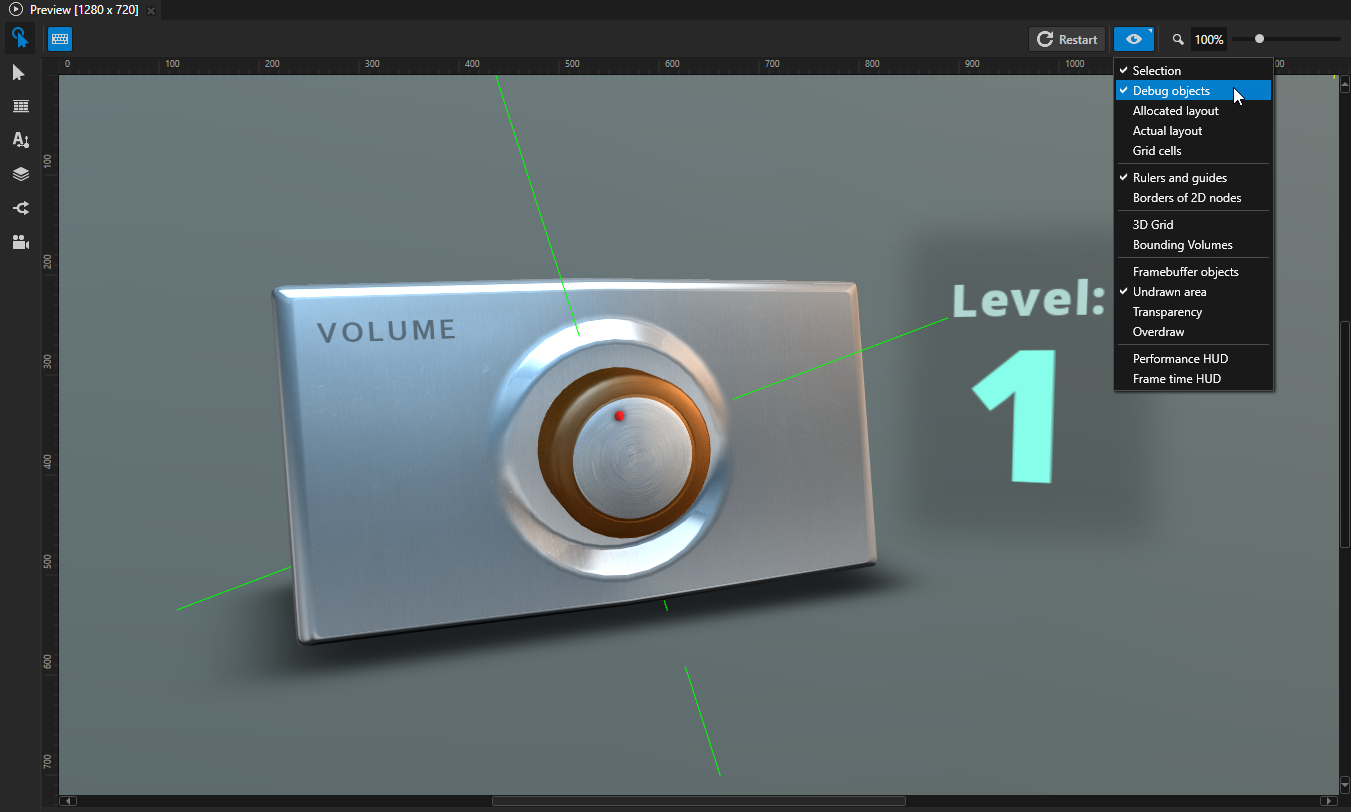
The Node3D plugin example creates a debug visualization for the Knob node:
In the
knob.cppfile, thedrawKnobDebugfunction draws a debug visualization, which consists of four lines that extend from the center of the knob to different directions.// Renders a debug visualization of the Knob. void drawKnobDebug(Renderer3D& renderer, NodeSharedPtr object) { // This example of a debug visualization draws four green lines that extend from the // origin of the Knob node to different directions. When you rotate the Knob, the // visualization rotates. const ColorRGBA color(0.0f, 1.0f, 0.0f); auto knobNode = dynamic_pointer_cast<Knob>(object); if (!knobNode) { return; } MaterialSharedPtr material = Material::acquireDebugMaterialSolid(*renderer.getResourceManager()); if (!renderer.applyColorMaterial(knobNode.get(), *material, color)) { return; } Matrix4x4 worldTransformation = knobNode->getFinalTransformation(); span<float> floatBuffer = renderer.getFloatBuffer(); const float radius = 5.0f; const unsigned int lineCount = 4; kzAssert(!floatBuffer.empty()); float* dataIt = floatBuffer.data(); // Get the rotation angle of the knob. float rotation = knobNode->getRotation(); auto rotationTransform = Matrix4x4::createZRotationInRadians(rotation); // Knob visualization. Renderer3D::addVertexToFloatArray(rotationTransform * Vector3(0.1f, 0.0f, 0.0f), dataIt); Renderer3D::addVertexToFloatArray(rotationTransform * Vector3(radius, 0.0f, 0.0f), dataIt); Renderer3D::addVertexToFloatArray(rotationTransform * Vector3(-0.1f, 0.0f, 0.0f), dataIt); Renderer3D::addVertexToFloatArray(rotationTransform * Vector3(-radius, 0.0f, 0.0f), dataIt); Renderer3D::addVertexToFloatArray(rotationTransform * Vector3(0.0f, 0.1f, 0.0f), dataIt); Renderer3D::addVertexToFloatArray(rotationTransform * Vector3(0.0f, radius, 0.0f), dataIt); Renderer3D::addVertexToFloatArray(rotationTransform * Vector3(0.0f, -0.1f, 0.0f), dataIt); Renderer3D::addVertexToFloatArray(rotationTransform * Vector3(0.0f, -radius, 0.0f), dataIt); renderer.drawLineList(floatBuffer.data(), lineCount, worldTransformation, *material); }
In the
node3d_plugin_module.cppfile, theModule::registerDebugRenderingFunctionsfunction registers the debug rendering functions of the plugin module. It uses theDebugRenderRegistry::addMappingfunction to associate the Knob class with thedrawKnobDebugfunction, which draws the visualization.// Registers the debug visualization function. void Node3DPluginModule::registerDebugRenderingFunctions(DebugRenderRegistry& registry) { // Add a mapping from the Knob class to the function that you use to render a // debug visualization of the knob and its rotation. registry.addMapping(Knob::getStaticMetaclass(), drawKnobDebug); }
To see the debug visualization in Kanzi Studio, in the Preview click  to enter the Analyze mode, right-click
  , and select Debug objects. When you turn the knob in the Preview, the visualization rotates.
Running the example
To run the example:
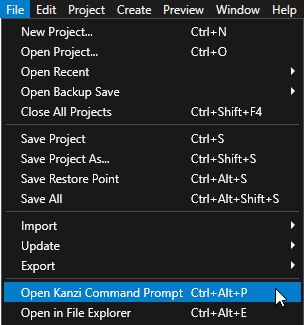
In Kanzi Studio, select File > Open Kanzi Command Prompt.
The Kanzi Command Prompt opens the Windows Command Prompt with the Kanzi environment variables set for the version of Kanzi for which you open a Kanzi Command Prompt.
Use the Kanzi Command Prompt to access Kanzi utilities and build tools, such as Gradle, SCons, and CMake, without using absolute paths or setting environment variables.
Tip
You can find the Kanzi Command Prompt in the Windows Start Menu in the Rightware directory.
When you have more than one version of Kanzi installed, make sure that you launch a Kanzi Command Prompt for the version of Kanzi with which you want to work in that command prompt.
In the Kanzi Command Prompt in the
<KanziWorkspace>/Examples/Node3D_plugin/Applicationdirectory run the script that generates a Visual Studio solution for the example application.For example, if you use Visual Studio 2019, run
generate_cmake_vs2019_solution.bat
This script generates a Visual Studio solution for the application in the directory
<KanziWorkspace>/Examples/Node3D_plugin/Application/build_vs2019.In Visual Studio open the
<KanziWorkspace>/Examples/Node3D_plugin/Application/build_vs<Version>/Node3D_plugin.slnVisual Studio solution.In Visual Studio in the Solution Explorer right-click the
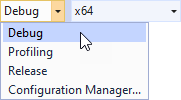
Node3D_plugin_executableproject and select Set as StartUp Project.Select the solution configuration that you want to use and run your application.
During development, select the Debug configuration. When you are ready to create a version for production, select the Release configuration.
See also
Extending the functionality of Kanzi Engine
Reference for showing Kanzi Engine plugin custom types in Kanzi Studio