Step 2 - Set a property value using the Kanzi Engine API
In this step, you create in Kanzi Studio a Text Block 2D node and an alias pointing to that node. Then, using the Kanzi Engine API, you set the value of the property that defines the content shown by the Text Block 2D node in your Kanzi application.
To set a property value using the Kanzi Engine API:
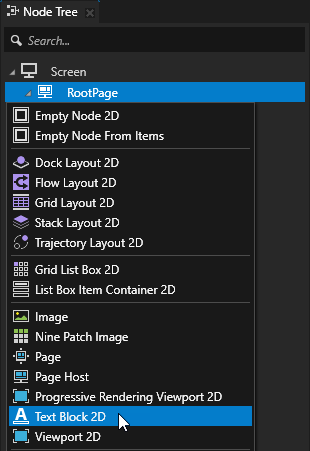
In the Node Tree, press Alt and right-click the RootPage node and select Text Block 2D.
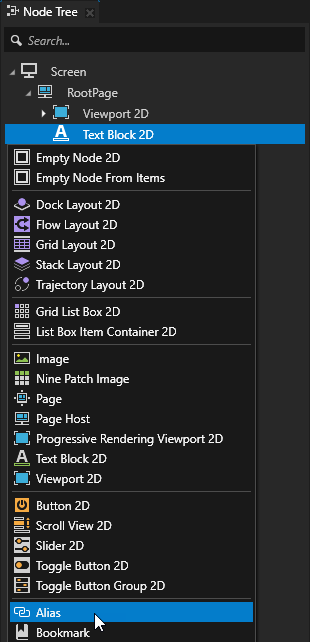
In the Node Tree, press Alt and right-click the Text Block 2D node that you created and select Alias.
Kanzi Studio creates an alias pointing to the node from which you created the alias and adds it to the resource dictionary of its nearest ancestor node that contains a resource dictionary.
You use an alias to access this node in application code.
In this example, the nearest node with a resource dictionary is the Screen node. In the application code of this project, you use the name of the alias to find and get that Text Block 2D node.
Tip
You can retrieve alias target nodes with bindings or the Kanzi Engine API using the hash sign (
#) followed by the name of the alias, regardless of the node location in the project.Tip
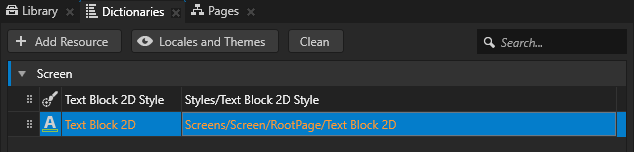
You can see in the Dictionaries window the list of resources in the resource dictionaries that the node selected in the Node Tree can access.
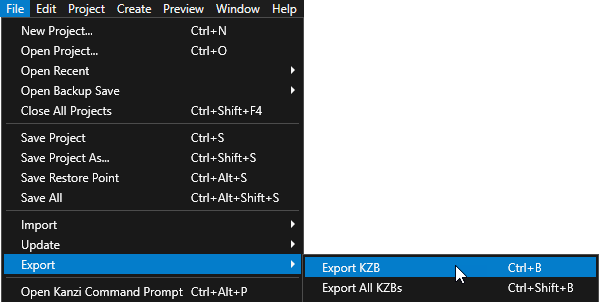
In Kanzi Studio, select File > Export > Export KZB.
In
hello_world.cppin the beginning of theApplication::onProjectLoadedfunction, add:void onProjectLoaded() override { // Get the Screen node whose resource dictionary contains the alias to the // Text Block 2D node. ScreenSharedPtr screenNode = getScreen(); // Get the Text Block 2D node using the alias that you created in the Kanzi Studio // project. The name of the alias is the same as the node name that you used for // the Text Block 2D node in the Kanzi Studio project with the # sign prefix. TextBlock2DSharedPtr textBlock = screenNode->lookupNode<TextBlock2D>("#Text Block 2D"); // Set the value of the Text Block 2D Text property to Hello world!. textBlock->setText("Hello world!"); ... }
When you run your Kanzi application, the
TextConceptImpl::setTextfunction sets the Text property of the Text Block 2D to Hello world! so that the text block shows Hello world!.
This is what your hello_world.cpp looks like when you complete this step.
#include <kanzi/kanzi.hpp>
#include <kanzi/core/log/log.hpp>

// [CodeBehind libs inclusion]. Do not remove this identifier.

#if defined(HELLO_WORLD_CODE_BEHIND_API) && !defined(ANDROID) && !defined(KANZI_CORE_API_IMPORT)
#include <Hello_world_code_behind_module.hpp>
#endif

using namespace kanzi;

class HelloWorld : public ExampleApplication
{
public:

   void onConfigure(ApplicationProperties& configuration) override
   {
      configuration.binaryName = "hello_world.kzb.cfg";
   }

   void onProjectLoaded() override
   {
      // Get the Screen node whose resource dictionary contains the alias to the
      // Text Block 2D node.
      ScreenSharedPtr screenNode = getScreen();
      // Get the Text Block 2D node using the alias that you created in the Kanzi Studio
      // project. The name of the alias is the same as the node name that you used for
      // the Text Block 2D node in the Kanzi Studio project with the # sign prefix.
      TextBlock2DSharedPtr textBlock = screenNode->lookupNode<TextBlock2D>("#Text Block 2D");
      // Set the value of the Text Block 2D Text property to Hello world!.
      textBlock->setText("Hello world!");

      // Prints Hello world! to the Kanzi debug console.
      kzLogInfo(KZ_LOG_CATEGORY_GENERIC, ("Hello world!"));
   }

   void registerMetadataOverride(ObjectFactory& factory) override
   {
      ExampleApplication::registerMetadataOverride(factory);

#if defined(HELLO_WORLD_CODE_BEHIND_API) && !defined(ANDROID) && !defined(KANZI_CORE_API_IMPORT)
      HelloWorldCodeBehindModule::registerModule(getDomain());
#endif

      // [CodeBehind module inclusion]. Do not remove this identifier.
   }
};

Application* createApplication()
{
   return new HelloWorld;
}
What’s next?
In this tutorial, you learned how to create a Kanzi Studio project with a C++ application and use the Kanzi Engine API to edit a property of a node you created in Kanzi Studio. To learn more about using the Kanzi Engine API, see:
See also
To learn about the underlying Kanzi principles, see Kanzi fundamentals.
To find out more about what you can create using the Kanzi Engine API, see Kanzi Engine C++ API reference.
To learn more about how Kanzi manages resources, see Resource management.
To find out more about using aliases, see Using aliases.
To learn more about creating Kanzi applications, see Tutorials.
To find out more about Kanzi Studio features, see Working with ….