Using Write Log action
Use a Write Log action to write a message to the Log window.

To open the Log window, in the main menu select Window > Log.
Kanzi prints to the Log window messages, warnings, and errors.
Writing to the Log window
When you want to write a message to the Log window, use a Write Log action in any trigger.
To write to the Log window:
In the Node Tree, create or select a node where you want to react to an event as a result of which you want to write a message to the Log window.
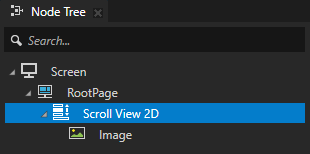
For example, in the Node Tree, create a Scroll View 2D node with content that you can scroll. See Creating a Scroll View node.
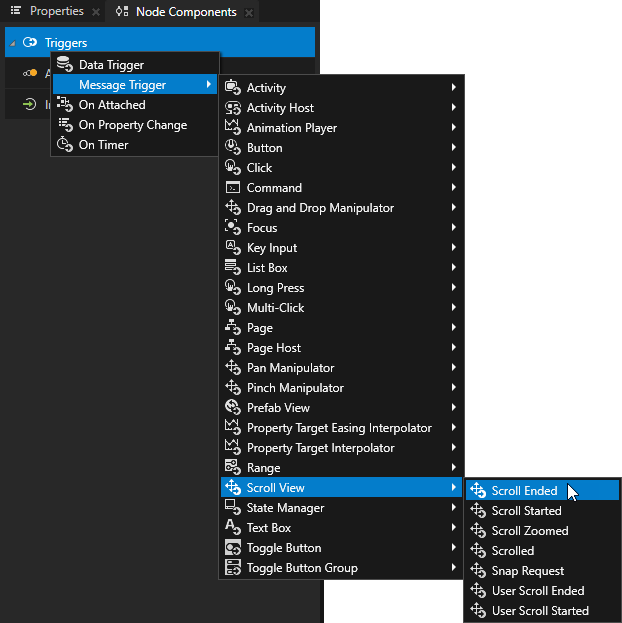
In the Node Components, press Alt and right-click Triggers and select a trigger that you want to use to write to the Log window when that trigger is set off. See Triggers reference.
For example, create a Message Trigger > Scroll View > Scroll Ended trigger. Scroll Ended trigger is set off when the scroll position of a scroll view has finished changing.
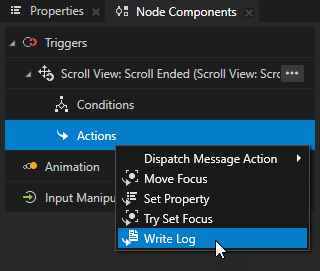
In the Node Components > Triggers, press Alt and right-click the trigger that you added in the previous step, and select Write Log action.
In the Write Log action, set the Log Text property to the message that you want to write to the Log window when the trigger is set off.
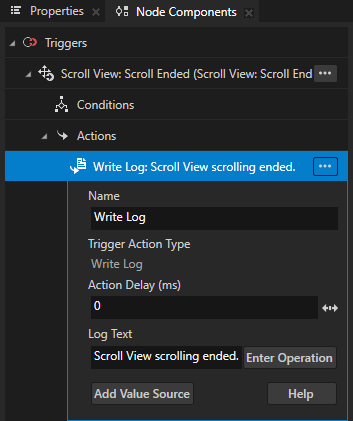
In the Preview, when you scroll the Scroll View and the scrolling stops, Kanzi prints to the Log window the message that you set in the Log Text property.

Tip
To open the Log window, in the main menu select Window > Log.
Using Write Log action macros
Use a Write Log action macro to add to your log message content that Kanzi replaces with the value of that macro.
To use Write Log action macros:
Create a Write Log action. See Writing to the Log window.
In the Write Log action, click Enter Operation and select a macro.
For example, instead of manually entering the name of a node, use the <Name> macro.
The <Name> macro inserts the name of the node that contains the Write Log action.
You can combine macros and text.
Macro
Description
<Name>
Inserts the name of the node that contains a Write Log action.
<EventName>
Inserts the name of the trigger that executes a Write Log action.
{ValueSourceIndex}
After you add a property value or a message argument, inserts the value of that item. See Logging values from properties or message arguments.
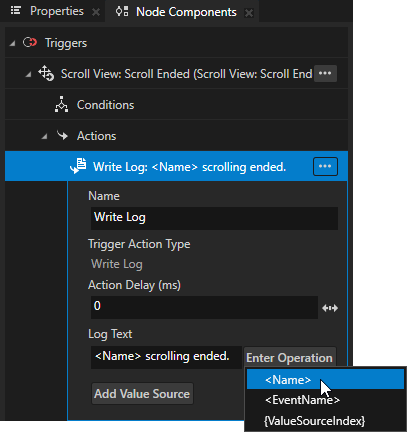
In the Preview, when you scroll the Scroll View and the scrolling stops, Kanzi prints to the Log window the message that you set in the Log Text property.

Logging values from properties or message arguments
You can use a Write Log action to write to the Log window values from properties or message arguments.
To log values from properties or message arguments:
Create a Write Log action. See Writing to the Log window.
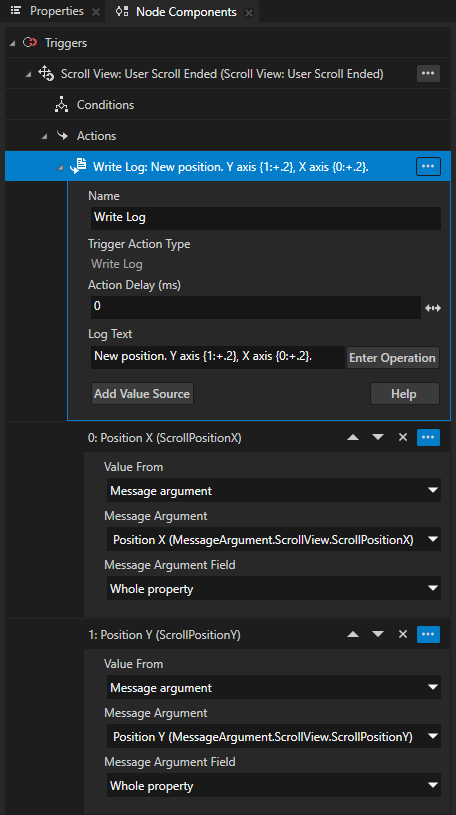
In the Write Log action, click Add Value Source and set the source from which you want to print the value to the Log window.
For example, to print the position of the Scroll View on the x axis, set:
Value From to Message argument
Message Argument to Position X
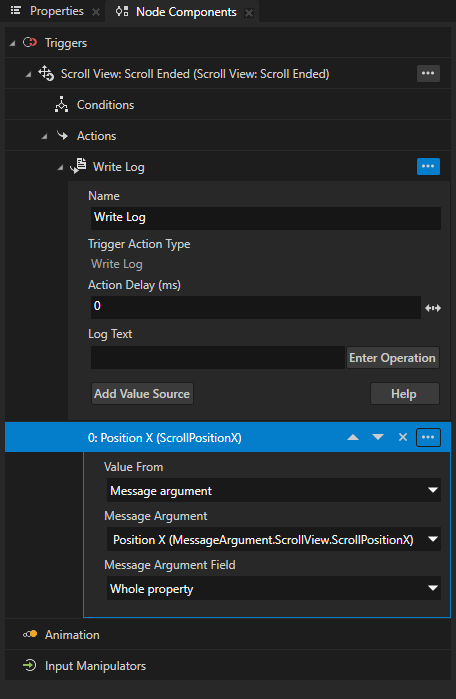
In the Write Log action, click Enter Operation and select {ValueSourceIndex}.
This macro inserts the curly braces (
{}) that Kanzi replaces with the value that you added in the previous step.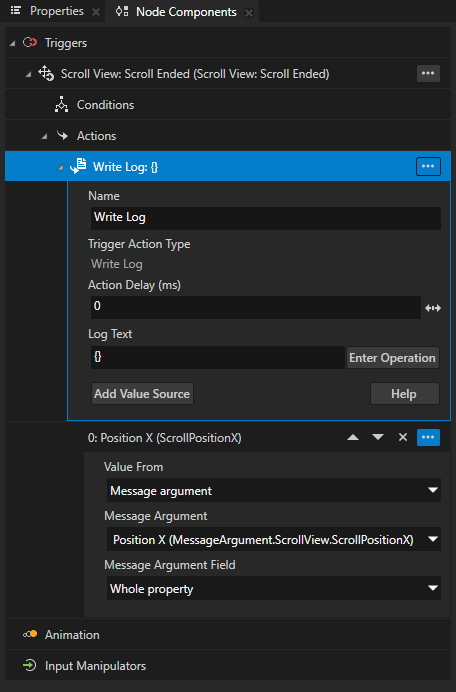
(Optional) When you refer to the values with empty curly braces (
{}), Kanzi uses the order in which the values appear in the Write Log action. To set the order of values in a message:Add another value to the Write Log action.
For example, to print the position of the Scroll View on the y axis, click Add Value Source and set:
Value From to Message argument
Message Argument to Position Y
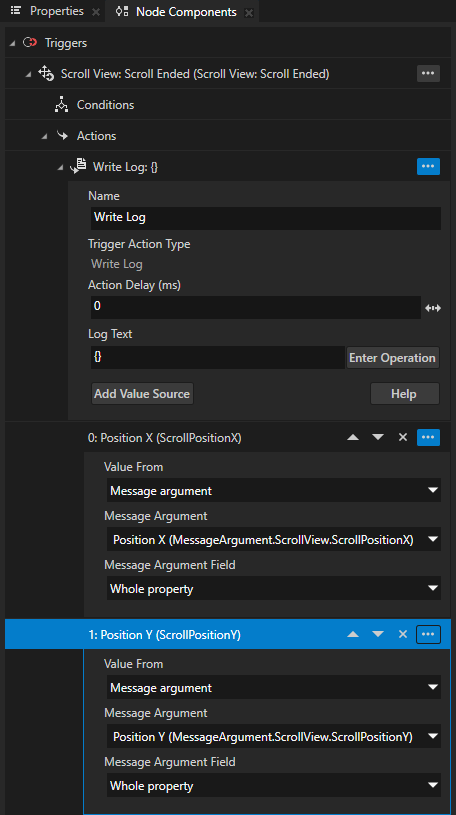
In the Log Text, add another pair of curly braces, and in the curly braces enter the index of the value that you want to use in that position.
For example, set the Log Text property to:
New position. Y axis: {1}, X axis: {0}.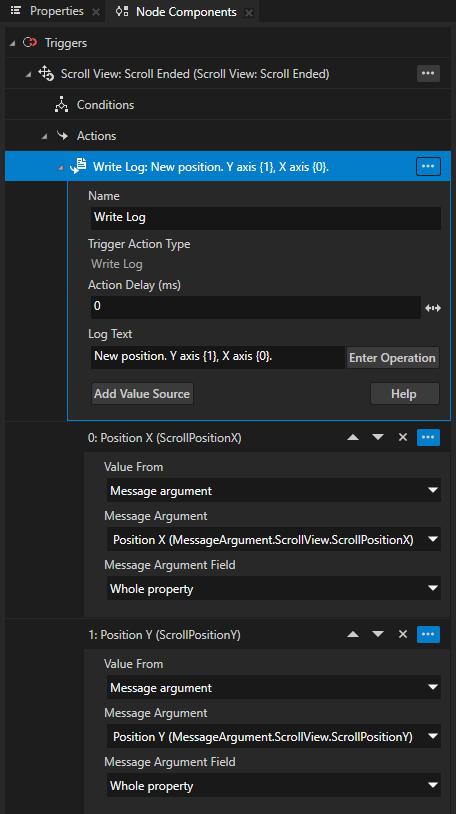

Tip
To change the order of values in a Write Log action, use the arrows next to the value.

(Optional). You can apply formatting to the property values. To learn how to format log messages, see Log message argument format specification.
For example, set the Log Text property to:
New position. Y axis {1:+.2}, X axis {0:+.2}.This way you format the property values to:
Always show the sign of the value
Set the precision of the value to two digits
