Using environment cubemap textures
Use an environment cubemap texture to represent the environment, such as an outdoor scene or an indoor space. You can create an environment cubemap texture for an hdr or exr image. An environment cubemap texture combines six square-shaped images into one texture to represent the environment.
Creating environment cubemap textures
To create an environment cubemap texture:
In the Assets click Import Assets and select an hdr or exr image for which you want to create an environment cubemap texture.

Tip
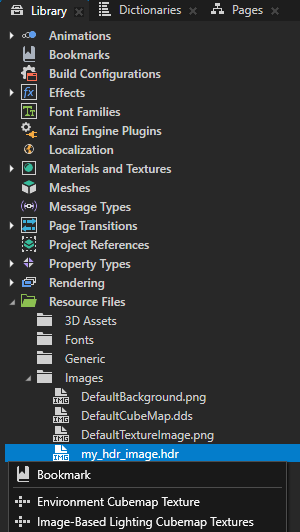
To create an environment cubemap texture for an hdr or exr image that you have already imported to your Kanzi Studio project, in the Library > Resource Files > Images press Alt and right-click that image and select Environment Cubemap Texture.

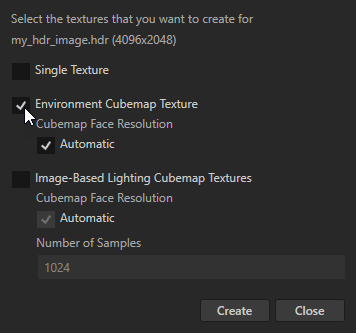
In the Create Textures for HDR Images dialog:
Select Environment Cubemap Texture.
Tip
To create for the image also irradiance and specular cubemap textures that represent the lighting coming from the environment, select Image-Based Lighting Cubemap Textures. See Using image-based lighting cubemap textures.
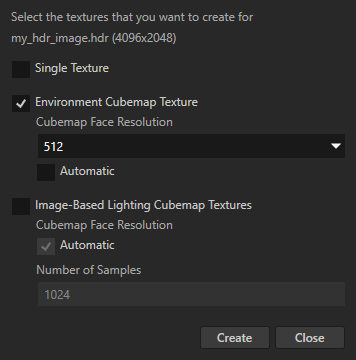
(Optional) To manually set the size of the cubemap faces, disable the Automatic setting and set the Cubemap Face Resolution.
For example, to create an environment cubemap texture where the size of each cubemap face is 512 by 512 pixels, set Cubemap Face Resolution to 512.
Kanzi Studio by default creates a cubemap texture where the width and height of each cubemap face is one quarter of the width of the image that you import.
Click Create.
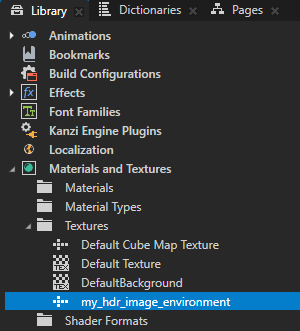
Kanzi Studio imports the image and creates in the Library > Materials and Textures > Textures an environment Cubemap Texture for that image.
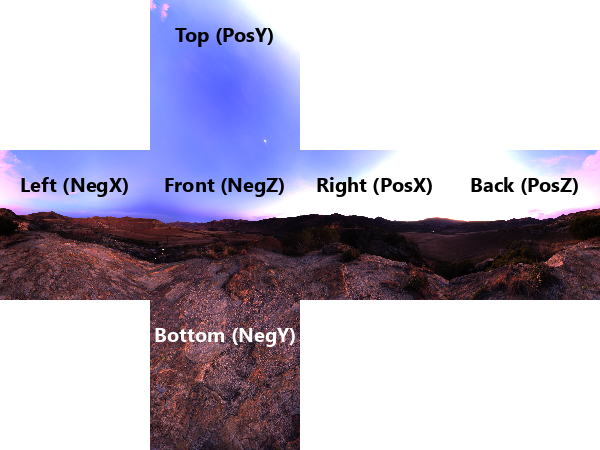
Kanzi Studio creates and sets the cubemap face images:
NegZ Image to the front face image
PosZ Image to the back face image
NegX Image to the left face image
PosX Image to the right face image
NegY Image to the bottom face image
PosY Image to the top face image

Tip
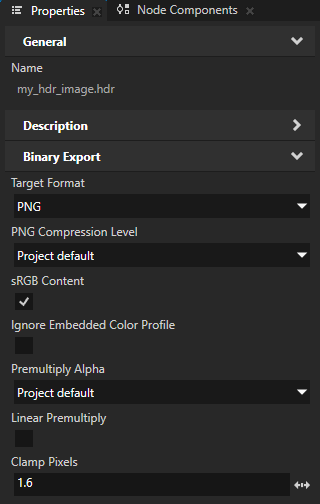
You can restrict the brightness of strongly lit areas in the textures that you create from an HDR image.
To set the maximum brightness level in the cubemap textures that you create from an HDR image:
In the Library > Resource Files > Images select the image, in the Properties add the Clamp Pixels property and set it to the value to which you want to restrict the color values in the cubemap face images that you create from that image.
In the Library > Resource Files > Images press Alt and right-click the image and select the cubemap texture that you want to create.
Using an environment cubemap texture
To use an environment cubemap texture:
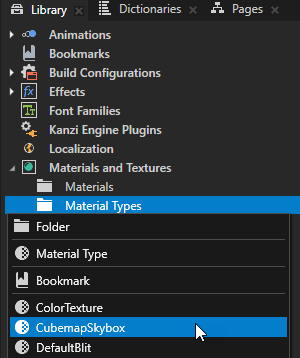
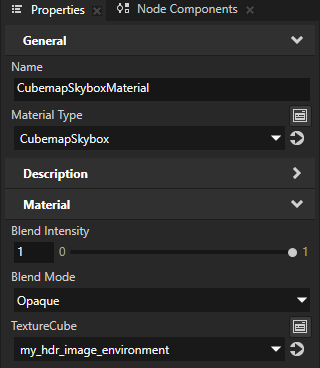
In the Library > Materials and Textures, press Alt and right-click Material Types, and select CubemapSkybox.
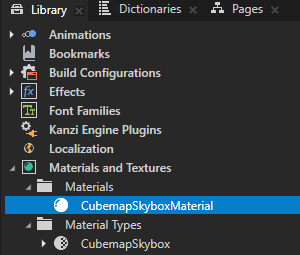
Kanzi Studio creates in the Library > Materials and Textures the CubemapSkybox material type and CubemapSkyboxMaterial, which supports showing a cubemap texture as a skybox.
In the Library, select the CubemapSkyboxMaterial material. In the Properties, set the TextureCube property to the cubemap texture that you want to use to render a skybox. Creating environment cubemap textures.
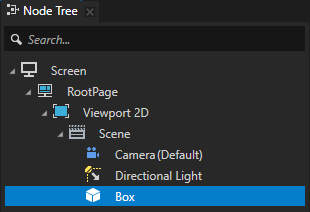
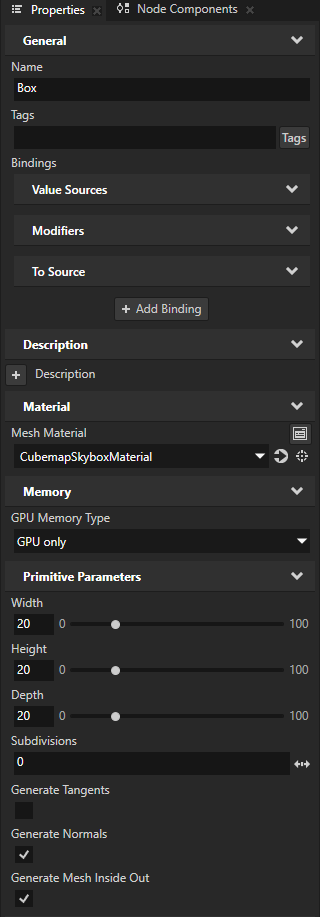
Create a Box or Sphere node that you use to render the skybox. In the Properties, set:
Mesh Material to CubemapSkyboxMaterial
The size of the node so that it is large enough to fit the content that you want to show inside it:
For a Box, set the Width, Height, and Depth properties.
For a Sphere, set the Radius property.
Generate Mesh Inside Out to enabled
When this property is enabled, Kanzi renders the cubemap texture inside the mesh.
Position a Camera node inside the node that you created.
When you rotate the camera, in the Preview you can see the environment texture rendered as a skybox.
