Using mipmaps
Use mipmaps to create a set of downscaled sublevels from a large texture. Mipmaps increase the GPU memory use by one third, but improve the performance when the full texture does not have to be sampled. Use mipmaps to improve the performance whenever you scale a textured node.
For example, a 256 by 256 pixels texture has mipmap levels that reduce the texture to 128 by 128, 64 by 64, and so on until 1 by 1 pixel. The performance improves because smaller mipmap levels fit better in the fixed-size texture cache in the GPU.
When you create mipmaps in a third-party tool and include them in a .dds file, Kanzi Studio extracts the images for mipmap levels and uses them.
Avoid creating mipmaps from .jpeg textures, because the .jpeg image format causes the quality of the mipmaps to degrade.
Generating mipmaps for a texture
When you import an image that does not contain mipmaps, you can generate the mipmaps for the texture from that image in Kanzi Studio.
To generate mipmaps for a texture:
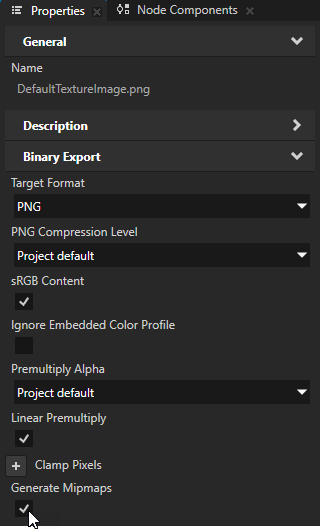
In the Library select Resource Files > Images, and select the image for which you want to create mipmaps.
Avoid creating mipmaps from .jpeg textures, because the .jpeg image format causes the quality of the mipmaps to degrade.
In the Properties enable the Generate Mipmaps property.
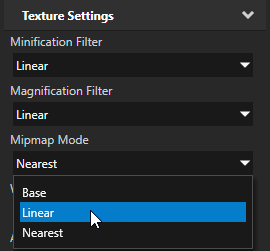
In the Library > Materials and Textures > Textures select the texture that uses the image for which you want to generate mipmaps and in the Properties set the Mipmap Mode property to Linear or Nearest to take the mipmaps into use. See Filtering textures.
When you export the kzb file of your project and Kanzi Studio asks whether you want to preprocess the images, click Yes. If you do not preprocess images in Kanzi Studio, Kanzi Engine generates mipmaps when it loads your application on the target device. This increases the loading time of your application.
Note
Kanzi cannot generate mipmaps for images that use ASTC, ATC, ETC, or PVRTC compression.
Tip
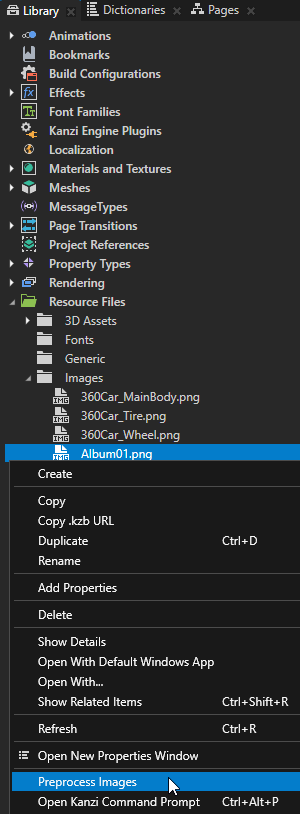
To manually generate mipmaps for images, in the Library right-click the image for which you want to generate mipmaps and select Preprocess images.
Creating mipmaps for a composition target
You can create mipmaps for a composition target when you render 3D content with a Composition Target Render Pass or Cubemap Render Pass. For example, use this to create a low-quality blur effect that is quick to render.
This procedure explains how to create mipmaps for a composition target which Kanzi creates automatically. To create mipmaps for a Render Target Texture, see Creating mipmaps for a Render Target Texture.
To create mipmaps for a composition target:
Create the render passes that you need to render your content to a composition target.
For example, in the Library > Rendering > Render Pass Prefabs create a Compose and Blit Pass. See Rendering content to composition targets.
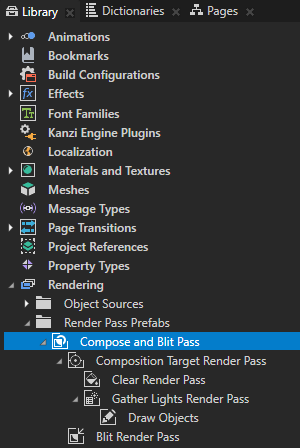
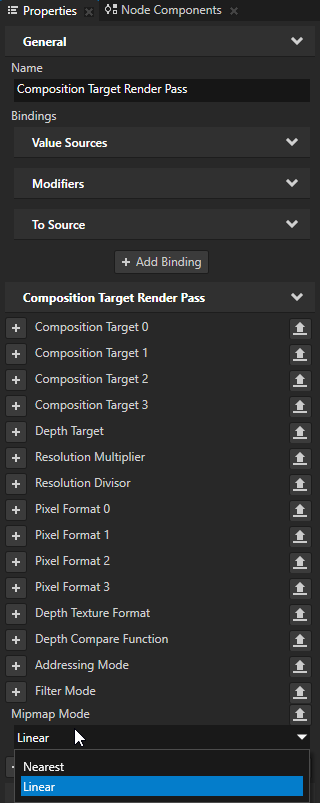
In the Library > Rendering > Render Pass Prefabs select the Composition Target Render Pass or Cubemap Render Pass for whose composition target you want to create mipmaps, in the Properties add the Mipmap Mode property, and set it either to Linear or Nearest. See Filtering textures.
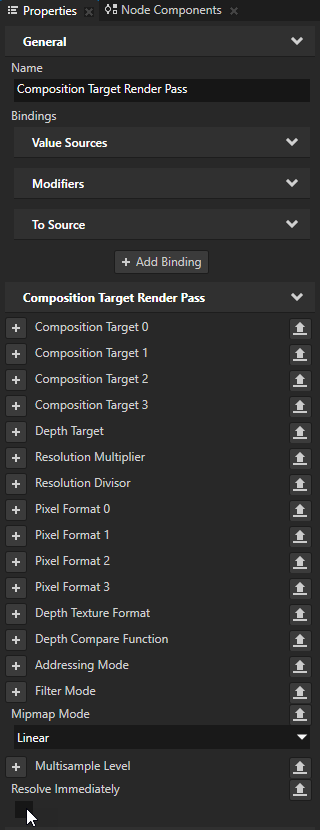
(Optional) By default Kanzi generates the mipmaps when the Composition Target Render Pass or Cubemap Render Pass creates the composition target. When you continue rendering to the same composition target in another render pass, creating the mipmaps immediately is likely to waste GPU time. To avoid this, in the Composition Target Render Pass or Cubemap Render Pass that creates the composition target add and disable the Composition Target Render Pass > Resolve Immediately or Cubemap Render Pass > Resolve Immediately property.
Creating mipmaps for a Render Target Texture
You can create mipmaps for a Render Target Texture to which you render 3D content with a Composition Target Render Pass. For example, use this to create a low-quality blur effect that is quick to render.
To create mipmaps for a Render Target Texture:
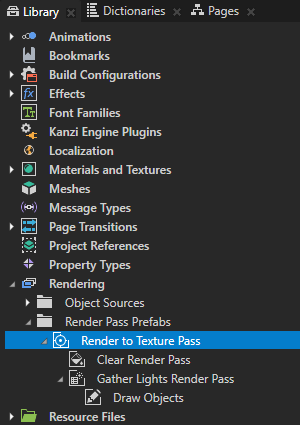
In the Library > Rendering > Render Pass Prefabs create a Render to Texture Pass.
Render to Texture Pass creates the render passes and texture you need to render to a texture.
See Rendering to texture.
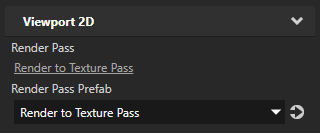
In the Node Tree select the Viewport 2D node the content of which you want to render to a texture and in the Properties set the Render Pass Prefab property to the Render to Texture Pass you created in the previous step.
Kanzi now renders the Viewport 2D using the render passes you created.
In the Library select the Render to Texture Pass that you created, in the Properties click
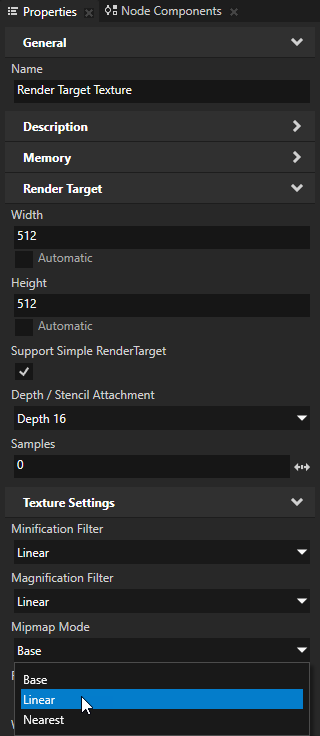
 next to the Composition Target 0 property to go to the Render Target Texture resource, and set the Mipmap Mode property to either Linear or Nearest. See Filtering textures.
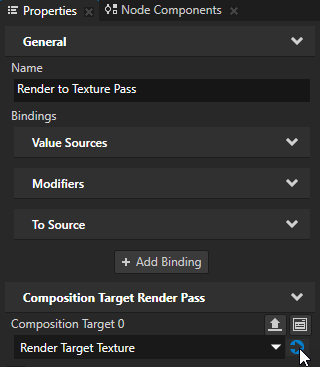
Use the Render Target Texture in a node where you want to show the 3D content. See Using render target textures.