Developing for Android with the Kanzi application framework (appfw)
Use the Kanzi application framework (appfw) when you want to create an application for multiple platforms and you intend to share non-trivial application code between the platforms.
Kanzi application framework (appfw) is a framework for developing cross-platform applications. You write application and plugin code in C++ and extending Android-specific functionality requires writing JNI glue code. When you use Kanzi application framework (appfw), you can render a Kanzi application to only one Android View at a time.
Android lifecycle events in a Kanzi application
The Android lifecycle events set how your Kanzi application behaves when the activity state changes. Each event maps to an Android activity callback method. A Kanzi application uses these lifecycle events:
Lifecycle.Event.ON_CREATE// Load the native library that provides Kanzi functionality, // initialize the context, and assign the KanziView for rendering. // This function calls the KanziNativeLibrary.createApplication() function, // which loads the Kanzi project. KanziView.createNativeApplication();
Lifecycle.Event.ON_DESTROY// Halt and destroy the Kanzi application. // This function calls the KanziNativeLibrary.haltApplication() and // KanziNativeLibrary.destroyApplication() functions. KanziView.destroyNativeApplication();
SurfaceHolder.Callback.surfaceCreated// When the application surface is created, run the Kanzi application. KanziNativeLibrary.runApplication(holder.getSurface());
SurfaceHolder.Callback.surfaceDestroyed// When the Kanzi application surface is destroyed, pause rendering. KanziNativeLibrary.haltApplication();
SurfaceHolder.Callback.surfaceChanged// When the format or size of the Kanzi application surface changes, // resize the application surface. // @param width: The new width of the surface. // @param height: The new height of the surface. KanziNativeLibrary.resizeEvent(width, height);
Kanzi does not use the LifeCycle.Event.ON_PAUSE and Lifecycle.Event.ON_RESUME events because they do not tell whether the application surface is ready for rendering. To pause and resume rendering, KanziView uses the SurfaceHolder.CallbacksurfaceCreated() and surfaceDestroyed() functions.
See https://developer.android.com/reference/androidx/lifecycle/Lifecycle.Event.html and https://developer.android.com/reference/android/view/SurfaceHolder.Callback.
This diagram shows the initialization sequence of a Kanzi application on the Android platform.
Adding a KanziView to an Android Studio project
To run your Kanzi application in your Android application, you can add a KanziView to an existing Android Studio project.
To add a KanziView to an Android Studio project:
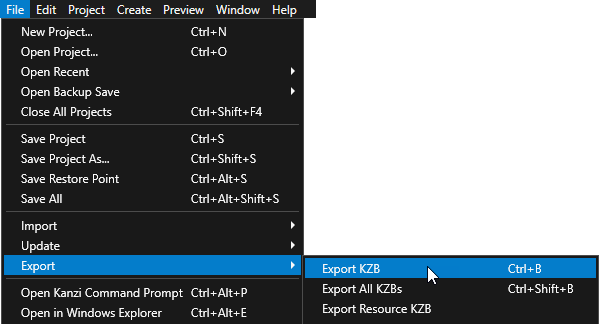
In Kanzi Studio, open the project which you want to add as a Kanzi View to an Android Studio project, and select File > Export > Export KZB.
Copy the
<ProjectName>/Application/bindirectory to your Android Studio project root directory. This way you include the kzb files in the Android package.For example, for an Android Studio project called
MyProject, copy theApplication/bindirectory to theMyProjectdirectory.In Android Studio, open the project to which you want to add a KanziView.
In Android Studio, in the
app/src/maindirectory, create a directory calledcppand add to that directory the CMake build file and source code for your Kanzi project:From the
<ProjectName>/Applicationdirectory of your Kanzi project copy theCMakeLists.txtfile to thecppdirectory.From the
<ProjectName>/Application/srcdirectory of your Kanzi project copy the<project_name>.cppfile to thecppdirectory.
From
<KanziWorkspace>/Templates/Basic_application/Application/configs/platforms/android_gradle, copy thegetkanzi.gradlefile to your Android project directory.Gradle uses the
getkanzi.gradlescript to find Kanzi Engine and Kanzi Gradle plugins.In Android Studio, add Kanzi to your project:
In the
app/build.gradlefile, add Kanzi to your Android project:apply plugin: 'com.rightware.gradle.kanzi'
Import to the Java activity the
Configurationand KanziView classes.For example, in
app/src/main/java/com/rightware/<projectname>/MainActivity.javaadd:import android.content.res.Configuration; import com.rightware.kanzi.KanziView;
In the
MainActivity.javafile, add the Kanzi View to theMainActivityclass:public class MainActivity extends AppCompatActivity { private KanziView mView = null; @Override protected void onCreate(Bundle savedInstanceState) { ... mView = findViewById(R.id.kanzicontent); mView.registerLifecycle(getLifecycle()); } ... @Override public void onConfigurationChanged(Configuration newConfig) { super.onConfigurationChanged(newConfig); mView.setOrientation(newConfig.orientation); } }
In the Android project root directory, in the
build.gradlefile, get the Kanzi Gradle plugins and add Kanzi as a dependency:buildscript { apply from: 'getkanzi.gradle' repositories { google() jcenter() flatDir { dirs getKanziPlugins().toString() } } dependencies { classpath 'com.android.tools.build:gradle:4.1.3' classpath 'com.rightware.gradle:kanzi:0.7.1' } ...
Add to your Android application content the KanziView and set its layout.
For example, in
app/src/main/res/layout/content_main.xml, add:<com.rightware.kanzi.KanziView android:id="@+id/kanzicontent" android:layout_width="match_parent" android:layout_height="wrap_content" android:layout_marginTop="24dp" app:layout_constraintBottom_toBottomOf="parent" app:layout_constraintEnd_toEndOf="parent" app:layout_constraintStart_toStartOf="parent" />
In the
app/build.gradlefile, set:Asset directory of your Android project to the directory which contains the kzb files
Path to the CMake build file
apply plugin: 'com.android.application'
apply plugin: 'com.rightware.gradle.kanzi'

android {

...

        sourceSets {
            main {
                assets.srcDirs = [new File(rootDir, "bin")]
            }
        }
    }

...

    externalNativeBuild {
        cmake {
            path file("$projectDir/src/main/cpp/CMakeLists.txt")
        }
    }
}
In Android Studio, in the main menu, select Build > Make Project.
Android Studio builds the application package.
