Using triggers
Use triggers and actions to create interactions based on user input.
A trigger defines a condition and an action defines what the trigger does when that condition is met. For example, to print a message to the Log window when a node is attached to the node tree, add the On Attached trigger to that node and add the Write Log action to that trigger.
Kanzi Studio has a range of actions which you can add to a trigger. For example, you can add an action to print to the Log window (Write Log), set a property to a certain value (Set Property), navigate to a Page node (Navigate to Page), or change application theme (Activate Theme).
Trigger messages
When a trigger intercepts a message that originates from an action you can set what the trigger does with the message. You can:
Intercept the message, act on it, and let it continue traveling up or down the project tree.
Intercept the message, act on it, and handle it. When a trigger handles a message it consumes it so that the message stops at the trigger that handles it and no other node can intercept it.
With a trigger you can intercept a message either at the node where the message originates, or in a trigger in any of its ancestor or descendant nodes. You can intercept many different message types in the same node. When a message travels up the project tree, the message bubbles. When a message travels down the project tree, the message tunnels. You can set in the action that creates the message whether the message bubbles, tunnels, or both bubbles and tunnels.
For example, if the action creates a bubbling message, after an action generates a message, the message bubbles from the node that receives the input to its parent node, then to the parent of the parent, and so on until a trigger intercepts the message. If the trigger also handles the message, the message stops bubbling (traveling up the project tree). If none of the ancestors handle the message, the message travels all the way to the root node of the project.
By default all triggers handle their own messages. You can control the handling of trigger messages by setting the Set Message Handled property in the trigger.
Data Triggers
Use a Data Trigger to:
Apply a value to a property with an Apply Property Action
Activate an Activity with an Apply Activation Action. See Activating Activities with an Apply Activation Action and Tutorial: Control application UI.
A Data Trigger keeps the change on a node applied for as long as the condition expression in that Data Trigger is met. When the condition in that Data Trigger is no longer met, Kanzi reverts the changes that it applied using that Data Trigger.
You set the condition in a Data Trigger in the form of a binding expression that evaluates to either True or False. In the condition you can use as an input either a property or a data source.
For example, you can use a Data Trigger to control the logic and activation state of Activities in an Activity Host.
Apply Activation Action and Apply Property Action actions have higher priority than any other actions. For example, if you use an Apply Activation Action that sets the Active Index property and a Set Property action that sets that same property to a different value, the effect of the Set Property action becomes visible only after Kanzi unapplies the Apply Activation Action.
Getting started
To get started with triggers, see:
For a list of all the triggers you can use in Kanzi Studio, see Triggers reference.
For a list of all the actions you can add to a trigger in Kanzi Studio, see Actions and messages reference.
Adding a trigger
The most common place to add a triggers is in the node that uses the trigger, but you can add a trigger to any node.
To add a trigger:
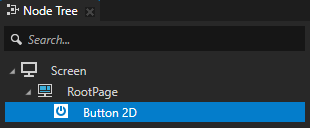
In the Node Tree create or select a node to which you want to add a trigger.
For example, create a Button 2D node. When you create the Button 2D node it already has a Button: Click trigger.
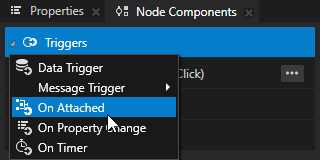
In the Node Components right-click Triggers and select a trigger that intercepts the type of message that you want to intercept. See Triggers reference.
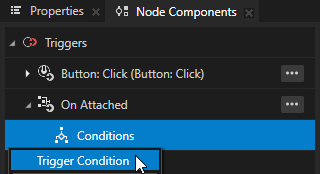
For example, add an On Attached trigger. The On Attached trigger is set off when Kanzi attaches the node to the node tree.
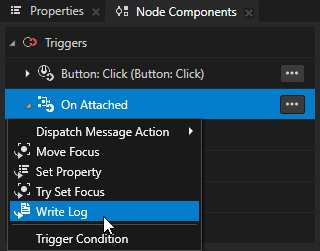
In the Node Components > Triggers press Alt and right-click the trigger that you added in the previous step, and select an action.
See Actions and messages reference.
For example, select the Write Log action and set Log Text to the message that you want to write to the Log window when the trigger is set off. The Write Log action is useful when you want to verify that the node received the input.
You can add any number of actions. Kanzi carries out the actions in the order beginning from the first action.
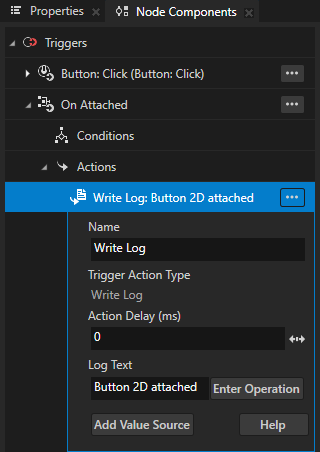
When Kanzi attaches the node, it prints the message you entered as the value of the Log Text property to the Log window.
To learn more about the Write Log action, see Using Write Log action.
To open the Log window, in the main menu select Window > Log.

(Optional) If you want the trigger to be set off only under specific conditions, in the Node Components > Triggers in the trigger for which you want to set a condition, right-click Conditions, and select Trigger Condition. See Adding conditions to a trigger.
Setting the handling of trigger messages
When a trigger handles a message it consumes it so that the message stops at the trigger that handles it and no other node can intercept it. See Creating custom messages in Kanzi Studio.
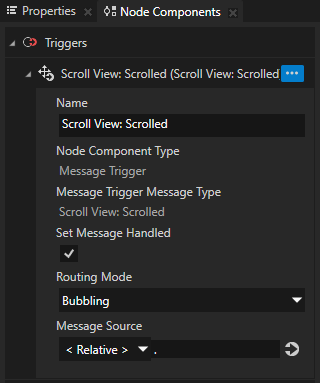
To set the handling of trigger messages, in the Node Components > Triggers, in the trigger for which you want to set message handling, set:
Set Message Handled property:
When you enable the Set Message Handled property, this trigger intercepts and handles the message. The message stops here, and does not continue neither bubbling nor tunneling in the project tree.
When you disable the Set Message Handled property, this trigger intercepts the message, but the message continues bubbling or tunneling in the project tree.
Routing Mode property:
Bubbling to intercept only bubbling messages.
Tunneling to intercept only tunneling messages.
Tunneling and bubbling to intercept tunneling and bubbling messages.
Message Source property:
To intercept messages from a specific target item, do one of the following:
Select the item from the dropdown menu.
Select <Relative> and set the path to the item:
Separate node names with
/to build the path.Use
.to access the current item.Use
..to access the parent item of the current item.Use
#to access a node using an alias in the resource dictionary of the current node. See Using aliases.
To intercept messages from all sources, select <No Item>.
Adding conditions to a trigger
Trigger conditions enable you to set which conditions must be met for the trigger to set off. For example, you can define conditions to set off a trigger when the user navigates to a specific Page node or enable the user to scroll a scroll view only when a specific Page node is active.
You create a trigger condition by comparing a value that you define in the A section to the value that you define in the B section using an operator that you set with the Operation property.
You can create conditions to set off a trigger when:
A value that comes from a property type matches a certain rule. See Creating a condition using a value from a property.
A value that comes from a message argument matches a certain rule. See Creating a condition using a value from a message.
Creating a condition using a value from a property
You can define a trigger condition to set off a trigger when a property that you select gets a value you set in that condition. For example, you can create a condition that allows the user to scroll a Scroll View node only when a specific Page node is active.
To create a condition using a value from a property:
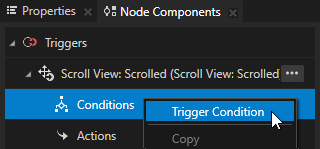
In the Node Tree select or create a node with a trigger to which you want to add a condition, in the Node Components in that trigger right-click Conditions, and select Trigger Condition. See Adding a trigger.
For example, create a Scroll View 2D node with a Scroll View: Scrolled trigger, in that trigger right-click Conditions, and select Trigger Condition. See Using the Scroll View nodes.

In the trigger condition that you created set the condition that must be met for the trigger to set off.
You create a trigger condition by comparing a value that you define in the A section to the value that you define in the B section using an operator that you set with the Operation property.
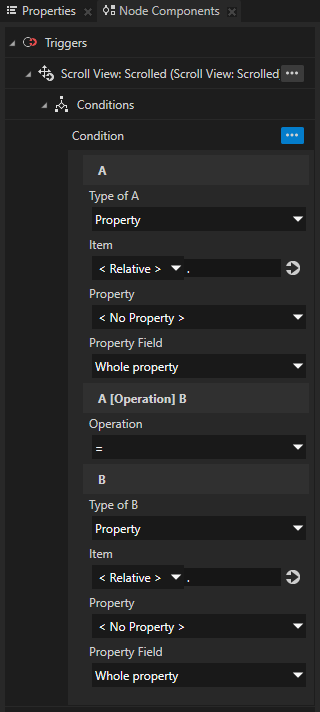
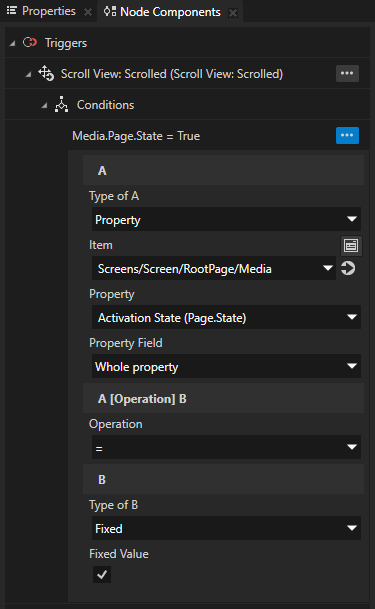
In the trigger condition set:
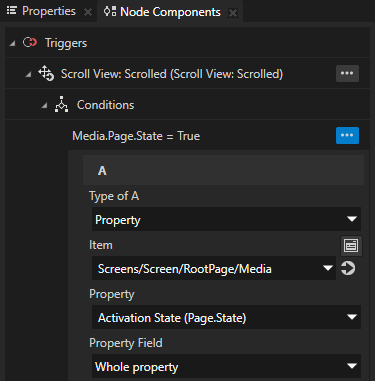
In the A section define the property type and value that you want to use for the condition. To use a value from a property, set:
Type of A to Property
Item to the node whose property you want to use for the condition
For example, set it to a Page node.
Property to the property type that you want to use for the condition
For example, set it to the Activation State property of the Page node you selected in the Item property.
Use the Activation State property to find out whether a Page or Page Host node is active.
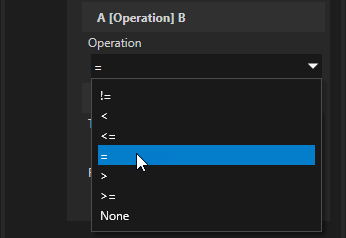
Operation to the operator that you want to use to compare the value that you defined in the A section to the value that you define in the B section.
For example, set it to = to create a condition where the trigger sets off only when the value that you defined in the A section is equal to the value that you define in the B section.
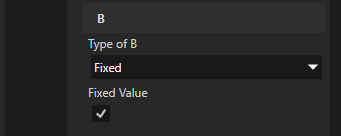
In the B section define the value to which you want to compare the value that you defined in the A section. The Type of B property defines where the value for the B comes from. Set the Type of B property to:
Property to compare to a value from any property from any node in the project
Message argument to use a value from a message argument from a trigger in the node that you set in the A section in the Item property
Fixed when you want to use the same property from the node that you set in the A section and set a value for that property
For example, set the Type of B property to Fixed and then enable the Fixed Value property.
The data type of the Fixed Value property depends on the property type that you set in the A section. In this example this is a Boolean property type Activation State of a Page node.
Here you created a condition which sets off the Scroll View: Scrolled trigger when the user navigates to the Page node Media.
Creating a condition using a value from a message
You can define a trigger condition to set off a trigger when a message that you select gets a value you set in that condition. You can use values from messages of these triggers:
Key Input. See Setting a specific key to move focus.
List Box.
Scroll View.
State Manager. See Reacting when a node enters or leaves a state.
For example, you can set off a trigger when the user selects a specific item in a List Box node.
To create a condition using a value from a message:
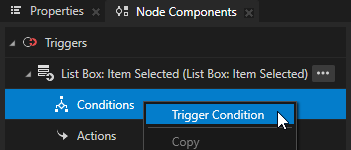
In the Node Tree select or create a node with a trigger to which you want to add a condition, in the Node Components in that trigger right-click Conditions, and select Trigger Condition. See Adding a trigger.
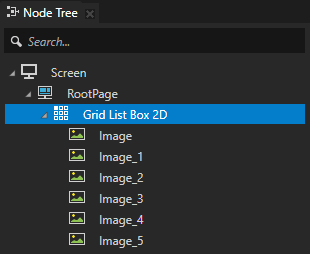
For example, create a Grid List Box 2D node with a List Box: Item Selected trigger, in the Node Components in the List Box: Item Selected trigger right-click Conditions, and select Trigger Condition. See Using the Grid List Box nodes.
In the trigger condition that you created set the condition that must be met for the trigger to set off.
You create a trigger condition by comparing a value that you define in the A section to the value that you define in the B section using an operator that you set with the Operation property.
In the trigger condition set:
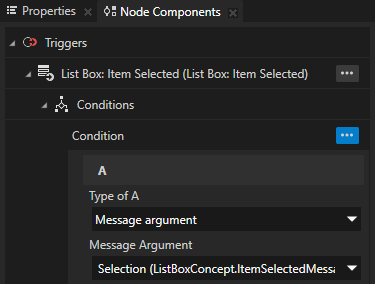
In the A section set the message argument that you want to use for the condition. To use a value from a message argument, set:
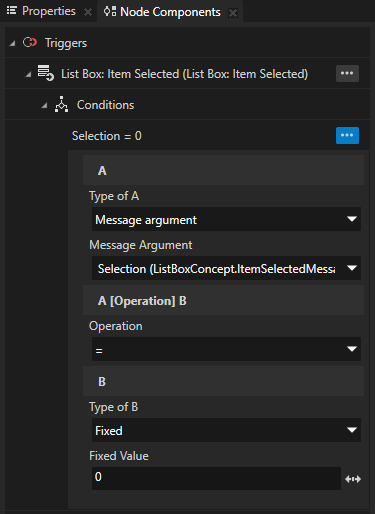
Type of A to Message argument
Message Argument to the message argument that you want to use for the condition
For example, if you created a List Box: Item Selected trigger, set the Message Argument to Selection.
Operation to the operator that you want to use to compare the value that you defined in the A section to the value that you define in the B section.
For example, set it to = to create a condition where the trigger sets off only when the value that you defined in the A section is equal to the value that you define in the B section.
In the B section define the value to which you want to compare the value that you defined in the A section. The Type of B property defines where the value for the B comes from. Set the Type of B property to:
Property to compare to a value from any property from any node in the project
Message argument to use a value from a message argument from a trigger in the node that you set in the A section in the Item property
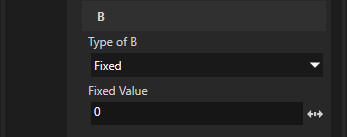
Fixed when you want to use the same message argument that you set in the A section and set a value for that message argument
For example, set the Type of B property to Fixed and then set the Fixed Value property to 0.
The data type of the Fixed Value property depends on the message type you set in the A section. In this example this is an integer.
In this example you created a condition which sets off a List Box: Item Selected when the user selects the first item in the Grid List Box 2D node.
Removing a trigger
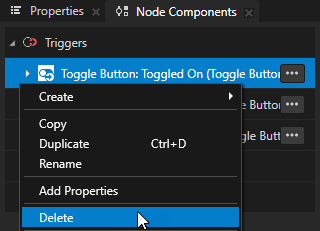
To remove a trigger, in the Node Components > Triggers either:
Select the trigger that you want to remove and press Delete.
Right-click the trigger that you want to remove and select Delete.
Using triggers in the API
For details, see the Trigger class in the Kanzi Engine API reference.