Using the Camera node
Use the Camera node to show the content of a Scene in your Kanzi Studio project and in your Kanzi application.
When a Camera node is a preview camera, in the Preview you see the Scene through that Camera node. In the Node Tree the preview camera is marked with (Preview).
Do not scale Camera nodes, or ancestors of Camera nodes, using either Render Transformation or Layout Transformation properties. When you scale a Camera node you affect the projection so that it does not match the parameters you set.
Setting the position of Camera nodes
To set the position of a Camera node:
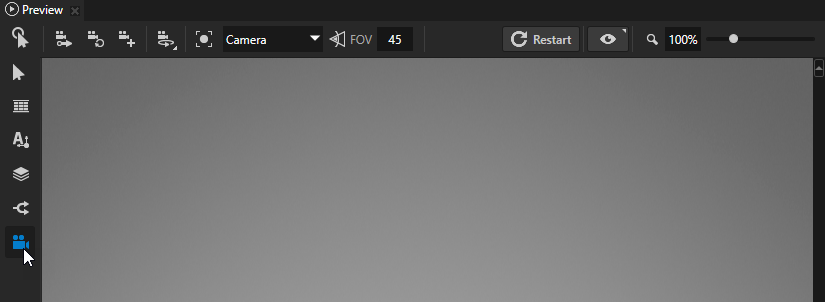
In the Preview select the Camera tool.
In the Camera tool you can use either orbit or free camera:
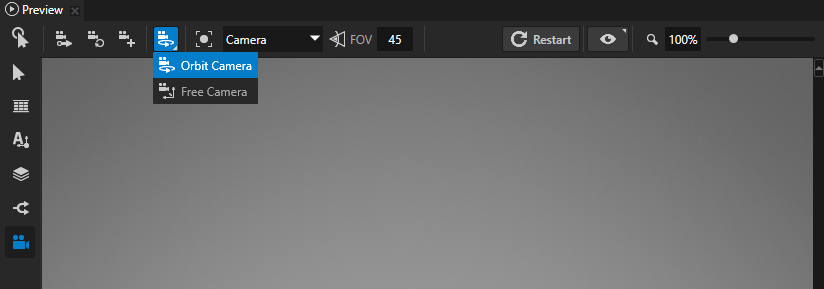

Orbit camera allows you to move around the nodes selected in the Node Tree or the node set in the Look At property of the camera.
To move with the orbit camera, use these controls:
Control
Description
Click and drag the left mouse button.
Rotate
Click and drag the middle mouse button.
Press the Space key, and click and drag the left mouse button.
Pan
Scroll the mouse wheel.
Press the Shift and Alt keys, and click and drag the left mouse button.
Zoom

Free camera allows you to move around without attachment to any point.
To move with the free camera, use these controls:
Control
Description
W
Move forward.
Hold down Shift to double the speed.
S
Move backward.
Hold down Shift to double the speed.
A
Move left.
Hold down Shift to double the speed.
D
Move right.
Hold down Shift to double the speed.
Q
Tilt left.
E
Tilt right.
Click and drag the left mouse button.
Rotate
Click and drag the middle mouse button.
Pan
Scroll the mouse wheel.
Set camera speed.
Scroll down to decrease the camera speed.
Scroll up to increase the camera speed.
When setting the position of a Camera node use these controls:
Control
Description

Store the current position of the camera to the preview Camera node.

Reset the camera to the current position of the preview Camera node.

Create a new Camera node from the current position of the camera.

Bring the camera to the 3D object selected in the Node Tree or the Preview.
Select the Camera node through which you want to view the current scene.

Set the field of view for the camera in degrees when working with 3D nodes.
Turning a Camera node into a preview camera
When a Camera node is a preview camera, in the Preview you see the Scene through that Camera node. In the Node Tree the preview camera is marked with (Preview).
To turn a Camera node into a preview camera:
In the Node Tree double-click the Camera node that you want to turn into a preview camera.
Or
In the Node Tree select the Scene node where you want to turn a Camera node into a preview camera.
In the Properties in the Camera > Preview Camera property select the Camera node that you want to use as the preview camera.
If the scene is not visible in the Preview even after you set a preview camera, you need to activate the scene. See Using the Scene node.
Viewing the active Scene from the preset viewpoints
The Camera tool allows you to quickly view the content of an entire Scene from one of the preset viewpoints: front, back, top, bottom, left, or right side. Unless you switched on the option to store the current position of the camera (), the preset viewpoints do not change the position of the Camera nodes in a Scene. See Setting the position of Camera nodes.
To view the entire active Scene from a preset viewpoint:
In the Preview select the Camera tool.
Use these shortcuts:
Preset viewpoint
Shortcut
View an entire Scene from the left side.
Shift 1
View an entire Scene from the right side.
Shift 2
View an entire Scene from the top.
Shift 3
View an entire Scene from the bottom.
Shift 4
View an entire Scene from the front.
Shift 5
View an entire Scene from the back.
Shift 6
Creating a new Camera node
You can create a new Camera node in these ways:
In the Preview select the Camera tool.
Use either the orbit or free camera to move to the location where you want to create a new camera and click
. See Setting the position of Camera nodes.Kanzi Studio creates a new Camera node in the position of the camera.
Or
In the Node Tree press Alt and right-click the Scene or any 3D node where you want to create a Camera node and select Camera.
Setting the projection type of a Camera node
To set the projection type of a Camera node, in the Node Tree select the Camera node and in the Properties set the Projection Type property:
Perspective to set the camera to show objects closer to Camera node larger than those that are further away. This is the projection type most commonly used for 3D scenes.
Orthographic to set the camera to so that the distance from the Camera node does not affect the drawing size of objects. You can use an orthographic camera to show a 2D view of a 3D scene.
Setting the camera for render passes
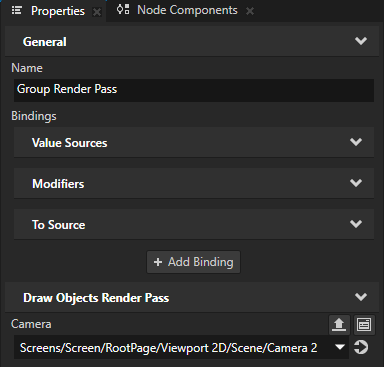
When you use render passes to define the rendering of 3D content, you can set in each render pass the Camera node that the render pass and its descendants use to render content. See Rendering.
Render passes by default use the default Camera node in a Scene node to render content. You can in any render pass add and set the Draw Object Render Pass > Camera property. This way you set the render pass and its descendant render passes to use a specific camera. The value of the Draw Object Render Pass > Camera property set in a render pass overrides the value that you set in an ancestor render pass.
For example, in this render pass prefab all Draw Object Render Pass render passes by default use the Camera node set in the Camera property of the Scene node. If you in the Group Render Pass render pass prefab add and set the Draw Object Render Pass > Camera property, all render passes in that render pass prefab use that camera unless you set their Camera property

Using the Camera node in the API
To create a camera with an orthographic projection:
// Create a camera named Camera.
CameraSharedPtr camera = Camera::create(domain, "Camera");
// Set the projection of the camera to relative orthogonal.
camera->setOrthogonalProjection(Camera::OrthogonalCoordinateSystemRelative);

// Make the viewing box display [-width,width] x [-1, 1] x [-1, 1] portion of the 3D space.
// The width of the viewing box is determined by the viewport aspect ratio.
camera->setOrthogonalPlaneHeight(1.0f);
camera->setZNear(-1.0f);
camera->setZFar(1.0f);
To create a camera with a perspective projection:
// Create a camera named Camera.
CameraSharedPtr camera = Camera::create(domain, "Camera");
// Set the projection of the camera to perspective.
camera->setPerspectiveProjection();

// Make the viewing box display a horizontal 90 degree cone of the 3D space.
// The vertical cone angle is determined by the viewport aspect ratio.
camera->setFovType(Matrix4x4::FieldOfViewType::YFov);
camera->setFov(90.0f);
camera->setZNear(0.1f);
camera->setZFar(100.0f);
For details, see the Camera class in the Kanzi Engine API reference.