Customizing the Kanzi Studio interface
You can customize the Kanzi Studio interface. You can open new, rearrange, dock, and close windows to make the environment that best suits your needs.
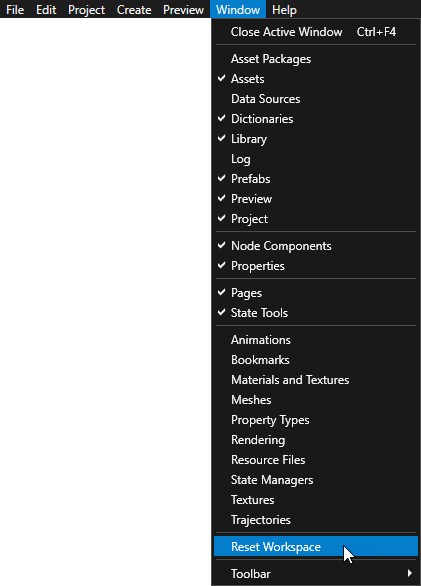
To restore the workspace to the default state, in the main menu select Window > Reset Workspace.
This is how Kanzi Studio looks when you create a new project.
Opening windows
To open a new window select Window and select the window that you want to open:
Use the Activity Browser to create and inspect Activities and Activity Hosts, and to simulate the activation of Activities. The Activity Browser shows all possible UI states of Activities in your application.
Animations shows animation data, animation clips, timeline sequences, and timeline entries in your project. See Animations.
Asset Packages shows collections of ready-made content that you can import to your Kanzi Studio project. See Asset packages.
Assets shows the 2D and 3D content, materials, and prefabs in your project.
Bookmarks shows the shortcuts in your project. See Using bookmarks.
Data Sources shows the data sources in your project. See Data sources.
Dictionaries shows the resource IDs of the resources that are local to the node that you select in the Node Tree.
See Resources.
Library shows all the resources in your project. Here you can find, create, and edit all the materials, textures, animations, trajectories, composers, and other resources in your project. You can open a separate dockable window for each resource type. See Resources.
Log shows the status of your project such as messages triggered in your project, but also warning and error messages.
Materials and Textures shows brushes, materials, material types, shader formats, and textures in your project. See Using brushes, Material types and materials, Using binary shaders, and Textures.
Meshes shows the mesh data in your project. See Using meshes.
Node Components shows the components, such as triggers, animation players, and input manipulators, for the node selected in the Node Tree. See Node components.
Node Tree shows all nodes in your project that Kanzi loads at application startup. This is where you create and organize the content of your project.
Pages shows the pages tool where you can create and manage the structure of your application. See Using the Page and Page Host nodes.
Prefabs shows the prefabs in your project. See Using node prefabs.
Preview shows your project the way it appears to your users. The Preview window has these modes:
In the Analyze mode you can analyze the performance and inner structure of your application. See Analyzing your application in the Preview.
In the Edit mode you can use the Preview window to edit the content in your project. Select any of the Preview window tools


 to enter the Edit mode.
In the Interact mode you can interact with your application in the Preview window as you would on a device. When you are using a Preview tool, to switch to the Interact mode, in the Preview window click
 .
.
Properties shows the properties for the item selected in the Node Tree or Library. When you add, remove, or edit the properties, you edit the look and behavior of the selected item.
Property Types shows the custom property types in your project. See Property types.
Rendering shows the object sources, render passes, and filters in your project. See Using object sources, Rendering, and Filters.
Resource Files shows the resource files in your project grouped by file type. See Using resource files.
State Managers shows the state managers in your project. See State manager.
State Tools shows the tools you can use to create, set, and manage states in your application. See State manager.
Textures shows the textures in your project. See Textures.
Trajectories shows the trajectories in your project. See Trajectories.
Rearranging windows in your workspace
You can rearrange your workspace by docking, undocking, opening and closing windows.
To undock click the header of the window and drag it either to a new location in the guide diamond, or drop it to keep the window floating.
To close a window, click the X in the header of the window you want to close.
To dock a window:
Click the header of the window you want to dock.
A guide diamond appears in the center of the area where the window is.
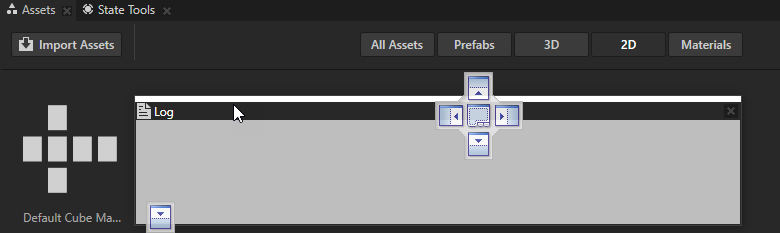
Drag the window over the area where you want to dock it, and move it over the corresponding portion of the guide diamond.
The area where the window docks becomes shaded.
Release the mouse button to dock the window in the indicated position.

Adding any window as a tab to another window
You can add any window as a tab to any other window to see more than one type of content in the same window.
To add any window as a tab to another window:
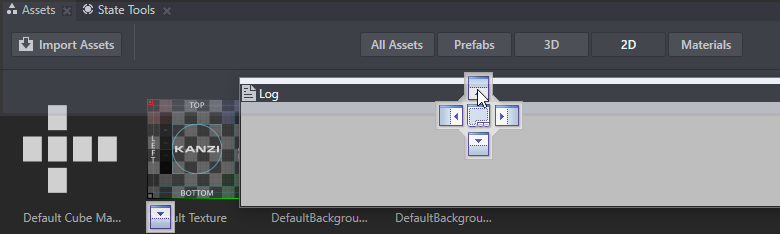
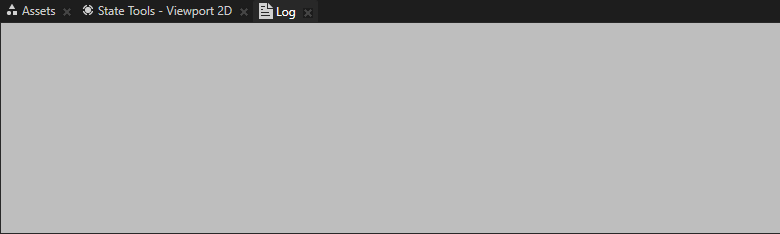
Click and drag the header of the window over the window where you want to add it as a tab, and move it over the central part of the guide diamond.
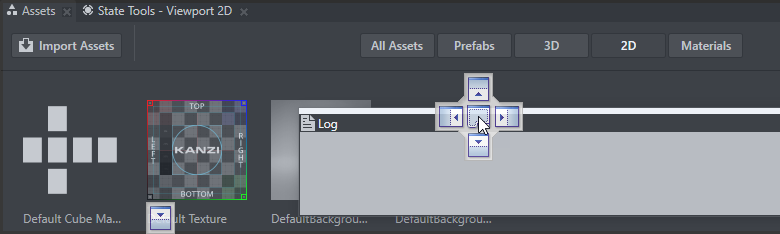
Release the mouse button to add the window as a tab.
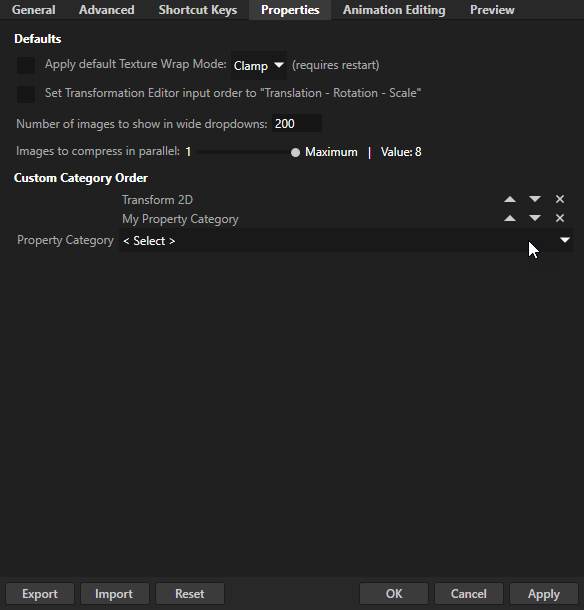
Ordering property categories in the Properties window
To set the order of property categories in the Properties window, select Edit > User Preferences, in the Properties tab in the Property Category dropdown select a property category, and set the position of the property category.
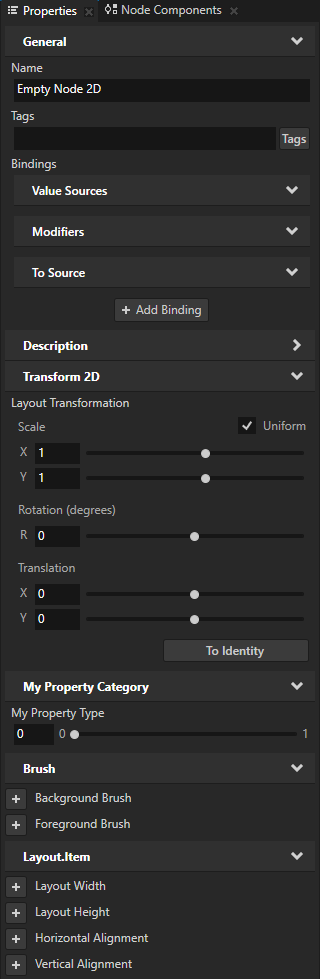
For example, you can set the Transform 2D and your own My Property Category categories to be shown after the Description category.
Note
The General and Description property categories are always shown on the top.